FujiFilm FinePix V10 Owner's Manual
Fujifilm owner's manual digital camera finepix v10
Hide thumbs
Also See for FinePix V10:
- Training manual (54 pages) ,
- Quick start manual (2 pages) ,
- Specifications (2 pages)
Table of Contents
Advertisement
Advertisement
Table of Contents

Related Manuals for FujiFilm FinePix V10


Summary of Contents for FujiFilm FinePix V10
- Page 1 OWNER’S MANUAL This manual will show you how to use your FUJIFILM DIGITAL CAMERA FinePix V10 correctly. Please follow the instructions carefully. Getting Ready Using the Camera Advanced Features Settings Software Installation Viewing Images BL00515-200 ( 1 )
-
Page 2: Important Safety Instructions
5. Limited Warranty. SOFTWARE RECORDED ON THE CD-ROM. BY OPENING FUJIFILM warrants to you that Media is free from any defect in material THE PACKAGE, YOU ACCEPT AND AGREE TO BE and workmanship under normal use for ninety (90) days from the date of BOUND BY THIS AGREEMENT. -
Page 3: Table Of Contents
Notes on the Power Supply ... 100 Explanation of Terms ... 109 Notes on the Battery (NP-40) ... 100 FUJIFILM Digital Camera Worldwide Network ... 110 AC Power Adapter ... 101 Safety Notes ... 114 Notes on the xD-Picture Card™ ... 102... -
Page 4: Preface
European countries and China. Accessories included h NP-40 Rechargeable Battery (1) h A/V cable for FinePix V10 (1) Soft case included h 16 MB, xD-Picture Card™ (1) h USB cable for FinePix V10 (1) Anti-static case (1) included... -
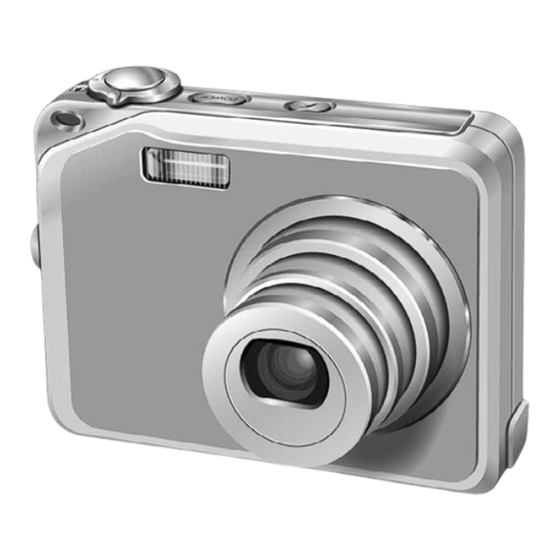
Page 5: Camera Parts And Features
✽ Refer to the pages in parentheses for information on Camera parts and features Zoom switch Wide zoom (P.19) Tele zoom (P.19) Shutter button Self-timer lamp (P.37) Flash (P.35) Microphone Photography mode LCD monitor Low light view button (P.38) Playback mode Erase button (P.30) Indicator lamp... -
Page 6: Getting Ready
LOADING THE BATTERY AND THE MEDIA Getting Ready Compatible battery Always use the Rechargeable Battery NP-40 (included). The use of other brands of rechargeable battery could cause faults or damage to the camera. h Rechargeable Battery NP-40 750 mAh (1) ●... -
Page 7: Checking The Battery Charge
Compatible AC power adapters AC-5VW (included) AC-5VX (sold separately) ● Always use the FUJIFILM products listed on the above. ● See P.101 for notes on using the AC power adapter. ● The socket-outlet shall be installed near the equipment and shall be easily accessible. -
Page 8: Turning On And Off
TURNING ON AND OFF Turn the camera on in Photography mode Press the “POWER” button to turn the camera on. Press the “POWER” button again to turn the camera off. The lens moves when the camera is in Photography mode. Take care not to obstruct the lens. -
Page 9: Correcting The Date And Time / Changing The Date Format
CORRECTING THE DATE AND TIME / CHANGING THE DATE FORMAT Press the “MENU/OK” button to display the menu on the LCD monitor. SHOOTING MODE SHOOTING MODE AUTO AUTO AUTO AUTO ● The menu screen varies depending on the selected mode. The screen on the left appears when AUTO is selected in “... -
Page 10: Selecting The Language
SELECTING THE LANGUAGE 1 Press the “MENU/OK” button to display the menu on the LCD monitor. 2 Press “a” or “b” to select “ SET-UP SET-UP AUTO AUTO ● The menu screen varies depending on the selected mode. The screen on the left appears when AUTO is selected in “... -
Page 11: Photography Mode
BASIC OPERATION GUIDE DISP/BACK button DISP: Press this button to select the LCD BACK: Press this button to stop a procedure g button Photography: d button Turns Macro ( ) on and off. c button Sets the Flash ( Playback: Change frame or movie frame advance. Using the Menus 1Displaying the menu. -
Page 12: Indicator Lamp Display
◆ ◆ Subjects not suitable for autofocus FinePix V10 uses a high-precision autofocusing mechanism. However, it may have difficulty focusing on the following: walls or subjects dressed in the same color as h Very shiny subjects such as a mirror or car... -
Page 13: Using Af/Ae Lock
AF (Autofocus) / AE (Auto-exposure) lock On FinePix V10, pressing the shutter button down halfway locks the focus and exposure settings (AF/AE lock). To focus on a subject that is off to one side or to set the exposure before composing the final shot, lock the AF and AE settings. -
Page 14: Playback Mode
◆ Still images viewable on FinePix V10 This camera will display still images recorded on FinePix V10 or still images (excluding some uncompressed images) recorded on any FUJIFILM digital camera that supports xD-Picture Cards. Clear playback or playback zooming may not be possible for still images shot on cameras other than FinePix V10. -
Page 15: Playback Zoom
VIEWING THE IMAGES ( w PLAYBACK ) PLAYBACK MODE To select the date: 1 Press “a”, “b”, “d” or “c” to move the cursor (colored frame) to “b” on the upper left frame. 2 Press “d” to display the selecting date. 2006 2/22 2/23... -
Page 16: Playback Mode
ERASING IMAGE ( ERASE FRAME ) PLAYBACK MODE Press the “ camera on in Playback mode. Press “d” or “c” to select the erasing frame (file). 100-0009 100-0009 100-0009 N N N 2 3 2 3 Erased frames (files) cannot be recovered. Back up important frames (files) onto your PC or another 2/24/2006 10:00 AM 2/24/2006 10:00 AM... -
Page 17: Advanced Features
PHOTOGRAPHY FUNCTIONS Advanced TAKING PICTURES — SELECTING THE CAMERA SETTINGS Features Specify the camera settings for taking pictures to get the best result. A general guide is given below. Select the Photography mode (➡P.45-46). AUTO Auto Specifies all settings other than Quality, Sensitivity and FinePix COLOR on the camera. -
Page 18: Macro (Close-Up)
PHOTOGRAPHY FUNCTIONS e MACRO ( CLOSE-UP ) Select Macro mode to take close-up shots. 1 Set the Mode switch to “ 2 Press the “ LCD monitor indicating that you can take close- up shots. To cancel Macro mode, press the “ N N N 12 12 12 button again. -
Page 19: Self-Timer
d FLASH PHOTOGRAPHY PHOTOGRAPHY FUNCTIONS d Forced flash Use this mode in backlit scenes, such as a subject against a window or in the shade of a tree, or to get the correct colors when taking a picture under bright lighting. In this mode, the flash fires in bright as well as dark conditions. -
Page 20: Increasing Monitor Brightness
PHOTOGRAPHY FUNCTIONS fi INCREASING MONITOR BRIGHTNESS This is useful when checking the shot composition for dimly lit scenes (Slow synchro shots, etc.). Set the Mode switch to “ Press the “ “ ” appears on the LCD monitor and the subject is displayed brightly. -
Page 21: Quality Setting In Photography Mode
p PHOTO MODE PHOTOGRAPHY ˘ QUALITY MODE ( NUMBER OF RECORDED PIXELS ) Quality setting in Photography mode Choose from 6 settings. Using the table below as a guide, select the setting that best suits your aims. Quality mode Sample uses ÷... -
Page 22: Finepix Color
ü FinePix COLOR p PHOTO MODE PHOTOGRAPHY 1 Set the Mode switch to “ 2 Press the “ LCD monitor. ● In “ ” Movie mode, do not set the “ setting. The FinePix COLOR setting is retained even when the camera is turned off or the mode setting is changed. -
Page 23: Â High-Speed Shooting
SETTING PHOTOGRAPHY MENU PHOTOGRAPHY MENU ➡P.45 â High-speed shooting ➡P.47 ˇ Shooting mode À Use this setting to reduce the time required for Specify “ ” MANUAL, “AUTO”, “ ” À À focusing. NATURAL LIGHT, “ & ” &WITH FLASH, “... -
Page 24: Exposure Compensation
PHOTOGRAPHY MENU PHOTOGRAPHY MENU Shooting mode Explanation Sets the “Exposure compensation” (➡P.46), “White balance” (➡P.47) and “AF mode” (➡P.50) to manual to easily control MANUAL yourself. Used in a wide range of conditions. This is the easiest mode for AUTO taking pictures. -
Page 25: Åcontinuous Shooting
PHOTOGRAPHY MENU PHOTOGRAPHY MENU Å CONTINUOUS SHOOTING Select the Continuous shooting mode in the CONT. CONT. Photography mode. Select the required Continuous shooting mode. AUTO AUTO ● Depending on the selected Photography mode, the menu for continuous shooting may not appear. When setting the Continuous shooting mode N N N 12 12 12 (except for “OFF”), the selected mode appears on... -
Page 26: Playback Menu
PHOTOGRAPHY MENU PHOTOGRAPHY MENU H AF MODE Ï CENTER AF MODE AF MODE ˝ MULTI AUTO AUTO Ï CENTER N N N 12 12 12 ISO 100 ISO ISO 100 ISO 100 The camera focuses on the center of the LCD monitor. -
Page 27: Playback Mode
CANCEL CANCEL FinePix V10 and FinePixViewer (included). ◆ ◆ Images that can be rotated You cannot rotate images that were shot with a camera other than FinePix V10. ” button to turn the camera on in Ú ” IMAGE ROTATE. -
Page 28: Photo Mode Playback
Card. The recorded specifications include information on which frames are to be printed. This section gives a detailed description of how to order your prints with FinePix V10. ✽ Some printers do not support date and time imprinting or specification of the number of prints. -
Page 29: Playback Menu
¸ SPECIFYING DPOF SETTINGS EASILY p PHOTO MODE PLAYBACK Always press the “MENU/OK” button after the settings are completed. Pressing the “DISP/BACK” button cancels those settings. PRINT ORDER (DPOF) PRINT ORDER (DPOF) :00009 DPOF DPOF Total number of prints Setting for that frame SHEETS SHEETS FRAME... -
Page 30: Dpof All Reset
FRAME ● DPOF settings cannot be specified for movie. ● Images photographed with a camera other than FinePix V10 may not be specified DPOF settings. Pressing the “DISP/BACK” button while choosing settings will cancel all current settings. If there are previous DPOF settings, only the modifications are canceled. -
Page 31: Çprotecting Images: Frame / Set All / Reset All
PLAYBACK MENU Ç PROTECTING IMAGES: FRAME / SET ALL / RESET ALL 1 Press the “ Playback mode. 2 Press the “MENU/OK” button to display the menu on the LCD monitor. Protection is a setting that prevents frames (files) from being accidentally erased. However, the “FORMAT”... -
Page 32: Automatic Playback
◊ AUTOMATIC PLAYBACK PLAYBACK MENU 1 Press the “ Playback mode. 2 Press the “MENU/OK” button to display the menu on the LCD monitor. ● The automatic playback setting is retained even when the camera is turned off. 1 Press “a” or “b” to select “ 2 Press “c”. -
Page 33: Ârecording Voice Memos
l GAME FUNCTION PLAYBACK MENU When playing games, note the followings: i Check whether your camera has ample battery charge. i Do not apply strong pressure to the “abdc” and “MENU/OK” buttons. NUMBER PUZZLE Your picture has cut and mixed up in grids. Arrange these grids and restore your picture. -
Page 34: Âplaying Back Voice Memos
◆ ◆ Playing voice memo files You may not be able to play back some voice memo files recorded on a camera other than FinePix V10. ” button to turn the camera on in Take care not to block the speaker. -
Page 35: Adjusting Volume Of Voice Memos
 PLAYING BACK VOICE MEMOS PLAYBACK MENU Adjusting volume of voice memos Volume can be controlled while playing back voice memos. Adjust the volume to suit your condition. Press the “MENU/OK” button while playing back voice memo. The voice memo is paused during playback. -
Page 36: Movie Mode
◆ ◆ Images that can be trimmed You cannot trim images that were shot with a camera other than FinePix V10. Sample uses Printing at up to 6R (15.2 × 20.3 cm) / A5 size Printing at up to 4R (10.2 × 15.2 cm) / A6 size To use for e-mail or web site ”... -
Page 37: Available Recording Times
r RECORDING MOVIES MOVIE MODE Press the shutter button down fully to start recording. ● The brightness and color of the LCD monitor shown during movie recording may differ from those shown before recording begins. ● There is no need to hold down the shutter button. ●... -
Page 38: Playback Mode
Playing movie files i You may not be able to play back some movie files recorded on a camera other than FinePix V10. i To play back movie files on a PC, save the movie file on the xD-Picture Card to the PC’s hard disk and then play back the saved file. -
Page 39: Settings
SET-UP Settings ˜ USING THE SET-UP SCREEN Press the “MENU/OK” button to display the menu on the LCD monitor. SHOOTING MODE SHOOTING MODE AUTO AUTO AUTO AUTO ● The menu screen varies depending on the selected mode. The screen on the left appears when AUTO is selected in “... -
Page 40: Set-Up Menu Options
SET-UP ■ SET-UP menu options Settings Display Factory default Specifies whether an image checking screen (photography result) appears after taking a picture. áIMAGE ZOOM/3 SEC/ 1.5 SEC The image is displayed for a few moments and then recorded. DISP. 1.5 SEC/OFF The color tones in images recorded may differ from actual color. -
Page 41: Playback Volume
SET-UP ã PLAYBACK VOLUME To adjust volume while playing back movie and voice memo: 2 3 4 5 6 8 9 10 1 Press “d” or “c” to adjust the volume. The larger the number, the larger the volume is emitted. -
Page 42: Auto Power Off
SET-UP î AUTO POWER OFF When this function is active and the camera is left AUTO POWER OFF AUTO POWER OFF unused for 2 or 5 minutes, it turns camera off. Auto power off function prevents leaving the power on. 2 MIN MIN 5 MIN MIN ON ON... -
Page 43: Software Installation
SET-UP Press “c”. TIME DIFFERENCE TIME DIFFERENCE TIME DIFFERENCE TIME DIFFERENCE LOCATION LOCATION TIME DIFFERENCE TIME DIFFERENCE CANCEL CANCEL 1 Press “d” or “c” to select + /–, hour and minute. TIME DIFFERENCE TIME DIFFERENCE 2 Press “a” or “b” to correct the setting. 2/24/2006 10:00 AM 2/24/2006 10:00 AM h Available time setting... -
Page 44: Installation On A Mac Os X
5.1 INSTALLATION ON A Windows PC Do not connect the camera to your PC until the software installation is completed. Install FinePixViewer as instructed in the Quick start guide. ◆ ◆ Launching the installer manually 1 Double-click the “My Computer” icon. ✽... -
Page 45: Viewing Images
AC power adapter into the power outlet. 3 Turn the printer on. ● The camera cannot be used to specify printer settings such as the paper size and print quality. ● Use an xD-Picture Card that was formatted on FinePix V10. Continued... -
Page 46: Specifying Images For Printing Without Using Dpof (Single-Frame Printing)
The camera cannot be used to specify printer settings such as the paper size and print quality. ● Use an xD-Picture Card that was formatted on FinePix V10. Press the “ ” button for about 1 second to turn the... -
Page 47: Disconnecting The Printer
Movie images cannot be printed. F R A M E F R A M E ● Images photographed with a camera other than FinePix V10 Y E S Y E S C A N C E L C A N C E L may not be printed. -
Page 48: Camera Operation
CAMERA CONNECTION Plug the AC power adapter connector into the “DC IN 5V” socket on the camera and then plug the AC DC IN 5V DC IN 5V DC IN 5V power adapter into the power outlet. socket socket socket Press the “... -
Page 49: Disconnecting The Camera
CAMERA CONNECTION 6.3.2 Disconnecting the camera Windows Once the image has been saved, the window below appears (Save Image Wizard Windows). To disconnect the camera, click the [Remove] button. Macintosh Once the image has been saved, the window below appears. To disconnect the camera, click the [OK] button. -
Page 50: System Expansion Options
System Expansion Options eBy using FinePix V10 together with other optional FUJIFILM products, your system can be expanded to fill a wide range of uses. ■ Image input / output to the PC FinePix V10 Image Memory Card Reader Digital Camera... -
Page 51: Using Your Camera Correctly
■ Damaged by Water or Sand FUJIFILM lens cleaning paper and wipe gently. FinePix V10 can be damaged on the inside and h Do not scratch hard objects against the lens or LCD outside by water and sand. When you are at the monitor. -
Page 52: Notes On The Xd-Picture Card
(xD-Picture Card) developed for number, such as DPC-M1GB). digital cameras. The Image Memory Card consists FinePix V10 is compatible with Type M, however it of a semiconductor memory (NAND-type flash may not be compatible depending on the device memory) to record digital image data. -
Page 53: Troubleshooting
Solutions adapter correctly. dry cloth. to charge, contact your FUJIFILM dealer. adapter, and wait a short time before turning the camera on. warm place to heat it and then load it into the camera just before you take a picture. -
Page 54: Specifications
3 D i s c o n n e c t t h e c a m e r a f r o m t h e Macintosh. Specifications System Model Digital camera FinePix V10 Effective pixels 5.1 million pixels 1/2.5-inch Super CCD HR Storage media... -
Page 55: Explanation Of Terms
Back up important frames (files) onto your PC or another media. ✽ These specifications are subject to change without notice. FUJIFILM shall not be held liable for damages resulting from errors in this Owner’s Manual. -
Page 56: Fujifilm Digital Camera Worldwide Network
Procesos de Color S.A. Technical support & Pablo Bermudez 111 Apartado 3794 - Esq. Arequipa - Lima 11 Repair service TEL +51 14 33 5563 FAX +51 14 33 7177 jalvarado@fujifilm.com.pe Uruguay Fotocamara S.R.L. Technical support & Cuareim 1439, montevideo, Uruguay Repair service TEL +598-2-9002004 FAX +598-2-9008430 fotocam@adinet.com.uy... - Page 57 Fujifilm Slovakia Technical support Pribylinska 2, 831 04 Bratislava, Slovakia TEL 00421 2 44 888 077 FAX 00421 2 44 889 300 fujifilm@fujifilm.sk Repair service FIS Tatracentrum, Hodzovo nam. 4 - Tatracentrum, 811 06 Bratislava, Slovakia TEL 00421 2 54 647 347 fis.tatracentrum@stonline.sk Spain Fujifilm España S.A.
-
Page 58: Safety Notes
Safety Notes h Make sure that you use your FinePix V10 camera correctly. Read these Safety Notes and your Owner’s Manual carefully before use. If a problem arises, turn the camera h After reading these Safety Notes, store them in a off, remove the battery, disconnect safe place. - Page 59 26 - 30, Nishiazabu 2 - chome, Minato - ku, Tokyo 106 - 8620, Japan http://home.fujifilm.com/products/digital/ Printed on recycled paper. FPT - 507112 - YP Printed in Japan...
Need help?
Do you have a question about the FinePix V10 and is the answer not in the manual?
Questions and answers