Table of Contents
Advertisement
Available languages
Available languages
Quick Links
Advertisement
Chapters
Table of Contents

Related Manuals for Samsung BD-D5900


Summary of Contents for Samsung BD-D5900
- Page 1 BD-D5900 Blu-ray™ Disc Player user manual imagine the possibilities Thank you for purchasing this Samsung product. To receive a more complete service, please register your product at www.samsung.com/register...
-
Page 2: Key Features
Key features Blu-ray Disc Features BD-LIVE You can use a Blu-ray Disc supporting BD-LIVE Blu-ray Discs support the highest quality HD video through network connection to enjoy various available in the industry - Large capacity means contents provided by the disc manufacturer. no compromise on video quality. -
Page 3: Safety Information
Safety Information Warning TO REDUCE THE RISK OF ELECTRIC SHOCK, DO NOT REMOVE THE COVER (OR BACK). NO USER-SERVICEABLE PARTS ARE INSIDE. REFER SERVICING TO QUALIFIED SERVICE PERSONNEL. CAUTION RISK OF ELECTRIC SHOCK DO NOT OPEN CAUTION: TO REDUCE THE RISK OF ELECTRIC This symbol indicates “dangerous voltage”... -
Page 4: Precautions
Safety Information CLASS 1 LASER PRODUCT 8. Do not install near any heat sources such as radiators, heat registers, stoves, or other This Compact Disc player is classified as a CLASS apparatus (including AV Receivers) that 1 LASER product. Use of controls, adjustments produce heat. -
Page 5: Viewing Using 3D Function
Viewing using 3D function Disc Storage & Management IMPORTANT HEALTH AND SAFETY Disc Handling INFORMATION FOR 3D PICTURES. Read and understand the following safety Disc Shape information before using the 3D function. • Some viewers may experience discomfort while • Use discs with regular viewing 3D TV such as dizziness, nausea, and shapes. -
Page 6: Handling Cautions
• Be sure to remove the disc and turn off the product. product after use. • Samsung cannot guarantee that this product • Disconnect the AC power cord from the AC will play every disc bearing the Blu-ray Disc, outlet when you don’t intend to use the product DVD or CD logo because disc formats evolve, for long periods of time. -
Page 7: Table Of Contents
Contents KEy FEATURES Blu-ray Disc Features Blu-ray Disc Player Features SAFETy INFORMATION Warning Precautions Important Safety Instructions Viewing using 3D function Disc Storage & Management Disc Handling GETTING STARTED Before using the User Manual Disc Types and Contents your product can play Disc types your product cannot play Blu-ray Disc Compatibility Disc Types... - Page 8 Contents CONNECTIONS Connecting to an Audio System Case 1 : Connecting to an Audio System (HDMI Supported Amplifier) - Best Quality (Recommended) Case 2 : Connecting to an Audio System (2 Channel Amplifier) - Good Quality Case 3 : Connecting to an Audio System (Dolby Digital, DTS Amplifier) - Better Quality Connecting to the Network Cable Network...
- Page 9 BASIC FUNCTIONS Slow Motion Play/Step Motion Play Slow Motion Play Step Motion Play Using the TOOLS button Moving to a Desired Scene Directly Repeat the Title or Chapter Repeat the Title or All Repeat the Section Selecting the Audio Language Selecting the Subtitle Language Changing the Camera Angle Selecting the Picture Setting...
- Page 10 Contents NETWORK SERVICES Using Smart Hub Getting Started with Smart Hub Settings Samsung Apps BD-LIVE™ APPENDIx Troubleshooting Repairs Specifications Compliance and Compatibility Notice Copy Protection Network Service Disclaimer Licence English...
-
Page 11: Getting Started
Getting Started Before using the User Manual Disc Types and Contents your product can play Term Logo Icon Definition Indicates a function available on a BD-ROM or BD-RE/-R disc recorded in the BD-RE format. VIDEO Indicates a function available on a DVD-VIDEO or recorded DVD+RW/ DVD-RW(V)/DVD-R/+R discs that have been recorded and finalized. -
Page 12: Blu-Ray Disc Compatibility
Please note that this is not a defect in the product. • When switching from the first layer to the ` Samsung cannot guarantee that this product will second layer of a dual-layered DVD-VIDEO disc, play every disc bearing the Blu-ray Disc, DVD or CD... -
Page 13: Region Code
All rights reserved; No part or whole of this user’s ` Some DivX, MKV and MP4 format discs may not manual may be reproduced or copied without the play, depending on the video resolution and frame prior written permission of Samsung Electronics rate condition. Co.,Ltd. English... -
Page 14: Supported File Formats
USB card reader from damage or loss of data. SAMSUNG is • Does not support if a folder or file name is not responsible for any data file damage or longer than 128 characters. - Page 15 Video File Support File Frame rate Bit rate Container Video Codec Resolution Audio Codec Extention (fps) (Mbsp) DivX 3.11/4.x/5.1/6.0 1920x1080 6 ~ 30 H.264 BP/MP/HP 1920x1080 6 ~ 30 *.avi LPCM MPEG4 SP/ASP 1920x1080 6 ~ 30 ADPCM Motion JPEG 800x600 6 ~ 30 DTS Core...
- Page 16 - MPEG4 SP, ASP: Below 1280x720: 60 frames max Above 1280x720: 30 frames max - Does not support GMC 2 or higher - For MJPEG, supports Samsung Techwin MJPEG only ƒ Audio decoder - Supports WMA 7, 8, 9 and STD...
-
Page 17: Logos Of Discs That Can Be Played
Logos of Discs that can be played Blu-ray Disc 3D Blu-ray Disc DTS-HD Master Audio DivX PAL broadcast System in U.K., BD-LIVE Dolby TrueHD Java France, Germany, etc. Accessories Check for the supplied accessories below. DISC MENU TITLE MENU HDMI cable RF cable for TV TV MUTE TV SOURCE... -
Page 18: Front Panel
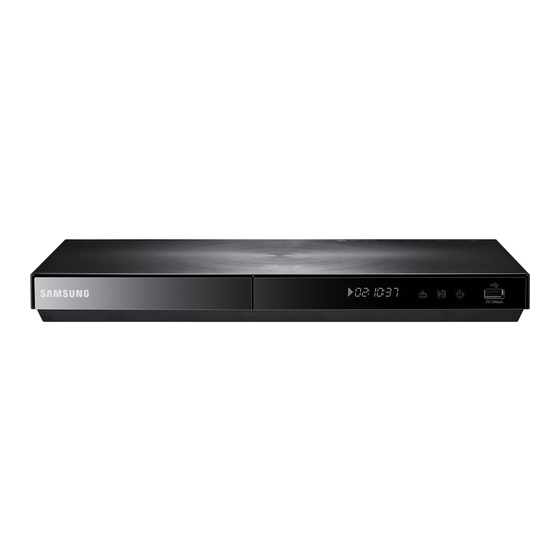
Getting Started Front Panel de f DISC TRAY Opens to accept a disc. REMOTE CONTROL SENSOR Detects signals from the remote control. DISPLAY Displays the playing status, time, etc. OPEN/CLOSE BUTTON Opens and closes the disc tray. STOP BUTTON Stops disc playback. PLAY/PAUSE BUTTON Plays a disc or pauses playback. -
Page 19: Rear Panel
Rear Panel ANT OUT (TO TV) Connects RF cable to TV antenna input. ANT IN Connects RF cable from antenna. COMPONENT OUT Connects to equipment having component video input. Can be used for network based services (See pages 61~64), BD-LIVE and software upgrades using a network connection. -
Page 20: Remote Control
Getting Started Remote Control Tour of the Remote Control Turn the TV on and off. (To operate your TV, please refer to pages Turn the product on and off. 21~22) Press this to operate a TV. To open and close the disc tray. Alternately selects Teletext, Double or Mix. -
Page 21: Setting The Remote Control
Setting the Remote Control In case of Samsung TV, below buttons are also compatible with this remote control. To determine whether your television is Button Function compatible, follow the instructions below. MENU Used to move to the TV menu. 1. Switch your television on. -
Page 22: Controllable Tv Codes
Getting Started Controllable TV Codes Brand Code Brand Code TV POWER+01, +02, +03, +04, +05, NEWSAN TV POWER+68 SAMSUNG +06, +07, +08, +09 NOBLEX TV POWER+66 AIWA TV POWER+82 NOKIA TV POWER+74 TV POWER+10, +11, +12, +13, +14, NORDMENDE TV POWER+72, +73, +75... -
Page 23: Connections
Connections Connecting to a TV with an Audio/Video cables and RF cable 1. Connect the RF cable as shown. 2. Using video/audio cables, connect the VIDEO OUT (yellow) / AUDIO OUT (red and white) terminals on the rear of the product to the VIDEO IN (yellow) / AUDIO IN (red and white) terminals of your TV. -
Page 24: Connecting To A Tv
Connections Connecting to a TV Case 1 : Connecting to a TV with an HDMI Cable - Best Quality (Recommended) 1. Using an HDMI cable, connect the HDMI OUT terminal on the rear of the product to the HDMI IN terminal of your TV. -
Page 25: Case 2 : Connecting To A Tv With Dvi Cable - Best Quality (Recommended)
Case 2 : Connecting to a TV with DVI Cable - Best Quality (Recommended) 1. Using an HDMI-DVI cable, connect the HDMI OUT terminal on the rear of the product to the DVI IN terminal of your TV. 2. Using the audio cables, connect the AUDIO OUT (red and white) terminals on the rear of the product to the AUDIO IN (red and white) terminals of your TV. -
Page 26: Case 3 : Connecting To A Tv (Component) - Better Quality
Connections Case 3 : Connecting to a TV (Component) - Better Quality - Connecting to your TV using Component video cables. - You will enjoy high quality images with accurate colour reproduction. Component video separates the picture element into black and white(Y), blue(P ) and red(P ) signals to present clear and clean images. -
Page 27: Connecting To An Audio System
Connecting to an Audio System • Please turn the volume down when you turn on the Amplifier. Sudden loud sound may cause damage to the speakers and your ears. • Please set the audio in the menu screen according to the Amplifier. (See pages 38~40) • The position of HDMI terminals may vary depending on the Amplifier. -
Page 28: Case 2 : Connecting To An Audio System
Connections Case 2 : Connecting to an Audio Case 3 : Connecting to an Audio System (2 Channel Amplifier) System (Dolby Digital, DTS - Good Quality Amplifier) - Better Quality 1. Using the audio cables, connect the AUDIO 1. Using an optical cable, connect the DIGITAL OUT (red and white) terminals on the rear of AUDIO OUT (OPTICAL) terminal on the rear the product to the AUDIO IN (red and white) -
Page 29: Connecting To The Network
NOTE ✎ ` Internet access to Samsung’s software update server may not be allowed, depending on the router you use or the ISP’s policy. For more information, contact your ISP (Internet Service Provider). ` For DSL users, please use a router to make a network connection. -
Page 30: Wireless Network
Wireless IP sharer NOTE ✎ ` Use only the Samsung wireless LAN adapter with this product. (Model name: WIS09ABGN). Do not use this adapter with any other third-party products. Please contact the retailer of this product for purchasing the wireless LAN adapter. -
Page 31: Setup
Setup Before Starting (Plug & Play) 9. Press the ◄► buttons to the select the desired Network Settings: Wired, Wireless or PBC (WPS), then press the ENTER button. 1. Turn on your TV after connecting the product. (See pages 42~46) (When the product is connected to TV for the 10. -
Page 32: Setting The Menu
4. Press the ▲▼ buttons to select the desired select Smart Hub from the home menu. item, then press the ENTER button. Download desired content from Samsung Apps. (See page 64) 5. Press the EXIT button to exit the menu. -
Page 33: Channel Settings
Channel Settings Channel Manager You can manage the stored channels. 1. Press the ▲▼ buttons to select the Country, then press the ENTER button. Channel Manager Screen (If some countries such as Iran do not appear on the menu, please select "Others") 2. -
Page 34: Channel List
Setup Channel List Channel Status Display Icons Icons Operations You can see all channels searched. 1. Press the CH LIST button on the remote A channel selected. control. A channel set as my channels. The channel List will be displayed. A locked channel. -
Page 35: Display
Display TV Screen Size Lets you enter the actual screen size of your TV so You can configure various display options such as that the product can adjust the image according to the the TV Aspect, Resolution, etc. screen size and display an optimal 3D image. (The maximum allowed screen size is 116 inches for this product.) CAUTION... - Page 36 Setup TV Aspect BD Wise (Samsung Products only) Depending on the type of television you have, you BD Wise is Samsung’s latest inter-connectivity may want to adjust the screen setting. feature. When you connect Samsung products with • 16:9 Normal BD Wise to each other via HDMI, the optimum resolution will be set automatically.
-
Page 37: Resolution According To The Output Mode
Resolution according to the output mode ƒ Blu-ray Disc Playback HDMI connected HDMI not connected Output Setup HDMI Mode Component/VIDEO Mode Component Mode VIDEO Mode Auto Optimal Resolution 576i/480i 1080p, Movie Frame(24Fs) off 1080p@50F/60F 576i/480i 1080p/1080i, 1080p@24F 576i/480i Movie Frame(24Fs) on 1080i, Movie Frame(24Fs) off 1080i 576i/480i... -
Page 38: Audio
Setup HDMI Format HDMI Deep Color You can optimize the colour setting from the HDMI Set to output the picture from the HDMI OUT jack output by selecting a connected device Type. with Deep Color or not. Deep Color allows more • TV : Select if connected to a TV via HDMI. -
Page 39: Digital Output Selection
Digital Output Selection Bitstream Bitstream Setup (Re-encode) (Audiophile) Connection HDMI Receiver Optical HDMI Receiver or Optical HDMI Receiver Optical Up to 7.1ch PCM 2ch DTS re-encoded PCM 2ch Dolby Digital Up to 5.1ch PCM 2ch DTS re-encoded Dolby Digital Dolby Digital Dolby Digital Dolby Digital Up to 7.1ch... -
Page 40: System
Samsung TV with an HDMI cable. ` If you are using HDMI receiver, this option is You can operate this product using a Samsung available when you set Digital Output setup as PCM. TV remote control and start disc playback simply by pressing the PLAY ( ) button on the TV’s... - Page 41 ` This function is not available if the HDMI cable does View DivX(R) VOD Registration Code to purchase not support CEC. and play DivX(R) VOD content. ` If your Samsung TV has an Anynet+ logo, then it supports the Anynet+ function. Settings ` Depending on your TV, certain HDMI output Display Plug &...
-
Page 42: Network
Setup Network BD Data Management Enables you to manage the downloaded contents To begin setting up the network connection for from a Blu-ray Disc that supports the BD-LIVE your product, follow these steps: service. 1. In the Home menu, press the ◄► buttons You can check the device information including to select the Settings, and then press the the storage size, delete the BD data or change the... - Page 43 ƒ Setting Up a Wired Connection - Auto To enter the Network settings into your product, follow these steps: 1. If you selected Auto, the Network Function 1. On the Internet Protocol Setup screen, press acquires and fills in the values for IP Address, the ENTER button.
- Page 44 Setup ƒ Setting Up the Wireless Network Connection 4. If you selected Auto, press the ▲ button to - PBC (WPS) go to Select a Network, and then press the ENTER button. The easiest way to set up the wireless network The Network function searches for available connection is using the PBC (WPS) function.
- Page 45 9. To enter the Pass Phrase, follow these general To Enter the Network settings into your product, directions: follow these steps: • Press the number keys on your remote to 1. On the Internet Protocol Setup screen, press enter numbers. the ENTER button.
-
Page 46: Language
Setup Network Test • DTV Primary Subtitle : Select the language for DTV primary subtitle language. Use this menu to connect to the wired network • DTV Secondary Subtitle : Select the language or check whether your network connection is for DTV secondary subtitle language. -
Page 47: General
In this case, Skin 6 option will be displayed. USB and upgrade. Energy Saving ` Samsung Electronics shall take no legal responsibility for product malfunction caused an unstable internet You can reduce power consumption by setting connection or consumer negligence during software the front panel to turn off automatically when the upgrade. -
Page 48: Contact Samsung
The product will be turned off and on automatically after completing the loader upgrade. The broadcasting channel will be displayed. • By Disc : Visit www.samsung.com/ bluraysupport, download and write the latest software onto a disc. Burn a data disc with your CD burning software. -
Page 49: Playing A Video
Basic Functions Disc Structure Playing a Video The content of discs are usually divided as shown Playback below. • Blu-ray Disc, DVD-VIDEO 1. Press the OPEN/CLOSE ( ) button to open the disc tray. title 1 title 2 2. Place a disc gently into the tray with the disc’s chapter 1 chapter 2 chapter 1... -
Page 50: Using The Title Menu
Basic Functions Using the Title Menu Using the Search and Skip Functions During play, you can search quickly through a chapter or track, and use the skip function to jump to the next selection. 1. During playback, press the TITLE MENU button on the remote control. -
Page 51: Slow Motion Play/Step Motion Play
Slow Motion Play/Step Motion Play Using the TOOLS button During playback, you can operate disc Slow Motion Play menu by pressing the TOOLS button. hzZ�� • Tools Menu Screen • In pause mode, press the SEARCH ( Tools button. Each time you press the SEARCH ( Title ) button, Chapter... -
Page 52: Repeat The Title Or Chapter
Basic Functions Repeat the Title or Chapter Repeat the Section hzZ� hzZ� Repeat the disc title or chapter. 1. During playback, press the TOOLS Depending on the disc, the Repeat function button. may not be available. 1. During playback, press the TOOLS button. 2. -
Page 53: Selecting The Audio Language
Selecting the Audio Language ` This function changes both the primary and secondary subtitles at the same time. hzZ� ` The total number of subtitles is the sum of the primary and secondary ones. 1. During playback, press the TOOLS button. Changing the Camera Angle 2. -
Page 54: Selecting The Information
Basic Functions Selecting the Information Listening to Music � o� This function enables you to check the Playing an Audio CD (CD-DA)/MP3 contents information including the name and size, etc. 1. Insert an Audio CD (CD-DA) or an MP3 Disc 1. -
Page 55: Repeat An Audio Cd (Cd-Da)/Mp3
Repeat an Audio CD (CD-DA)/MP3 3. Press the ▲▼◄► buttons to move desired track, then press the YELLOW(C) button to check desired tracks. 1. During the Playlist playback, press the Repeat this procedure to select additional TOOLS button. tracks. 2. Press the ◄► buttons to select the desired Repeat Mode, then press the Music ENTER button. -
Page 56: Playing Back A Picture
Basic Functions Playing back a Picture • Background Music : Select this if you want to listen to music while viewing a picture. • Zoom : Select this if you want to enlarge the current picture. (Enlarged up to 4 times) Playing a JPEG • Rotate : Select this if you to rotate the picture. -
Page 57: Playing Back A Usb Storage Device
Playing back a USB Storage Device You can use the USB connection to play multimedia files (MP3, JPEG, DivX, etc) located from a USB storage device. 1. Move to the Home menu. Please activate Smart Hub service You Tube internet radio to enjoy a variety of Internet Services. -
Page 58: Dtv Functions
DTV Functions Selecting the Subtitle Language Display Screen 1. Press the TOOLS button while you are 1. Press the PROG button to select the desired channel, then press the INFO button. viewing a channel. The channel information screen will be 2. -
Page 59: Selecting The Dual I Ii
Selecting the Dual I II • Guide Screen 1. Press the TOOLS button while you are viewing a channel. Guide 7:11 Thu 12 Oct 2. Press the ▲▼ buttons to select the Dual I II. DTV TCM 23 3. Press the ◄► buttons to select the desired No Information Audio, then press the ENTER button. -
Page 60: Timer Viewing
DTV Functions Timer Viewing 5. Press the ▲▼ buttons to select the Timer Viewing, then press the ENTER button. Make sure that clock must be set before operating this function. (See page 41) Using the GUIDE button Timer Viewing Antenna Channel Repeat 1. -
Page 61: Network Services
No Disc a Change Device d View Devices " Enter Samsung Apps : You can download various 2. Press the ◄► buttons to select Smart Hub chargeable or free-of-charge application services. and press the ENTER button. 3. In the start screen of the Smart Hub service, you will see the service agreement screen. - Page 62 User account : Password : NOTE ✎ Create [0~9] Enter PIN ' Cancel ` Samsung Electronics shall take no legal responsibility Samsung Apps Settings for any interruption of the Smart Hub service caused Login Mark as Favourite Sort by ' Return by the service provider for any reasons.
-
Page 63: Settings
Settings Manager • Service Site : Register login information for Create IDs and configure Smart Hub settings from service sites. this screen. • Change Password : Change account password. Settings • Delete : Delete the account. System setup ƒ Change the Service Lock password ƒ... -
Page 64: Samsung Apps
If you questions about Smart Hub, check this section first. If none of the tips apply, please visit the help website. Using the colour buttons with the Samsung Apps • RED(A) (Login) : To log in to the internet service. -
Page 65: Appendix
Appendix Troubleshooting Before requesting service, please check the following. PROBLEM SOLUTION No operation can be performed with the • Check the batteries in the remote control. They may need replacing. remote control. • Operate the remote control at a distance of no more than 6.1m. • Remove batteries and hold down one or more buttons for several minutes to drain the microprocessor inside the remote control to reset it. -
Page 66: Repairs
We will provide you with the amount of the administration fee before we make a home visit or begin any work on your product. We recommend you read this manually thoroughly, search for a solution on line at www.samsung.com, or contact Samsung Customer Care before seeking to repair your product. -
Page 67: Specifications
L(1/L), R(2/R) 2 Analog Audio output Audio Output Optical Digital Audio Output Ethernet 10/100BASE-TX Terminal Supports when the player is connected with the Samsung Wireless LAN Wireless LAN Adapter. (Model Name : WIS09ABGN) Network WEP (OPEN/SHARED) Security WPA-PSK (TKIP/AES) WPA2-PSK (TKIP/AES) -
Page 68: Compliance And Compatibility Notice
• Samsung cannot assure that this product will play every disc bearing the BD-ROM, BD-RE/-R, DVD-VIDEO, DVD-RW/-R, DVD+RW/+R and CD-RW/-R logos, and this product may not respond to all operating commands or operate all features of every disc. -
Page 69: Network Service Disclaimer
CONTENT OR SERVICE BY YOU OR ANY THIRD PARTY, EVEN IF ADVISED OF THE POSSIBILITY OF SUCH DAMAGES. Third party services may be terminated or interrupted at any time, and Samsung makes no representation or warranty that any content or service will remain available for any period of time. Content and services are transmitted by third parties by means of networks and transmission facilities over which Samsung has no control. -
Page 70: Licence
Appendix Licence • Manufactured under licence from Dolby Laboratories. Dolby and the double-D symbol are trademarks of Dolby Laboratories. • Manufactured under licence under U.S. Patent #’s : 5,451,942; 5,956,674; 5,974,380; 5,978,762; 6,226,616; 6,487,535; 7,212,872; 7,333,929; 7,392,195; 7,272,567 & other U.S. and worldwide patents issued & pending. DTS and the Symbol are registered trademarks, &... - Page 71 - Rovi reserves the right to delete data from the Rovi Databases or to change data categories for any cause that Rovi deems sufficient. No warranty is made that the Rovi Technology or Rovi Servers are error-free or that functioning of Rovi Technology or Rovi Servers will be uninterrupted. Rovi is not obligated to provide you with any new enhanced or additional data types or categories that Rovi may choose to provide in the future and is free to discontinue its online services at any time.
- Page 72 Contact SAMSUNG WORLD WIDE If you have any questions or comments relating to Samsung products, please contact the SAMSUNG customer care centre. Area Contact Centre Web Site Area Contact Centre Web Site ` North America 0700 Samsung (0700 726 Serbia www.samsung.com...
- Page 73 AK68-02064Q-03...
- Page 74 BD-D5900 Blu-ray پخش کننده دیسک ™ دفترچه راهنما را تجسم کنید فرصت ها . از شما ممنونیمSamsung بابت خرید این محصول لطف ا ً برای دریافت خدماتی جامع تر، محصول خود را در www.samsung.com/register .ثبت کنید نشانی...
-
Page 75: Blu-Ray ویژگی های دیسک های
ویژگی های اصلی BD-LIVE Blu-ray ویژگی های دیسک های پشتیبانی کنندهBlu-ray شما می توانید با یک دیسک از باالترین کیفیت تصویر وضوح باالBlu-ray دیسک های از طریق اتصال شبکه از محتواها و برنامهBD-LIVE از ) موجود پشتیبانی می کنند – ظرفیت باال به معنایHD( های... -
Page 76: هشدار
اطالعات ایمنی هشدار .جهت کاهش خطر برق گرفتگی، از برداشتن درپوش (یا پشت) دستگاه خودداری کنید هیچ قطعه قابل تعمیری توسط کاربر در داخل دستگاه وجود ندارد. جهت تعمیرات به پرسنل واجد شرایط سرویس .مراجعه نمایید احتیاط خطر برق گرفتگی باز... -
Page 77: اقدامات احتیاطی
اطالعات ایمنی 1 محصول لیزری کالس ۸ . ،در مجاورت هیچ نوع منبع گرمازا مانند رادیاتورها دریچه های هوای گرم، اجاق های خوراک پزی، یا سایر این دستگاه پخش دیسک فشرده، به عنوان محصول لیزری .) قرار ندهیدAV وسایل گرمازا (شامل گیرنده های ،کالس... -
Page 78: مدیریت و ذخیره کردن دیسک ها
مدیریت و ذخیره کردن دیسک ها مشاهده با استفاده از قابلیت 3 بعدی .اطالعات مهم سالمتی و ایمنی درباره تصاویر 3 بعدی کار با دیسک لطف ا ً پیش از اینکه قابلیت 3 بعدی را مورد استفاده قرار دهید، اطالعات ایمنی زیر را مطالعه کرده و آنها را درک شکل... - Page 79 .تمیز کنید در این پخش کنندهCD وBlu-ray، DVD دیسک های • •پخش کننده را در معرض هیچ مایعی . تماس بگیریدSAMSUNG با مرکز خدمات مشتریان .قرار ندهید در ضمن، برای کسب اطالعات بیشتر درمورد محدودیت • •زمانی که دوشاخه برق متناوب به پریز دیوار متصل...
- Page 80 ویژگی های اصلی Blu-ray ویژگی های دیسک های Blu-ray پخش کننده دیسک ویژگی های اطالعات ایمنی هشدار اقدامات احتیاطی دستورالعمل های ایمنی مهم مشاهده با استفاده از قابلیت ۳ بعدی مدیریت و ذخیره کردن دیسک ها کار با دیسک آغاز به کار پیش...
- Page 81 فهرست مطالب اتصاالت وصل کردن به سیستم صوتی حالت 1: وصل کردن به سیستم صوتی (آمپلیفایر ) – بهترین کیفیت (توصیه میHDMI پشتیبانی کننده از )شود )حالت 2: وصل کردن به سیستم صوتی (آمپلیفایر 2 کانال – کیفیت خوب Dolby حالت 3: وصل کردن به سیستم صوتی (آمپلیفایر ) - کیفیت...
- Page 82 قابلیت های پایه پخش حرکت آهسته/پخش مقطعی پخش حرکت آهسته پخش حرکت مقطعی TOOLS استفاده از دکمه رفتن مستقیم به صحنه دلخواه تکرار بخش یا عنوان تکرار عنوان یا همه تکرار بخش انتخاب زبان صدا انتخاب زبان زیرنویس عوض کردن زاویه دوربین انتخاب...
- Page 83 فهرست مطالب خدمات شبکه Smart Hub استفاده از Smart Hub شروع کار با تنظیمات Samsung Apps BD-LIVE™ ضمیمه عیب یابی تعمیرات مشخصات فنی اعالمیه تطابق و سازگاری حفاظت در برابر نسخه برداری اعالمیه سلب مسئولیت در خصوص خدمات شبکه مجوز...
- Page 84 آغاز به کار پیش از استفاده از این دفترچه راهنما انواع دیسک ها و فرمت های قابل پخش توسط این دستگاه شرح نماد نشان عبارت ضبطBD-RE است که با فرمتBD-RE/-R و یاBD-ROM بیانگر قابلیت موجود در دیسک های .شده...
-
Page 85: Blu-Ray سازگاری با دیسک
.محسوب نمی شود .نمی شود ▪ تمام نمی تواند تضمین کند که این دستگاهSamsung DVD-RW/-R/+R را پخش خواهدCD وBlu-ray، DVD دیسک های دارای عالمت کرد زیرا ممکن است فرمت دیسک ها تکامل پیدا کرده، و DVD-RW/-R/+R این دستگاه می تواند دیسک های... -
Page 86: کد منطقه
دیسک های کلیه حقوق محفوظ است؛ تمام یا قسمتی از این راهنمای . دوربین های ویدیویی طیف رنگی گسترده تری دارندDVD Samsung کاربر نمی تواند بدون مجوز کتبی قبلی ▪ شاید بسته MP4 وDivX، MKV برخی از دیسک های فرمت... -
Page 87: فرمت های فایل پشتیبانی شده
.شدن اطالعات و یا از بین رفتن آنها جلوگیری شود کاراکتر باشد از آن 128 اگر نام پوشه یا فایل بیش از • • مسئولیتی در قبال خرابی فایل هایSAMSUNG .پشتیبانی نخواهد شد .اطالعات و یا از بین رفتن اطالعات نخواهد داشت /دوربین های خاص با این... - Page 88 پشتیبانی فایل ویدیویی نرخ بیت نرخ کادر رمزگذاری صوتی (مگابیت (کادر در دقت تصویر رمزگذاری ویدیویی حامل پسوند فایل )در ثانیه )ثانیه 6 ~ 30 1920x1080 DivX 3.11/4.x/5.1/6.0 6 ~ 30 1920x1080 H.264 BP/MP/HP LPCM *.avi 6 ~ 30 1920x1080 MPEG4 SP/ASP ADPCM DTS Core...
- Page 89 زیر 0821×027: حداکثر 06 کادر باالی 0821×027: حداکثر 03 کادر .یا باالتر پشتیبانی نمی شود GMC 2 Samsung Techwin ، فقط ازMJPEG برای پشتیبانی می شودMJPEG ƒ ƒ کدگشای صوتی پشتیبانی می شود STD وWMA 7، 8، 9 باشد،...
-
Page 90: نشان انواع دیسک های قابل پخش
نشان انواع دیسک های قابل پخش DivX DTS-HD Master Audio 3D Blu-ray دیسک Blu-ray دیسک ، در بریتانیاPAL سیستم مخابره جاوا Dolby TrueHD BD-LIVE فرانسه، آلمان و غیره لوازم جانبی .لوازم جانبی ارائه شده زیر را کنترل کنید DISC MENU TITLE MENU ... -
Page 91: پانل جلو
آغاز به کار پانل جلو 4 5 6 سینی دیسک .برای قرار دادن دیسک باز می شود ۲ سنسور کنترل از راه دور .سیگنال های کنترل از راه دور را تشخیص می دهد ۳ صفحه نمایش .وضعیت پخش، زمان و غیره را نمایش می دهد ۴... -
Page 92: پانل پشت
پانل پشت ANT OUT )TO TV( . را به ورودی آنتن تلویزیون وصل می کندRF کابل ۲ ANT IN . آنتن وصل می شودRF به کابل ۳ COMPONENT OUT .به دستگاه دارای ورودی مؤلفه ای وصل می شود ۴ و ارتقاهای نرم افزاری ازBD-LIVE ،)برای خدمات شبکه ای (صفحات 16~46 را مالحظه کنید .طریق... -
Page 93: دستگاه کنترل از راه دور
آغاز به کار دستگاه کنترل از راه دور آشنایی با دستگاه کنترل از راه دور .تلویزیون را روشن و خاموش می کند (برای کار با کنترل های تلویزیون به صفحات .دستگاه را روشن و خاموش می کند )12~22 مراجعه کنید .این... -
Page 94: تنظیم دستگاه کنترل از راه دور
تنظیم دستگاه کنترل از راه دور ، دکمه های زیر نیز با اینSamsung در مورد تلویزیون های .کنترل از راه دور سازگار هستند برای مشخص کردن اینکه آیا تلویزیون شما با عملکرد دکمه ،این دستگاه کنترل از راه دور سازگار است یا خیر... -
Page 95: کد تلویزیونهای قابل کنترل
آغاز به کار کد تلویزیونهای قابل کنترل مارک کد مارک کد NEWSAN TV POWER+68 TV POWER+01, +02, +03, +04, +05, SAMSUNG +06, +07, +08, +09 NOBLEX TV POWER+66 AIWA TV POWER+82 NOKIA TV POWER+74 TV POWER+10, +11, +12, +13, +14,... -
Page 96: Rf کابل
اتصاالت RF وصل کردن به یک تلویزیون با کابل های صدا/تصویر و کابل .را مطابق شکل وصل کنید RF کابل ) (قرمز و سفیدAUDIO OUT /) (زردVIDEO OUT با استفاده از کابل های صدا/تصویر، پایانه های ۲ . واقع در پشت .... -
Page 97: وصل کردن به تلویزیون
اتصاالت وصل کردن به تلویزیون – بهترین کیفیت (توصیه میHDMI حالت 1: وصل کردن به تلویزیون با کابل )شود HDMI IN واقع در پشت دستگاه خود را به پایانهHDMI OUT ، پایانهHDMI با استفاده از یک کابل تلویزیون خود .وصل... - Page 98 – بهترین کیفیت (توصیه میDVI حالت ۲: وصل کردن به تلویزیون با کابل )شود DVI IN واقع در پشت دستگاه خود را به پایانهHDMI OUT ، پایانهHDMI با استفاده از یک کابل تلویزیون خود وصل .کنید AUDIO (قرمز و سفید) واقع در پشت دستگاه را به پایانهAUDIO OUT با استفاده از کابل های صدا، پایانه های ۲...
- Page 99 اتصاالت حالت ۳: وصل کردن به تلویزیون (مؤلفه ای) – کیفیت بهتر .- وصل کردن به تلویزیون با استفاده از کابل های تصویر کامپوننت یا مؤلفه ای - می توانید از تصاویری با کیفیت باال که با رنگی دقیق بازآفرینی شده اند لذت ببرید. تصویر مؤلفه ای، عناصر تصویر .) تقسیم...
-
Page 100: وصل کردن به سیستم صوتی
وصل کردن به سیستم صوتی • •لطف ا ً هنگام روشن کردن آمپلیفایر، صدا را کم کنید. صدای بلند ناگهانی می تواند به بلندگوها و گوش های شما .آسیب برساند )را مالحظه کنید 40~38 لطف ا ً صدا را در صفحه منو مطابق با آمپلیفایر تنظیم کنید. (صفحات •... - Page 101 اتصاالت حالت ۳: وصل کردن به سیستم حالت ۲: وصل کردن به سیستم Dolby Digital، صوتی (آمپلیفایر صوتی (آمپلیفایر ۲ کانال) – کیفیت ) - کیفیت بهترDTS خوب DIGITAL AUDIO با استفاده از یک کابل نوری پایانه AUDIO با استفاده از کابل های صدا، پایانه های ...
-
Page 102: اتصال به شبکه
✎ ▪ ممکن نباشد. برای Samsung شما شاید دسترسی اینترنتی به سرور ارتقای نرم افزاریISP بسته به روتر مورد استفاده یا سیاست های . خود تماس بگیریدISP آگاهی بیشتر با ▪ .توجه کنند که برای برقراری اتصال شبکه باید از روتر خود استفاده کنند... -
Page 103: شبکه بیسیم
بیسیمIP تقسیم کننده توجه ✎ WIS09ABGN : استفاده کنید. (نام مدلSamsung بیسیمLAN برای این دستگاه فقط از مبدل اصلی ▪ .این مبدل را با هیچ یک از محصوالت سازندگان دیگر استفاده نکنید . بیسیم با فروشنده این دستگاه تماس بگیریدLAN لطف ا ً برای خرید مبدل... -
Page 104: Plug & Play
تنظیم )Plug & Play( پیش از شروع ۹ . جهت انتخاب تنظیمات شبکه دلخواه دکمه یاWireless ،Wired .های ►◄ را فشار دهید .، سپس دکمه ورود را فشار دهیدWPS)PBC( بعد از وصل کردن دستگاه، تلویزیون خود را روشن )(صفحات 24~64 را مالحظه کنید .کنید... -
Page 105: تنظیم منو
را از .فشار داده، سپس دکمه ورود را فشار دهید .منوی اصلی انتخاب کنید ۴ . . دانلود کنیدSamsung Apps برنامه های دلخواه را از را فشار ▲▼ جهت انتخاب مورد دلخواه دکمه های .داده، سپس دکمه ورود را فشار دهید... -
Page 106: تنظیمات کانال
مدیریت کانال تنظیمات کانال .می توانید کانال های ذخیره شده را مدیریت کنید را برای انتخاب کشور فشار داده و ▲▼ دکمه های .سپس دکمه ورود را فشار دهید صفحه مدیریت کانال (اگر برخی کشورها مانند ایران در منو ظاهر نمی )"... -
Page 107: فهرست کانال
تنظیم فهرست کانال نمادهای نمایش وضعیت کانال کارکردها نمادها در اینجا می توانید تمام کانال های جستجو شده را .مشاهده کنید .یک کانال انتخاب شده CH LIST دکمه .را در کنترل از راه دور فشار دهید .کانالی که در کانال های شخصی ثبت شده است .فهرست... -
Page 108: نمایش
نمایش اندازه صفحه نمایش تلویزیون با این گزینه می توانید اندازه واقعی صفحه تلویزیون خود را وارد شما می توانید گزینه های مختلف نمایش مانند نسبت کنید تا دستگاه تصویر را مطابق با اندازه صفحه تنظیم کرده و .صفحه تلویزیون، دقت تصویر و غیره را تنظیم کنید .یک... - Page 109 )Samsung (فقط محصوالتBD Wise وجه تلویزیون ،شاید الزم باشد بسته به نوع تلویزیونی که دارید . استSamsung جدیدترین قابلیت ارتباطیBD Wise .تنظیمات صفحه نمایش را اصالح کنید مجهز به قابلیتSamsung هنگامی که محصوالت بهم وصل می کنید، دقت بهینهHDMI را باBD Wise Normal 16:9 •...
- Page 110 دقت تصویر مطابق با حالت خروجی Blu-ray پخش دیسک ƒ ƒ متصل نیستHDMI متصل استHDMI خروجی تنظیم حالت ویدیو حالت مؤلفه ای حالت مؤلفه ای / ویدیو HDMI حالت 576i/480i دقت بهینه خودکار 0801، قاب فیلمp 576i/480i 1080p@50F/60F (42 فریم...
-
Page 111: صدا
تنظیم HDMI رنگ عمیق HDMI فرمت دستگاه را مطابق خواسته خود طوری تنظیم کنید که را با انتخابHDMI شما می توانید تنظیم رنگ خروجی با رنگ عمیق باشد یاHDMI OUT خروجی تصویر فیش .نوع وسیله وصل شده بهینه کنید HDMI ... - Page 112 انتخاب خروجی دیجیتال ) (آدیوفیلBitstream ) (کدگذاری مجددBitstream تنظیم نوری HDMI گیرنده یا نوریHDMI گیرنده نوری HDMI گیرنده اتصال کانالPCM 2 رمزگذاری شده مجددDTS کانالPCM 2 تا 1.7 کانال Dolby Digital Dolby Digital رمزگذاری شده مجددDTS ...
-
Page 113: سیستم
.کنید شما می توانید این دستگاه را با استفاده از دستگاه توجه ✎ به کار انداخته و باSamsung کنترل از راه دور تلویزیون ▪ ( فشار دادن دکمه پخش استفاده می کنید این گزینه زمانی HDMI اگر از یک گیرنده... -
Page 114: Time Zone
DivX)R( VOD برای خرید و پخش برنامه ها و فیلم های .قابل دسترس نخواهد بود . را مشاهده کنیدDivX)R( VOD باید کد ثبت ▪ باشد، از Anynet+ شما دارای عالمتSamsung اگر تلویزیون . پشتیبانی می کندAnynet+ قابلیت Settings ▪ بسته... -
Page 115: شبکه
تنظیم شبکه BD مدیریت اطالعات با آن می توانید محتوای دانلود شده از دیسک های برای برقرار کردن اتصال شبکه دستگاه خود مراحل زیر را . را مدیریت کنیدBD-LIVE سازگار با سرویسBlu-ray :دنبال کنید شما می توانید اطالعات وسیله مانند اندازه ذخیره سازی Settings جهت... - Page 116 برای وارد کردن کلیه تنظیمات شبکه در دستگاه خود ƒ ƒ راه اندازی یک اتصال سیمی - خودکار :مراحل زیر را دنبال کنید Auto اگر را انتخاب کرده اید، قابلیت شبکه مقادیر در صفحه تنظیمات پروتکل اینترنت دکمه ورود را مربوط...
- Page 117 تنظیم Auto اگر گزینه ۴ . را انتخاب کرده اید، دکمه ▲ را فشار WPS( PBC – راه اندازی یک اتصال شبکه بیسیم ƒ ƒ بروید و سپس دکمهSelect a Networkداده و به ساده ترین راه برای راه اندازی یک اتصال شبکه بیسیم .ورود...
- Page 118 ۹ . برای وارد کردن تنظیمات شبکه در دستگاه خود مراحل زیر برای وارد کردن گذر واژه از دستورالعمل های کلی زیر :را دنبال کنید :پیروی کنید • •برای وارد کردن عددها دکمه های عددی روی کنترل در صفحه تنظیمات پروتکل اینترنت دکمه ورود را...
-
Page 119: امنیت
تنظیم DTV : زبان زیرنویس اصلیDTV Primary Subtitle آزمایش شبکه را • • .انتخاب می کند از این منو برای اتصال به شبکه سیمی و آزمایش کارکرد DTV : زبان زیرنویس ثانویDTV Secondary Subtitle • • .اتصال شبکه استفاده کنید .را... -
Page 120: عمومی
. دانلود کرده و ارتقا دهیدUSB )65 را مالحظه کنید ▪ هیچگونه مسئولیتی در قبال Samsung Electronics .در این صورت، گزینه پوسته 6 نمایش داده خواهد شد اشکاالت بوجود آمده بر اثر اختالالت اتصال اینترنت و یا بی صرفه جویی انرژی... - Page 121 دستگاه بعد از اتمام ارتقای بارگذار بطور خودکار خاموش و سپس روشن خواهد شد. کانال در حال پخش .نمایش داده می شود www.samsung.com/bluraysupport : بهBy Disc • • مراجعه کنید، سپس آخرین نسخه نرم افزار را دانلود .کرده و روی یک دیسک کپی کنید...
-
Page 122: پخش فیلم
قابلیت های پایه ساختار دیسک پخش فیلم .محتوای دیسک ها معمو ال ً بصورت زیر تقسیم می شود پخش Blu-ray، DVD-VIDEO دیسک • • ) باز/بسته ( برای باز کردن سینی دیسک دکمه 1 عنوان 2 عنوان .را فشار دهید 1 فصل... -
Page 123: استفاده از منوی عنوان
قابلیت های پایه استفاده از منوی عنوان استفاده از قابلیت های جستجو و رد کردن در حین پخش، می توانید در یک فصل یا تراک به سرعت به جستجو پرداخته و از قابلیت رد کردن برای پرش به انتخاب .بعدی استفاده کنید TITLE MENU دکمه... -
Page 124: پخش حرکت آهسته/پخش مقطعی
TOOLS استفاده از دکمه پخش حرکت آهسته/پخش مقطعی شما می توانید در حین پخش با فشار دادن دکمه پخش حرکت آهسته . با منوی دیسک کار کنیدTOOLS hzZ�� • •صفحه منوی ابزارها ( در حالت مکث، دکمه جستجو .) را فشار دهید •... -
Page 125: تکرار بخش یا عنوان
قابلیت های پایه تکرار بخش تکرار بخش یا عنوان hzZ� hzZ� .تکرار بخش یا عنوان دیسک TOOLS در حین پخش، دکمه .را فشار دهید بسته به نوع دیسک، ممکن است قابلیت تکرار .قابل دسترس نباشد ▲▼ دکمه هایRepeat برای انتخاب ۲... -
Page 126: انتخاب زبان صدا
انتخاب زبان صدا ▪ این قابلیت زیرنویس های اصلی و ثانوی را همزمان عوض می .کند hzZ� ▪ کل تعداد زیرنویس ها معادل مجموع زیرنویس های اصلی و .ثانوی است TOOLS در حین پخش، دکمه .را فشار دهید عوض کردن زاویه دوربین ▲▼... -
Page 127: انتخاب اطالعات
قابلیت های پایه انتخاب اطالعات گوش دادن به موسیقی � o� این قابلیت به شما اجازه می دهد تا اطالعات MP3/)CD-DA( پخش یک دیسک صوتی .محتویات مانند نام و اندازه و غیره را کنترل کنید TOOLS در حین پخش، دکمه .را... -
Page 128: Mp3/)Cd-Da
تکرار پخش یک دیسک صوتی ۳ . را ▲▼◄► برای رفتن به آهنگ دلخواه دکمه های MP3/)CD-DA( فشار داده و سپس برای عالمت زدن آهنگ های دلخواه .) را فشار دهیدC( دکمه زرد .برای انتخاب آهنگ های بیشتر، این کار را تکرار کنید TOOLS در... -
Page 129: پخش عکس
قابلیت های پایه پخش عکس Background Music : این گزینه را زمانی انتخاب • • کنید که می خواهید در حین تماشای عکس ها به .موسیقی گوش کنید Zoom : این گزینه را زمانی انتخاب کنید که می • • JPEG پخش... -
Page 130: Usb پخش یک وسیله ذخیره سازی
USB پخش یک وسیله ذخیره سازی برای پخش فایل هایUSB شما می توانید از اتصال و غیره) موجود در یکMP3، JPEG، DivX( چندرسانه ای . استفاده کنیدUSB وسیله ذخیره سازی .به منوی اصلی بروید Please activate Smart Hub service You Tube internet radio to enjoy a variety of Internet Services. -
Page 131: Dtv قابلیت های
DTV قابلیت های انتخاب زبان زیرنویس صفحه نمایش TOOLS دکمه PROG دکمه را هنگام مشاهده یک کانال فشار را برای انتخاب کانال دلخواه فشار داده . را فشار دهیدINFO و سپس دکمه .دهید Subtitle دکمه های ▼▲ را برای انتخاب ۲... -
Page 132: Dual I Ii انتخاب
Dual I II انتخاب • •صفحه راهن ما TOOLS دکمه را هنگام مشاهده یک کانال فشار .دهید Guide 7:11 Thu 12 Oct Dual I II دکمه های ▼▲ را برای انتخاب ۲ . .فشار دهید DTV TCM 23 ۳ . را... -
Page 133: تماشای تایمر
DTV قابلیت های تماشای تایمر ۵ . فشار Timer Viewing دکمه های ▼▲ را برای انتخاب .داده و سپس دکمه ورود را فشار دهید پیش از کار با این قابلیت اطمینان حاصل کنید که ساعت )تنظیم شده باشد. (صفحه 14 را مالحظه کنید GUIDE استفاده... -
Page 134: Smart Hub
.راه دور را فشار دهید ، اطالعات دستگاه و معرفیSmart Hub تبلیغات: راهنمای .برنامه های جدید را نمایش می دهد Smart Hub شروع کار با را نمایشSamsung توصیه شده: برنامه های توصیه شده .می دهد MENU دکمه .را فشار دهید... - Page 135 ✎ Create [0~9] Enter PIN ' Cancel ▪ هیچگونه مسئولیتی در قبال هیچ Samsung Electronics Samsung Apps Settings که به هر دلیلی توسطSmart Hub نوع اختالل در خدمات Login Mark as Favourite Sort by ' Return .سرویس دهنده ایجاد شده اند نمی پذیرد...
-
Page 136: Change Password
تنظیمات Manager Service Site : ثبت اطالعات ورود به سایت های • • از اینSmart Hub ایجاد شناسه و پیکربندی تنظیمات .خدمات .صفحه انجام می شود Change Password .: عوض کردن رمز عبور حساب • • Delete .: حذف حساب •... - Page 137 دارید ابتدا این بخش راSmart Hub اگر سوالی درباره ببینید. اگر هیچکدام از نکات و اطالعات مطرح شده حاوی پاسخ سوال شما نبود به وب سایت راهنما مراجعه .کنید Samsung Apps استفاده از دکمه های رنگی با )Login( )A( قرمز .: برای ورود به خدمات اینترنت • •...
- Page 138 ضمیمه عیب یابی .قبل از درخواست تعمیر، لطف ا ً موارد ذیل را کنترل کنید راه حل مشکل • •باتری های دستگاه کنترل از راه دور را کنترل کنید. ممکن است نیاز به تعویض داشته .هیچ عملیاتی با کنترل از راه دور انجام نمی شود .باشند...
- Page 139 پیش از اینکه برای تعمیر دستگاه خود اقدام کنید، لطف ا ً ابتدا این دفترچه راهنما را با دقت مطالعه کنید، در سایت . تماس بگیریدSamsung راه حل ها را جستجو کرده و یا با مرکز خدمات مشتریانwww.samsung.com فارسى...
- Page 140 L)1/L(, R)2/R( 2 خروجی صدای آنالوگ خروجی صدا نوری خروجی صدای دیجیتال 10/100BASE-TX پایانه اترنت وصل شدهSamsung بیسیمLAN هنگامی که پخش کننده با مبدل بیسیمLAN )WIS09ABGN :باشد پشتیبانی می گردد. (نام مدل WEP )OPEN/SHARED( شبکه WPA-PSK )TKIP/AES( امنیت...
- Page 141 • •در صورتیکه با مشکالت سازگاری دیسک یا کارکرد پخش کننده مواجه شدید، لطف ا ً با مرکز خدمات مشتریان . تماس بگیریدSAMSUNG نیز تماس حاصلSAMSUNG شما میتوانید برای بروز رسانی های احتمالی این پخش کننده با مرکز خدمات مشتریان .نمایید...
- Page 142 دقت، اعتبار، به روز بودن، قانونی بودن و یا کاملSAMSUNG .مناسب بودن برای مقاصد خاص را از خود سلب می نماید SAMSUNG بودن هیچ یک از محتواها و یا خدماتی را که از طریق این دستگاه در دسترس قرار می گیرد ضمانت نکرده و...
- Page 143 ضمیمه مجوز Dolby عالمت های تجاریD و دو حرفDolby . نشانDolby Laboratories ساخته شده تحت مجوز • • . می باشندLaboratories 5,956,674 ;5,451,942 :ساخته شده تحت امتیازهای حق ثبت اختراعات آمریکا به شماره • • ;7,392,195 ;7,333,929 ;7,212,872 ;6,487,535 ;6,226,616 ;5,978,762 ;5,974,380 ...
- Page 144 و Rovi شما موافقت می کنید که مجوز غیر انحصاری اعطا شده به شما برای دسترسی به پایگاه های داده در صورت زیر پا گذاشتن این شرایط لغو گردد. اگر مجوزRovi و سرورهایRovi ، فن آوریRovi استفاده از اطالعات Rovi ...
- Page 145 تماس بگیریدSAMSUNG WORLD WIDE با تماسSAMSUNG دارید، لطف ا ً با مرکز خدمات مشتریSAMSUNG در صورتیکه هرگونه پرسش یا نظری در مورد محصوالت .بگیرید Area Contact Centre Web Site Area Contact Centre Web Site ` North America...
- Page 146 English Português Nota da Cinavia: Esse produto usa tecnologia Cinavia Notice : This product uses Cinavia technology to limit the use of unauthorized copies of some commercially-produced Cinavia para limitar o uso de cópias não autorizadas de filmes e vídeos film and videos and their soundtracks.
- Page 147 Français Avis de Cinavia : Ce produit utilise la technologie Español Aviso de Cinavia : Este producto utiliza tecnología Cinavia para limitar el uso de copias no autorizadas de algunas películas Cinavia pour limiter l'utilisation de copies non autorisées de certains films et vidéos commerciaux ainsi que leurs bandes son.
- Page 148 Suomi Česky Upozornění k technologii Cinavia : Tento Cinavia-ilmoitus: Tämä tuote käyttää Cinavia- přístroj využívá technologii Cinavia k omezení použití neoprávněných tekniikkaa rajoittaakseen joidenkin kaupallisesti tuotettujen elokuvien ja videoiden sekä niiden ääniraitojen luvattomien kopioiden käyttöä. Kun kopií některých komerčních filmů a videí a jejich zvukových stop. Při luvattoman kopion kielletty käyttö...
- Page 149 Polski Български Komentarz Cinavia : Urządzenie to korzysta z Бележка за Cinavia : Този продукт използва technologii Cinavia w celu ograniczenia wykorzystania nieupoważnionych технологията Cinavia, за да ограничи използването на неоторизирани kopii pewnych filmów i obrazów wideo wyprodukowanych w celach копия...
- Page 150 Hrvatski Русский Obavijest o tehnologiji Cinavia : ovaj proizvod rabi Уведомление о Cinavia: Данный продукт оснащен tehnologiju Cinavia kako bi se ograničila uporaba neovlaštenih kopija технологией Cinavia, которая не позволяет использовать незаконно сделанные nekih komercijalno proizvedenih filmova i videozapisa i njihovih zvučnih копии...
- Page 151 Thai 繁體中文 Cinavia 聲明:本產品使用 Cinavia 技術來限制 ประกาศเกี ่ ย วกั บ Cinavia : ผลิ ต ภั ณ ฑ์ น ี ้ ใ ช้ เ ทคโนโลยี Cinavia เพื ่ อ จำกั ด การใช้ ง านแผ่ น 使用某些商業製造的電影和視訊及其聲道的未經授權副本。當偵測 ที ่ ไ ม่ ไ ด้ ร ั บ อนุ ญ าตของฟิ ล ์ ม และวิ ด ี โ อและแทร็ ก เสี ย งที ่ ผ ลิ ต ม 到禁止使用的未經授權副本時,將會顯示一則訊息,並且播放或複...
- Page 152 Tiếng Việt Thông bá o củ a Cinavia: Sả n phẩ m nà y sử dụ n g công nghệ Cinavia để hạ n chế việ c sử dụ n g cá c bả n sao trá i phé p mộ t số bộ phim và video đượ c sả n xuấ t thương mạ...
- Page 153 AK68-02064Q-03...