Table of Contents
Advertisement
CONTENTS
1.
2.
. . . . . . . . . . . . . . . . . . . . . . . . . . . . . . . . . .
. . . . . . . . . . . . . . . . . . . . . . . . . . . . . .
. . . . . . . . . . . . . . . . . . . . . . . . . . . . . . . . . .
. . . . . . . . . . . . . . . . . . . . . . . . . . . . . . . . . .
3.
. . . . . . . . . . . . . . . . . . . . . . . . . . . . . .
. . . . . . . . . . . . . . . . . . . . . . . . . . . . . . . . . . .
. . . . . . . . . . . . . . . . . . . . . . . . . . . . . .
. . . . . . . . . . . . . . . . . . . . . . . . . . . . . . . . .
4.
. . . . . . . . . . . . . . . . . . . . . . . . . . . . . . . .
. . . . . . . . . . . . . . . . . . . . . . . . . . . . . . . . . . . . . . . . .
. . . . . . . . . . . . . . . . . . . . . . . . . . . . . . . . . . . . .
. . . . . . . . . . . . . . . . . . . . . . . . . . . . . . . . . . . . .
. . . . . . . . . . . . . . . . . . . . . . . . . . . . . .
5.
. . . . . . . . . . . . . . . . . . . . . . . . . . . . .
. . . . . . . . . . . . . . . . . . . . . . . . . . . . . . . . .
. . . . . . . . . . . . . . . . . . . . . . . . . . . . . . . . . . . .
. . . . . . . . .
. . . . .
. . . . . . . . . . . . . . . . . . . . . .
. . . . . . . . . . . . . . . . . . .
. . . . . . . . . . . .
. . . . . . . . . . . . . . .
. . . . . . . . . . . . . . . . . . . . . . . . .
. . . . . . . . . . . . . . .
. . . . . . . . . . . . . . . . . . . . . . .
. . . . . . . . .
. . . . . . . . . . .
. . . . . . . . . . .
. . . . . . . . . . . . . . . . . . . . . . . . . . .
. . . . . . . . . . . . . .
. . . . . . . . .
. . . . . . . . . . . . . . . . . . . . . . . . . . .
. . . . . . . . . . . . . . . . . . . . . . . . . .
. . . . . . . . . . . . . . . . . . . . . . . . . . .
. . . . . . . . . . . . . . . . . . . . . . . . . . .
. . . . . . . . . . . . . . . . . . . . . . . . . .
. . . . . . .
. . . . .
. . . . . . . . . . . . . . . . . . . . . . . . .
. . . . . . . . . . . . . . . . . . . . . . .
. . . . . . . . . . . . . . . . . . . . . . . . .
. . . . . . . . . . . . . . . . . . . . . . . . . . . .
. . . . . . . . . . . .
. . . . . . . . . . . . . . . . . . . . . . . .
. . . . . . . . . . . .
. . . . . . . . . . . . . . . . . . . . . .
4
6.
4
4
5
5
6
. . . . . . . . . . . . . . . . . . . . . . . . . . . . . . . . . . . . . . . . .
6
6
7
7.
7
. . . . . . . . . . . . . . . . . . . . . . . . . . . . . . . . . . . . . . .
7
8
8
8
9
9
. . . . . . . . . . . . . . . . . . . . . . . . . . . . . . . . . . . . . .
9
10
10
. . . . . . . . . . . . . . . . . . . . . . . . . . . . . . . . . . . . . . . . . .
10
8.
10
10
9.
. . . . . . . . . . . . . . . . . . . . . . . . . . . . . . . . . . . . . .
11
11
12
12
12
12
13
13
13
13
13
. .
13
13
14
14
14
14
15
15
15
15
15
16
16
16
. . . . . . . . . . . . . . .
. . . . . . . . . . . . . . . . .
. . . . . . .
. . . .
. . . . . .
. . . . . . . . . . . . . . . . . . . . . . . . .
. . . . . . . . . . . . . . . .
. . . . . . . . . . . . .
. . . . . . . . . . . . . . . . . . . . . . . . . . . . .
. . . . . . . . . . . . . . . . .
. . . . . . . . . . . . . . . . . . . . . . .
. . . . . . . . . . . . . . . . . . . . . . . . .
. . . . . . . . . . . . . . . . . . . . . . .
. . . . . . . . . . . . . . . . . . . . . . . . . . . . .
17
17
17
18
20
20
21
21
21
21
21
22
22
22
23
23
24
25
25
3
Advertisement
Table of Contents

Related Manuals for Philips VR605/02


Summary of Contents for Philips VR605/02
-
Page 1: Table Of Contents
CONTENTS HOW TO CONNECT YOUR VIDEO RECORDER ..PROGRAMMED RECORDING (TIMER) ....How to connect your video recorder to the TV set . - Page 2 & OPERATING INSTRUCTIONS IN BRIEF The remote control PLAY G Playback : To play a recorded cassette Rewind : During STOP and STANDBY: rewind, during PLAYBACK: reverse SMART: To adjust the picture setting during SMART scanning playback STOP h Pause/Stop: To stop the tape, except while a TIMER-recording is being made STANDBY m Switch off : To switch off set, interrupt menu function, interrupt a programmed recording...
- Page 3 & Front of the set Back of the set STANDBY m Switch off : To switch off set, interrupt menu function, interrupt programmed recording Mains socket: To connect the mains cable (TIMER) L AUDIO OUT R Audio output socket, left/right : To connect a HiFi-set RECORD n Record: To record the programme selected at this moment EXT.2 Scart socket 2: To connect a satellite receiver, decoder, video recorder, etc.
- Page 4 Pathe Cinema 19, 30 Videotechnic Frontech 23, 25 Pausa Visa Fujitsu Perdio Vision Funai 25, 28 Phase Waltham 10, 20 Philco Watson Philips 01, 36 Watt Radio Geloso Pioneer Wega Genexxa Profex 02, 33 White Westinghouse 19, 30 Yoko 20, 25...
-
Page 5: Technical Information
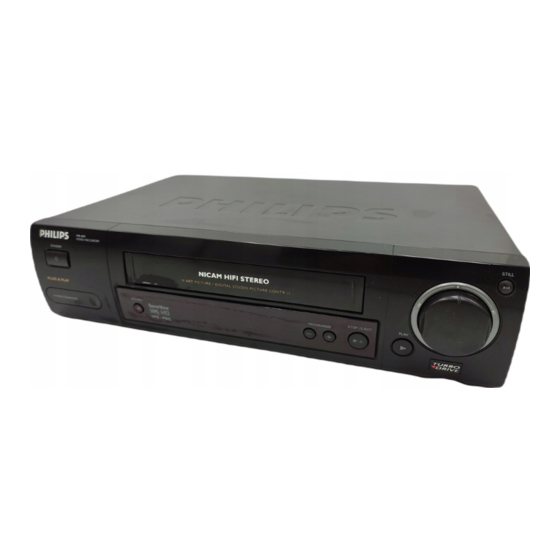
OPERATING INSTRUCTIONS PHILIPS VR605/07 Congratulations! You now own one of the most sophisticated So that you can identify your machine in the event of theft, and simple-to-use video recorders (VCR) on the market. With enter the serial number (PROD.NO) here. The serial number is this VCR you can record and play VHS-standard cassettes. - Page 6 Simple programming system for video recorders. Makes programming as easy as making a telephone call. Simply enter the programme code which you will find in your listings magazine. The precision tape drive from Philips with short rewind times and automatic tape length recognition.
-
Page 7: How To Connect Your Video Recorder
HOW TO CONNECT YOUR VIDEO RECORDER Important for the United Kingdom How to connect your video recorder to the TV set This machine is fitted with an approved moulded 13 Amp plug. To change a fuse in this type of plug, please follow these We recommend the use of a scart cable. -
Page 8: Connecting Without A Scart Cable
35 or 583MHz. CONGRATULATIONS ON THE CONGRATULATIONS ON THE PURCHASE OF YOUR NEW PURCHASE OF YOUR NEW PHILIPS VIDEO RECORDER PHILIPS VIDEO RECORDER TO CONTINUE PRESS OK TO CONTINUE PRESS OK D If your TV set does not switch to programme number When the TV has been tuned read the paragraph ’Initial... -
Page 9: Installing Your Video Recorder
INSTALLING YOUR VIDEO RECORDER Initial installation Allocating a decoder Open up the battery compartment of your remote control Some TV stations will send coded TV channels, that you can and place the batteries in it as shown in the picture. only watch when you use a decoder. -
Page 10: Manual Tv Channel Search
Manual TV channel search Channel number or frequency display You can switch between the display for ’channel number’ or In certain cases the ’Automatic TV channel search’ may not be ’frequency’ for manual channel search. able to find all of the TV channels (e.g. coded TV channels). In that case, use this manual method to set the channels. -
Page 11: Special Installation Functions
Select the next programme number, for example, ’2’ on Special installation functions the TV set. You can select one of the following installation functions in Confirm with the button on the video order to adapt the video recorder to your own specific recorder-remote control. -
Page 12: Monitor Function
Monitor function Setting the time and date You can switch backwards and forwards between TV picture and video recorder picture with the button. But this D If a TV channel which transmits TXT/PDC is stored MONITOR only works when you use a scart cable to connect the video under programme number ’P01’, time and date will recorder to your TV set and if your TV set responds to this automatically be taken from the TXT/PDC... -
Page 13: Important Notes For Operation
IMPORTANT NOTES FOR OPERATION General information The symbols on your video recorder display D You can switch on with the button, the STOP h buttons or by putting in a cassette. D If you do not use the video recorder for a few minutes, it will switch to standby automatically. -
Page 14: Summary Of User Guide
Summary of user guide The OSD menu offers the following functions. More details on each can be found in the appropriate chapter. CLOCK CHANNEL ALLOCATION TIME 20:00 CHANNEL/FREQUENCY YEAR 1999 MANUAL SEARCH MONTH AUTOINSTALL DATE FOLLOW TV DIRECT RECORD COUNTER ------------------------ ------------------------ Chapter: INSTALLING YOUR VIDEO RECORDER -... -
Page 15: Playback Functions
PLAYBACK FUNCTIONS Playing a cassette Tape position indication Put a cassette into the cassette slot. ’ ’ will appear on When playing a tape, by pressing the button, you can the display. show the present tape position on the TV screen. You have a choise of selecting ’LINEAR COUNTER’... -
Page 16: Searching For Tape Position With The Picture (Picture Search)
Instant View Searching for tape position with the picture (picture search) With this function you can switch to picture search during wind and rewind. While a cassette is playing, press the (reverse) or (forward) button once or several times. If you hold the (rewind) or (wind) button during wind or rewind, you will switch to picture search. -
Page 17: Picture Interference
Picture interference If the picture quality is poor when you play a cassette, please follow these instructions. Tracking during playback While a cassette is playing, hold the button until ’TRAC’ (tracking) appears on the display. Hold the button until the picture quality is at its best. -
Page 18: Manual Recording
MANUAL RECORDING Use ’Manual Recording’ to make a spontaneous recording (for Recording with automatic switch-off example, a programme currently being shown). (OTR one-touch-recording) E If you want to start and stop a recording manually, read the section: ’Recording without automatic switch-off’. Put a cassette in the machine. -
Page 19: Selecting The Recording Speed (Sp Or Lp)
Selecting the recording speed (SP or LP) Switching on ’Direct Record’ You can reduce the recording speed by half. This makes it When this function is switched on, the video recorder will possible to record, for example, eight-hours instead of automatically record the programme selected on the television four-hours on an ’E240’... -
Page 20: Programmed Recording (Timer)
PROGRAMMED RECORDING (TIMER) Use programmed recording to automatically start and stop a Enter the entire PlusCode-programming number (up to 9 recording at a later date. digits) printed in your TV guide next to the start time of a TV programme. To make a programmed recording, your video recorder needs For example, 5-234-89 or 5 234 89 to know:... -
Page 21: Programming A Recording (Without 'Video Plus+')
D If you want to set a later end time for a recording, press the button. Each time you press the button, you will add 15 minutes to the end time. Confirm with the button when the information is correct. D The programming information has been stored in a TIMER block. - Page 22 D While a programmed recording is being made, you Programming a recording cannot operate your video recorder manually. If you (without ’VIDEO Plus+’) want to cancel the programmed recording, press the button. STANDBY m Switch on the TV set and select the programme number D If the video recorder is switched on a few minutes for the video recorder.
-
Page 23: How To Check Or Change A Programmed Recording (Timer)
How to check or change a programmed recording (TIMER) Switch on the TV set and select the programme number for the video recorder. Press the button on the remote control twice. TIMER Select the programmed recording (TIMER) you want to check or change with the button. -
Page 24: Additional Functions
ADDITIONAL FUNCTIONS Child lock Switching the remote control command If you have two video recorders with the same remote control This function will prevent unauthorised use of your video command, you can change the remote control command of the recorder. All button-functions will be locked. remote control for one of the video recorders. -
Page 25: Automatic Switch-Off (Tuner Mode)
Automatic switch-off (tuner mode) Switching off the modulator If you cannot clear picture or sound interference, you can If you do not use the video recorder for a few minutes in switch off the built-in modulator. certain modes (e.g.: STOP), it will switch to standby You should only do this if you have connected the video automatically. -
Page 26: Selecting The Sound Track
Selecting the sound track Using your video recorder remote control with your TV set You can select the sound track you want to record. This is especially useful if the programme is multilingual. Your video recorder remote control can transmit several commands to TV sets of different makes. -
Page 27: Before You Call An Engineer
Before you call an engineer If, contrary to expectation, you have any problems using this Programmed recording does not work: • You have not set the TIMER properly: check the TIMER blocks. video recorder, it may be caused by one of the reasons •... -
Page 28: Glossary
GLOSSARY Technical terms used Current tape position : The part of the tape currently being played. External source : A device connected via a socket (for example, scart socket) which is transmitting audio/video signals to the video recorder. Index marking : A marking which is automatically made on the tape at the beginning of every recording.