Table of Contents
Advertisement
Quick Links
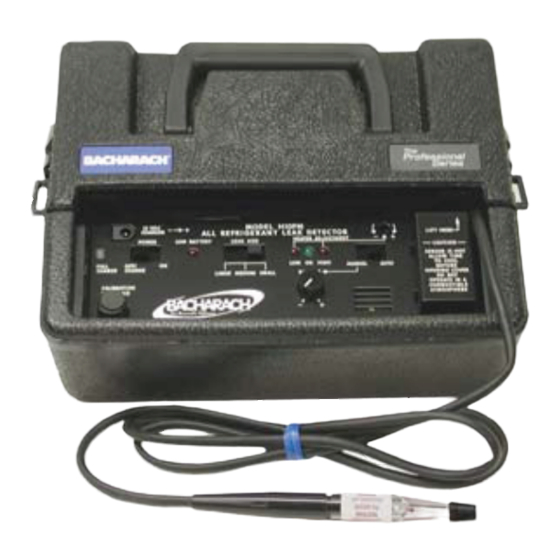
H-10PM
Congratulations! You have just
purchased the most versatile, high
performance service leak detector
available in the industry today. It
will detect refrigerants with a sen-
sitivity to effectively pinpoint both
small and large leaks quickly and
efficiently.
We encourage your review of this
manual to assure satisfac-
tory performance and a long
service life.
Refrigerant
Leak Detector
Advertisement
Table of Contents

Related Manuals for Bacharach H-10PM


Summary of Contents for Bacharach H-10PM
- Page 1 H-10PM Refrigerant Leak Detector Congratulations! You have just purchased the most versatile, high performance service leak detector available in the industry today. It will detect refrigerants with a sen- sitivity to effectively pinpoint both small and large leaks quickly and efficiently.
- Page 2 How the H-10PM Works The sensor in the H-10PM uses positive ion emission technology, commonly known as a heated diode. It is very sensitive to only halon substances (refrigerants) making this...
- Page 3 Before you use the unit the first time . . . 1. Remove the sticky-label disc from the cap of the Calibration Reference Bottle. This disc can be reused to help seal the vial when the leak detector is not in use, or it can be discarded.
-
Page 4: Operating Instructions
approach the test equipment/area. Adjust the Manual Balance control counterclock- wise as necessary to maintain 2-3 ticks per second. As you approach the vehicle or equipment, the gas concentration will increase, causing an alarm condition. Each time an alarm occurs, readjust the Manual Balance control. - Page 5 5. Allow two minutes for the sensor to warm up, after which the flashing probe light and sound indicator will idle at 2-3 clicks per second. 6. Test operation by quickly touching the top of the calibration reference bottle (make sure sticky label is removed). The unit should respond with a rapid flash rate and sound verifying correct opera- tion and optimum sensitivity for detecting...
- Page 6 WARNING: Personal Injury Hazard Do not use the H-10PM in an explosive or com- bustible atmosphere. The ambient atmosphere is drawn through the probe and through the sensor, which operates at approximately 1472°F (800°C). The resulting hot mixture of air and combustible gas could explode.
-
Page 7: Manual Mode
Manual Mode In the Manual Mode the auto-zero circuit is disabled. The unit will not zero out the leak if the probe is held over the leak site. This mode may require frequent read- justment of the Manual Balance control to maintain the required 2-3 ticks per second that indicates proper adjustment and calibra- tion for all three sensitivity switch positions. -
Page 8: Application Notes
this procedure until the green OK LED briefly glows. If the red HIGH LED glows, the heat is set too high and the Heater Adjustment should be turned slightly counterclockwise. Allow the unit to stabilize and then repeat the test. Continue this procedure until the proper green OK LED indication has been achieved. - Page 9 filter clogging and extend sensor life. DO NOT allow the unit to ingest moisture. Use of the supplied rubber probe tip helps prevent moisture from being drawn into the unit. Check ports for moisture before inserting the probe. 2. After locating and repairing any leaks requiring the use of the LARGE switch setting, switch to the MEDIUM setting and verify the system is free of leaks.
- Page 10 Maintenance (replacing the filter and airflow indicator) To protect the air pump from damage due to foreign particles and moisture, replace the filter as it becomes dirty. With mod- erate use (15 to 30 minutes a day), it is recommended that the filter be replaced once a month.
-
Page 11: Troubleshooting
Replacing the Sensor: The sensor is a plug-in unit that can be thrown away when expended. It needs replaced when the H-10PM no longer responds to the Calibration Reference Bottle, even with the Heater Adjustment turned fully clockwise (make sure the reference bottle contains some refrigerant). - Page 12 ** Solution # corresponds to Cause # ** No response to Calibration Problem Reference bottle Heat Adjustment set too low or Cause bottle is empty No air flow (indicator ball in probe doesn’t float) Sensor exposed to excessive amounts of halogen gas Water in probe Readjust heater (see “Heater Solution...
- Page 13 ** Solution # corresponds to Cause # ** Erratic response in all leak posi- Problem tions Filter is clogged Cause Dirt in sensor Short circuit in sensor Atmosphere contaminated with excessive refrigerant gas. Replace the filter (3015-0784) Solution Remove sensor and blow it out with clean air (not over 10psi).
-
Page 14: Ordering Information
Ordering Information 3015-0627 H-10PM Refrigerant Leak Detector w/ Battery & Charger 3015-0326 14 inch Flexible Probe Extension 3015-0119 100-240VAC Charge/Run AC Adapter 3015-0895 Battery Clamp / Cigarette Adapter assembly 3015-0641 Clear Probe Tip 3015-0680 Rubber Probe Tip 3015-0486 Replacement Sensor... -
Page 15: Limited Warranty
Repair Information Should it become necessary to repair your H-10PM, please contact an Authorized Service Center. Units should be carefully packed to prevent shipping damage and shipped prepaid. Warranty Send units under warranty and a copy of the purchase receipt to an Authorized Service Center for repairs. - Page 16 United States Bacharach Sales/Service Center 621 Hunt Valley Circle New Kensington, PA 15068 Phone: 724-334-5051 Fax: 724-334-5723 E-mail: help@mybacharach.com Canada Bacharach of Canada, Inc. 20 Amber St. Unit #7 Markham, Ontario L3R 5P4 Canada Phone: 905-470-8985 Fax: 905-470-8963 E-mail: bachcan@idirect.com...
- Page 17 Notes:...
- Page 18 Notes:...
- Page 19 Notes:...
Need help?
Do you have a question about the H-10PM and is the answer not in the manual?
Questions and answers