American Dynamics Intellex Installation And Configuration Manual
Version 4.12
Hide thumbs
Also See for Intellex:
- Quick reference manual (8 pages) ,
- User manual (48 pages) ,
- Quick setup manual (2 pages)

Related Manuals for American Dynamics Intellex


Summary of Contents for American Dynamics Intellex
-
Page 1: Configuration Guide
Installation and Configuration Guide Intellex® Version 4.12 Part Number 8200-0806-01 A0... - Page 2 Customer Service Thank you for using American Dynamics products. We support our products through an extensive worldwide network of dealers. The dealer through whom you originally purchased this product is your point of contact if you need service or support. Our dealers are empowered to provide the very best in customer service and support.
- Page 3 Warnings To reduce risk of electric shock, do not remove cover. No user serviceable parts inside. Refer servicing to qualified service personnel. Do not expose this appliance to rain or moisture. Do not install this product in hazardous areas where highly combustible or explosive products are stored or used. This equipment is a Class 1 laser product incorporating a Class 1 laser diode and it complies with FDA radiation per- formance standards, 21 CFR subchapter J and the Canadian Radiation Emitting Devices Act, REDRC1370.
-
Page 4: License Information
World Wide Web site may be copied by you for use within your organization or for distribution to external parties for law enforcement, investigative, or adjudicative purposes and only to display video recorded by an Intellex system. The Intellex Player Software may not be sold. - Page 5 license will substantially perform as described in the user documentation provided with the product when used with the specified hardware. CUSTOMER REMEDIES Sensormatic's entire liability and your exclusive remedy under this warranty will be, at Sensormatic's option, to a). attempt to correct software errors with efforts we believe suitable to the problem, b).
-
Page 7: Table Of Contents
Connecting the Intellex to a Network........ - Page 8 Offline Array ........... . 60 viii Intellex®...
- Page 9 Setting Up a Drive at the Intellex Level ....... . .
- Page 10 Contents Intellex®...
-
Page 11: Before Installing The Intellex
The maximum temperature for rack-mounted units is 35° C or 95° F. Note Refer to the Intellex Ultra Quick Setup Guide for a visual overview of system contents, how to set up and connect the components, and how to power up the unit. -
Page 12: System Requirements
512 MB 512 MB Media drive Includes DVD-RW DVD-RW or CD-RW DVD-RW CD-RW Chassis Operating System: Intellex 4.1 software is compatible only with Microsoft XP Pro SP2. Note * = a feature is enabled Features Ultra DVMS Camera Camera Camera... - Page 13 Before Installing the Intellex Features Ultra DVMS Camera Camera Camera Camera Camera Hard drive failure advance notification Network archive Activity log Direct dome control (USB-SNET) Email alarm/system events Audio recording Premier Premier Premier Premier Premier only only only only only...
-
Page 14: Programmable Settings
Before Installing the Intellex Programmable Settings Setting Default Value Camera names Camera1–Camera16 75 Ω Camera termination Security access Disabled Administrator PIN 1234 Schedule mode Regular Record settings Circular Mode, normal sensitivity, 60 ips (50 ips PAL) Alarm duration 5 seconds... -
Page 15: Display
** = 16-camera only Connector Applies to Intellex: Camera In BNC. Composite video input from camera. Ultra, DVMS, LT Camera Out BNC. Composite video output from camera (passive loop Ultra*, DVMS**, LT** through). Termination is set within Intellex. Installation and Configuration Guide... -
Page 16: Power Supply
Caution Intellex Operating Temperature Range The specified operating temperature range for the Intellex Ultra is 5 ° C to 35° C (41° F to 95° F). The product meets all functional specifications in this temperature range, and all of the internal components are within their manufacturers’... -
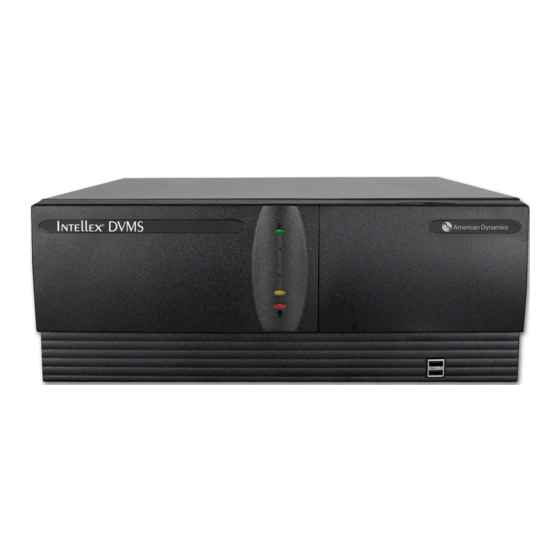
Page 17: Front Panel
Before Installing the Intellex Front Panel Power switch Reset switch Power indicator DVD-RW Drive REC (recording indicator) illuminates when the unit records images to the image database. Ultra POWER Hard drives ALARM 4_0FP_1 Alarms indicator • Illuminates when alarm events USB Connectors occur but have not been reviewed. -
Page 18: Rack-Mounted Intellex
Do not modify any BIOS or system settings or reconfigure any hard drives. During power-up, the Intellex splash screen appears. During initial power-up, a message may appear. Do not press buttons on the front panel or keys on the keyboard until this screen and message disappears, which may take 2 minutes. -
Page 19: Installing Hardware
Terminate the video using the switches at each BNC connector (8-camera system) or the Ω Intellex Setup screen. If you use the switches to select the 75 termination, select Hi-Z from the Intellex Setup screen. See page 20. -
Page 20: Connecting Audio Devices (Optional)
The layout of the rear panel varies slightly with different motherboards. Connecting Audio Devices (optional) 1 Connect the microphone or audio source to the Intellex unit through the color-coded 3.5 mm audio connectors on the back of the unit. For the best quality sound, use a pre-amplifier with appropriate filtering with a compatible microphone. -
Page 21: Connecting Optional Components
Adding a keyboard to the Intellex unit provides access to the operating system’s features such as Log Off and Shut Down and to other applications. The Intellex Security Option does not control this access. To restrict user access to these features, do not install a keyboard. - Page 22 Installing Hardware • For DVMS only, connect an optional Live/Playback monitor to the BNC connector on the VACD board to view live, or playback, video without the Intellex interface. Ultra INT40_BP Keyboard USB ports COM2 Printer connector DVMS/Rackmount Mouse Live/Playback...
-
Page 23: Connecting Alarms To The Intellex
Alarm outputs are initialized to inactive–low on power-up. Attach the alarm inputs, outputs, and grounds to the connectors, according to the pin assignment. Use the Time Sync Signal (Alarm In 17) to reset the system time of the Intellex to the nearest hour. Time Time resets to <30 minutes before the hour... - Page 24 Input 10 Output 10 Input 11 Output 11 Input 12 Output 12 Ground Ground Input 13 Output 13 Input 14 Output 14 Input 15 Output 15 Ground Ground Input 16 Output 16 Time Sync Reserved Export signal Reserved Ground Reserved Intellex®...
-
Page 25: Connecting The Intellex To A Network
Ground Ground 8-Channel The DB37 alarm port of the 8-channel Intellex can also be used without the alarm adapter. In that case the pinout looks like this: Connecting the Intellex to a Network Only connect the Intellex to a network if you have installed the Network Client, Browser Client, or other software designed to connect to an Intellex on the network. -
Page 26: Rack Mounting The System
Installing Hardware Rack Mounting the System The Intellex rack-mounting chassis has pre-drilled holes to install the included rack slides. Mount the unit by attaching rack slides to the chassis and using the included front mount rack holes. Ensuring Proper Rack Mounting Consult with the supplier of your equipment rack for adequate rack mounting for the unit’s weight,... -
Page 27: Configuring The Intellex
Configuring the Intellex Configuring the Operating System The Intellex uses the Windows® operating system to configure the regional, mouse, time zone, network, printer, and language settings; you must exit to Windows. Please note that exiting to Windows is a protected feature. You must have the Exit to System privilege to access it. - Page 28 Configuring the Intellex 2 Configure to PAL or NTSC settings: If default setting is NTSC, to change to PAL: a At the desktop, double-click the PAL icon. b Click Yes to add the information in PAL.reg to the registry. c Click OK.
-
Page 29: Setup Options
Configuring the Intellex Setup Options On the main screen, click Setup. The Setup Options screen appears. Note You must have appropriate privileges to access setup options. See page 40. Setting Up Cameras 1 From the Setup Options screen, click Cameras. -
Page 30: Termination
Configuring the Intellex Termination Ω From the Termination Tab, select 75 or Hi-Z for each camera. Ω • Set the termination to 75 if the loop-through is not being used. • Select the Hi-Z if the video signal is looped to another device. -
Page 31: Camera Control
The Setup button adjacent to that camera is now active. Note If you want to select a camera that Intellex does not directly support, you can install a custom handler from the User-Defined Handlers tab. Refer to User-Defined Handlers on page 22. -
Page 32: User-Defined Handlers
Some camera handlers do not use comm ports or monitors. For these, the Comm Port and Monitor Number fields do not appear. Make sure that you set up every camera that has a selected camera handler, so that Intellex functions properly. - Page 33 2 From the Windows dialog, select the handler definition file for your dome camera, and click Open, which closes the Windows dialog. The User-Defined Handlers screen appears with the handler you selected, indicating Intellex now recognizes it. 3 Click OK. The Setup Options menu reappears.
-
Page 34: Ptz Cameras
Configuring the Intellex PTZ Cameras Use this feature to activate PTZ (pan, tilt, zoom) cameras based on an alarm event. The PTZ Triggers tab displays a list of previously defined triggers. Lists which camera is Lists the camera The alarm types that trigger a... - Page 35 Configuring the Intellex Specify the Specify the response to conditions that the alarm. cause an alarm to trigger a PTZ camera action. Default selection Trigger Dialog 1 From the Alarm Camera dropdown list, select the alarmed camera that you want to trigger a response.
- Page 36 Configuring the Intellex After configuring the PTZ triggers, during normal Intellex operation, if another camera control session is already controlling the PTZ camera when its triggering alarm occurs, the triggered action fails and registers in the Activity Log. The category is called Surveillance, and the activity is called Camera Control.
-
Page 37: Covert Mode
Configuring the Intellex Covert Mode 1 To remove the selected camera from view and appear disconnected, from the Covert Mode tab you can choose Covert. Note Covert mode is not available for camera 1. 2 Click OK. Note You must have Administrator authorization to enable or disable viewing covert cameras. When Covert mode is disabled in classic security mode, all live and recorded video is visible to all users. -
Page 38: Setting Up Schedules
Configuring the Intellex Setting Up Schedules Schedule recording to accommodate specific applications: set up a regular schedule, a custom schedule, or single camera schedule. Regular Schedules Set up the same schedule for all cameras, every day of the week. Changing the schedule can affect the recording’s duration. -
Page 39: Setting Up Live Filters
Configuring the Intellex 7 Click OK to save all the settings made above. night Setting Up Live Filters For more information, see the User’s Guide. Setting Up Motion Detection 1 From the Setup Options screen, click Schedule. 2 If you are using Regular Schedule mode, Camera 1-8 and 9-16 tabs appear. From these tabs, choose Day Filter >... - Page 40 Configuring the Intellex 5 Repeat steps 2–4 for the Night Filter. Draw zone Slider Setting Up Perimeter Protection Perimeter protection searches for objects that cross into or out of the target area. 1 From the Setup Options screen, click Schedule.
-
Page 41: Setting Up Light Change
Configuring the Intellex Setting Up Light Change 1 From the Setup Options screen, click Schedule. 2 From the Camera 1-8 and 9-16 tabs, choose Day Filter > Light Change. Click Setup. 3 In the draw zone: click and draw the target area. The shape must form an enclosed boundary. -
Page 42: Select A Data Lifetime Mode
Configuring the Intellex 7 Click Apply. 8 Repeat steps 2–5 for the night filter. Select a Data Lifetime Mode 1 From the Setup Options screen, click Schedule. 2 Select the Data Lifetime tab. • Disabled prevents any scheduled deletion of video data (default). - Page 43 Configuring the Intellex a To customize the first and last days of the weekend, in the Weekend Days box, select any day of the week from the First full day and Last full day dropdown menus. b Select weekend and holiday start and end times from the appropriate boxes.
- Page 44 Configuring the Intellex b Click Setup. Choose the Quality, Sensitivity, Resolution, and Live Filter. Click OK. For information about live filters, see page 29. c To schedule alarm recording time, click Alarmed then click and drag to highlight the time block for custom scheduling.
-
Page 45: Setting Up Camera Rate
Configuring the Intellex 5 Select Quality. Super highest image quality Normal mid-range quality Extended Record highest compression 6 Select the sensitivity and resolution. Higher sensitivity and resolution offer better quality but less recording time. 7 Click the Data Lifetime tab to configure the deletion of expired data. - Page 46 Configuring the Intellex 4 Set up Camera Selectable Rate: a Click Use Camera Selectable Rate Mode. b From the Per Camera Rate tab, move the rate slider for each active camera set the rates. c Adjust the Minimum, Normal, and Alarm rates individually by adjusting the section of the corresponding slider.
-
Page 47: Adding, Editing, And Deleting Text Source
3 From the Text Source tab, give the text a title in the name field. 4 Choose a handler type from Type. Click Setup. • For General Text, the end-of-line delimiter allows Intellex to parse the text correctly for matching search criteria as well as display. - Page 48 Configuring the Intellex If you select COM Port, the following screen appears: 6 Select a COM Port, Bits Per Second, Data Bits, Parity, Stop Bits, and Flow Control from the lists. For information about text, see the User’s Guide. If you select IP Port, the following screen appears: 7 Enter an unused IP port number in the Text Stream TCP/IP Port edit box.
-
Page 49: Setting Up Audio
Configuring the Intellex 9 From the Alarms tab, click Apply selected exceptions as a group to generate an alarm: • If you selected at least one receipt definition • If a receipt definition marker is in the current receipt • If all selected text exceptions report a match for the current receipt 10 Click Build Exceptions to generate advanced text exceptions. -
Page 50: Setting Up Classic Security Options
4 Using the virtual or physical keyboard, enter the security administrator’s PIN. Click OK. 5 At the prompt, click OK. 6 Log on to the Intellex: enter the security administrator’s PIN. Click OK. 7 From the main screen, click Setup. -
Page 51: Setting Up Record Mode
• Create user accounts for Intellex application users. • Assign access and management privileges. For more information, see the Policy Manager for Intellex Installation and User’s Guides. Setting Up Record Mode 1 From the Setup Options screen, click Record Mode. -
Page 52: Setting Up Alarms
Configuring the Intellex Setting Up Alarms 1 From the Setup Options screen, click Alarms. 2 From the General tab, set the alarm duration. Click the corresponding radio button to set: • Latch Messages—to require the operator to clear alarm messages manually from screen using Utility >... - Page 53 7 From the Alarm in Duration tab, select Single Frame or Normal Duration. Single Frame instructs the Intellex to mark a single frame for an alarm event for that alarm input with the same start and end time. Normal Duration instructs the Intellex to use the duration from the General tab for an alarm event on the corresponding alarm input.
-
Page 54: Setting Up Display Settings
Configuring the Intellex Setting Up Display Settings 1 From the Setup Options screen, click Display. 2 From the Mode tab: a Set the Sequencer Dwell, the amount of time the unit displays a camera’s images before switching to the next camera when you select the sequencer... -
Page 55: Setting Up The Port Address And Live Net Client Connections
Configuring the Intellex Setting Up the Port Address and Live Net Client Connections Specify a fixed port address for the Intellex. Change the default settings only if network conditions require. 1 From the Setup Options screen, click Port Address. 2 Highlight and enter new settings. - Page 56 Configuring the Intellex Archiving All 1 From the Setup Options screen, click Archive Schedule. 2 From the Mode tab, click Archive All to configure the same archive schedule for all cameras, every day of the week. 3 Select the Time tab and set start times for day and night operation.
-
Page 57: Setting Up Email Notification
Configuring the Intellex Setting Up Email Notification 1 To generate email notification to specific individuals or distribution lists in case of system events and camera alarms, from the Setup Options screen, click Email. The Email Notification Setup screen appears. 2 From the Summary tab, view the list of events and cameras that can trigger email notification. - Page 58 Configuring the Intellex 3 To modify an item in the source list, highlight it, and click Edit (or double-click it). The Email Setup screen appears. 4 From the Email Setup screen, you can: a Enable or disable email b Set the email priority...
-
Page 59: Sending A Test Message
Configuring the Intellex 6 Select the Configuration tab to set up an email configuration. 7 In the Email Server fields, enter the name and port number of the recipient’s email SMTP server. 8 In the Sender fields, enter the name and email address of the user sending the notification. -
Page 60: Saving The Set Up
5 Edit the email address as desired, and save the update. Updated master list appears. Saving the Set Up American Dynamics recommends saving the configuration to a floppy disk or CD. 1 Exit to Windows. a From the main screen, click Utility. The Utility Options screen appears. - Page 61 Configuring the Intellex 3 Select the media path (defaults to the floppy drive) where the configuration is saved. 4 Enter a name for the configuration. For example, Intellex 1. 5 Click Save Settings. Recommendation: Store the floppy disk with the Intellex.
- Page 62 Configuring the Intellex Intellex®...
-
Page 63: Configuring Anti-Virus Detection
1 Install McAfee 7.1 Enterprise Edition software. 2 Verify that it is installed on Intellex: the virus shield icon must appear in the system tray. If McAfee is not installed, an error message appears when you try to install it. The message states that the anti-virus software was not detected and that you must install it. -
Page 64: Configuring The Symantec Module
1 Install Symantec 8.1 AntiVirus Corporate Edition software. 2 Verify that it is installed on Intellex: The yellow shield icon must appear in the system tray. If Symantec is not installed, an error message appears when you try to install it. The message states that the anti-virus software was not detected and that you must install it. -
Page 65: Custom Scan
2 From the Scan Options screen, set the Throttling Options (priority when idle and priority when not idle) to the lowest setting, 3. Caution This setting has the least impact on the Intellex system, but even at the lowest setting, some recording data may be lost. Installation and Configuration Guide 55... - Page 66 Configuring Anti-Virus Detection Intellex®...
-
Page 67: Raid
RAID Installing the Hard Drives You must install the 4 hard drives packaged with the Intellex Ultra. The hard drives are each contained in a caddy and are easy to install. 1 Remove the drives from the packaging. 2 Unlock the front cover of the Intellex Ultra unit and open the front cover. -
Page 68: Setting Up E-Mail Alerts
RAID Setting Up E-mail Alerts Set up your Intellex Ultra system to send e-mail notifications in case of drive problems. To set up e- mail notifications, use the 3ware 3DM2 Windows utility. 1 Double-click the 3DM2 icon on your Windows desktop, or go to Start >... -
Page 69: Troubleshooting A Raid Problem
• A faulty SATA cable, 3Ware RAID card, motherboard, or power supply. In case of a degraded array with only one degraded hard drive, the Intellex Ultra still functions, including recording/playback, while the array rebuilds. -
Page 70: Array Degraded Status
If called for, follow drive installation procedures given earlier in this chapter. 7 Record the hard drive's number for future reference. 8 Close the 3DM2 utility and restart the Intellex application. The array begins rebuilding during normal Intellex operation. -
Page 71: Setting Up A Logical Drive
18 Repeat this process for the remaining 4 logical drives. Leave the last logical drive you create with the remaining space in the Amount of disk space to use box. 19 Exit Computer Management. Setting Up a Drive at the Intellex Level 1 Double-click the Drive-Config icon on the desktop. 2 Click OK. -
Page 72: Questions & Answers
How long does it take to rebuild a hard disk? That depends on the disk size and whether you rebuild while the Intellex software is running in the background. It can take upwards of 8 hours to rebuild a 250GB disk while recording, but slightly less while not recording. -
Page 73: Intellex Ip
Intellex IP Intellex IP Intellex IP v4.1 is the product in the Intellex family that accepts video information from IP devices rather than from conventional video cameras. This system lets users record video, monitor alarms, and control cameras that are attached to the Internet. Intellex IP is compatible with the Windows XP operating system. - Page 74 Intellex IP 1 For information on setting up and installing Intellex IP, see the Intellex IP Quick Setup Guide. Green light indicates the unit has power, but you must press the power button to start Intellex IP 2 Follow the prompts and enter information as for the standard Ultra 4.1 application.
- Page 75 Intellex IP • Intellex IP camera numbers IP addresses that are assigned Manage IP sources List of configured IP sources Click to add a new IP source. The IP Device Type screen appears. Click to modify properties of Click to delete the highlighted IP source.
-
Page 76: Setting Up Parameters For Ip Devices
Intellex IP Setting Up Parameters for IP Devices Set up the parameters for each IP device and each channel of video supported by a device. Note To configure the IP address of a device, see the manufacturer’s instructions. The server type depends on the device category. -
Page 77: Adding A Videoedge™ Ip Encoder
1 For more information on installing an IP Encoder, see the VideoEdge™ 4-Channel IP Encoder Quick Start Guide. 2 From the Intellex main screen, select Setup. The Setup Options screen appears. 3 Select IP Sources. The IP Sources screen will be displayed showing all configured IP devices. - Page 78 Note If the IP Encoder that is being added does not appear in the list, and is on the same subnet as the Intellex, select Refresh. This will clear the list and rediscover the AD IP devices. Note If the IP Encoder has not been configured, highlight the IP Encoder and then select Device Setup.
- Page 79 12 Enter the following Video Stream parameters for each required Video Stream: • Name — A name for the Camera providing the video stream • Assignment — The Intellex IP camera number to use for the video stream assignment on the Intellex IP display •...
-
Page 80: Changing An Ad Device Configuration
Intellex IP • Enable Bandwidth Limit — Can be set to On or Off • Bandwidth Limit — Only applicable when Enable Bandwidth Limit is set to On. Meaasured in KB/sec, with a range of 30 KB/sec to 400 KB/sec 13 Select OK to confirm the settings. -
Page 81: Setting The Record Rate
Intellex IP Setting the Record Rate In Intellex IP, camera resolution is measured in Common Interchange Format (CIF). Record Rate 1 CIF = 320 × 240 pixels < 480 ips 2 CIF = 640 × 240 pixels < 240 ips 4 CIF = 640 ×... -
Page 82: Setting Up The Rate
This network is isolated from a corporate network; the live video from the cameras will not affect the corporate network’s performance. To monitor the security system from computers connected to the corporate network, Intellex IP’s 10/100 NIC is connected to the corporate network, and Network Client is installed on corporate network computers. -
Page 83: Intellex Web Server
You can download .Net Framework 1.1 from www.microsoft.com. Viewing the IP Address and Machine Name In order to use IWS, you will need to know the Intellex name or IP address on the local network. IP Address 1 From the Windows Start menu, select Run. In the dialog that displays, type <cmd> and click 2 In the dialog that displays, type <ipconfig>... -
Page 84: User Accounts
Enter the system exit code. (Contact your dealer or system administrator for this code). e Click OK. 2 On the Desktop, double-click on the Intellex Web Server User Accounts icon. The following screen displays: 3 Enter a Username and Password. -
Page 85: Connecting To An Intellex
Intellex Web Server Connecting to an Intellex 1 Open a Web Browser. 2 In the address bar, type <http://> followed by the IP address or Intellex machine name. The Video Server screen displays: 3 Click on View Video. 4 Enter your user name and password and click OK. - Page 86 However, you must install a video card and appropriate software drivers with DirectDraw support on the computer that is running the Intellex Web Server. 10 IWS allows you to control any PTZ camera that is connected to the Intellex. Click on the dome icon .
-
Page 87: Raid Storage System Compatibility
3 Click on the System Log Options tab. The System Logging Options screen displays. 4 In the Remote log host section of the screen, enter the IP address of the Intellex on which you want drive failure notifications to display. -
Page 88: Sample Drive Failure Notification
Sample Drive Failure Notification In the event of a drive failure, a message similar to the one below automatically displays on your Intellex. The following sample message displayed when a drive was removed. Once the failure is restored, a message similar to the one below automatically displays on your Intellex. -
Page 89: Large Database Support
Large database support (greater than 4 terabytes) is available, but it has to be configured. If your Intellex configuration requires more than 4 terabytes of storage, you need to perform the following procedure on an Intellex unit running software version 4.0 SP1 (4.03) or greater. - Page 90 RAID Storage System Compatibility Intellex®...
-
Page 91: Index
9 connectors 5 installing control panel 18 hard drives 57 Covert mode 27 Intellex IP 63 custom schedules 32 record rate 71 IP device parameters 66 IP Encoder data lifetime mode 32, 34, 35 Adding an IP Encoder 67... - Page 92 16 User-defined handlers 22 network connections 15 Using single camera schedule 34 Offline array 59 video format 4 Overview, Intellex SDK 9, 53, 73, 77 Windows Policy Manager 41 Control Panel 18 port address 45 power supply 6...
Need help?
Do you have a question about the Intellex and is the answer not in the manual?
Questions and answers