Allied Telesis AT-MC102XL Installation Manual
Fast ethernet media converters
Hide thumbs
Also See for AT-MC102XL:
- Installation manual (48 pages) ,
- Datasheet (2 pages) ,
- Installation manual (29 pages)

Related Manuals for Allied Telesis AT-MC102XL


Summary of Contents for Allied Telesis AT-MC102XL
-
Page 1: Installation Guide
AT-MC101XL AT-MC102XL AT-MC103XL AT-MC103LH AT-MC104XL AT-MC104LH Fast Ethernet Media Converters Version 4 Installation Guide PN 613-000235 Rev A... - Page 2 Copyright © 2005 Allied Telesyn, Inc. www.alliedtelesyn.com All rights reserved. No part of this publication may be reproduced without prior written permission from Allied Telesyn, Inc. Ethernet is a registered trademark of Xerox Corporation. All other product names, company names, logos or other designations mentioned herein are trademarks or registered trademarks of their respective owners.
-
Page 3: Electrical Safety And Emission Compliance Statement
Allied Telesyn, Inc. Declares that the product: Fast Ethernet Media Converters Model Numbers: AT-MC101XL, AT-MC102XL, AT-MC103XL, AT-MC103LH, AT-MC104XL, AT-MC104LH This product complies with FCC Part 15B, Class B Limits: This device complies with part 15 of the FCC Rules. Operation is subject to... - Page 4 Electrical Safety and Emission Compliance Statement RFI Emissions FCC Part 15 Class B, EN55022 Class B, CISPR 22 Class B, C-TICK Immunity EN55024 Electrical Safety UL 60950-1 ( ), EN60950 (TUV), Laser Safety EN60825 Warning: Class 1 Laser product. Warning: Do not stare into the Laser beam. Important: Appendix C contains translated safety statements for installing this equipment.
-
Page 5: Table Of Contents
Contents Electrical Safety and Emission Compliance Statement .........iii Preface .......................vii How This Guide is Organized ................vii Document Conventions..................viii Where to Find Web-based Guides...............ix Contacting Allied Telesyn..................x Online Support ....................x Email and Telephone Support ..............x Returning Products ..................x Sales or Corporate Information.............. - Page 6 Contents Installing the Media Converter ................20 Using the Media Converter on a Desktop ........... 20 Installing a Media Converter in an AT-WLMT-010 Bracket Wallmounting.. 21 Installing a Media Converter in an AT-MCR12 Chassis for Rackmounting 21 Installing a Media Converter in an AT-TRAY4 for Rackmounting....22 Powering On and Cabling the Media Converter..........
-
Page 7: Preface
Preface This guide contains instructions on how to install an AT-MC10x Media Converter. How This Guide is Organized This guide contains the following chapters and appendices: Chapter 1, ”Overview” on page 1 Chapter 2, ”Installation” on page 13 Chapter 3, ”Troubleshooting” on page 27 Appendix A, ”Technical Specifications”... -
Page 8: Document Conventions
Preface Document Conventions This document uses the following conventions: Note Notes provide additional information. Caution Cautions inform you that performing or omitting a specific action may result in equipment damage or loss of data. Warning Warnings inform you that performing or omitting a specific action may result in bodily injury. -
Page 9: Where To Find Web-Based Guides
AT-MC10x Series Media Converters Installation Guide Where to Find Web-based Guides The installation and user guides for all Allied Telesyn products are available in portable document format (PDF) on our web site at www.alliedtelesyn.com. You can view the documents online or download them onto a local workstation or server. -
Page 10: Contacting Allied Telesyn
Preface Contacting Allied Telesyn This section provides Allied Telesyn contact information for technical support as well as sales or corporate information. Online Support You can request technical support online by accessing the Allied Telesyn Knowledge Base: www.alliedtelesyn.com/kb. You can use the Knowledge Base to submit questions to our technical support staff and review answers to previously asked questions. -
Page 11: Chapter 1 Overview
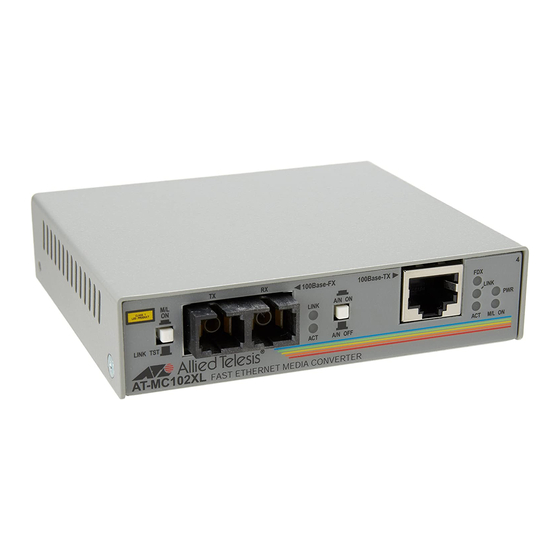
LAN devices that are physically separated by large distances. The AT-MC101XL, AT-MC102XL, AT-MC103XL, and AT-MC103LH media converters feature a 100Base-TX twisted pair port and an 100Base-FX fiber optic port. The twisted pair port has an RJ-45 connector and a maximum operating distance of 100 meters (328 feet). - Page 12 LASER PRODUCT LINK LINK LINK TST A/N OFF M/L ON AT-MC101XL FAST ETHERNET MEDIA CONVERTER Figure 1. AT-MC101XL Model Figure 2 displays an AT-MC102XL Media Converter. 100Base-FX 100Base-TX CLASS 1 A/N ON LASER PRODUCT LINK LINK LINK TST A/N OFF...
- Page 13 AT-MC10x Series Media Converters Installation Guide Figure 4 displays an AT-MC103LH Media Converter. 100Base-FX 100Base-TX A/N ON CLASS 1 LINK LASER PRODUCT LINK LINK TST M/L ON A/N OFF AT-MC103LH SINGLE MODE FIBER FAST ETHERNET MEDIA CONVERTER LONG HAUL Figure 4. AT-MC103LH Model - Front Panel Figure 5 displays an AT-MC104XL Media Converter.
- Page 14 Figure 7 displays an AT-MC103LH Media Converter. 12VDC Figure 7. AT-MC10x Series - Rear Panel Table 1 lists the maximum operating distances for the AT-MC101XL, AT-MC102XL, AT-MC103XL, and AT-MC103LH media converters. Table 1. Maximum Operating Distances (AT-MC101XL, AT-MC102XL, AT-MC103XL, and AT-MC103LH) Maximum Operating...
- Page 15 AT-MC10x Series Media Converters Installation Guide Table 2 lists the maximum operating distances for the AT-MC104XL and AT-MC104LH media converters. Table 2. Maximum Operating Distances (AT-MC104XL and AT-MC104LH) Maximum Operating Type of Connector Distance Model Port 1 Port 2 Port 1 Port 2 (Single- (Multi-...
-
Page 16: Key Features
Chapter 1: Overview Key Features The media converters have the following key features: LEDs for unit and port status 100Base-TX twisted pair port (all models except AT-MC104xx Series) 100Base-FX fiber optic port(s) Auto MDI-MDI/X Half- or full-duplex operation with Auto-Negotiation function Link Test/MissingLink button for performing a link test or activating the MissingLink feature which notifies end-nodes of connection... -
Page 17: Auto Mdi/Mdi-X
AT-MC10x Series Media Converters Installation Guide Auto MDI/MDI-X An RJ-45 twisted pair port on an 100 Mbps Ethernet network device can have one of two possible wiring configurations: MDI or MDI-X. The RJ-45 port on a PC, router, or bridge is typically wired as MDI, while the twisted pair port on a switch or hub is usually MDI-X. -
Page 18: Missinglink
Auto-Negotiation Button The Auto-Negotiation (A/N) button, located on the front panel of the AT-MC101XL, AT-MC102XL, and AT-MC103XL/LH, enables and disables the Auto-Negotiation feature (IEEE 802.3u) of the media converter. The media converter uses Auto-Negotiation to determine the duplex mode of the ports. The duplex mode refers to the manner in which an end-node sends and receives data on the network. - Page 19 AT-MC10x Series Media Converters Installation Guide In most configurations, you will want to leave the Auto-Negotiation button activated so the unit can determine the appropriate duplex mode, based on the capabilities of the end-nodes. For example, the Auto-Negotiation feature on the media converter should be left activated in situations where both end-nodes are also capable of Auto-Negotiation, or where both end- nodes have been pre-set to the same mode or are capable of operating in only one duplex mode, such as half-duplex.
-
Page 20: External Ac/Dc Power Adapter
After a configuration change, you must reset the media converter by powering OFF then powering ON the unit On the AT-MC101XL, AT-MC102XL, AT-MC103XL, and AT-MC103LH models, set the Auto-Negotiation feature as follows: If both end-nodes will use Auto-Negotiation to determine the... -
Page 21: Network Topologies
The AT-MC10x Series Media Converters can be used in two different types of topologies: standalone and back-to-back. Both topologies are described below. Standalone Topology Figure 9 illustrates a standalone topology where two AT-8524M switches have been interconnected with an AT-MC102XL media converter. AT-8524M 100Base-FX 100Base-TX CLASS 1... -
Page 22: Back-To-Back Topology
Chapter 1: Overview Back-to-Back Topology Figure 10 illustrates two AT-MC103XL media converters in a back-to- back configuration. AT-8524M AT-MC103XL 100Base-FX 100Base-TX CLASS 1 A/N ON LASER PRODUCT LINK LINK LINK TST M/L ON A/N OFF AT-MC103XL SINGLE MODE FIBER FAST ETHERNET MEDIA CONVERTER AT-8524M AT-MC103XL 100Base-FX... -
Page 23: Chapter 2 Installation
Chapter 2 Installation This chapter contains the following installation procedures for the AT-MC10x Series media converters. “Reviewing Safety Precautions” on page 14 “Selecting a Site for the Media Converter” on page 16 “Planning the Installation” on page 17 “Unpacking the Media Converter” on page 19 “Installing the Media Converter”... -
Page 24: Reviewing Safety Precautions
Chapter 2: Installation Reviewing Safety Precautions Please review the following safety guidelines before installing the media converter. Note When you the , go to Appendix C, ”Translated Electrical, Safety, and Emission Information” on page 43 for translated safety statements. Laser Class 1 laser product. - Page 25 AT-MC10x Series Media Converters Installation Guide Warning Class I Equipment. This equipment must be earthed. The power plug must be connected to a properly wired earth ground socket outlet. An improperly wired socket outlet could place hazardous voltages on accessible metal parts. Warning Pluggable Equipment.
-
Page 26: Selecting A Site For The Media Converter
Chapter 2: Installation Selecting a Site for the Media Converter Observe the following requirements when choosing a site for the AT-MC10x Series Media Converter. If you plan to install the media converter in an AT-MCR12 chassis, refer to the installation guide that comes with the chassis for instructions. -
Page 27: Planning The Installation
Distance Budget AT-MC101XL 50/125 or 62.5/ 2 km (1.2 mi) 13 dB at 1310 nm 125 micron multimode AT-MC102XL 50/125 or 62.5/ 2 km (1.2 mi) 13 dB at 1310 nm 125 micron multimode AT-MC103XL 9/125 micron 15 km (9.3 mi) 16 dB at 1310 nm... - Page 28 Chapter 2: Installation Table 6. 100Base-FX Fiber Optic Port (Half-duplex) Maximum Number of Media Connected Devices Operating Converters Distance One Media Converter Switch to Switch 372 m (1,221 ft) Inline Workstation to Switch 372 m (1,221 ft) Switch to Class I 137 m (450 ft) Repeater Switch to Class II...
-
Page 29: Unpacking The Media Converter
AT-MC10x Series Media Converters Installation Guide Unpacking the Media Converter To unpack the AT-MC10x Series media converter, perform the following procedure: 1. Remove all components from the shipping package. Note Store the packaging material in a safe location. You must use the original shipping material if you need to return the unit to Allied Telesyn. -
Page 30: Installing The Media Converter
Chapter 2: Installation Installing the Media Converter The AT-MC10x Series media converters can be used on a desktop, mounted on a wall, or installed in a rack. Using the Media Converter on a Desktop To use the media converter on a desktop, perform the following procedure: 1. -
Page 31: Installing A Media Converter In An At-Wlmt-010 Bracket Wallmounting
AT-MC10x Series Media Converters Installation Guide Installing a Media Converter in an AT-WLMT-010 Bracket Wallmounting The AT-WLMT-10, shown in Figure 12, is a "shelf" style unit designed to hold an Allied Telesyn Standard Size Media Converter for wallmounting. C A U T IO T O P R E V E N T T R IS K O... -
Page 32: Installing A Media Converter In An At-Tray4 For Rackmounting
Chapter 2: Installation Installing a Media Converter in an AT-TRAY4 for Rackmounting The AT-TRAY4, shown in Figure 14, is a "shelf" style unit designed to hold up to four Allied Telesyn media converters for rackmounting. A T- TR A Figure 14. AT-TRAY4 Rackmounting Tray For installing the media converter in an AT-TRAY4 bracket, refer to the AT-TRAY4 Rackmounting Bracket Installation Guide (613-50366-00), that comes with the unit. -
Page 33: Powering On And Cabling The Media Converter
(TX) is connected to the end-node’s receiver port (RX) and that the media converter’s receiver port (RX) is connected to the end-node’s transmitter port (TX). 5. If you are installing an AT-MC101XL, AT-MC102XL, AT-MC103XL, or AT-MC103LH, connect the twisted pair cable to the twisted pair port. - Page 34 Chapter 2: Installation 6. If you are installing an AT-MC104XL or AT-MC104LH, repeat Step 4 to cable the second fiber optic port. Note End-nodes connected to the media converter must operate with the same duplex mode, either both full-duplex or both half-duplex. 7.
-
Page 35: Warranty Registration
AT-MC10x Series Media Converters Installation Guide Warranty Registration When you finish installing the product, you should register your product by completing the enclosed warranty card and sending it in. -
Page 37: Chapter 3 Troubleshooting
Chapter 3 Troubleshooting Follow the guidelines below to test and troubleshoot the installation in the event a problem occurs. If the PWR LED is OFF, do the following: If the unit is installed on a desktop, check to be sure that the power adapter is securely connected to a power outlet and that the power adapter cable is securely connected to the back of the media converter. - Page 38 For maximum operating distances, refer to Table 1, “Maximum Operating Distances (AT-MC101XL, AT-MC102XL, AT-MC103XL, and AT- MC103LH),” on page 4. For cable types, refer to “Fiber Optic Port Specifications” on page 34.
-
Page 39: Loopback Test
AT-MC10x Series Media Converters Installation Guide Loopback Test To check hardware reliability of the media converter, perform the following procedure: 1. Power OFF the media converter by unplugging the power adapter from the wall outlet and from the back of the unit. 2. -
Page 41: Technical Specifications
Appendix A Technical Specifications Physical Dimensions: W x D x H 10.5 cm x 9.5 cm x 2.5 cm (4.125 in x 3.75 in x 1.0 in) Weight: .27 kg (0.60 lbs) Temperature Operating Temperature: 0° C to 40° C (32° F to 104° F) Storage Temperature: -25°... -
Page 42: Agency Certifications
Appendix A: Technical Specifications Agency Certifications RFI Emissions FCC Part 15 Class B, EN55022 Class B, CISPR 22 Class B, C-TICK Immunity EN55024 Electrical Safety UL 60950-1 ( ), EN60950 (TUV), Laser Safety EN60825... -
Page 43: Rj-45 Twisted Pair Port Pinouts
AT-MC10x Series Media Converters Installation Guide RJ-45 Twisted Pair Port Pinouts Figure 16 illustrates the pin layout to an RJ-45 connector and port. Figure 16. RJ-45 Connector and Port Pin Layout Table 7 lists the RJ-45 pin signals when a twisted pair port is operating in the MDI configuration at 100 Mbps. -
Page 44: Fiber Optic Port Specifications
Launch Power (dBm) Fiber Optic Optical Model Diameter Wavelength Type Min. Avg. Max. (microns) AT-MC101XL 50/125 1310 nm -22.5 -20.3 -14.0 AT-MC102XL 1310 nm -19.0 -16.8 -14.0 62.5/125 AT-MC103XL 9/125 1310 nm -15.0 -11.5 -8.0 AT-MC103LH 9/125 1310 nm -5.0 -3.0 AT-MC104XL... - Page 45 Max. Distance Model Link Spec. Type Spec. Budget AT-MC101XL 50/125 9.3 dB 2 km (1.2 mi) AT-MC102XL 12.8 dB 2 km (1.2 mi) 62.5/125 AT-MC103XL 9/125 16.0 dB 15 km (9.4 mi) AT-MC103LH 9/125 29.0 dB 10 km (6.2 mi) 40 km (24.8 mi)
-
Page 47: Cleaning Fiber Optic Connectors
Appendix B Cleaning Fiber Optic Connectors This section describes how to clean fiber optic connections. The fiber optic connector consists of a fiber optic plug and its adapter. The end of the fiber optic cable is held in the core of the ferrule in the plug. Light signals are transmitted through the core of the fiber. -
Page 48: Using A Cartridge-Type Cleaner
Appendix B: Cleaning Fiber Optic Connectors This appendix provides the following procedures: “Using a Cartridge-Type Cleaner” on page 38 “Using a Swab” on page 40 Using a Cartridge-Type Cleaner Fiber optic cartridge cleaners, shown inFigure 24, are available from many vendors and are typically called “cartridge cleaners”. Figure 24. - Page 49 AT-MC10x Series Media Converters Installation Guide 2. Place the ferrule tip on the exposed cleaning surface and rub the ferrule in a downward direction, as shown in Figure 25. Figure 25. Rubbing the Ferrule Tip on the Cleaning Surface Note Rub the ferrule tip on the cleaning surface in one direction only.
-
Page 50: Using A Swab
Appendix B: Cleaning Fiber Optic Connectors Note Do not touch the end face of the ferrule in the connector. Warning Do not stare into the laser beam. Warning Do not look directly at the fiber optic cable ends or inspect the cable ends with an optical lens. - Page 51 AT-MC10x Series Media Converters Installation Guide To clean a recessed ferrule using a swab, perform the following procedure. 1. Insert the swab into the adapter as shown in Figure 27. Rub the ferrule tip with the swab. Figure 27. Cleaning a Recessed Ferrule 2.
-
Page 53: Translated Electrical, Safety, And Emission Information
Appendix C Translated Electrical, Safety, and Emission Information Important: This appendix contains multiple-language translations for the safety statements in this guide. Wichtig: Dieser Anhang enthält Übersetzungen der in diesem Handbuch enthaltenen Sicherheitshinweise in mehreren Sprachen. Importante: Este apéndice contiene traducciones en múltiples idiomas de los mensajes de seguridad incluidos en esta guía. - Page 54 Appendix C: Translated Electrical, Safety, and Emission Information Laser Safety Notices Warning: Class 1 Laser product. Warning: Do not stare into the laser beam. Electrical Safety Notices Warning: To prevent electric shock, do not remove the cover. No user-serviceable parts inside. This unit contains hazardous voltages and should only be opened by a trained and qualified technician.
- Page 55 AT-MC10x Series Media Converters Installation Guide Warning: As a safety precaution, install a circuit breaker with a minimum value of 20 Amps between the equipment and the DC power source. Always connect the wires to the LAN equipment first before you connect the wires to the circuit breaker.
- Page 56 Appendix C: Translated Electrical, Safety, and Emission Information Warning: The power source for the gateway unit should be located near the unit and should be easily accessible. Caution: To allow proper cooling of the gateway device, make sure that the air flow around the unit and through its heatsink cooling fins on the rear is not restricted.
- Page 57 AT-MC10x Series Media Converters Installation Guide Warning: Do not look directly at the fiber optic cable ends or inspect the cable ends with an optical lens. Warning: This unit might have more than one power cord. To reduce the risk of electric shock, disconnect all power cords before servicing the unit.
- Page 58 Appendix C: Translated Electrical, Safety, and Emission Information Telecommunications Compliance Notices Warning: When using your telephone equipment, basic safety precautions should always be followed to reduce the risk of fire, electronic shock, and injury to persons, including the following: Do not use this product near water, for example, near a bathtub, washbowl, kitchen sink, or laundry tub in a wet basement or near a swimming pool.
- Page 59 AT-MC10x Series Media Converters Installation Guide Lasersicherheitshinweise Achtung: Laserprodukt der Klasse 1. Achtung: Blicken Sie nicht in den Laserstrahl. Elektrische Sicherheitshinweise Achtung: Um Stromschlдge zu vermeiden, darf die Abdeckung nicht entfernt werden. Die Ausrьstung enthдlt keine benutzerwartbaren Teile. Diese Einheit fьhrt gefдhrliche Spannungen und sollte nur durch einen ausgebildeten und qualifizierten Techniker geцffnet werden.
- Page 60 Appendix C: Translated Electrical, Safety, and Emission Information Achtung: Als Sicherheitsvorkehrung sollte ein Ьberlastschalter mit einem minimalen Nennwert von 20 Ampere zwischen der Ausrьstung und der Gleichstromversorgung installiert werden. Vor dem Anschluss der Kabel am Ьberlastschalter sollten stets zuerst die Kabel an die LAN-Ausrьstung angeschlossen werden.
- Page 61 AT-MC10x Series Media Converters Installation Guide Vorsicht: Bei der Innenraummontage des Gateway-Gerдts ist darauf zu achten, dass es in einer staubfreien Umgebung installiert wird. Es sollte ein Installationsort gewдhlt werden, an dem die Ports am Gateway-Gerдt gut zugдnglich sind, um das AnschlieЯen und Abtrennen von Kabeln zu erleichtern und den freien Blick auf die LEDs zu ermцglichen.
- Page 62 Appendix C: Translated Electrical, Safety, and Emission Information Zur zuverlдssigen Stromversorgung des Gerдts sollte ein dedizierter Stromkreis oder Netzfilter und Stabilisator (Power Conditioner) verwendet werden. Achtung: Das Chassis kann schwer und schwierig zu heben sein. Allied Telesyn empfiehlt, bei der Rackmontage des Chassis Hilfspersonal heranzuziehen.
- Page 63 AT-MC10x Series Media Converters Installation Guide Telekommunikationskonformitдtshinweise Achtung: Bei der Verwendung Ihrer Telefonausrьstung sollten zur Reduzierung der Brand-, Stromschlag und Verletzungsgefahr stets grundsдtzliche Sicherheitsrichtlinien, einschlieЯlich der folgenden, befolgt werden: Verwenden Sie dieses Produkt nicht in der Nдhe von Wasser, zum Beispiel in der Nдhe einer Badewanne, einer Waschschьssel, eines Spьlbeckens, eines Waschbottichs, in einem nassen Kellerraum oder in der Nдhe eines Schwimmbads.
- Page 64 Appendix C: Translated Electrical, Safety, and Emission Information Avisos de seguridad láser Atenciуn: Producto lбser de clase 1. Atenciуn: No mire el rayo lбser. Avisos de seguridad elйctricas Atenciуn: Para evitar la electrocuciуn, no quite la tapa. La unidad no contiene piezas que pueda reparar el usuario. Esta unidad contiene tensiones peligrosas y sуlo la debe abrir un tйcnico convenientemente formado y cualificado.
- Page 65 AT-MC10x Series Media Converters Installation Guide Atenciуn: Como medida de seguridad, instale un disyuntor con un valor mнnimo de 20 A entre el equipo y la toma de alimentaciуn CC. Conecte siempre los cables a los equipos de la LAN antes de conectarlos al disyuntor.
- Page 66 Appendix C: Translated Electrical, Safety, and Emission Information Atenciуn: La toma elйctrica de la unidad de puerta de enlace debe estar situada cerca de la unidad y ser de fбcil acceso. Precauciуn: Para permitir la refrigeraciуn adecuada del dispositivo de puerta de enlace, asegъrese de no limitar la circulaciуn de aire alrededor de la unidad ni a travйs de las aletas de refrigeraciуn del radiador de la parte trasera.
- Page 67 AT-MC10x Series Media Converters Installation Guide Atenciуn: Esta unidad puede tener mбs de un cable de alimentaciуn. Para reducir el peligro de electrocuciуn, desconecte todos los cables de alimentaciуn antes de manipular la unidad. Atenciуn: Este equipo sуlo debe ser instalado y manipulado por personal convenientemente formado y cualificado.
- Page 68 Appendix C: Translated Electrical, Safety, and Emission Information Avisos de conformidad de telecomunicaciones Atenciуn: Cuando utilice su equipo telefуnico, deberб adoptar las siguientes precauciones de seguridad bбsicas para reducir el riesgo de incendio, descarga electrуnica y lesiones: No utilice este producto en zonas hъmedas; por ejemplo, cerca de una baсera, un lavabo o un fregadero, en un sуtano hъmedo o cerca de una piscina.
- Page 69 AT-MC10x Series Media Converters Installation Guide Avis de sécurité laser Avertissement: Produit laser de classe 1. Avertissement: Ne pas observer directement le rayon laser. Avis de sйcuritй йlectrique Avertissement: Pour йviter tout risque d’йlectrocution, ne pas dйposer le capot. L’appareil ne contient aucun composant rйparable par l’utilisateur.
- Page 70 Appendix C: Translated Electrical, Safety, and Emission Information Avertissement: Par mesure de sйcuritй, installer un coupe- circuit d’une intensitй minimum de 20 ampиre entre l’йquipement et la source d’alimentation en courant continu. Toujours connecter les fils а l’йquipement de rйseau local avant de les raccorder au coupe-circuit.
- Page 71 AT-MC10x Series Media Converters Installation Guide Attention: Si le pйriphйrique servant de passerelle est installй а l’intйrieur, s’assurer qu’il se trouve dans en endroit non poussiйreux. Le site doit offrir un accиs aisй au port du pйriphйrique servant de passerelle afin de faciliter la connexion et la dйconnexion des cвbles, tout en permettant d’observer aisйment les voyants.
- Page 72 Appendix C: Translated Electrical, Safety, and Emission Information Utiliser des circuits d’alimentation ou des unitйs de conditionnement dйdiйs pour fournir une alimentation йlectrique fiable а l’йquipement. Avertissement: Le chвssis peut кtre lourd et difficile а soulever. Allied Telesyn recommande de demander de l’aide pour installer le chвssis dans un rack.
- Page 73 AT-MC10x Series Media Converters Installation Guide Tйlйcommunications – Avis de conformitй Avertissement: Les prйcautions йlйmentaires de sйcuritй doivent кtre systйmatiquement respectйes en utilisant l’йquipement tйlйphonique pour rйduire les risques d’incendie, d’йlectrocution et d’accident corporel, notamment: Ne pas utiliser ce produit prиs d’une source d’eau, telle qu’une baignoire, un lavabo, un йvier ou un baquet dans un sous-sol humide ou prиs d’une piscine.
- Page 74 Appendix C: Translated Electrical, Safety, and Emission Information Indicazioni sulla sicurezza laser Avvertenza: Prodotto laser Classe 1. Avvertenza: Non fissare il raggio laser. Indicazioni sulla sicurezza elettrica Avvertenza: Per evitare scosse elettriche, non rimuovere la copertura. All'interno non sono presenti componenti utilizzabili dall'utente.
- Page 75 AT-MC10x Series Media Converters Installation Guide Avvertenza: Per precauzione, installare un salvavita con un valore minimo di 20 ampere tra l'apparecchiatura e la fonte di alimentazione CC. Collegare i cavi all'apparecchiatura LAN prima di collegarli al salvavita. Per evitare il rischio di danni fisici causati da scosse elettriche, non utilizzare l'apparecchiatura ad alte temperature.
- Page 76 Appendix C: Translated Electrical, Safety, and Emission Information Avvertenza: La fonte di alimentazione dell'unitа gateway deve essere posizionata vicino all'unitа, in un luogo facilmente accessibile. Attenzione: Per consentire il raffreddamento appropriato del dispositivo gateway, verificare che il flusso d'aria attorno all'unitа e attraverso le ventole di raffreddamento per la dispersione del calore poste sul retro non sia ostruito.
- Page 77 AT-MC10x Series Media Converters Installation Guide Avvertenza: Questa unitа potrebbe disporre di piщ cavi di alimentazione. Per ridurre il rischio di scosse elettriche, scollegare tutti i cavi di alimentazione prima di iniziare la manutenzione dell'unitа. Avvertenza: Solo personale esperto e qualificato puт installare o sostituire l'apparecchiatura.
- Page 78 Appendix C: Translated Electrical, Safety, and Emission Information Indicazioni per la conformitа con le norme sulle telecomunicazioni Avvertenza: Quando si utilizza l'apparecchiatura telefonica, per ridurre il rischio di incendio, scosse elettriche e danni alle persone, и necessario seguire alcune precauzioni di base per la sicurezza, ad esempio: Non utilizzare il prodotto in prossimitа...
- Page 79 AT-MC10x Series Media Converters Installation Guide Лазерная безопасность Внимание: лазерный продукт, класс 1. Внимание: Не смотрите прямо в лазерный луч. Электрическая безопасность Внимание: Для предотвращения электрического шока, не снимайте кожух. Внутри нет частей, подлежащих обслуживанию пользователем. Этот устройство – под опасным...
- Page 80 Appendix C: Translated Electrical, Safety, and Emission Information Во всех странах: Инсталлируйте продукт в соответствии с национальными нормами электротехники. Внимание: Для безопасности установите прерыватель для максимальной силы тока 15 ампер между оборудованием и источником постоянного тока. Всегда подсоединяйте провода к сетевому оборудованию (LAN) перед...
- Page 81 AT-MC10x Series Media Converters Installation Guide Предостережение: Если шлюзовая установка инсталлируется в помещении, позаботьтесь, чтобы в помещении не было пыли. Должен быть обеспечен легкий доступ к портам оборудования, чтобы Вам было легко соединять и отсоединять кабели и видеть светодиоды. Внимание: Источник питания должен быть невдалеке от установки, и...
- Page 82 Appendix C: Translated Electrical, Safety, and Emission Information Внимание: Корпус может быть тяжелым и поднять его может быть сложно. Allied Telesyn рекомендует, что при установке корпуса на раме Вам необходимо обеспечить соответствующую помощь. Внимание: Не смотрите прямо на торцы волоконно- оптического...
- Page 83 AT-MC10x Series Media Converters Installation Guide Телекоммуникационное соответствие Внимание: При использовании телефонного оборудования, всегда следует обращать внимания на требования безопасности для снижения риска пожара, поражения током и ранения, в том числе: Не используйте оборудование рядом с водой – например ванной, раковиной или стиральным резервуаров или в мокром...
Need help?
Do you have a question about the AT-MC102XL and is the answer not in the manual?
Questions and answers