Table of Contents
Advertisement
Quick Links
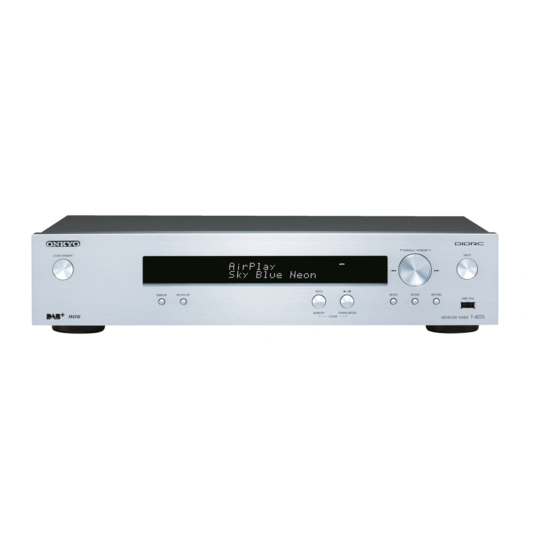
Network Tuner
T-4070
Instruction Manual
Thank you for purchasing an Onkyo Network Tuner.
Please read this manual thoroughly before making
connections and plugging in the unit.
Following the instructions in this manual will enable
you to obtain optimum performance and listening
enjoyment from your new Tuner.
Please retain this manual for future reference.
Contents
Introduction
..................................En-
Connections
.............................. En-
Enjoying Audio Sources
Appendix
Troubleshooting
..................... En-
Specifications
......................... En-
2
10
16
...... En-
37
39
E
n
Advertisement
Table of Contents

Related Manuals for Onkyo T-4070


Summary of Contents for Onkyo T-4070
- Page 1 ........En- T-4070 Instruction Manual Connections ......En- Enjoying Audio Sources ..En- Thank you for purchasing an Onkyo Network Tuner. Appendix Please read this manual thoroughly before making Troubleshooting connections and plugging in the unit...... En- Specifications Following the instructions in this manual will enable ......
-
Page 2: Important Safety Instructions
WARNING: WARNING AVIS RISK OF ELECTRIC SHOCK RISQUE DE CHOC ELECTRIQUE TO REDUCE THE RISK OF FIRE OR ELECTRIC DO NOT OPEN NE PAS OUVRIR SHOCK, DO NOT EXPOSE THIS APPARATUS The lightning flash with arrowhead symbol, within an TO RAIN OR MOISTURE. equilateral triangle, is intended to alert the user to the presence of uninsulated “dangerous voltage”... -
Page 3: Precautions
We, ONKYO EUROPE ELECTRONICS GmbH are wet or damp. If water or any other liquid gets LIEGNITZERSTRASSE 6, inside this unit, have it checked by your Onkyo 82194 GROEBENZELL, GERMANY dealer. declare in own responsibility, that the ONKYO product 8. -
Page 4: Features
Please note that the use of this accessory with iPod or iPhone may affect wireless performance. Music Optimizer™ is a trademark of Onkyo Corporation. DIDRC and DIDRC logo are registered trademarks of Onkyo Corporation. -
Page 5: Table Of Contents
Before Making Any Connections......12 Cable and Jacks ............12 About Balanced Output (AES/EBU Jack) ....13 Connecting to an Amplifier........13 Connecting Onkyo Components....... 14 Connecting the Power Cord ........15 Turning On and Standby ......... 15 Listening to the Radio........16 Listening to AM/FM Stations ......... -
Page 6: Supplied Accessories
• Expired batteries should be removed as soon as cable To use , T-4070 must be connected with an cable. possible to prevent damage from leakage or corrosion. Aiming the Remote Controller When using the remote controller, point it toward the tuner’s remote control sensor, as shown below. -
Page 7: Getting To Know The Tuner
Getting to Know the Tuner Front Panel For detailed information, see the pages in parentheses. ON/STANDBY button (15, 35, 36, 37) MEMORY/MENU button (17, 25, 28) TUNING / , PRESET / , / TUNING MODE/ / button (16, 17, 20, 37) buttons (16, 19, 22, 24, 28, 31) SETUP button (18, 19, 20, 24, 31, 34) INPUT button (16, 19, 23) -
Page 8: Rear Panel
Getting to Know the Tuner —Continued Rear Panel For detailed information, see the pages in parentheses. AUDIO OUTPUT jacks (12, 13) ETHERNET port (29) FM ANTENNA jack and AM ANTENNA AC INLET terminal (15) terminal and DAB ANTENNA jack (10, 11) See “Connecting Antennas”, “Connecting Your ... -
Page 9: Remote Controller
Getting to Know the Tuner —Continued Remote Controller For detailed information, see the pages in parentheses. button (15) DIMMER button (31) DISPLAY button (19, 23, 25) INPUT SELECTOR buttons (16, 19, 23) SHUFFL button (23, 24, 25) Control buttons (17, 23, 25, 28) Arrow []/[]/[]/[] and ENTER buttons (16, 19, 23, 31, 34) SETUP button (18, 19, 20, 24, 31, 34) -
Page 10: Connecting Antennas
Connecting Antennas This section explains how to connect the supplied Connecting the AM Loop Antenna FM antenna, AM loop antenna, and DAB antenna. The supplied AM loop antenna is for indoor use only. The tuner won’t pick up any radio signals if no antenna is connected, so you must connect the antenna to use the tuner. -
Page 11: Connecting The Dab Antenna
Connecting Antennas —Continued Connecting the DAB Antenna Screw the supplied DAB antenna’s plug onto the DAB ANTENNA jack. Once your tuner is ready for use, you’ll need to tune into a DAB station and adjust the position of the DAB antenna to achieve the best possible reception. -
Page 12: Connecting Your Components
Analog audio connections (RCA) carry analog audio. White The network tuner supports high-speed USB 2.0. You can connect USB memory or iPod/iPhone. To use (Remote Interactive), you need to connect your Onkyo AV components with an cable. -
Page 13: About Balanced Output (Aes/Ebu Jack)
Pull out the connection cable while holding down the button. Amplifier Push Use the digital audio cable to connect the T-4070’s DIGITAL COAXIAL/OPTICAL jacks to the DIGITAL IN jacks on your amplifier, as shown. Digital (AES/EBU) Connection Connecting to an Amplifier... -
Page 14: Connecting Onkyo Components
cables are supplied with Onkyo tuners and players (DVD, CD, etc.). Note: • If the T-4070 is used with another Onkyo component, • Some components, including the T-4070, have two such as the A-9070, refer to its instruction manual as ... -
Page 15: Connecting The Power Cord
Connecting Your Components —Continued Connecting the Power Cord Supplied power cord To an AC wall outlet (Plug type varies from AC INLET country to country.) Connect all of your speakers and AV components. Connect the supplied power cord to the network tuner’s AC INLET. -
Page 16: Listening To The Radio
Listening to the Radio Auto Tuning Listening to AM/FM Stations To activate this mode, press the [TUNING MODE] button to turn on the “AUTO” indicator. In this With the built-in tuner, you can enjoy AM and FM radio mode, you will receive the broadcast in stereo stations. - Page 17 Listening to the Radio —Continued ■ Tuning into Stations by Frequency You can store up to 40 of your favorite AM/FM radio stations as presets. You can tune to AM and FM stations directly by entering the appropriate frequency. Presetting FM/AM stations is performed by the tuner. Tune to the AM/FM station that you want to store as a preset.
- Page 18 Listening to the Radio —Continued ■ Name Edit • The following table shows available characters. You can enter a custom name for radio preset for easy identification. When entered, the custom name will appear on the display. The custom name is edited using the character input screen.
-
Page 19: Listening To Dab Digital Radio
Listening to the Radio —Continued Listening to DAB Digital Radio Press the [SETUP] button. With the built-in tuner, you can enjoy DAB digital radio. Use the arrow []/[] button to select “1.Hardware Setup” and then press [ENTER]. Use the arrow []/[] button to select “1.DAB Scan?”... - Page 20 Listening to the Radio —Continued 2. Program Type Press the [SETUP] button. Displays the type of program. Use the arrow []/[] button to select “1.Hardware Setup” and then press [ENTER]. Use the arrow []/[] button to select the 3. Bit Rate and Audio Mode item you want to set.
-
Page 21: Using Rds
Listening to the Radio —Continued RDS Program Types (PTY) Using RDS RDS only works in areas where RDS broadcasts are Type Display available. When tuned into an RDS station, the RDS None NONE indicator appears. News reports NEWS Current affairs AFFAIRS RDS indicator Information... - Page 22 Listening to the Radio —Continued Displaying Radio Text (RT) Listening to Traffic News (TP) You can search for stations that broadcast traffic news. When tuned to an RDS station that’s broadcasting text information, the text can be displayed. Press the [RT/PTY/TP] button three times. Press the [RT/PTY/TP] button once.
-
Page 23: Using The Usb/Network Device
Using the USB/Network Device Connecting the iPod/iPhone Directly Press [MODE] to switch to Extended to the USB Port Mode You can also switch modes by pressing and USB can be used to play music files stored on iPod/ holding down the tuner’s [TUNING MODE] iPhone, which can be plugged into the tuner’s USB port. -
Page 24: Using The Airplay
Network Setup Use the tuner’s [INPUT] button or the remote controller’s [NET] button to select “AirPlay”. Connect the T-4070 to your router with an Ethernet cable. Press the [SETUP] button on the remote See: “Network/USB Features” ( page 29). controller. -
Page 25: Playing The Usb Device
• Protected WMA music files on an MP3 player cannot be played. • Onkyo accepts no responsibility whatsoever for the loss or damage to data stored on a USB device when that device is used with the tuner. We recommend that you back up your important music files beforehand. -
Page 26: Listening To The Internet Radio
Address of your unit to create a member login account (email address and password) on the On your computer, start your web browser http://onkyo.vtuner.com/ portal. To verify your MAC and enter the tuner’s IP address in the Address, please see “Network Setup” ( page 32). -
Page 27: Playing Music Files On A Server
Using the USB/Network Device —Continued Listening to the Preset Stations Registered Click “OK” to close the dialog box. in “My Favorites” This completes the Windows Media Player 11 configuration. Press [NET] button. You can now play the music files in your Windows The “NET”... -
Page 28: Remote Playback
Using the USB/Network Device —Continued • Depending on the sharing settings in the media Click “OK” to close the dialog box. server, the tuner may not able to access the content. See the instruction manual of the media This completes the Windows Media Player 12 server. -
Page 29: Network/Usb Features
Network/USB Features Notes: Connecting to the Network • To receive Internet radio with the tuner, your broadband Internet connection must be working and The following diagram shows how you can connect the tuner to your home network. In this example, it’s able to access the Web.... -
Page 30: Usb Device Requirements
Network/USB Features —Continued ■ WMA (.wma or .WMA) Minimum system requirements for Windows WMA stands for Windows Media Audio and is an audio Media Player 11 on Windows XP compression technology developed by Microsoft Operating system Corporation. Audio can be encoded in WMA format by ®... -
Page 31: Advanced Setup
Advanced Setup Setting the Display Brightness Turn on the power. You can adjust the brightness of the display. Press the [SETUP] button on the remote controller. The setup menu appears in the display. Use the arrow []/[] buttons to select “1. Hardware Setup,”... -
Page 32: Advanced Setup Menu
Advanced Setup —Continued DHCP Advanced Setup Menu This setting determines whether or not the tuner uses DHCP to automatically configure its IP Address, Subnet 1. Hardware Setup Mask, Gateway, and DNS Server settings. Auto Standby Enable (Default setting) Disable When “Auto Standby” is set to “On”, the tuner will automatically enter Standby mode if there is no Note: operation for 30 minutes with no audio signal input. - Page 33 • Perform the firmware update only when such an announcement is posted on the Onkyo web site. Visit the Onkyo web site for the latest information. • It takes about 5 to 30 minutes to complete the firmware update....
-
Page 34: Firmware Update
In has been completed. no event will Onkyo be liable to you or any third party for any special, indirect, incidental, or consequential Turn off the tuner using [ ON/STANDBY] damages of any kind, including, but not limited to, on the front panel. -
Page 35: Updating The Firmware Via Usb
USB device, remove it first. will not be able to access the network. Consult your Internet Download the firmware file from the Onkyo Service Provider (ISP). web site. The file name is as follows: • If your modem does not function as a router, you will need a router. - Page 36 Tgim Sha Tsui Kowloon, Hong Kong. Refer to the following table and take appropriate action. Tel: 852-2429-3118 Fax: 852-2428-9039 <http://www.onkyochina.com/> Asia, Oceania, Middle East, Africa Please contact an ONKYO distributor referring to Onkyo SUPPORT site. <http://www.intl.onkyo.com/support/local_support/index.html>...
-
Page 37: Troubleshooting
6). If you can’t resolve the issue yourself, try resetting • Install new batteries. Don’t mix different types of the tuner before contacting your Onkyo dealer. batteries or old and new batteries ( page 6). To reset the tuner to its factory defaults, turn it •... -
Page 38: Usb Device Playback
Onkyo is not responsible for damages (such as CD rental fees) due to unsuccessful recordings caused by the unit’s malfunction. Before you record important data, make sure that the material will be recorded correctly. -
Page 39: Specifications
Specifications Tuner Section ■ FM Tuning Frequency Range 87.5 MHz– 108.0 MHz RDS ■ AM Tuning Frequency Range 522/530 kHz–1611/1710 kHz Preset Channel ■ DAB/DAB+ Tuning Frequency Range Band III: 174.928 MHz–239.200 MHz L–Band: 1452.960 MHz–1490.624 MHz General Power Supply AC 230 V, 50 Hz Power Consumption 28 W... - Page 40 Unit 1033, 10/F, Star House, No 3, Salisbury Road, Tsim Sha Tsui Kowloon, Hong Kong. Tel: 852-2429-3118 Fax: 852-2428-9039 http://www.onkyochina.com/ 1301, 555 Tower, No.555 West NanJin Road, Jin an, Shanghai, China 200041, Tel: 86-21-52131366 Fax: 86-21-52130396 http://www.cn.onkyo.com/ C1110-1 SN 29400930 (C) Copyright 2011 ONKYO SOUND & VISION CORPORATION Japan. All rights reserved.
Need help?
Do you have a question about the T-4070 and is the answer not in the manual?
Questions and answers