Table of Contents

Related Manuals for Miele H 5240 BP


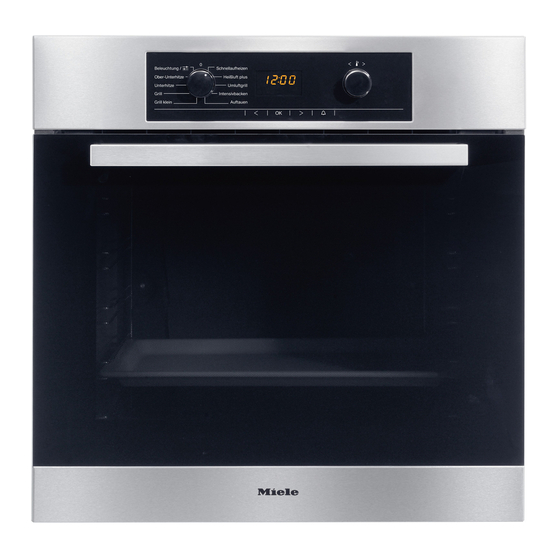
Summary of Contents for Miele H 5240 BP
-
Page 1: Operating And Installation Instructions
Operating and installation instructions Oven H 5140 BP, H 5240 BP en - GB To avoid the risk of accidents or damage to the appliance it is essential to read these instructions before it is installed and used for the first time. -
Page 2: Table Of Contents
H 5140 BP, H 5240 BP........ - Page 3 Contents Temperature indicator ......... . . 25 Pre-heating .
- Page 4 Contents Defrost ............45 Cooking ready meals .
-
Page 5: Warning And Safety Instructions
Warning and safety instructions Correct application This appliance conforms to current The appliance is intended for safety requirements. Inappropriate domestic use to cook food, and in use can, however, lead to personal particular to bake, roast, grill, cook, injury and damage to property. defrost and dry fruit. - Page 6 Warning and safety instructions Safety with children Technical safety This appliance is not toy! To prevent Installation, maintenance and the risk of injury do not let children play repairs may only be carried out by a with the appliance or its controls. suitably qualified and competent person in strict accordance with current Older children may only use the...
- Page 7 Tampering with electrical connections If the supply cord is damaged, it must be replaced by a Miele approved or components and mechanical parts is highly dangerous to the user and can service technician to avoid a hazard. cause operational faults.
-
Page 8: Correct Use
Warning and safety instructions Correct use If using alcohol in your recipes, high temperatures can cause the alcohol to Caution. Danger of burning. vaporise and even to ignite on the hot High temperatures are produced by heating elements. the oven. Alcohol should be burnt off before the dish is placed in the oven to avoid this Use oven gloves when placing food... - Page 9 Warning and safety instructions Do not line the floor of the oven with If using plastic containers for aluminium foil when using cooking, these must be declared by the "Conventional "/"Bottom manufacturer as being suitable for use heat "/"Intensive bake "/"Rapid in an oven.
- Page 10 Warning and safety instructions Accessories The manufacturer cannot be held Only use genuine Miele spare parts liable for damage caused by and accessories with this appliance. If non-compliance with these Warning spare parts or accessories from other and Safety instructions.
-
Page 11: Caring For The Environment
Caring for the environment Disposal of the packing Disposal of your old appliance material Electrical and electronic appliances often contain materials which, if The transport and protective packing handled or disposed of incorrectly, has been selected from materials which could be potentially hazardous to are environmentally friendly for human health and to the environment. -
Page 12: Guide To The Appliance
Guide to the appliance H 5140 BP, H 5240 BP Function selector, retractable when it is at "0" Display Sensors V, OK, W, Temperature selector, retractable Door lock for pyrolytic operation Top heat/grill element Back panel with air inlet for the fan... -
Page 13: Features
Features Oven controls Cooling system In addition to operating the various A cooling fan will come on cooking programmes to bake, roast automatically when a cooking and grill the controls also offer the programme is started. The cooling fan following: mixes hot air from the oven cavity with cool room air before venting it out into –... -
Page 14: Pyrolytic Cleaning
Accessories See "Cleaning and care" for more information. The following accessories are supplied with this oven. These and other accessories are also available to order from the Miele Spare Parts Department, your Dealer or via the internet at www.miele-shop.com. -
Page 15: Baking Tray, Universal Tray And Rack With Non-Tip Notches
Features Baking tray, universal tray and rack Anti-splash insert (depending on with non-tip notches model) The anti-splash insert should be placed in the universal tray when grilling or The baking tray, universal tray and rack roasting. are inserted into the oven between the The juices from the food being cooked two rails of a shelf runner. -
Page 16: Controls
Controls Function selector The left-hand control is used to select the function. It can be turned clockwise or anti-clockwise. The function selector can only be retracted when it is at "0". Rapid heat-up Fan plus Fan grill Intensive bake Defrost Conventional heat Bottom heat Full grill... -
Page 17: Temperature Selector
Controls Temperature selector The right-hand control V W is used to select the temperature. It can be turned clockwise or anti-clockwise. The temperature selector can be retracted in any position. Sensors The sensors underneath the display react to touch. A keypad tone sounds each time a sensor is touched. You can deactivate this, if wished (see "Settings "). -
Page 18: Symbols In The Display
Controls Symbols in the display I2:00 The following symbols will appear in the display depending on the position of the function selector and/or whether a sensor has been touched: Position of the Symbols Function/meaning function selector Time of day System lock Function (except Temperature indicator lighting) -
Page 19: Triangle V In The Display
Controls Triangle V in the display When a sensor is touched, the symbols of functions which can be altered will light up in the display. These will vary depending on programme. Touch the V or W sensor repeatedly until triangle V is underneath the symbol of the required function. -
Page 20: Functions
Functions Your oven has a range of appliance functions for preparing a wide variety of recipes. Functions Notes Conventional – For baking traditional recipes, e.g. fruit cake, casseroles. – Also ideal for soufflés. – If using an older recipe or cookbook, set the oven temperature for Conventional, 10°C lower than that recommended. - Page 21 Functions Functions Notes Rapid – For pre-heating the oven compartment. heat-up The oven function required must then be selected. Fan plus – For baking and roasting. – You can bake and roast on different levels at the same time. – Lower temperatures can be used than with "Conventional "...
-
Page 22: Before Using For The First Time
Before using for the first time The time of day you have selected has Before the oven can be used, you now been entered. will need to If there is a power cut, the appliance – release the controls by pressing will store the current time of day of them in, if they are pushed in approx. -
Page 23: Cleaning And Heating Up For The First Time
Before using for the first time Cleaning and heating up for The oven will start heating up as soon as this entry has been accepted. the first time ^ Heat the empty oven for at least an Before use, please remove hour. -
Page 24: Operation
Operation Using the oven Cooling system ^ Place the food in the oven. The cooling fan will continue to run for a while after the oven has been switched ^ Select the function you want (e.g. Fan off to prevent any humidity building up plus in the oven, on the control panel or on The following will appear in the display:... -
Page 25: Changing The Temperature
Operation Pre-heating Changing the temperature If your recipe requires a temperature Most dishes can be placed in a cold which is different from the oven. They will then make use of the recommended temperature for that heat produced during the heating-up function you can use the temperature phase. -
Page 26: Switching On And Off Automatically
Operation Switching on and off Entering a cooking duration automatically ^ Place the food in the oven. You can programme the oven to switch ^ Select the required function and set off automatically or on and off the temperature. automatically. The oven heating, lighting and cooling For automatic switching off you need to fan will switch on. -
Page 27: Entering A Cooking Duration And Delaying The Finish Time
Operation Entering a cooking duration and Now set the Finish time: delaying the finish time I2:I5 To use the automatic switching on and off function on the oven, both the cooking duration and the finish time must be entered. For example: The time now is 10:45;... -
Page 28: The End Of A Cooking Programme
Operation The end of a cooking programme To check and change an entered time At the end of the duration It is possible to check or change times entered for a cooking programme at – the oven heating switches off any time by calling up the relevant automatically. -
Page 29: Minute Minder (Egg Timer)
Minute minder (egg timer) The minute minder can be used to time At the end of the time set for the minute any activity in the kitchen, e.g. boiling minder eggs. – the symbol will flash. A maximum minute minder time of 59 –... -
Page 30: Settings
Settings Your oven is supplied with standard factory default settings. These settings "P" can be changed by altering their status "s" (see chart). Setting Status (* factory default setting) The time of day display is switched off When the function selector is turned to the "0" Time of day position, the display remains dark. -
Page 31: To Change The "Status" Of A Setting
Settings To change the "status" of a setting ^ Select " Settings". "P I" will appear in the display. ^ Touch the V or W sensor repeatedly until the setting required appears in the display. ^ Touch the OK sensor. The current status "S"... -
Page 32: System Lock
System lock Your oven has a system lock which prevents it from being used unintentionally, for example, by children. ^ Turn the function selector to "0". ^ Touch the W sensor repeatedly until triangle V is underneath the symbol. ^ Touch the OK sensor. ^ Whilst triangle V is flashing under symbol, use the V or W sensors to select the "I"... -
Page 33: Baking Tips
Baking tips Baking parchment Refer to the baking charts for Because of their PerfectClean anti-stick suggestions of temperatures, shelf surface the baking tray and the levels and cooking durations. These universal tray do not need to be take into account a range of different greased or lined with baking parchment baking tins, quantities and cooking for baking. -
Page 34: Notes About The Charts
Baking tips Notes about the charts Frozen food When baking frozen products such as Temperature, baking duration cakes, pizza and baguettes, use the lowest temperature quoted on the To achieve even results without over-browning the food, manufacturer's packaging. Bake on a layer of baking parchment placed on –... -
Page 35: Baking Chart
Baking chart Fan plus Temperature Recommended Duration Cakes / biscuits in °C shelf level in min. Creamed mixture Sponge cake 150 – 170 60 – 70 Ring cake 150 – 170 65 – 80 Foam cake (tray) 150 – 170 25 –... -
Page 36: Conventional Heat
Baking chart Conventional heat Temperature Recommended Duration Cakes / biscuits in °C shelf level in min. Creamed mixture Sponge cake 150 – 170 60 – 70 Ring cake 170 – 190 65 – 80 Foam cake (tray) 170 – 190 25 –... -
Page 37: Intensive Bake
Baking chart Intensive bake Particularly suitable for – dishes that require a moist topping and crisp base like pizza and quiche lorraine. – cakes with a filling where the base has not been pre-baked, e.g. some cheesecakes. Temperature Recommended Duration Cakes / biscuits in °C shelf level... -
Page 38: Roasting Tips
You can also use Conventional Containers Any heat-resistant The Miele Gourmet oven dish, roasting pans with a lid, containers ovenproof china or glass, roasting bags, the universal tray, the rack on top of the universal tray, the anti-splash insert (if you have one) in the universal tray. -
Page 39: Useful Tips
Roasting tips Useful tips Browning Browning only occurs towards the end of the roasting time. Remove the lid about halfway through the roasting time if a more intensive browning result is desired. Standing time At the end of the programme, take the roast out of the oven, wrap in aluminium foil and leave to stand for about 10 minutes. -
Page 40: Roasting Chart
Roasting chart Recom- Fan plus Conventional mended Temperature Time Temperature Time Food shelf in °C in min. in °C in min. level Topside of beef, approx. 170 – 190 100 – 120 190 – 210 100 – 120 1 kg Beef fillet or roast beef, 190 –... -
Page 41: Grilling Tips
Grilling tips Grill with the oven door closed. If you grill with the door open, hot air will escape from the oven instead of being cooled by the cooling fan. The controls will get hot. Danger of burning. Function Notes Full grill For grilling thin cuts in large quantities and for browning large baked dishes. - Page 42 Grilling tips Recommendations Notes Containers Rack on the universal Do not use the baking tray. tray Anti-splash insert in the universal tray (if you have one) Shelf level from the For thin cuts use shelf level 4 or 5 bottom For thicker cuts use shelf level 3 or 4 Please refer to the grilling chart.
-
Page 43: Preparing Food For Grilling
Grilling tips Preparing food for grilling Useful tips Rinse briefly under running cold water, It is best to grill food of a similar pat dry and season with pepper and thickness at the same time so that the herbs. Do not season meat with salt grilling time for each item does not vary before grilling as this draws the juices too greatly. -
Page 44: Grilling Chart
Grilling chart Pre-heat the grill for approx. 5 minutes with the door shut. Food to be grilled Recom- Full grill Fan grill mended Economy grill shelf Temperature Total Temperature Total level in °C grilling time in °C grilling time in min. in min. -
Page 45: Defrost
Defrost The Defrost function uses the fan to Defrosting times circulate air at room temperature. The time needed for defrosting Please note: depends on the type and weight of the food, and at what temperature it was – Where possible remove the deep frozen. -
Page 46: Cooking Ready Meals
Cooking ready meals We recommend using Fan plus ^ Select the required function and set the temperature. ^ When the temperature indicator light goes out, place the dish in the pre-heated oven. Cook frozen cakes and pizza on baking paper on the rack rather than on the baking tray or the universal tray. -
Page 47: Cleaning And Care
– abrasive cleaning agents, e.g. to alter or discolour. powder cleaners and cream cleaners, Clean the front using a damp Miele – solvent-based cleaning agents, microfibre E-cloth or with a clean sponge and a solution of hot water and – stainless steel cleaning agents, washing-up liquid. -
Page 48: Accessories
Cleaning and care Remove all accessories as well as the runners and any extra accessories such as FlexiClip telescopic runners from the oven interior before starting the pyrolytic cleaning process. The high temperatures needed for pyrolysis will damage the accessories. Accessories Baking tray, universal tray, anti-splash insert (if applicable) -
Page 49: Perfectclean
Cleaning and care PerfectClean Normal soiling Clean as soon as possible after each Before using for the first time remove use with a dishcloth, soft sponge or a any stickers from PerfectClean soft nylon brush, and a solution of hot surfaces. - Page 50 Cleaning and care Do not attempt to use on a hot oven or The following cause lasting damage accessories. Allow the PerfectClean to the surface structure and reduce surfaces to cool down to room the anti-stick effect and must not be temperature before applying an oven used on PerfectClean surfaces: spray.
-
Page 51: Oven Interior
Cleaning and care Oven interior Most cooking residues can be removed with a damp cloth and a mild solution of The oven interior is coated with dark hot water and washing-up liquid. pyrolytic enamel which facilitates cleaning. Never use hard brushes, hard This is a particularly hard enamel with sponges, wire wool pads*, knives or an extremely smooth surface and very... -
Page 52: Pyrolytic Cleaning Of The Oven Interior
Cleaning and care Pyrolytic cleaning of the oven During the pyrolytic process the oven is heated to over 400 °C. Any residual interior soiling is broken down and reduced to Before starting a pyrolytic cleaning ash by the high temperatures. process please note the following: For safety reasons the oven door is Remove any coarse soiling from the... - Page 53 Cleaning and care Starting a pyrolytic process You can set a finish time for the pyrolytic process during the first five ^ Take all accessories out of the oven. minutes after starting the programme, ^ Select the "Pyrolytic " function. for example, to take advantage of cheaper night electricity tarifs.
- Page 54 Cleaning and care After the pyrolytic process any debris The pyrolytic process will be (e.g, ash), can easily be wiped away. cancelled, – if the function selector is turned to Remember to wait until the oven has "0". cooled down before doing so! Danger of burning.
-
Page 55: To Remove The Oven Door
Cleaning and care ^ Then lift the door upwards as far as it To remove the oven door will go. The oven door is connected to the oven by hinges. Do not attempt to take the door off the hinge guides when it is in a horizontal position. -
Page 56: To Dismantle The Oven Door
Cleaning and care To dismantle the oven door Always remove the oven door before The oven door is made up of four dismantling it. panes of glass and has vents at the top and bottom. ^ Place the door on a protective surface (e.g. - Page 57 ^ Remove the seal. ^ Clean the glass panes and other parts with a Miele E-cloth or a clean sponge and a solution of hot water with a little washing-up liquid. Wipe dry using a soft cloth.
- Page 58 Cleaning and care ^ To refit the door: When refitting the upper pane, the The two middle panes are identical. more angled corner must be To ensure that they are refitted inserted at the top left. correctly, one of the corners is more angled than the others.
-
Page 59: To Refit The Door
Cleaning and care To refit the door ^ Push the inner pane into the plastic strip and insert it in the retainers. ^ Hold the door securely at both sides and carefully fit it back onto the hinge guides. Make sure that the door goes back ^ Flip the glass pane retainers inwards on straight. -
Page 60: To Remove The Runners
Cleaning and care ^ Open the door fully. To remove the runners Make sure the oven heating elements are switched off and cool. Danger of burning. ^ Flip both locking clamps back up as far as they will go into a horizontal position. -
Page 61: To Lower The Top Heat/Grill Element
Cleaning and care To lower the top heat/grill element Make sure the oven heating elements are switched off and cool. Danger of burning. ^ Remove the runners. ^ Unscrew the wing nut and lower the top heating element. Do not use force to pull it down as this can cause the element to break. -
Page 62: Problem Solving Guide
- P i"). does not show in the display (see "Settings – Check whether the mains fuse has tripped. If it has, contact a qualified electrician or Miele. The oven does not – Check if the system lock has been activated. - Page 63 Possible cause and remedy ^ Switch the appliance off. If the door lock will still not open The door cannot be opened at the end please contact the Miele Service Department. of a pyrolytic cleaning programme. ^ Disconnect the appliance from the electricity supply:...
- Page 64 – Fault 32: The door has not locked for the pyrolytic cleaning process. Switch the oven off and start the pyrolytic cleaning process again. If the fault code appears again call the Miele Service Department. – Fault 33: The door lock for the pyrolytic cleaning process will not open.
-
Page 65: After Sales Service
– your Miele Dealer visible on the front frame of the oven, with the door fully open. Please note that telephone calls may – the Miele Customer Contact Centre be monitored and recorded to (see back cover for address). improve our service. -
Page 66: Optional Accessories
Optional accessories The following accessories may come as standard with some models. They are also available to order at extra cost via the internet on www.miele-shop.com, your Miele Dealer or the Miele Spare Parts Department. FlexiClip telescopic runners Pizza stone... - Page 67 Optional accessories Gourmet oven dish Miele E-cloth The gourmet oven dish can be placed Removes grease and stains and leaves in the oven directly on the runners. It no smearing. Suitable for cleaning has non-tip safety notches like the surfaces such as stainless steel, glass,...
-
Page 68: Electrical Connection
(CSA) accessible after the appliance has may be used (available from the been built in. Miele Customer Contact Centre). If the switch is not accessible after installation (depending on country) an additional means of disconnection must be provided for all poles. -
Page 69: Building-In Diagrams
Building-in diagrams Appliance dimensions and unit cut-out Installation in a base unit Installation in a tall unit * Appliances with glass front ** Appliances with metal front... -
Page 70: Front Dimensions
Building-in diagrams Front dimensions A H 5140: 53.2 H 5240: 47.5 B Appliances with glass front: 2.2 Appliances with metal front: 1.2... -
Page 71: Installing The Oven
Installing the oven The appliance must not be Turn off the mains electricity supply operated until it has been correctly to the isolator. installed in its housing unit. ^ Connect the mains cable from the Otherwise it poses an electric shock oven to the isolator. - Page 72 Alteration rights reserved / 22 / 1609 M.-Nr. 07 336 120 / 03 (H 5140 BP; H 5240 BP)