Table of Contents
Advertisement
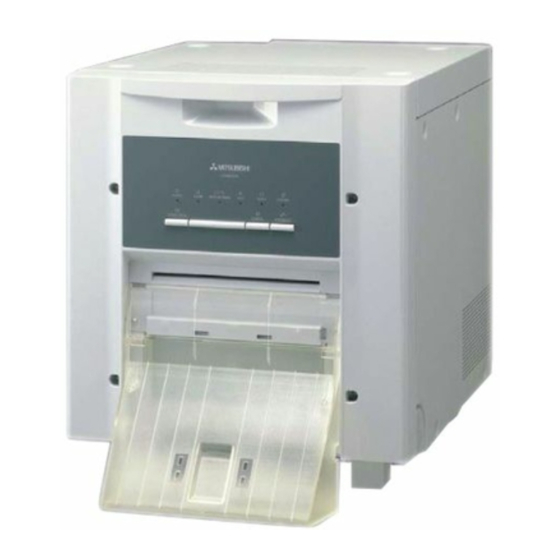
DIGITAL COLOR PRINTER
MODEL
CP9810DW
OPERATION MANUAL
THIS OPERATION MANUAL IS IMPORTANT
TO YOU.
PLEASE READ IT BEFORE USING YOUR
DIGITAL COLOR PRINTER.
Hereby, Mitsubishi Electric Corporation, declares that this digital color printer is in
compliance with the essential requirements and other relevant provisions of Directive
1999/5/EC.
Advertisement
Table of Contents

Related Manuals for Mitsubishi Electric CP9810DW


Summary of Contents for Mitsubishi Electric CP9810DW
- Page 1 THIS OPERATION MANUAL IS IMPORTANT TO YOU. PLEASE READ IT BEFORE USING YOUR DIGITAL COLOR PRINTER. Hereby, Mitsubishi Electric Corporation, declares that this digital color printer is in compliance with the essential requirements and other relevant provisions of Directive 1999/5/EC.
- Page 2 INFORMATION This Class A digital apparatus complies with Canadian ICES-003. WARNING : TO PREVENT FIRE OR SHOCK HAZARD, DO NOT EXPOSE THIS APPLIANCE TO RAIN OR MOISTURE. WARNING: Use the included AC power cord so as not to interfere with radio and television reception. If you use other cables, it may cause interference with radio and television reception.
- Page 3 This symbol mark is according to the directive 2002/96/EC Article 10 Information for users and Annex IV, and/ or to the directive 2006/66/EC Article 20 Information for end-users and Annex II. Your MITSUBISHI ELECTRIC product is designed and manufactured with high quality materials and components which can be recycled and/or reused.
-
Page 4: Table Of Contents
CONTENTS CONTENTS Contents ....................1 Safety precautions ................2-4 Special features ..................5 Unpacking ..................... 6 Features and functions ................. 7-8 Front panel ..................... 7 Side and rear panel ................8 Connections ..................9-10 Connection with USB data signal equipment ......... 9 Setting of DIP switches ................ -
Page 5: Safety Precautions
SAFETY PRECAUTIONS In the interest of safety, please observe the following precautions: POWER REQUIREMENT This Digital Color Printer is designed to operate on 120 V AC 50/60 Hz in the U.S.A. and Canada, and 220 V - 240 V AC 50/60 Hz in Europe. - Page 6 SAFETY PRECAUTIONS REMOVE THE PAPER STRIP BIN WHEN OPENING OR CLOSING THE DOOR When you open or close the door with the paper strip bin installed, the bin may be removed and fall. This may cause injury or damage. INSTALLATION LOCATIONS MAINTAIN GOOD VENTILATION Ventilation slots and holes are provided on the rear and both sides of this unit.
-
Page 7: Safety Precautions
SAFETY PRECAUTIONS OTHER CAUTIONS • Do not pull out nor touch the print paper until printing is completed. It may degrade the print quality or cause an error. • Dust or other foreign matter adhering to the print paper or the ink cassette, or deformation resulting from exposure to extremely low or high temperatures could cause loss of color, uneven color or lines, or wrinkles in the print images. -
Page 8: Special Features
HIGH QUALITY PRINTING CP9810DW is a dye sublimation thermal transfer color printer, which produces superior high quality images. It also produces a continuous tone at 256 gradient for each of Y, M, and C and 16.7 million colors. HIGH SPEED PRINTING Normal printing speed is approx. -
Page 9: Unpacking
UNPACKING UNPACKING Take the printer out of the box by the following procedures. Make sure to check the accessories. 1 Open the top of the box. 2 Remove the accessories together with the cushion. Remove the protective cardboard and then take the accessories out of the cushion. 3 Hold the handle and the upper front part of the printer and pull the printer up carefully to take it out of the box. -
Page 10: Features And Functions
FEATURES AND FUNCTIONS FRONT PANEL PAPER STRIP BIN Hook the paper strip bin by its latches. To attach: A -> B To remove: B -> A 1 PAPER STRIP BIN A COOLING INDICATOR ( ) Holds the paper chips generated by margin cut. To prevent When the unit is overheated, this indicator blinks. -
Page 11: Side And Rear Panel
FEATURES AND FUNCTIONS SIDE AND REAR PANEL (LEFT SIDE) (REAR) 1 USB TERMINAL 3 HANDLE FOR TRANSPORTING Use to connect the USB cable. When transporting this unit, hold this handle and the upper See page 9. front part of this unit. 2 DIP SWITCHES 4 POWER SOCKET (AC LINE) Use to set various functions of this unit. -
Page 12: Connections
CONNECTIONS CONNECTION WITH USB DATA SIGNAL EQUIPMENT 2 2 2 2 2 CONNECTING TO PERSONAL COMPUTER (EXAMPLE) Connect this unit to a personal computer as shown below. To USB port To USB port Personal computer Digital color printer NOTE A USB cable is not supplied with this unit. Use the USB 2.0 certified cable of 2 m or less in length. -
Page 13: Setting Of Dip Switches
CONNECTIONS SETTING OF DIP SWITCHES 2 2 2 2 2 SETTING DIP SWITCHES All the switches are set to OFF at the time of shipment from the factory. Turn off the power before changing the DIP switch settings. Switch No. Setting Function Auto feed &... -
Page 14: Before Operation
BEFORE OPERATION Before printing, 1 Install the print paper to this unit. (See below.) Position the adjustable paper guides. (See page 13.) Install the ink ribbon to this unit. (See page 14-15.) INSTALLATION OF PRINT PAPER Paper Spacers flange 2 For the usage of the spacers, see the Quick Setup Guide. Remove the cushions put between the paper flange and spacer when using the spacers. - Page 15 BEFORE OPERATION 2 Press the POWER switch on the rear panel to turn on the power. POWER switch 3 After the mechanical initialization is completed, press the DOOR OPEN button to open the door. Take the ink cassette in the printer out. 4 Install the print paper into the unit.
-
Page 16: Positioning Of Adjustable Paper Guide
BEFORE OPERATION POSITIONING OF ADJUSTABLE PAPER GUIDE Adjustable paper guides Adjust the paper guides according to the size of print paper to be used. For 9x13(3x5”) or 13x18(5x7”) size For 10x15(4x6”), 15x20(6x8”) or Fixed rollers paper (5”-width) 15x23(6x9”) size paper (6”-width) 2 2 2 2 2 HOW TO SHIFT THE ADJUSTABLE PAPER GUIDES 1 Push both the adjustable paper guides with both hands until they touch the fixed rollers respectively. -
Page 17: Installation Of Ink Ribbon
BEFORE OPERATION INSTALLATION OF INK RIBBON 2 2 2 2 2 INSTALLING THE INK RIBBON After installing the print paper, install the ink cassette into this unit. Before installing the ink cassette into this unit, load the ink ribbon in the ink cassette. NOTE •... - Page 18 BEFORE OPERATION 2 Push the ink cassette toward the back of the unit. Thermal head (inside) Hold the handle of the ink cassette and push it straight toward the back of the unit. Then raise it until you hear a click to secure it in the ink cassette holder. NOTE If the ink ribbon is used up, repeat the steps 1 to 2 to replace the print paper and the ink ribbon.
-
Page 19: Handling Of Paper / Ink Ribbon Set
BEFORE OPERATION HANDLING OF PAPER / INK RIBBON SET 2 2 2 2 2 BEFORE PRINTING • Fingerprints or dust on the paper’s printing surface may degrade the print quality and cause paper jams. When the manual feed & cut mode has been selected, repeat the FEED &... -
Page 20: Installation Of Printer Driver
BEFORE OPERATION INSTALLATION OF PRINTER DRIVER 2 The printer driver is required to print the data from the personal computer connected with this unit. ® The printer driver for Windows is supplied with this unit. Product name Required operating system Applies for Microsoft ®... -
Page 21: Error Messages And Countermeasures
ERROR MESSAGES AND COUNTERMEASURES INDICATIONS ON THE FRONT PANEL AND COUNTERMEASURES 2 If, for some reason, printing is not possible or an error occurs during printing, the indicators on the front panel will illuminate or blink. In this case, follow the procedure described below. In case of an error during printing, unless you turn off the unit, the unit resumes printing automatically when the error is corrected. -
Page 22: Overcoming Paper Jams
ERROR MESSAGES AND COUNTERMEASURES OVERCOMING PAPER JAMS 1 Press the DOOR OPEN button to open the door. Make sure that the power is turned on before opening the door. If the door does not open, turn off the power and turn it on again. Then press the DOOR OPEN button again. -
Page 23: Before Calling For Service
ERROR MESSAGES AND COUNTERMEASURES BEFORE CALLING FOR SERVICE For the following symptoms, check the unit again before calling for service. Symptom Check & Remedy Is the power cord plug disconnected from the outlet? The power is not turned on. → Connect the power cord plug to the outlet firmly. →... -
Page 24: Cleaning
CLEANING Cleaning as indicated below will help maintain stable printer operation and extend the printer’s life. PREPARATIONS FOR CLEANING 1 Press the POWER switch on the rear panel to turn on the power. 2 Press the DOOR OPEN button to open the door. 3 Remove the ink cassette. -
Page 25: Cleaning
CLEANING ROLLER CLEANING Preparations Alcohol (isopropyl alcohol) Tissue paper (Fold in half about four times, and use the folded side to clean.) Clean the black part of the roller. Wipe the black part carefully with tissue paper dampened with a small amount of alcohol. Roller Wipe the whole roller by turning it. -
Page 26: Specifications
SPECIFICATIONS SPECIFICATIONS Class Digital Color Printer Model CP9810DW Printing method Sublimation Dye Thermal Transfer line print 3-color faces progressive printing (yellow, magenta, and cyan) and surface lamination Print’s resolution 300 x 300 dpi (dpi : dots per inch) Dot resolution 9x13 (3.5x5”) - Page 27 08190-Sant Cugat del Vallés - (Barcelona) Spain Phone +34 93 565 3154 FAX +34 93 589 4388 Please contact the nearest Mitsubishi sales branch to get DOC (Declaration of Conformity) of the EC Directive 1999/5/EC. Manufactured by Mitsubishi Electric (Malaysia) Sdn. Bhd.