
Related Manuals for Sherwood Scuba Scuba MAXIMUS SRB3600 regulator


Summary of Contents for Sherwood Scuba Scuba MAXIMUS SRB3600 regulator
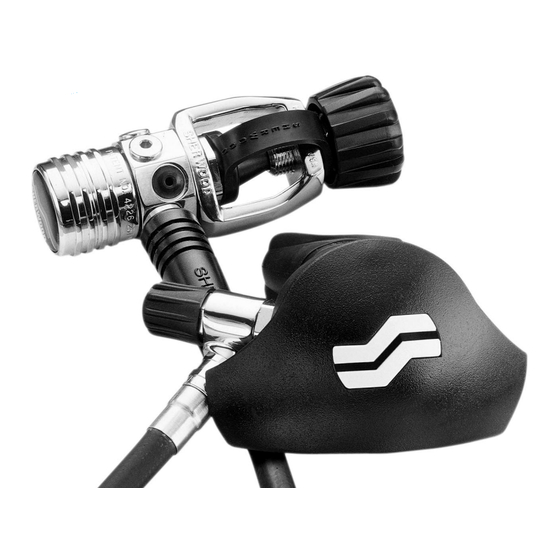
- Page 1 ® ®...
- Page 2 ITEM # CATALOG # DESCRIPTION ... .SRB3601 ..First Stage Complete 1 ...5105-70 ..Handwheel Assembly 2 .
- Page 3 Page Introduction ........1 Specifications ........2 General Specification .
- Page 4 This manual is written as a guide to the annual servicing and maintenance of the Sherwood Maximus SRB3600 regulator. This manual gives breakdowns of regulator parts, equipment specifications, servicing instructions, troubleshooting recommendations, and guidelines for proper care of these regulators. The manual is intended for use only by persons specially trained and authorized to service Sherwood Scuba equipment.
- Page 5 REGULATOR MODEL: Sherwood SRB3600 Maximus AIR FLOW: 32 cu. ft./min. (850 liters)/min. @ 1 atmosphere INHALATION RESISTANCE: 1.1" w.c. (2.8 cm w.c.) @ 1 atmosphere EXHALATION RESISTANCE: 0.5" w.c. (1.3 cm w.c.) max. @ 1 atm. RECOMMENDED LUBRICANT: LTI Christo-Lube MCG#111, Dow Corning #111 ®...
- Page 7 The external adjustability of the first stage allows you to adjust the regulator output to match the type of diving being done. Relatively low outlet pressure (120 psi, 8.3 Bar) helps the regulator resist freezing in cold water diving. Medium outlet pressure (130 psi, 9 Bar), combines good breathing effort and durability.
- Page 8 - Sherwood 50 cc Graduated Cylinder (p/n TL110) - Sherwood Piston Seat Removal Tool (p/n TL112) - Sherwood Plastic Probe (p/n TL111) to push out orifice - Sherwood Regulator Support Handle (p/n TL113) - Sherwood Intermediate Pressure Gauge (p/n TL119)
- Page 9 Unscrew and remove the handwheel Remove the dust cap Install a Sherwood regulator support handle (p/n 4700-15) into one of the low-pressure ports. Use the support handle and a 15" adjustable wrench or bench vise to loosen the yoke nut from the body .
- Page 10 Remove the piston O-rings and discard them. Take care not to scratch the O-ring grooves in the piston. Remove the piston seat by pushing through the stem with the Sherwood piston seat removal tool (p/n TL112) from the large end. The seat will then pop out. Discard the old seat.
- Page 11 b. Use a clean, dry cloth to wipe the piston surface if it needs cleaning. c. Do not put the piston in a cleaning solution or ultrasonic cleaner. If there is any oil on the surface, it will coat the piston. d.
- Page 12 Remove the one-way bleed valve from the body using your fingers or a soft plastic probe. DO NOT use a metal screwdriver or blade since this will scratch the sealing surface against which the bleed valve seals. This scratch may allow water to enter the first stage spring chamber during use.
- Page 13 (see Section 7.3). Installing the small O-ring on the piston will be easier if you use the brass-colored Sherwood O-ring installation cone (p/n TL106). Place the cone over the tip of the piston. Slide the lubricated O-ring over the cone until it slips into the piston groove.
- Page 14 If the first stage has a SYA-5300 or SYA5200 DIN adapter instead of a standard yoke, see the installation instructions given in Sherwood Technical Bulletin 104 for overhaul and installation instructions of the DIN adapter. Install an intermediate pressure test gauge (p/n TL119) into one of the low pressure ports of the first stage.
- Page 15 If it is clogged, the piston must be replaced. Attach any Sherwood second stage to one of the low pressure ports and the Sherwood intermediate pressure gauge (TL119) to another low pressure port. Plug all other ports with appropriate port plugs.
- Page 16 At this point the Sherwood logo on the purge button can be changed to a different color. See the parts list on the foldout back cover for available colors. If you are going to change the color, follow the next five steps.
- Page 17 Carefully remove the old seat insert from the poppet cavity using a pen knife or similar object. b. Put the new seat insert on a clean flat surface and lower the poppet cavity over it. Install the black molded seat (p/n 978-9BN) with the identifying Sherwood symbol facing outward.
- Page 18 If you need to replace certain parts of the lever assembly (stem, spring, lever, etc.), you can do this by temporarily screwing the orifice housing with the orifice back onto the lever support and assembly (without the plastic case). With these parts screwed together, the locking can be removed without all of the components springing apart.
- Page 19 You must use a blue retaining ring! These rings are available from your Sherwood Scuba distributor at no cost. You should always have several on hand. Install the proper diaphragm retaining ring into the case so that it holds the diaphragm in place.
- Page 20 Sherwood's Lever Bending Tool (p/n 4005-16). c. If the regulator hisses slightly when the air is turned on, but stops hissing when you remove the diaphragm, then the lever is too high. Use Sherwood's Lever Bending Tool to bend the lever slightly downward.
- Page 21 Replace the diaphragm. Continue to test the gap between the lever and the diaphragm after each bending until the lever is in the correct position. Return to Section 6.3, Step 13 of this manual (Assembly of Second Stage) to complete assembly of the regulator.
- Page 22 Attach the regulator first stage to a tank short enough to totally submerge the first and second stage in your filling station cooling water. With the tank valve still turned off, flood the second stage completely with water, and then position it mouthpiece up.
- Page 23 POSSIBLE CAUSE RECOMMENDED ACTION HIGH INSTALLATION EFFORT AT DEPTH: a. Inlet filter clogged. Replace the filter. b. No air flowing through the dry air bleed Check the flow rate coming out of the system. one-way bleed valve . If no or low air flow is detected, clean the flow element in the piston, or replace the piston.
- Page 24 Immerse only those parts which really need cleaning. With Sherwood's Dry Air Bleed system, the interior of the first stage is always clean and dry, so the piston and spring should never need cleaning.
- Page 25 Polish the orifice with a clean pencil eraser. Blow off dust and debris after polishing. Due to its unique stainless mesh design, the inlet filter of the Sherwood SR3601 first stage can be cleaned in the ultrasonic cleaner. Visually inspect the filter before and after cleaning. Blow the filter dry with clean compressed air.
- Page 26 Neglecting these simple procedures is the greatest cause of corrosion and wear in scuba regulators. When used properly, Sherwood's exclusive Dry Air Bleed System keeps all other water-borne contamination out of the first stage body.
- Page 27 For Sherwood Scuba regulators manufactured before Jan. 1, 1993 which still have a valid Lifetime Limited Warranty, you, the dealer, must send the white Warranty Service Form to Sherwood. The information will be recorded by Sherwood to determine whether or not the warranty on that particular regulator is still in effect.
- Page 28 ITEM # CATALOG # DESCRIPTION ITEM # CATALOG # DESCRIPTION 1 ..3602-16B ..Cap (for adjusting knob) 21 ..3602-2 ... Front Cover 2 .
- Page 29 Sherwood Scuba, the SS symbol, Oasis, Blizzard, Magnum, Brut and Wisdom are trademarks of Sherwood, Taylor-Wharton Gas Equipment Division of Harsco Corp. All other names are trademarks of their respective owners. © 2001 The Liberty Group ALL PRODUCTS SUBJECT TO CHANGE WITHOUT NOTICE.
Need help?
Do you have a question about the Scuba MAXIMUS SRB3600 regulator and is the answer not in the manual?
Questions and answers