Korg Triton Le Basic Manual
Hide thumbs
Also See for Triton Le:
- Parameter manual (269 pages) ,
- Service manual (32 pages) ,
- Manual (12 pages)
Table of Contents
Advertisement
Quick Links
Advertisement
Table of Contents

Related Manuals for Korg Triton Le


Summary of Contents for Korg Triton Le
-
Page 2: Data Handling
(Smart- • Never set any container with liquid in it near Media etc.). Please be aware that Korg will accept no this equipment. If liquid gets into the equipment, responsibility for any damages which may result from it could cause a breakdown, fire, or electrical loss of data. -
Page 3: About This Manual
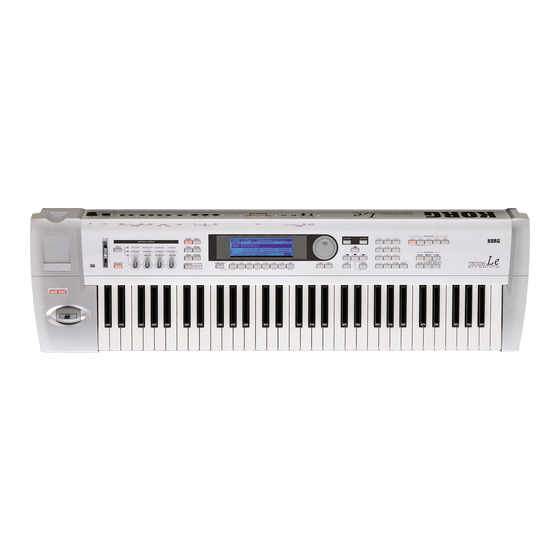
About this manual Conventions in this manual References to the TRITON Le The TRITON Le is available in 76-key and 61-key mod- The owner’s manuals and how to use els, but both models are referred to without distinction in this manual as “the TRITON Le.” Illustrations of the... -
Page 4: Table Of Contents
Table of Contents Selecting and playing a program..20 Selecting a program......20 Introduction ......... 1 Selecting and playing a combination 22 Selecting a combination ..... 22 Overview.......... 1 Main features ........1 Using controllers to modify the sound23 Overview of the modes ......3 Joystick .......... - Page 5 Basic program editing ......48 Caution and other functions in Sequencer Oscillator settings......... 49 mode ..........77 Controller settings ........50 Recording on the TRITON Le....78 Pitch settings..........50 Recording a track, Filter settings ..........51 and recording a pattern ......78 Amplifier settings ........
- Page 6 Global mode ........93 Other functions ......113 Creating a drum kit......93 Tuning to another instrument/Transposing About drum kits ...........93 Editing a drum kit ........94 Bypassing the effects ......113 Specifying the function of the Assignable Media mode ........96 Switch and Assignable Pedal .... 113 How Media mode is organized ...96 Selecting different Velocity and Aftertouch Media that can be used ........96...
-
Page 7: Introduction
Programs and combinations The TRITON Le is the ideal music workstation for music production or live performance. • In the Program mode, the TRITON Le provides 512 user programs, and 128 programs + 9 drum sets for HI (Hyper Integrated) synthesis system GM compatibility. - Page 8 In addition to providing conventional arpeggiator functionality, the polyphonic arpeggiator of the TRITON Le can respond to the pitches or timing at which you play the keyboard, and produce a diverse range of chords or phrases. This can be used to play a variety of drum phrases (using the “Fixed...
-
Page 9: Overview Of The Modes
A combination is a set of two or more programs (a media. The largest unit used to organize these func- maximum of eight), and allows you to produce tions is called a mode. The TRITON Le has five modes. complex sounds that could not be created by an individual program. - Page 10 (If the EXB-SMPL option is installed) as 100 patterns. • An external audio device or mic connected to the • The TRITON Le can be used as a 16-track rear panel AUDIO INPUT jacks can be sampled multitimbral tone generator.
-
Page 11: Front And Rear Panel
Front and rear panel Front panel 1. SmartMedia slot 6. REALTIME CONTROLS SmartMedia cards can be inserted here, allowing you to save or load data or song data or other types of data you edited. For details on handling SmartMedia, refer to “Caution when handling SmartMedia”... - Page 12 [3] EG-INTENSITY: [GLOBAL] key Controls the filter EG intensity. Global mode will be selected [4] EG-RELEASE: [MEDIA] key Controls the filter/amp release time. Media mode will be selected. B-mode [COMPARE] key [1] ASSIGNABLE 1: Use this key when you wish to compare the sound of [2] ASSIGNABLE 2: the program or combination that you are currently [3] ASSIGNABLE 3:...
- Page 13 [VALUE] dial When a dialog box is open, this key will cancel the set- tings made in the dialog box and close the dialog box Use this dial to modify the value of the parameter. (corresponds to the “Cancel”). If a Utility menu or page menu is open, pressing [EXIT] will close the [INC]/[DEC] keys menu.
-
Page 14: Rear Panel
“stuck notes” occur for some reason. [REC/WRITE] key When you press this key in Sequencer mode, the TRITON Le will enter recording-ready mode (the key will light). If you then press the [START/STOP] key, recording will start. ( p.78) - Page 15 ASSIGNABLE SWITCH jack These connectors are used to sample mono or stereo A separately sold on/off foot switch such as the Korg audio from a mic or audio device ( p.34, 38), or to use PS-1 foot switch can be connected here ( p.13).
-
Page 16: Objects And Functions In The Lcd Screen
f: Function buttons Objects and functions in the LCD By pressing the function key [F1]–[F8] nearest this button, you can turn various functions on/off. screen a: Current page d: Edit cell e: Check box In Media mode, these select the current directory. Accesses the utility menu where you can execute utility menu commands. - Page 17 Dialog boxes Page menu When you select a utility menu command etc., a In Combination, Program, Sequencer, Global, or dialog box will open. Sampling (if the separately sold EXB-SMPL option Use the cursor keys [ ], [ ], [ ], [ ] to select is installed) modes, pressing the [MENU] key will parameters.
-
Page 18: Connections
INPUT of your powered monitor system etc. Connect the included AC/AC power supply to the For details on the output of each jack ( p.108– AC power supply inlet of TRITON Le, and then “Routing”). connect the other end of the cable to an AC outlet. -
Page 19: Connecting Pedals Etc
3. Connecting pedals etc. 2. Connections to a computer Your performance on the TRITON Le, as well as con- Foot pedal connections troller and sequencer data, can be sent to a computer A foot pedal can be connected to control the volume or (connected via MIDI interface), and the tone generator other functions. -
Page 20: Basic Operation
In order to use a particular function on the menu will not appear. TRITON Le, you must first select the appropriate 3 Press the function key [F1]–[F7] that is nearest the mode. Press one of the front panel mode keys to page you wish to select. -
Page 21: Selecting Parameters
Selecting a tab Numeric keys [0]–[9], [ENTER] key, [–] key, [./HOLD] key 5 Press the function key [F1]–[F7] that is nearest the Use these when you know the parameter value that tab displayed at the bottom of the LCD screen. you wish to input. - Page 22 5 If after recording two different takes on the same track, you record a third, the Compare function will now alternate between the second and third takes. Recording a fourth take will mean that Compare now alternates between takes three and four, and so on.
-
Page 23: Quick Start
1. Turning the power on The mode and page that will be selected when the 1 Press the TRITON Le’s [POWER] switch to turn on power is turned on the power. The state of this instrument when the power is turned The LCD screen will display the name of your on will depend on the setting of “Power On Mode”... -
Page 24: Listening To A Demo Song
[EXIT] key, the Load All (Preload PCG and Demo Songs) operation will be executed automatically. The TRITON Le contains demo songs (and preloaded (The LCD screen will show a message of “Now data). This data can be loaded in Global mode. -
Page 25: Playing A Cue List
Playing a cue list Here’s how to playback the demonstration cue list. By using a cue list, you can repeatedly play multiple songs that you specify in the cue list, or play songs consecutively. ( p.71) 1 Press the [MENU] key. 2 Press the [F2] key to select “Cue,”... -
Page 26: Selecting And Playing A Program
(the key will light) to turn on the Audition function G g(d) G g(d) G… and the TRITON Le will automatically play a riff For details of the program names etc., refer to (phrase) suitable for the selected program. - Page 27 Using a connected switch to select programs A separately sold on/off-type switch (such as the sepa- rately sold Korg PS-1) can be connected to the rear panel ASSIGNABLE SWITCH connector, and assigned a program select function. ( p.113)
-
Page 28: Selecting And Playing A Combination
Play a note on the keyboard to hear the sound you A separately sold on/off type foot switch such as the selected. Korg PS-1 can be connected to the rear panel ASSIGN- ABLE SWITCH jack, and used to select combinations. Selecting the combination bank ( p.113) -
Page 29: Using Controllers To Modify The Sound23
Using controllers to modify the sound The TRITON Le provides various controllers – a joy- You can specify the way in which the [SW1] and [SW2] stick, the SW1 and SW2 switches, and the REALTIME keys will operate: either Toggle, when the assigned CONTROL [1], [2], [3], [4] knobs –... -
Page 30: Realtime Controls [1], [2], [3
Knob [2]: RESONANCE/HPF JS X Lock, JS+Y Lock, or JS-Y Lock, the tone that was heard when the joystick is tilted can be main- Adjust the resonance level of a low pass filter or the tained even after the joystick is returned to the cutoff frequency of a high pass filter. -
Page 31: Keyboard
Assignable Foot Switch You can control the effect of the arpeggiator in real- A separately sold on/off switch such as the Korg PS-1 time. For details on operation, refer to p.26. foot switch can be connected to this instrument, allow- ing you to turn an assigned function on/off by step- ping on the foot switch. -
Page 32: Using The Arpeggiator While You Play
[ARP ON/OFF] key LED will light for some programs. ( p.29 “Other settings for the arpeggia- The chord you played on tor”) Play the keyboard of the TRITON Le and the the keyboard is sounded as arpeggio will start. -
Page 33: Settings In The Lcd Screen
MIDI input the pattern number, and press the [ENTER] device, and it will not be possible to adjust the key. tempo on the TRITON Le. Changing the timing value of the arpeggio Adjusting the length of the arpeggio notes notes 1 Press the REALTIME CONTROLS [SELECT] key The “Reso (Resolution)”... -
Page 34: Using The Arpeggiator As You Play In Combination Mode
In Combination mode the TRITON Le provides dual your hand off the keyboard. arpeggiators, allowing you to run two arpeggio pat- terns simultaneously. - Page 35 Checking the structure of a user arpeggio Other settings for the arpeggiator pattern You can also set “Gate,” “Velocity,” “Swing,” and Let’s see how combination C053: Echo Jamm is con- “Scan Zone.” These parameters are set in PROG 6.1: structed. Ed–Arp, COMBI 6.1: Ed–Arp.
-
Page 36: Playing With The Rppr (Realtime Pattern Play/Recording) Function
Playing with the RPPR (Realtime Pattern Play/Recording) function This instrument’s Sequencer mode provides an RPPR Shutdown Keys: (Realtime Pattern Play/Recording) function. When you play a key in the range of C–1 – C2, the cur- Using the RPPR function, each note of the keyboard rently-playing pattern will stop. -
Page 37: Simple Program Editing
Simple program editing Amp Level: Indicates the amp level. This will adjust By operating the performance editor and the realtime controllers you can easily and intuitively modify the the volume of the entire program. sound of a program. Attack Time: Indicates the attack time of the filter EG Program editing refers to the process of modifying the and amp EG. -
Page 38: Simple Combination Editing
Simple combination editing Selecting the program for a timbre A combination is a set of multiple (up to eight) pro- grams, and allows you to create complex sounds that 3 Select the Prog page. could not be produced by a single program. Press the [F2] (“Prog”) key. - Page 39 Listening to the program sound of just one timbre Adjusting the volume while preserving the volume balance between timbres Press the [F8] (“UTILITY”) key to access the utility menu, and press the [F7] key to choose “Solo Press the [F8] (“UTILITY”) key to access the utility Selected Timbre.”...
-
Page 40: Sampling (Recording A Sample)
Sampling (recording a sample) 5 In the Input1 area, set “BUS” to L/R, specifying the If the EXB-SMPL option (sold separately) is installed, you will be able to record 48 kHz 16 bit stereo samples. bus to which the AUDIO INPUT 1 jack will be Sampled sounds can be used in a program, combina- input. -
Page 41: Using The Insert Effect While You Sample
(Example: “Easy,” “To,” “Sample,” “With” sample that you want to create, and press the “TRITON Le”) [ENTER] key. 6 Play consecutive notes on the keyboard. 2 Set “Orig.K (Original Key)” and “TopK (Top Key)”... -
Page 42: Assigning A Name To The Sample Or Multisample
For this example, select “Index” 001. Assigning a name to the sample or multisample The TRITON Le allows you to create up to 4,000 sam- It is also possible to select a sample in “SMPL,” ples and 1,000 multisamples (limited by the amount of but since the sample assigned to each index can memory). -
Page 43: Saving Sample Data
Saving sample data Here’s how to save a sample or multisample that you created. All samples and multisamples in the TRITON Le will be lost when the power is turned off. 4 In the “To:” field, select the program into which the data will be converted. -
Page 44: Sampling And Looping A Drum Phrase
5 Set various parameters so that the signal from the AUDIO INPUT jacks will be input to the 4. Record the sample TRITON Le. 1 Press the [F1] (“Sample”) key to access the SMPL Make the following settings. 1.1: Recording, Sample page. - Page 45 3 At the moment that you wish to start sampling, The sample will sound as follows. press the [START/STOP] key. When looping is on: S (continue repeating LpS Sampling will start. When looping is off: S It is a good idea to allow a bit of extra time before Use the [ ], [ ] to select “S (Start)”...
- Page 46 5 Use “Truncate” to delete the unwanted data that is outside of the start (or loop start) and end addresses. Press the [F8] (“UTILITY”) key to access the utility menu, and press the [F7] key to select “Truncate.” Press the [F8] (“OK”) key. The following dialog box will appear.
-
Page 47: Basic Functions
• Song and cue lists • Standard MIDI Files (SMF) On the TRITON Le, there are three ways to save data: Sequencer mode songs can be saved as SMF data. writing to internal memory, saving on external media •... -
Page 48: Writing To Internal Memory
Memory protect To prevent programs, combinations, songs, user drum kits, and user arpeggio patterns from being overwrit- ten accidentally, the TRITON Le provides a Memory Protect setting that prohibits writing to memory. 2 In “Category,” specify the category of the program/ Before you save edited data or load data from Smart- combination. - Page 49 The function buttons will have the following functions. Assigning a name (Rename) Clear: Erase all text. Del (Delete): Delete the character at the cursor loca- You can modify the name of an edited program, combi- tion. nation, song, drum kit, user arpeggio patterns etc.. Ins (Insert): Insert a space at the cursor location.
-
Page 50: Writing Global Settings, User Drum Kits, And User Arpeggio Patterns
Using the [REC/WRITE] key to write Writing global settings, user drum kits, 1 In the following pages, press the [REC/WRITE] and user arpeggio patterns key. A dialog box will appear. Global settings: GLOBAL 1.1–4.1 The settings you edit in Global mode can be written User drum kits: GLOBAL 5.1 into internal memory. -
Page 51: Saving On External Media
For details on the data that can be saved on external media (SmartMedia etc.) ( p.41 “Types of data that can be saved”). Song data and cue lists in the TRITON Le’s Press the [F8] (“UTILITY”) key to access the Utility Sequencer mode, and multisamples and samples menu. -
Page 52: Midi Data Dump
MIDI exclusive data and saved on a con- .KSC file nected MIDI data filer, computer, or another Files listing the multisamples and samples created TRITON Le. ( PG p.129) in Sampling mode (if the separately sold EXB-SMPL option is installed). Directory A directory containing the multisamples (.KMP... -
Page 53: Restoring The Factory Settings
The action of restoring the programs, combina- Loading individual banks or data items tions, and global settings of the TRITON Le to their factory settings is referred to as “loading the preloaded The TRITON Le allows you to load individual banks, data.”... -
Page 54: Program Mode
1.1: Play. Basic program editing When shipped from the factory, the TRITON Le con- tains numerous preloaded programs. You can edit With the factory settings, this instrument’s program these preloaded programs to create your own original bunks A, B, C and D contain preloaded programs. -
Page 55: Oscillator Settings
Basic (Prog Basic) page The three elements of sound Sound can be broken down into three elements: pitch, tone, and volume. On this instrument, these elements correspond to the Pitch, Filter, and Amplifier settings of the program. In other words you would adjust the Pitch settings to modify the pitch, the Filter settings to modify the tone, Mode (Oscillator Mode) and the Amplifier settings to modify the volume. -
Page 56: Controller Settings
Notes played on the keyboard at a velocity less than • 24 user drum kits created in Global mode the value you specify will sound the Low multisam- (Drum samples can be freely assigned to each key to ple; velocities at or above this velocity value will create a drum kit. -
Page 57: Filter Settings
OSC1 page “Intensity (AMS Intensity)” specifies the depth of vibrato that will be applied by the LFO when AMS (Alternate Modulation Source) is operated. For exam- ple if “AMS (LFO1 AMS)” is set to AfterT and you set an appropriate value for “Intensity (AMS Intensity),” vibrato will be applied when you apply pressure to the keyboard or when MIDI aftertouch messages are received. - Page 58 Filter characteristics When resonance is applied This area of Level Level overtones will Low Pass be diminished Level Filter Overtones included Overtones after in the original multisample passing through the filter Frequency (pitch) Frequency (pitch) Basic page Low resonance value High resonance value Mod.1, Mod.2 page Filter Type, Filter A, Filter B...
-
Page 59: Amplifier Settings
Adjusts the volume of the sound that has passed ple if “AMS” is set to AfterT, applying pressure to the through the oscillator, filter, and amp. keyboard of the TRITON Le, will apply a wah effect. EG page Specifies the pan (stereo position) after the signal has Indicates settings for the filter EG, which controls time-... -
Page 60: Lfo Settings
Amp Mod. OSC1 LFO1, OSC1 LFO2, OSC2 LFO1, OSC2 LFO2 “Velocity Int” is used by most programs to decrease “Waveform” selects the type of LFO. You can choose the volume of softly played notes and increase the vol- from a variety of waveforms, including standard ume of strongly played notes, and this Amp Modula- waveforms such as Triangle, Saw, Square, and Sine, tion parameter adjusts the depth of this control. -
Page 61: More About Alternate Modulation
More about Alternate Modulation Alternate Modulation is a type of modulation that can be used to control various aspects of the sound. AMS (Alternate Modulation Source) refers to any of the numerous sources that can control alternate modu- lation, and includes controllers that you operate physi- cally such as the joystick and realtime controllers, incoming MIDI data, as well as modulators such as the EG or LFO. -
Page 62: Combination Mode
Program mode. In addition, you can make arpeggiator settings Banks A, B, and C of the TRITON Le contain a variety (in 6.1: Ed-Arp.) and controller settings (in 2.2: Ed-Ctrl) of combinations that use the preloaded programs to create the finished combination. -
Page 63: Timbre 1-8 Program, Pan And Volume
Layer, split, and velocity switch The Compare function Within a combination, you can use keyboard location As you are editing a combi, you can use the [COM- and velocity to change the program that sounds. The PARE] key to listen to the previously saved version (as programs assigned to each timbre can sound in three it was before you began editing). -
Page 64: Controller Settings
Volume giator settings in Combination and Sequencer modes” ( p.101, PG p.43), and study the relation- Adjusts the volume of each timbre. ship between arpeggiator assignments, “Status,” Create the overall sound by adjusting the volume bal- and “MIDI Channel.” ance between timbres. The “Volume” setting is an important aspect of creating the sound, and this setting Bank(EX2) MSB, Bank(EX2) LSB will have a significant effect on the overall impression... -
Page 65: Note Timing And Scale Settings
Pitch page Layer and split settings 3.3: Ed–Key Zone Indicates settings such as layer, split, and keyboard crossfade. Key page Transpose, Detune (BPM Adjust) Specifies the range of notes that will sound each tim- These parameters adjust the pitch of the timbre. bre. -
Page 66: Velocity Switch Settings
Velocity switch settings MIDI filter settings 3.4: Ed–Vel Zone 4.1: Ed–MIDI Filter1–4.4: Ed–MIDI Filter4 Here you can make settings for velocity switching and velocity crossfading. For each MIDI Filter item, you can specify whether or not the corresponding MIDI message will be transmit- Vel (Velocity) page ted and received. -
Page 67: Sequencer Mode
• Various methods of recording are supported, sequencer. The sequencer is the center to which including realtime recording in which your TRITON Le’s numerous functions are integrated, performance on the keyboard and controllers allowing it to be used in a variety of situations includ- (including MIDI control events) is recorded just as ing music production and live performance. -
Page 68: The Structure Of Sequencer Mode
Filter, Key Zone, Velocity Zone, Track Name, IFX/ A cue list allows you to playback multiple songs in Indiv.Out BUS Select, Send1(MFX1)*, Send2(MFX2)* succession. The TRITON Le allows you to create 20 cue Master track lists. Each cue list allows you to connect a maximum of... -
Page 69: Producing A Song
Track too?” Press the [INC] key to check the check box. This section describes how to use the TRITON Le’s If this is checked, a drum pattern will be copied to sequencer. As an example, we will create a song by fol- the song after the template song is loaded. - Page 70 Press the [F1] key to select “Loop,” and press the When the power is turned on, the “Recording [F8] (“Open”) key. Mode” of the TRITON Le will be set to Over Write recording, in which newly recorded data will be The SEQ 1.2: Loop, Track Play Loop page will overwritten.
- Page 71 Verify that arpeggios are sounded in synchroniza- 4 Press the [REC/WRITE] key. tion with the tempo of the drum and bass perfor- You will hear the metronome. The TRITON Le will mance, and rehearse your performance. be in record-ready mode. ( Refer to PG p.57 for 4 Press the [START/STOP] key to stop playback.
- Page 72 record phrases that would be impossible or too rapid input the next note, the data will be input at that to play “live.” location. Continue pressing notes to input a melody. Rapid phrases can also be recorded in realtime by temporarily slowing down the sequencer tempo.
- Page 73 8. Saving the song Remember to save the song you created. The data will be lost when the power of the TRITON Le is turned off. Refer to p.45 for the Save procedure. To cancel muting, press the “PLAY/MUTE/REC”...
- Page 74 Making track settings for a new song “MIDI Channel” of TRITON Le tracks that are set Here’s how to make basic settings for a new song, such to EXT, EX2 or BTH.) as assigning a program to each track, and setting the If “Status”...
-
Page 75: Song Editing Methods
2. Naming a song When you are finished making these settings, the basic setup is complete. Record as described in “3. Record- Here’s how to assign a name to a song you created. ing the bass track” ( p.64) and following sections. 1 Choose “Song Select,”... - Page 76 A dialog box will appear. 5 Press the [F8] (“UTILITY”) key, select the Utility menu command “Shift/Ers.Note,” and press the [F8] (“OK”) key. Input the number of measures for the song. For this example, select 008 (8 measures) and press the [F8] (“OK”) key.
-
Page 77: Creating And Playing A Cue List
4 Set the last step to End. Creating and playing a Cue List If you set this to Continue to Step01, the cue list will play back repeatedly. A cue list allows you to play multiple songs in succes- 5 In “Rep (Repeat),” specify the number of times sion. - Page 78 If playback is not connected smoothly between Using a foot switch to switch the Step songs when playing a cue list You can use a foot switch to switch the Step. If you set “Rep(Repeat)” to FS, a foot switch connected Depending on the effect settings, a certain amount of to the ASSIGNABLE SWITCH jack will control the tim- time may be required for the effects to be switched.
-
Page 79: Creating And Recording Rppr (Realtime Pattern Play/Record)
Choose “Pattern Select,” and press the [INC] key Creating and recording RPPR once to select P122: HipHop 2/HipHop. (Realtime Pattern Play/Record) By using “REVERT” in this way, you can work efficiently when the patterns to be assigned have consecutive or nearby numbers, or use the same This section explains how to assign a pattern to RPPR, track. -
Page 80: Rppr Playback
The assigned keys will be shown as a keyboard If you want RPPR pattern playback to begin at the graphic in the LCD screen. moment that song playback begins, it is a good idea to insert an empty measure containing no Unassigned keys can be used for normal keyboard musical data before the song playback begins. -
Page 81: Recording The Sounds Of A Combination
Do not check “Key Sync.” If you made a mistake during your performance or would like to re-record, you can use the Compare Press the [ARP ON/OFF] key. (The key will light.) function (press the [COMPARE] key) to re-record as 3 In the SEQ 1.1: Play/REC, Preference page, check many times as you wish. - Page 82 In order to play the sounds and arpeggiator in the If “Arpeggiator Run” A and B are checked, and the same way as in Combination mode, set “Track arpeggiator is assigned to a track, make sure that Select” to the track that matches the global MIDI “MIDI Channel”...
-
Page 83: Caution And Other Functions In Sequencer Mode
• Editing song parameters Sequencer mode • Utility menu commands other than those listed above (in Operations for which Compare is TRITON Le song data and its compatibility available) The following two types of song data can be loaded Memory Protect from SmartMedia into this instrument’s sequencer. -
Page 84: Recording On The Triton Le
1 Use “Track Select” to select the track that you want Recording on the TRITON Le to record. 2 Set the “Recording Mode” to Over Write. (SEQ 1.1: The process by which your playing on this instru- Play/REC, Preference page REC Setup) ment’s keyboard and controllers is captured on the... - Page 85 2 Set the “Recording Mode” to Manual Punch In. your performance. When you reach the ending loca- (SEQ 1.1: Play/REC, Preference page REC Setup) tion you specified in step 3, recording will end. (Playback will continue.) 6 Press the [START/STOP] key. Playback will stop, and you will return to the loca- tion you specified in step 4.
- Page 86 MIDI data from an external sequencer, etc. This is a method of recording where you specify the 1 Make sure that the TRITON Le’s MIDI IN and the note timing, note length, and velocity etc. in the LCD screen, and use the keyboard to input the pitches.
- Page 87 When realtime-recording a pattern, a pattern of the Using the arpeggiator for pattern recording specified number of measures will playback repeat- edly, allowing you to continue adding musical data to If the arpeggiator is set to operate for the track that is selected for “Track Select,”...
-
Page 88: Sampling Mode
WAVE format sample data can be loaded. (Once Link (with Crossfade) data has been loaded into the TRITON Le, it will all This allows you to join two samples into a single be treated as Korg format sample data.) sample. -
Page 89: How Sampling Mode Is Organized
Start, Loop Start, and End Level Address. Samples can be used in multisamples and drum kits. The TRITON Le can hold a maximum of 4,000 samples Analog waveform Time in its internal memory. The TRITON Le can share a single waveform among multiple samples. -
Page 90: Sampling
The TRITON Le can hold a maximum of 1,000 multi- samples in its internal memory. 1 Connect the mic or external audio device to the A multisample can be selected as the oscillator for a AUDIO INPUT 1 jack. -
Page 91: Manual Sampling
• “Pan” adjust the panning. For this example set it to L000. level. (Refer to step 6 of “Connections and set- • Set “BUS.” If you wish to use the TRITON Le’s tings for a monaural source”) insert effect to process the incoming sound, select The [LEVEL] knob adjusts both AUDIO INPUT 1 IFX here. -
Page 92: Auto Sampling
8 Press the [REC/WRITE] key. 3 Select the 1.1: Recording, Sample page. 4 For “MS (Multisample Select),” select 000: If an input signal is present, the Recording Level NewMS____000. [dB] meter will move according to the “Pan” setting in “Input1” and “Input2.” This is the recording- Immediately after the power is turned on, 000: standby condition. -
Page 93: Creating Multisample Indexes And Sampling
( “Manual sampling” step 4) 6 Select the sample in “SMPL (Sample Select)” that you wish to record. ( “Manual sampling” step 5) 7 Select the 1.1: Recording, Recording page. Immediately after the power is turned on, “Pstn (Position)” will be R (Right), “Range (Zone 8 Set the “Mode (Sample Mode).”... -
Page 94: Loop Settings
4 Specify the start address in “S (Start),” the loop The recorded sample will automatically be assigned to the index you created in step 1. start address in “LpS (Loop Start),” and the end address in “E (End).” 3 Repeat steps 1 and 2. Select “S (Start)”... -
Page 95: Sample (Waveform Data) Editing
The following dialog box will appear. Sample (waveform data) editing Editing the waveform data of the sample is done in 2.1: Sample Edit. You can use commands such as cut, copy, Check “Grid,” set “Resolution” as desired, and and normalize to edit the waveform data. press the [F8] (“OK”) key. -
Page 96: Multisample Editing
A note on saving samples Multisample editing In the dialog boxes of some Utility menu, there is a “Save to No.” setting that lets you specify the sample Editing a multisample is accomplished with a number number to which the edited sample will be saved. At of operations i.e. -
Page 97: Converting A Multisample To A Program
You can either record these on the multi. TRITON Le, or load them in Media mode. Initially, you For details on using the Utility menu command “Conv. should try this using a one-measure pattern in 4/4 To Prog,”... - Page 98 9 Press the [SEQ] key to enter Sequencer mode, and Press the [F8] (“OK”) key. The Set Sample Tempo dialog box will appear. set “Song Select” to 000. 4 Specify the number of quarter-note beats in the sample, and its tempo. The following song data that you specified in steps If you know the BPM, set “Source BPM.”...
-
Page 99: Global Mode
When you play the keyboard in Global mode, the into one of the user drum kit memory areas 00 (INT)– TRITON Le will sound as in the previous mode in 23 (User). In Media mode, drum kits can also be saved which you were previously. -
Page 100: Editing A Drum Kit
want only to change the pitch, such as with tom or Editing a drum kit cymbal sounds. 6 Use “Drumsample Bank” and “Drumsample” to Before editing a drum kit, uncheck the Memory select the drum sample that will be assigned to the Protect ( p.42). - Page 101 A Set the “Excl Group (Exclusive Group).” The “Excl Group (Exclusive Group)” setting is used when you wish to group drumsamples of the same type. For example if the note number to which a open hi- hat and a closed hi-hat drumsample are assigned are set to the same exclusive group number, they will be grouped so that the open hi-hat and closed hi-hat can not be sounded simultaneously, ensuring...
-
Page 102: Media Mode
You can also make settings related to saving and by another device cannot be used immediately on the loading functionality. TRITON Le. It must first be formatted for use on the TRITON Le. For details on connecting an external SCSI device and setting the SCSI ID, refer to refer to the manual The TRITON Le supports MS-DOS format. -
Page 103: Loading Data
(see diagram If you are unable to remove the media, do not use below). force. Contact your Korg distributor for help. Select this if you have used “Save All” or “Save PCG” to save your own original programs and combinations, and want to reload this data. -
Page 104: Saving Data
When you load a .PCG file, the data in the internal “S.Item” (Select Save Items) check boxes when sav- memory of the TRITON Le will be overwritten by ing will be saved). the data from the .PCG file (programs, combina- •... -
Page 105: Arpeggiator Settings
MIDI device. In this case, it will not be possible to change the tempo on the TRITON Le. 3 In “Pattern,” select the arpeggio pattern. You can select from preset arpeggio patterns P000–... - Page 106 4 Make settings for the various parameters. Sort “Octave”: Select the octave range in which the OFF, UP arpeggio will be played. Sort ON, UP Octave: 4 “Latch”: If this is checked, the arpeggio will con- tinue playing even after you take your hand off the keyboard.
-
Page 107: Linking The Arpeggiator To A Program
Arpeggiator settings in Combina- tion and Sequencer modes 3 Select COMBI 6.1: Ed-Arp., Setup page. In Combination and Sequencer modes, the TRITON Le provides dual arpeggiator functionality that lets you use two arpeggio patterns simultaneously. The settings in each of these modes are made in the similar way. -
Page 108: Linking The Arpeggiator To The Combination
You can use keyboard ranges or playing velocity to (Gch). T4 will be sounded by arpeggiator A. Since operate the arpeggiator, or to switch between arpeg- the “Status” of T8 is Off, it will not sound. giators A and B. By using the COMBI 3.3: Ed-Key •... -
Page 109: Creating An User Arpeggio Pattern
About user arpeggio patterns tern is used in Program, Combination, or Song. 5 In “Lgth (Length),” specify the length of the pat- The patterns that can be selected on the TRITON Le’s tern. arpeggiator are called “arpeggio patterns.” There are After the pattern has played for the length specified,... - Page 110 • Tone: At each step, a chord consisting of up to 12 “Ptch (Pitch Offset)” value for each to create a mel- tones (Tone No. 00–11) can be sounded. ody using a single tone. ( “Melody pattern”) To input tones, select “Step (Step No.)” and then “Gt (Gate)”: Specify the length of the arpeggio note use numeric keys [0]–[9], [–], and [./HOLD] to for each step.
- Page 111 To simulate the timing nuances of a strummed Other examples of creating a user arpeggio pat- guitar chord, select “Flam.” In Program mode, tern select an acoustic guitar program, and choose the user arpeggio pattern that you created here. In the Melody pattern Setup page of PROG 6.1: Ed-Arpeg., set “Gate”...
-
Page 112: Dual Arpeggiator Editing
3 Select the Edit page. Before you set “Gate,” move the REALTIME CON- TROLS C-mode [ARP-GATE] knob to the center Each Tone in the display will be shown as a small position (12 o’clock). circle. For each horizontal line (Tone) in the display, you Before you set “Velocity,”... -
Page 113: Synchronizing The Arpeggiator
“ (Tempo)” is EXT (GLOBAL 2.1: MIDI “MIDI Clock” If “Key Sync.” is checked, A and B will each oper- set to External), the TRITON Le will synchronize to ate on their own timing. MIDI Clock and Start messages received from an exter- nal MIDI sequencer (or similar device) connected by a MIDI cable. -
Page 114: Effects Settings
01–15 Filter and dynamics effects, such as EQ and com- and master EQ. pressor This means that you can use the TRITON Le as a 2-in/ 16–31 Pitch and phase modulation effects, such as chorus 4-out effect processor. and phaser 32–40... - Page 115 Master effects Off: The output will not be sent to AUDIO OUT- PUT (MAIN) L/MONO, R, or to (INDIVIDUAL) 1, The input level of the master effect is determined by 2 (After passing through the master effects, it will be the send level 1 and 2 settings (routing step 3, or output from AUDIO OUTPUT (MAIN).) Select this insert effect step 4).
-
Page 116: Effect Settings In Combination, And Song
Master effects Effect settings in combination, and Master EQ song These settings are made in the same way as for pro- grams ( p.109). In Combination, and Sequencer modes, you can spec- ify the routing of each timbre/track to the insert effect and master effects. -
Page 117: Effect Settings For The Audio Input (Requires The Exb-Smpl Option)
“Level” is raised, the external audio source Even in modes other than Sampling mode, the will be input to the TRITON Le. At this time, if TRITON Le’s effects can be applied to the external audio cables are connected to the AUDIO INPUT... - Page 118 Using the Dmod function to vary the feedback For some effects, you can synchronize the LFO fre- level by operating [SW1] key quency to the tempo. Set the effect parameters “BPM/MIDI Sync” to On, and “BPM” to MIDI. 5 In the PROG 2.2: Ed-Ctrl, Controls page, set the For details refer to PG p.168.
-
Page 119: Other Functions
Global mode. You can specify the assignable function that will be performed by a footpedal (such as the Korg XVP-10 1 Press the [GLOBAL] key to enter Global mode. EXP/VOL or EXP-2) connected to the ASSIGNABLE 2 Press the [EXIT] key. -
Page 120: Selecting Different Velocity And Aftertouch Curves
Creating original scales If you connected a Korg PS-1 pedal switch, select (-) KORG Standard. The pedal will not function cor- You can create your own original scales. You can create rectly if you do not select the correct polarity. -
Page 121: Setting The Function Of [Sw1] And [Sw2]
Setting the function of [SW1] and Setting the B-mode functions of [SW2] REALTIME CONTROLS [1]–[4] You can specify the function of the [SW1] and [SW2] You can specify the B-mode functions of REALTIME keys ( PG p.220). CONTROLS knobs [1]–[4]. ( PG p.221) The functions of the [SW1] and [SW2] keys are set The B-mode functions are set independently for each independently for each program, combination, and... -
Page 122: Adjusting The Contrast (Brightness) Of The Lcd Screen
Utility menu items. [ENTER] key + keyboard By holding down the [ENTER] key and pressing a note on the keyboard of the TRITON Le, you can perform the following input operations. • Input note number values or velocity values •... -
Page 123: Appendices
• After a sample edit has been executed, or after a The TRITON Le will be initialized, and data will be stereo sample has been recorded, a small noise may written into internal memory. While the data is be heard. - Page 124 • If you are in Combination, Sequencer, and master • If no sound is played when you turn on the effects are not applied when you raise the “S1 [AUDITION] key in Sampling mode, check the (Send1 (MFX1))” or “S2 (Send2 (MFX2))” of the following points.
- Page 125 Select a different memory bank....PG p.90 Delete unneeded samples......PG p.94 Save important samples before deleting them..............PG p.94, 149 The TRITON Le does not recognize when MO media has been exchanged, and does not cor- rectly display the media information after the exchange.
-
Page 126: Specifications And Options
SMPL option is installed) control keys: 200 songs [REC/WRITE], [START/STOP] 20 cue lists 150 preset patterns, 100 user patterns (for each song) Other: 16 preset/16 user template songs [AUDITION] key, [CATEGORY] key Supports TRITON Le format and SMF (formats 0 and... -
Page 127: Options
Audio outputs Options 1/4" AUDIO OUTPUT (MAIN) L/MONO, R: 1/4" AUDIO OUTPUT (INDIVIDUAL) 1, 2 Output impedance 1.1 [k ] Expansion board (L/MONO is 550 [ ] for mono) EXB-SMPL Sampling upgrade Maximum output level Expression/volume pedal: L/MONO, R: +12.0 [dBu] XVP-10 EXP/VOL pedal (INDIVIDUAL)1.2: +11.6 [dBu]... -
Page 128: Midi Implementation Chart
*2: LSB,MSB=02,00: Arpeggiator ON/OFF, 0A,00: Arpeggiator Gate control, 0B,00: Arpeggiator Velocity control *3: LSB,MSB=00,00: Pitch bend range, 01,00: Fine tune, 02,00: Coarse tune *4: In addition to Korg exclusive messages, Inquiry, GM System On, Master Volume, Master Balance, Master Fine Tune, and Master Coarse Tune are supported. -
Page 129: Index
Index Numerics BUS Select AUDIO INPUT .......111 10’s HOLD ........21 Edit Combination, Sequencer ..110 Combination ......56 Program ........108 Pattern edit........ 70 Sampling........85 Program........48 ADC OVER!......34, 38 Song edit........70 Track edit ........70 After Touch........25 Edit Buffer........ - Page 130 Index...35, 36, 82, 84, 87, 88, 89, Master effect......... 109 Pitch .......... 23, 50 90, 92 Combination, Sequencer ..110 Combination......59 Program........109 Drum kit......93, 94 (INDIVIDUAL) 1, 2 ......8 Sampling ......... 110 Program ....49, 50, 51, 55 Input setting ........38 Sampling ...
- Page 131 Routing Step..........103 Volume ....5, 17, 23, 31, 33, 49, AUDIO INPUT....... 111 51, 53, 57, 58 Step recording......65, 80 Combination, Sequencer..110 Combination ......58 Stereo.........86, 88 Program ........108 Sampling ........84 Stereo source ........86 Sampling ......... 110 Sequencer ........
Need help?
Do you have a question about the Triton Le and is the answer not in the manual?
Questions and answers