Table of Contents
Advertisement
KX3
Electronic Crossover
Congratulations! You have just purchased one of the latest products
in signal processing technology to carry the famous KICKER name.
Your KICKER KX3 is designed and built to give you years of trouble-
free performance. This installation manual contains valuable informa-
tion on how to get the most out of your new KX3 Electronic Crossover.
Thanks for buying KICKER. Enjoy!
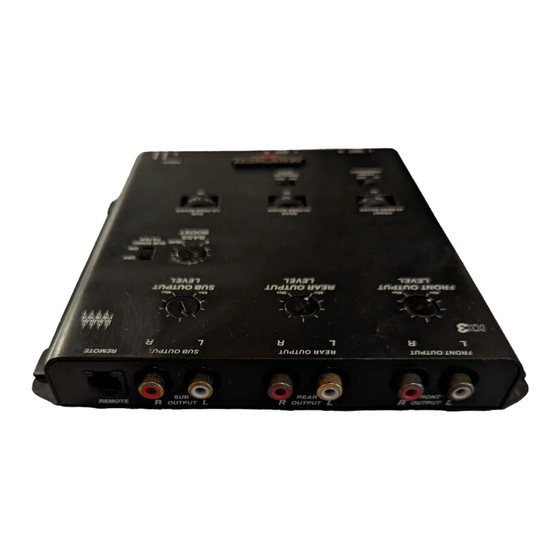
Features & Controls
Front High Frequency Output Jacks High passed at 18 dB/octave with infi-
nitely variable frequencies of 35 to 8000 Hz.
Rear High Frequency Output Jacks High passed at 18 dB/octave with infi-
nitely variable frequencies of 35 to 400 Hz.
Frequency multiplier switch Increases the front HI-Pass frequency by 1x or
20x depending on the type of speakers being used. The switch determines the
frequency. 1x (35Hz-400Hz) or set to 20x (700Hz-8000Hz)
Low Frequency Output Jacks Low passed at 18 dB/octave in a range of 45
to 250 Hz for use with low frequency amplifier(s).
Subsonic Filter Set at 25Hz with a slope of 24dB/octave to increase power
handling and help control subwoofer excursion.
Remote Bass Level Control Provides a convenient way to adjust the amount
of bass to suit your taste without having to leave your seat.
R
Advertisement
Table of Contents

Related Manuals for Kicker KX3

Summary of Contents for Kicker KX3
- Page 1 Your KICKER KX3 is designed and built to give you years of trouble- free performance. This installation manual contains valuable informa- tion on how to get the most out of your new KX3 Electronic Crossover. Thanks for buying KICKER. Enjoy! Features &...
- Page 2 If you are using a source which does not have a remote turn on lead the KX3 can be turned on with a switched accessory lead. You can find this accessory power source in the factory harness at the back of the radio.
- Page 3 This is the setting where the head unit puts out the maximum output without sounding bad. Due to the wide range on the level controls of the KX3 you may not be able to hear the music loud enough to tell distortion yet. If this is the case, raise all three Output Level controls to the halfway point (12 o’clock posi-...
- Page 4 Remember: When the Remote Bass Level Control is plugged in to the KX3 the SUB Output Level Control on the crossover will not affect the output, only the Remote Bass Level Control will.
- Page 5 System Diagram using the KX3 2 Channel Tri-Amp Configuration: RCAs RCAs RCAs Tweeter Midrange REMOTE BASS LEVEL GROUND REMOTE To Source TURN-ON CONSTANT + 12V *If the tweeters used are supplied with passive crossovers which have protection circuits built in, keep these crossover in-line to maintain protection from burn out..
- Page 6 If problem stays on the same side, proceed on -Swap left and right High Pass RCAs at output of KX3 If problem trades sides in the vehicle, then the KX3 is defective If problem stays on the same side, proceed on...
- Page 7 ONE (1) YEAR from date of original purchase if purchased from but not installed by an Authorized KICK- ER Dealer. If the product is labeled “B Stock” and purchased from an Authorized KICKER Dealer, it is war- ranted for ONE (1) YEAR from date of purchase, regardless of place of installation. Should service be nec-...
Need help?
Do you have a question about the KX3 and is the answer not in the manual?
Questions and answers