Table of Contents
Advertisement
Advertisement
Table of Contents

Related Manuals for Janome 415


Summary of Contents for Janome 415
- Page 1 INSTRUCTION BOOK Model...
-
Page 2: Important Safety Instructions
IMPORTANT SAFETY INSTRUCTIONS When using an electrical appliance, basic safety precautions should always be followed, including the followings: Read all instructions before using this appliance. DANGER— To reduce the risk of electric shock: 1. An appliance should never be left unattended when plugged in. Always unplug this sewing machine from the electric outlet immediately after using and before cleaning. - Page 3 IMPORTANT SAFETY INSTRUCTIONS Your sewing machine is designed and constructed only for HOUSEHOLD use. Read all instructions before using this sewing machine. DANGER – To reduce the risk of electric shock: 1. An appliance should never be left unattended when plugged in. Always unplug this appliance from the electric outlet immediately after using and befor cleaning.
-
Page 4: Table Of Contents
TABLE OF CONTENTS SECTION 1. ESSENTIAL PARTS Name of Parts ............................ SECTION 2. GETTING READY TO SEW Extension Table ..........................Standard Accessories ........................Accessories Storage Box ........................Connecting the Machine to the Power Supply ................... Foot Control ............................Presser Foot Lifter ..........................To Attach and Remove the Presser Foot .................. -
Page 5: Section 1. Essential Parts
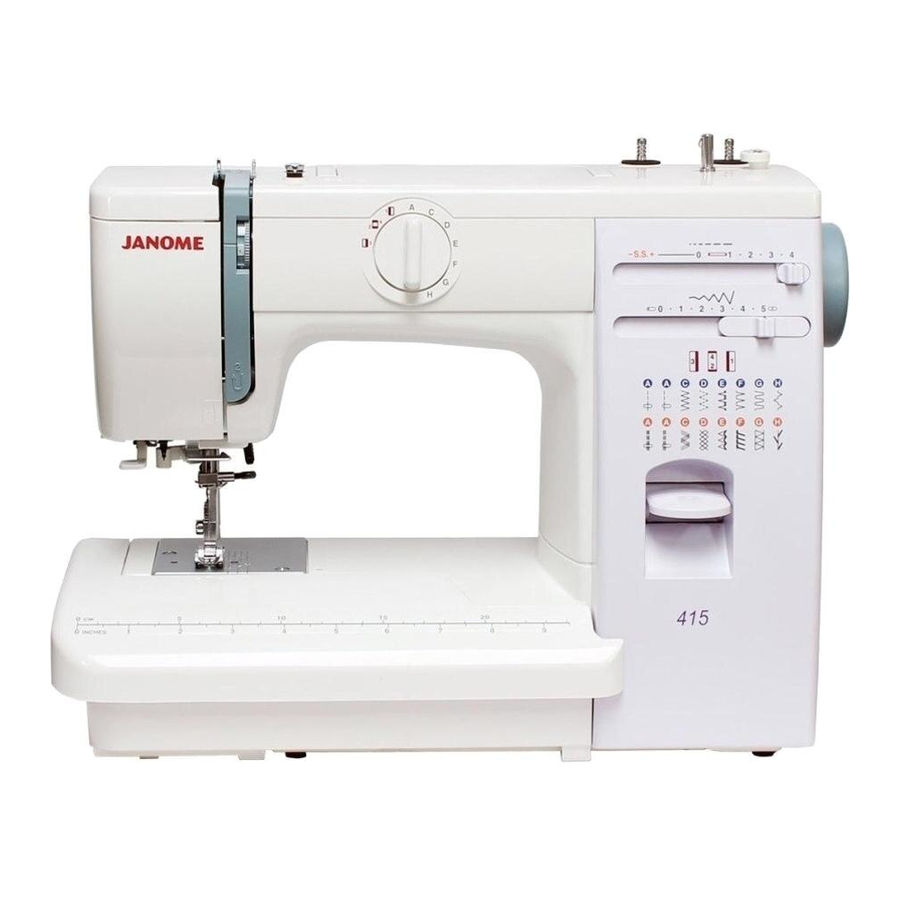
SECTION 1. ESSENTIAL PARTS Name of Parts Reverse stitch button Pattern selector dial Stitch width control Stitch length control Bobbin winder stopper Bobbin winder spindle Spool pins Bobbin winder thread guide Thread guide Thread take-up lever Thread tension dial Face plate Thread cutter Needle threader (on specific models only) Needle plate... -
Page 6: Section 2. Getting Ready To Sew
SECTION 2. GETTING READY TO SEW Extension Table The extension table provides added sewing surface and can be easily removed for free arm sewing. Detaching the table: Pull the table away from the machine. Attaching the table: Push the extension table until it snaps into the machine. Advantages and uses of free arm sewing: * Avoid fabric bunching around the needle when bartacking to reinforce pockets, plackets and waistlines. -
Page 7: Connecting The Machine To The Power Supply
Connecting the Machine to the Power Supply Before connecting the power cord, make sure the voltage and frequency shown on the machine conform to your electrical power. 1. Turn off the power switch. 2. Insert the machine plug into the machine socket. 3. -
Page 8: Presser Foot Lifter
Presser Foot Lifter The presser foot lifter raises and lowers your presser foot. You can raise it about 0.6 cm (1/4") higher than the normal up position for easy removal of the presser foot or to help you to place heavy fabric under the foot. Normal up position Highest position To Attach and Remove the Presser Foot... -
Page 9: Changing Needle
Changing Needle Raise the needle by turning the handwheel toward you and lower the presser foot. Loosen the needle clamp screw by turning it counterclockwise. Remove the needle from the clamp. Insert the new needle into the clamp with the flat side away from you. -
Page 10: Setting Spool Pins
Setting Spool Pins The spool pins are used for holding the spool of thread in order to feed thread to the machine. To use, pull up the spool pin. Push down for storage. Upper thread Hole Tangle Note : When using thread which has tendency to tangle around spool pin, thread through the hole of spool pin as shown. -
Page 11: Winding The Bobbin
Winding the Bobbin Draw the thread from spool. Guide the thread around the bobbin winder thread guide. Insert the thread through the hole in the bobbin from the inside to the outside. Put the bobbin on the bobbin winder spindle. Push it to the right. -
Page 12: Threading The Machine
Threading the Machine Raise the take–up lever to its highest position by turning the handwheel toward you. Raise the presser foot. Place a spool on the spool pin as shown, with thread coming from back of the spool. Draw the thread into thread guide using both hands. While holding the thread near spool, draw thread down into the tension area and then around the check spring holder. -
Page 13: Needle Threader
Note: The needle threader can be used with a #11 to #16 needle or Janome Blue Tipped needle. Thread size 50 to 100 would work well. Drawing Up Bobbin Thread Raise the presser foot and hold the needle thread lightly with your left hand. -
Page 14: Balancing Needle Thread Tension
Balancing Needle Thread Tension Correct tension The thread tension is adjusted depending on the sewing materials, layers of fabric and other sewing conditions. * The ideal straight stitch has threads looked between two layers of fabric, as illustrated (magnifies to show detail). * For an ideal zigzag stitch, the bobbin thread does not show on the right side (top side) of the fabric, and the needle thread shows slightly on the wrong side (bottomside) of... -
Page 15: Pattern Selector Dial
Pattern Selector Dial Raise the needle and presser foot. Turn the pateern selector dial to set the setting mark at the symbol corresponding to the desired pattern. Setting mark Stitch Length Control Slide the stitch width control to set the setting mark at the S.S. -
Page 16: Reverse Stitch Button
Reverse Stitch Button As long as you keep the reverse stitch button depressed, the machine sews backwards. Dropping the Feed Dog Remove the extension table. Raise the presser foot. To drop the feed dog, push the lever to the right . Drop feed lever To raise the feed dog, push the lever to the left. -
Page 17: Section 3. Basic Sewing
SECTION 3. BASIC SEWING Straight Stitch Sewing Pattern selector: Presser foot: Zigzag foot Thread tension: 2–6 S.S. Stitch length: 1.5–4 Stitch width: (0) or Raise the presser foot and position the fabric with its edge lining up with a seam guide line on the needle plate. -
Page 18: Seam Guides Line
Seam Guide Line The numbers on the needle plate indicate the distance between the center needle position and the line. The numbers in front are millimeters. The numbers in back are fractions of an inch. Variable Needle Position When the straight stitch (pattern A) is selected, you can move the needle drop position between center and left by sliding the stitch width control. -
Page 19: Zigzag Stitching
Zigzag Stitching Pattern selector: Presser foot: Zigzag foot Thread tension: 2–5 S.S. Stitch length: 0.5–4 Stitch width: Simple zigzag stitching is widely used for overcasting, sewing on buttons etc. SECTION 4. UTILITY STITCHING Overcasting Pattern selector: Presser foot: Zigzag foot Thread tension: 1–4 Stitch length:... -
Page 20: Tricot Stitch
Tricot Stitch Pattern selector: Presser foot: Zigzag foot Thread tension: 1–4 Stitch length: 0.5–1.5 S.S. Stitch width: This stitch is used to finish the raw edge on synthetics and other fabrics that tend to pucker. Place your fabric to allow a 1.6 cm (5/8") seam. Trim the seam allowance after sewing. -
Page 21: Straight Stretch Stitch
Straight Stretch Stitch Pattern selector: Presser foot: Zigzag foot Thread tension: 2–6 S.S. Stitch length: S.S. Stitch width: (0) or The stitch is sewn with two stitches forward and one stitch backward forming a seam that does not rip easily. -
Page 22: Sewing On Buttons
Sewing on Buttons Pattern selector: Presser foot: Zigzag foot Thread tension: 1–3 Stitch length: Stitch width: Adjust as necessary S.S. Feed dog: Dropped Push the drop lever to the left to lower the feed dog. Set the pattern selector dial at "C" and stitch width control at 0. -
Page 23: Buttonhole
Buttonhole Pattern selector: Presser foot: Buttonhole foot Thread tension: 1–5 Stitch length: (0.5–1) S.S. Stitch width: To adjust buttonhole stitch density. Set the stitch length slider between 0.5 and 1.0 to adjust the buttonhole stitch density. S.S. Carefully mark buttonhole length on fabric. Place the fabric under the foot with the buttonhole marking running toward you. -
Page 24: Zipper Application
Zipper Application Pattern selector: Presser foot: Zipper foot Thread tension: 3 – 6 Stitch length: 1.5 – 4 S.S. Stitch width: Pin or baste zipper tape to fabric and place it under the foot. Smooth the threads toward the back and lower the foot. To sew the left side of the zipper, guide the zipper teeth along the edge of the foot and stitch through the garment and zipper tape. -
Page 25: Blind Stitch Hemming
Blind Stitch Hemming Pattern selector: Presser foot: Blind hem foot Thread tension: 2–4 Stitch length: 1–3 S.S. Stitch width: Hem guide Fold up the hem and fold it back to from a 0.4 to 0.7cm (1/4") allowance as illustrated. Right side of the fabric 0.4 to 0.7 cm (1/4") [A] Heavy weight fabrics (The raw edge should be overcast.) -
Page 26: Rolled Hem
Rolled Hem Pattern selector: Presser foot: Hemmer foot Thread tension: 2–6 Stitch length: 1.5–4 S.S. Stitch width: Make a double 0.25 cm (1/8") fold approximately 8 cm (3") in length. 0.25 cm (1/8") 8 cm (3") Lower the needle into the fabric at the point where sewing is to begin, then lower the hemmer foot. -
Page 27: Section 5. Decorative Stitching
SECTION 5. DECORATIVE STITCHING Sell Tuck Pattern selector: Presser foot: Zigzag foot Thread tension: 6–8 S.S. Stitch length: 2–3 Stitch width: Fold the fablic in bias. Place the folded edge along the slot of foot. The needle should fall off the edge of the fabric on the right forming tucks. -
Page 28: Smocking
Smocking Pattern selector: Presser foot: Zigzag foot Thread tension: 1–4 Stitch length: S.S. S.S. Stitch width: With the stitch length at "4", sew straight stitching lines 1 cm (3/8") apart, across the area to be smocked. Note : Loosen the needle thread tension to make gathering Knot the threads along one edge. -
Page 29: Applique
Applique Pattern selector: Presser foot: Zigzag foot Thread tension: 1–4 Stitch length: 0.5–1 S.S. Stitch width: Baste (or fuse with iron-on fabric joiner) applique pieces on the fabric. Stitch around the applique making sure the needle falls along the outer edge of the applique. When sewing corners, lower the needle down into the fabric. -
Page 30: Section 6. Care Of Your Machine
SECTION 6. CARE OF YOUR MACHINE Dismantling and Assembling Hook Race Unit Note : Turn off the power switch and/or unplug the machine. To dismantle hook race unit: Raise the needle to its highest position and open the hook cover. Open the hinged latch of bobbin case and take it out of the machine. -
Page 31: Oiling The Machine
Oiling the Machine Note:Turn off the power switch when oiling the machine. Oil the points as shown at least once a year. Use good quality sewing machine oil. One or two drops of oil is sufficient. Wipe off excess oil, otherwise it may stain fabric. If machine has not been used for an extended time, oil it before sewing. -
Page 32: Troubleshooting
Troubleshooting Cause Condition Reference 1. The needle thread is not threaded properly. The needle thread See Page 9 breaks. 2. The needle thread tension is too tight. See Page 11 3. The needle is bent or blunt. See Page 6 4.
Need help?
Do you have a question about the 415 and is the answer not in the manual?
Questions and answers