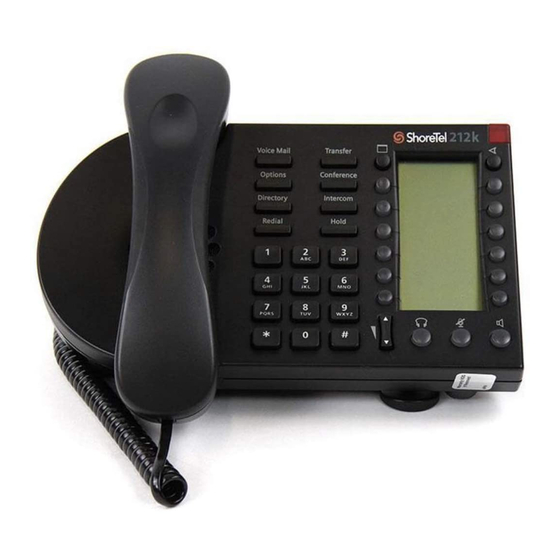
ShoreTel BB24 User Manual
Programmable buttons
Hide thumbs
Also See for BB24:
- Quick install manual (12 pages) ,
- Quick reference (6 pages) ,
- Quick manual (2 pages)
Summary of Contents for ShoreTel BB24
- Page 1 Programmable Buttons User Guide Supplement to IP 212k, IP 230, IP 560, and BB24 Devices...
-
Page 2: Version Information
ShoreTel, Inc. ShoreTel, Inc. reserves the right to make changes without notice to the specifications and materials contained herein and shall not be responsible for any damage (including consequential) caused by reliance on the materials presented, including, but not limited to, typographical, arithmetic, or listing errors. -
Page 3: Table Of Contents
Contents OVERVIEW..........5 HOW TO ASSOCIATE A BUTTON BOX WITH A PHONE . -
Page 5: Overview
After a function is assigned to a button, users can enter a label (up to five characters on the IP 560 and up to six characters on the IP 100 and BB24). The label appears on the LED display next to the custom button. •... -
Page 6: How To Associate A Button Box With A Phone
HOW TO ASSOCIATE A BUTTON BOX WITH A PHONE Before you can program the buttons on a BB24 button box, you must first associate the button box device with a user’ s IP 212k, 230, or 560 phone. To create this association using ShoreWare Director, follow the procedure below:... - Page 7 Step 7 In the Button Box Order drop-down menu, select 1 if you only have one BB24 assigned to this user’ s phone. Only four button boxes can be assigned to a single IP 212k, 230, or 560 phone.
-
Page 8: How To Tie A User To A Phone
HOW TO TIE A USER TO A PHONE At this point, you should have successfully associated the button box with an IP phone. If you have not already done so, you may want to associate a user with that same IP phone to ensure that the correct person has access to the new button box. - Page 9 Select the MAC address of the user’ s phone from the Home Port - IP Phones drop-down menu, as shown. Step 4 Click Save to store your changes. You are now ready to move on to the next section, which provides information on programming the buttons on your BB24 button box.
-
Page 10: How To Program Buttons From Director
HOW TO PROGRAM BUTTONS FROM DIRECTOR To configure programmable buttons on the phone of a specific user via ShoreWare Director, follow the procedure below: Step 1 Launch ShoreWare Director and enter the user ID and password. Then click the Login button. Step 2 Click on the Administration link to expand the list (if it has not already been expanded). - Page 11 IP 212k, 230, and 560 phones and up to six characters long for the IP 100 phone and BB24 device. Step 9 After you have selected a function and entered a label for a particular button, you may optionally enter destination information in the Target field.
- Page 12 Figure 5 Access the User Group via the Edit User window Step 5 Click on the Go to this User Group link and on the next window that appears, click on the Go to this Class of Service link located to the right of the COS - Telephony field.
- Page 13 Figure 6 Enable customization of IP phone buttons Step 6 Select the Allow Customization of IP Phone Buttons check box. Step 7 Click the Save button to store your changes. Details: • The default for new Class of Service (Telephony) profiles is to have this feature disabled, thus preventing users from modifying their own custom buttons.
-
Page 14: How To Program Buttons From An Ip Phone
HOW TO PROGRAM BUTTONS FROM AN IP PHONE To change the custom buttons on your IP 212k, 230, 560 phone or BB24 device via the telephone interface, follow the procedure below: Step 1 Press the Options button on your IP phone and enter your password, followed by the # key or OK soft key. -
Page 15: Supported Functions
SUPPORTED FUNCTIONS Table 1 Supported Functions Function Parameter Comments Barge In Extension or none Call Appearance None Not supported on Button Conference Blind Extension or external number Conference Consultative Extension or external number Conference Intercom Extension or none Dial Mailbox Extension or none Dial Number (Speed Dial) Extension or external... -
Page 16: Blink Patterns And Icons
Extension or none Whisper Page Extension or none Whisper Page Mute None BLINK PATTERNS AND ICONS Table 2 Blink Patterns and Icons LABEL Device LEDs ICON (characters) IP 212k Phone 3-color IP 230 Phone 1-color IP 560 Phone 3-color BB24 3-color...


Need help?
Do you have a question about the BB24 and is the answer not in the manual?
Questions and answers