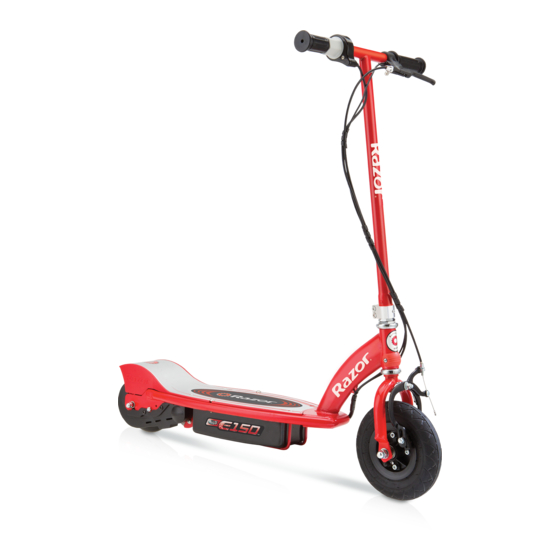
Razor E150 Owner's Manual
Hide thumbs
Also See for E150:
- Owner's manual (42 pages) ,
- Manual (15 pages) ,
- Installation instructions (3 pages)
Table of Contents
Advertisement
Owner's Manual
Read and understand this entire manual before riding!
DO NOT RETURN TO STORE!
NOTE:
E100/125/150 must be traveling
3mph before motor will engage. Kick start to
3mph then twist the throttle to start motor.
Item Numbers
E100
13100E-BL
E125
13125E-BK Black
13111110 Red
E150 13111612
E200
13200E-SL
E200S
13201S-SL
E225S
13112850
E300
13300E-SL
E300S
13301S-SL
E325S
13116390
Advertisement
Table of Contents

Related Manuals for Razor E150


Summary of Contents for Razor E150
- Page 1 NOTE: E100/125/150 must be traveling Item Numbers 3mph before motor will engage. Kick start to E100 13100E-BL 3mph then twist the throttle to start motor. E125 13125E-BK Black 13111110 Red E150 13111612 E200 13200E-SL E200S 13201S-SL E225S 13112850 E300 13300E-SL E300S 13301S-SL...
-
Page 2: Table Of Contents
DO NOT EXCEED THE WEIGHT LIMIT OF 120 pounds for the E100 and PROPER RIDING ATTIRE E150 scooter or 220 pounds for the E200 and E300 scooters. Always wear proper protective equipment such as an approved safety helmet (with chin strap securely buckled), elbow pads and kneepads. A Rider weight does not necessarily mean a person’s size is appropriate... -
Page 3: Before You Begin
(included) (with E200 & E300 tires, with pressure only) gauge Need Help? Visit our web site for updates and a list of authorized service centers at www.razor.com or call toll-free at 866-467-2967 Monday - Friday 8:00 AM - 5:00 PM Pacific Time. -
Page 4: Assembly And Set-Up
ASSEMBLY AND SET-UP q Charging the Battery WARNING: Always Your electric scooter may not have a fully charged battery. Therefore it is a good idea to charge the battery disconnect your scooter from prior to use. the charger before cleaning with • Initial charge time: 12 hours •... -
Page 5: Repair And Maintenance
Note: The E100 must be going 3 mph before the motor will start. Kick to 3 mph then activate the speed control while simultaneously pressing the green“go” button to engage the motor. REPAIR AND MAINTENANCE Check the Razor web site for any updates on the latest repair and maintenance procedures. Turn power switch off before conducting any maintenance procedures. q Adjusting the Brakes... - Page 6 E150 / E200 / E300 Front Tire and E100 Tires inflate to the correct PSI. If you inadvertently over-inflate the tire, release the excess pressure immediately.
-
Page 7: Adjusting Chain
BMX bicycles. If you are not familiar with it or do not feel comfortable performing the ad- justment, consult an authorized Razor service center or a quali- fied BMX bike or motorcycle mechanic. The chain should be “just taut” Using two 17mm wrenches,... - Page 8 REPAIR AND MAINTENANCE q Chain and Rear Tire Replacement Tools required: Phillips screwdriver, 10mm wrench, two (2) 8mm wrenches, and two (2) 17mm wrenches. With a Phillips screwdriver, With a 10mm wrench, With two 8mm wrenches, loosen the two screws and loosen the brake cable anchor loosen brake housing anchor remove the chain guard.
- Page 9 REPAIR AND MAINTENANCE Install the axle adjusters Tighten both axle adjust- Tighten the brake housing and axle nuts. Tighten until they ers the same number of turns anchor securely. Test ride and just barely hold the hardware to fine-tune the tension on the check.
- Page 10 REPAIR AND MAINTENANCE q Front Tire Replacement Tools required: 10mm wrench, two (2) 17mm wrenches and a flathead screwdriver. (E100 only, other Using two 17mm wrenches, Remove wheel and replace loosen the front axle bolts by tire. To reinstall wheel, reverse models go to Step 2) these steps. Helpful hint: You Loosen the brake pad bolt and turning the wrenches counter clockwise.
- Page 11 Refer to the disposal instructions at left. If Disposal: Your Razor product uses sealed lead-acid batteries which must be recycled or disposed of in acid comes into contact with an environmentally sound manner. Do not dispose of a lead-acid battery in a fire. The battery may explode skin or eyes, flush with cool or leak.
-
Page 12: Troubleshooting Guide
Make sure power flow to the wall outlet is on. Loose wires or connectors You may check to see if your charger is working by using a volt meter or asking your local Razor authorized service center to test your charger for you. E100 only - Scooter must be Kick start to 3mph then twist the throttle to start motor. - Page 13 Need Help? Visit our web site for updates and a list of authorized service centers at www.razor.com Need Help? Visit our web site for updates and a list of authorized service centers at www.razor.com or call toll-free at 866-467-2967 Monday - Friday 8:00 AM - 5:00 PM Pacific Time.
-
Page 14: E100, E150, E200 And E300 Scooter Parts
E100 PARTS Keep your scooter running for years with genuine Razor parts. Visit our web site or e-mail us for more information on spare part availability. (Specifications subject to change without notice.) Front caliper brake Handlebar grip (right/left) Battery tray Single speed twist grip throttle... - Page 15 E100 PARTS...
- Page 16 E150 PARTS Keep your scooter running for years with genuine Razor parts. Visit our web site or e-mail us for more information on spare part availability. (Specifications subject to change without notice.) 09 Front wheel complete 01 Handlebar grip (right/left) 10 Battery tray...
- Page 17 E150 PARTS...
- Page 18 E200 PARTS Keep your scooter running for years with genuine Razor parts. Visit our web site or e-mail us for more information on spare part availability. (Specifications subject to change without notice.) 11 Front wheel complete 01 Handlebar Grip (right/left) 12 Battery tray...
- Page 19 E200 PARTS Only used on E200S...
- Page 20 E300 PARTS Keep your scooter running for years with genuine Razor parts. Visit our web site or e-mail us for more information on spare part availability. (Specifications subject to change without notice.) 09 Front wheel complete 01 Handlebar grips (right/left) 10 Battery tray...
- Page 21 E300 PARTS Only used on E300S...
- Page 22 SB 1918 (CALIFORNIA) DECLARATION YOUR INSURANCE POLICIES MAY NOT PROVIDE COVERAGE FOR ACCIDENTS INVOLVING THE USE OF THIS SCOOTER/ELECTRIC VEHICLE. TO DETERMINE IF COVERAGE IS PROVIDED, YOU SHOULD CONTACT YOUR INSURANCE COMPANY OR AGENT.
-
Page 24: Safety Reminders
Need Help? Visit our web site for updates and a list of authorized service centers at www.razor.com or call toll-free at 866-467-2967 Monday - Friday 8:00 AM - 5:00 PM Pacific Time.
Need help?
Do you have a question about the E150 and is the answer not in the manual?
Questions and answers