Genie POWERLIFT 900 Operation & Maintenance Manual
Screw drive garage door opener
Hide thumbs
Also See for POWERLIFT 900:
- Operation & maintenance manual (24 pages) ,
- Operation & maintenance manual (24 pages) ,
- Operation & maintenance manual (24 pages)
Table of Contents
Advertisement
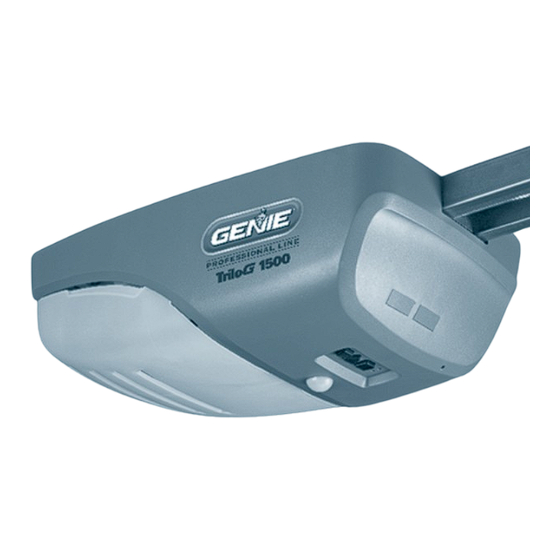
SCREW DRIVE
GARAGE DOOR OPENER MODELS
POWERLIFT™ 900, GPOWER™ 900,
PowerMax™1200/1500, TriloG™1200/1500
OPERATION & MAINTENANCE MANUAL
Includes INTELLICODE
®
2 Remote Control. Safe-T-Beam
®
System must be installed to close door.
For use only with residential sectional or one piece overhead garage doors.
Homelink
®
and Car2U
®
compatible.
For Answers and Assistance:
1.800.354.3643
or visit www.geniecompany.com
WARNING: To reduce the risk of injury to persons or damage to property – Use this opener only with a one piece
or sectional door.
SAVE THIS MANUAL FOR FUTURE REFERENCE.
INSTALLER:
LEAVE THIS MANUAL WITH HOMEOWNER
Genie, Genie logo, Intellicode, Safe-T-Beam are registered trademarks of, and SilentMax is a registered trademark of GMI Holdings, Inc., dba The Genie Company.
Homelink is a registered trademark of Johnson Controls Technology Company. Car2U is a registered trademark of Lear Corporation. © The Genie Company 2011 PN# 38082501312, 09/2011
Advertisement
Table of Contents
Troubleshooting

Related Manuals for Genie POWERLIFT 900


Summary of Contents for Genie POWERLIFT 900
- Page 1 Genie, Genie logo, Intellicode, Safe-T-Beam are registered trademarks of, and SilentMax is a registered trademark of GMI Holdings, Inc., dba The Genie Company. Homelink is a registered trademark of Johnson Controls Technology Company. Car2U is a registered trademark of Lear Corporation. © The Genie Company 2011 PN# 38082501312, 09/2011...
- Page 2 THIS PAGE LEFT BLANK...
-
Page 3: Table Of Contents
Wireless Keypads ............6 WARNING indicates a potentially hazardous situation which, Programming New Remotes to NOT avoided, could result in death or serious injury. Previously Installed Genie® Intellicode® 1 CAUTION indicates a potentially hazardous situation which, ............6 Garage Door Openers NOT a voided, may result in injury or property damage. -
Page 4: Transmitter Compliance Statement
Lights will turn OFF after Ländern eingesetzt werden, so muss der Importeur vor dem 4 minutes of no motion. Gebrauch sicherstellen, dass die Sendegeräte auch solchen lokalen Bestimmungen entsprechen, welche von den Bestimmungen der USA und Kanadas abweichen. ©2011 The Genie Company 9/2011... -
Page 5: Overview Of Powerhead Controls
Indicator Facing There are no assembly or installation Garage Door steps included in this manual. Contact your Genie® Professional Dealer for an installation poster, if needed, or call LONG LED Indicator 1-800 35-GENIE. You may also visit Located on bottom of Powerhead. -
Page 6: Limits And Force
FORCE are set. Severe damage to the opener can occur. button. The bullet MUST be engaged to carriage BEFORE setting limits. See Installation Poster (if provided) or call Customer Service at 800-35-GENIE or visit www.geniecompany.com. Door fully opens. Press &... -
Page 7: Programming Intellicode® 2 Remote
Connect the opener into an outlet on a circuit different from that to which the receiver is connected. Consult your local dealer. REMOTE BUTTON IS PROGRAMMED TO OPENER (Follow the TOP 2 steps above to shift back to Intellicode®2) 9/2011 ©2011 The Genie Company... -
Page 8: Optional Programming Powerhead
Press & Hold for Wall consoles from other manufacturers may not work with 2 seconds or until openers of these serial number groups. Genie® Series I wall round LED turns blue BLUE buttons and Series II wall consoles will not work with openers then OFF. -
Page 9: 3-Maintenance & Troubleshooting
Check that both the RED and GREEN LEDs are ON steady. If you have any questions, please do not hesitate to This indicates the system is working properly. If both LEDs contact customer service at: 1-800-35-GENIE or visit are not ON steady, check the appropriate items below. www.geniecompany.com. -
Page 10: Corrective Maintenance
ROUTINE YEARLY Lubricate the drive screw: Wipe off old grease using a lint-free cloth. Apply a light coating of silicon based grease (For best results, use Genie® GLU-R). CORRECTIVE MAINTENANCE CHANGE LIGHT BULBS WARNING Use extreme caution when working from a ladder or step stool. -
Page 11: Force/Speed Adjustment
FLASH BLUE BLUE BLUE to confirm setting. BLUE BLUE FORCE SETTINGS DONE PURPLE LED indicator colors Blue Purple PURPLE Powerhead LEDs Speed Level LONG LED ROUND LED PURPLE PURPLE High Medium PURPLE PURPLE BLUE BLUE 9/2011 ©2011 The Genie Company... - Page 12 REFERENCE - CIRCUIT WIRING DIAGRAM FOR HELP-1-800-35-GENIE OR WWW.GENIECOMPANY.COM Opener circuit wiring diagram. This wiring diagram is for reference only. Opening Cover May Cause Electric Shock. WARNING Disconnect power from opener prior to removing cover. POWER CORD SCREW DRIVE MOTOR...
-
Page 13: Troubleshooting Guide
Is this opener installed on a one piece door? Normal speed for one piece door is lowest speed setting. Door opener runs If carriage travel is less than 6 feet, opener configures programming for a one piece door. slow. Contact The Genie Company at 1-800-35-GENIE concerning door speed. ©2011 The Genie Company 9/2011... -
Page 14: Warranty
TROUBLESHOOTING GUIDE - POWERHEAD LEDs FOR HELP-1-800-35-GENIE OR WWW.GENIECOMPANY.COM Powerhead LED Possible Problem Solution Round LED Long LED Normal operation None required Check power supply No response from unit Contact a trained door system technician ON/RED/ ON/RED/ Limits NOT set properly...
Need help?
Do you have a question about the POWERLIFT 900 and is the answer not in the manual?
Questions and answers