Advertisement
4-BAY RAID ENCLOSURE
Model: QB-35US3R
English
CONTENT
RAID Modus Einstellungen / LED Anzeigen
Windows Vista / Windows 7 / Macintosh O.S. 10.X
Please visit our website for more information:
http://www.fantec.de
If you have questions or need help with this device,
please visit our Fantec Support Forum:
http://www.fantec-forum.de/
1-3
4-5
6-14
15-24
25-28
Advertisement

Related Manuals for Fantec QB-35US3R


Summary of Contents for Fantec QB-35US3R
-
Page 1: Table Of Contents
RAID Modus Einstellungen / LED Anzeigen Initialization 15-24 Windows Vista / Windows 7 / Macintosh O.S. 10.X References 25-28 Please visit our website for more information: http://www.fantec.de If you have questions or need help with this device, please visit our Fantec Support Forum: http://www.fantec-forum.de/... -
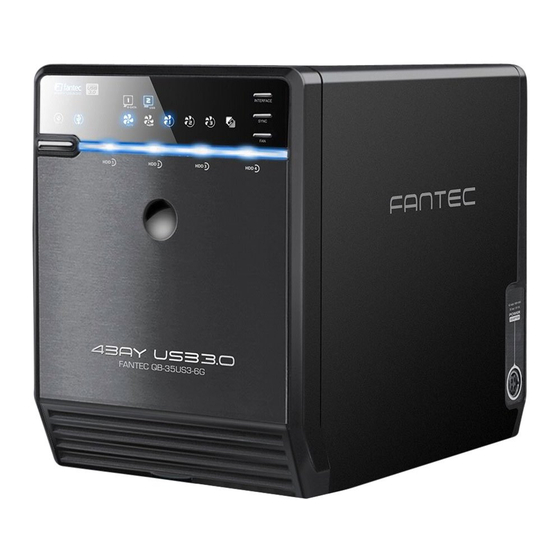
Page 2: Overview
OVERVIEW DESCRIPTION DIAGRAM of FANTEC QB-35US3R LED INDICATION FRONT PANEL 1. Blue Power on Orange Sleep mode 2. Rebuild 3. HDD error When any of HDD1~HDD4 has error, HDD error is on. 4. RAID 0 Spanning Mode / BIG 5. RAID 0 Striping Mode 6. -
Page 3: Self-Assembly
SELF-ASSEMBLY REAR PANEL DESCRIPTION Quick installation guide 1. Fan 2. RAID CONFIRMATION button 3. USB 3.0 / 2.0 port A. Please use the provided handles to 4. eSATA port secure the 4 HDDs with screws. SIDE PANEL right B. Press the circular deepening to open DESCRIPTION the cover. -
Page 4: Setup
SETUP D. Take the transport paper board out of the device. RAID mode setup First install the HDD from up to down in the enclosure. Power on the device, press RAID button for 3 seconds until LED flashes. Press it again, select the RAID mode you want to use and press the Confirmation Button on the rear panel till the device shuts down. - Page 5 RAID 3 RAID O This mechanism provides an improved performance and fault tolerance similar to Striped set Spanning Spanning concatenates multiple hard drives as a single large volume; resulting in a seamless RAID 5 but with a dedicated parity disk rather than rotated parity stripes. with dedicated parity expansion of virtual volumes beyond the physical limitations of separately connected The single parity disk is a bottle-neck for writing since every write requires updating the...
- Page 6 LED Display Status LED Display Status MODE LED Display MODE LED Display When any of HDD1 ~ HDD4 is recognized by the PC, When any of HDD1 ~ HDD4 is recognized by the PC, RAID O RAID O Striping Spanning HDD1 ~ HDD4 blue / active is on.
- Page 7 LED Display Status LED Display Status MODE LED Display MODE LED Display When any of HDD1 ~ HDD4 is recognized by the PC, RAID 1 When any of HDD1 ~ HDD4 is recognized by the PC, RAID 3 Mirroring HDD1 ~ HDD4 blue / active is on. Striped set HDD1 ~ HDD4 blue / active is on.
- Page 8 LED Display Status LED Display Status MODE LED Display MODE LED Display When any of HDD1 ~ HDD4 is recognized by the PC, RAID 10 When any of HDD1 ~ HDD4 is recognized by the PC, RAID 5 Striped sets Striped set HDD1 ~ HDD4 blue / active is on.
-
Page 9: Initialization
INITIALIZATION 2. Create new partition and format disk. Windows 2000 / XP (32 / 64 bit) If the HDD is uninitialized, you may have to initialize it by doing steps as followed: At first click “Start”, “Execute” at your PC and key in “diskmgmt. msc”. After that please press “RETURN”... - Page 10 Windows Vista (32 / 64 bit) 2. Create new partition and format disk. If the HDD is uninitialized, you may have to initialize it by doing steps as followed: At first click “Start”, “Execute” at your PC and key in “diskmgmt. msc”. After that please press “RETURN”...
- Page 11 Initialization with GPT or MBR mode. Windows 7 (32 / 64 bit) Note: Please enable GPT if the total capacity is more than 2TB and enable MBR if the If the HDD is uninitialized, you may have to initialize total capacity is lup to 2TB. it by doing steps as followed: At first click “Start”, “Execute”...
- Page 12 Macintosh O.S. 10.X 2. Create new partition and format disk. 1. Click Disk Utility icon. 3.HDD format completed 2. HDD initialize... EN - 21/28 DE - 31/38 EN - 22/28...
- Page 13 5. HDD format in process 3. Click Erase 4. Click Erase 6. Format completed EN - 23/28 EN - 24/28...
-
Page 14: References
REFERENCES 15. Setting up motherboard's power management in S3 is recommended. (For more details, please refer to the user guide of motherboard BIOS setting). 16. If the device takes too long to initialize, please check if the HDD is securely installed or 1. - Page 15 26. The chart below shows you that the device still functions when one HDD has error. RAID MODE RAID 1 When one HDD has error, the device still functions well RAID 3 but you may have to replace it with a new one immediately. RAID 5 27.
Need help?
Do you have a question about the QB-35US3R and is the answer not in the manual?
Questions and answers