Fisher-Price DELUXE TAKE-ALONG 79618 User Manual
Fisher-price baby swing user manual
Hide thumbs
Also See for DELUXE TAKE-ALONG 79618:
- User manual (21 pages) ,
- Instructions manual (20 pages)
Advertisement
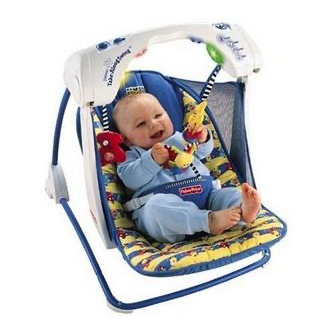
Deluxe Take-Along
™
Swing
Model Number: 79618
Please keep this instruction sheet, as it contains important information.
Adult assembly is required.
Tool needed for battery installation: Phillips Screwdriver.
Requires four "C" (LR14) alkaline batteries for operation (not included).
Weight Limit: 17 lbs (7.7 kg).
IMPORTANT! The maximum weight limit for this product is 17 lbs. If your child
weighs less than 17 lbs., but is really active and appears to be able to climb
out of the swing, immediately discontinue its use.
Advertisement
Table of Contents

Related Manuals for Fisher-Price DELUXE TAKE-ALONG 79618


Summary of Contents for Fisher-Price DELUXE TAKE-ALONG 79618
- Page 1 Deluxe Take-Along ™ Swing Model Number: 79618 Please keep this instruction sheet, as it contains important information. Adult assembly is required. Tool needed for battery installation: Phillips Screwdriver. Requires four “C” (LR14) alkaline batteries for operation (not included). Weight Limit: 17 lbs (7.7 kg). IMPORTANT! The maximum weight limit for this product is 17 lbs.
- Page 2 Usually, we can solve the problem over the telephone or send you replacement parts. Please call Fisher-Price® Consumer Relations, toll-free at 1-800-432-KIDS, 8 AM - 6 PM EST Monday through Friday. Hearing-impaired consumers using TTY/TDD equipment, please call 1-800-382-7470.
- Page 3 Parts Frame with Liner Pad with Restraint Front Tube 2 Frame Tubes...
- Page 4 IMPORTANT! Before assembly, inspect this product for damaged hardware, loose joints, missing parts or sharp edges. DO NOT use if any parts are missing or broken. Contact Fisher-Price® for replace- ment parts and instructions if needed. Never substitute parts. • Rotate the upper frame tube until it "snaps" into an upright position, as shown.
- Page 5 Assembly • Pull the front tube to be sure it is secure to each lower frame tube. Frame with Liner Press Button on Upper Frame Tube • Position the frame with liner so that the seat is over the front tube. •...
-
Page 6: Assembly
Assembly Frame with Liner Upper Frame Tube • Check to be sure the upper frame tubes are secure in the frame with liner. If you can remove the upper frame tubes from the frame with liner, you have not properly inserted the tubes into the frame. Remove the upper frame tubes from the frame with liner and repeat Assembly step 4. - Page 7 Assembly Waist Belts Slot Slot • Pull the edges of the pad up slightly and insert the waist belts on the liner through the slots in the pad. Assembly is now complete.
- Page 8 Battery Installation Battery Holder • Locate the battery compartment door on the frame. • Loosen the screw in the battery compartment door with a Phillips screwdriver. • Remove the battery compartment door and the battery holder from the battery compartment. •...
- Page 9 Battery Installation • Align the ridge on the battery holder with the groove in the battery compartment. • Slide the battery holder back into the battery compartment. • Replace the battery compartment door and tighten the screw with a Phillips screwdriver. Do not over-tighten. Battery Battery Holder...
- Page 10 Battery Tips SHOWN ACTUAL SIZE • Do not mix old and new batteries. • Do not mix different types of batteries: alkaline, standard (carbon-zinc) or rechargeable (nickel-cadmium). • Remove the batteries during long periods of non-use. Always remove exhausted batteries from the toy. Battery leakage and corrosion can damage this toy.
- Page 11 Securing Your Child • To prevent falls: - Never use with an active child who may be able to climb out. - Never use on any elevated surface. • To prevent injury or death from falls or sliding out, always use restraint system. •...
- Page 12 Securing Your Child Free End Anchored End Tighten To tighten the restraint: • Feed the anchored end of the restraint belt up through the buckle to form a loop • Pull the free end of the restraint belt • Repeat this procedure to tighten the other restraint belt. To loosen the restraint: •...
- Page 13 IMPORTANT! Before each use, inspect this product for damaged hardware, loose joints, missing parts or sharp edges. DO NOT use if any parts are missing or broken. Contact Fisher-Price® for replace- ment parts and instructions if needed. Never substitute parts.
- Page 14 Lights and Music! Hint: Your baby can enjoy lights and music with or without swinging. Baby Activated Lights and Music Switch • Slide the lights and music switch to: baby activated lights and one song ; sound and lights off lights and music When baby pulls either toy on the arch, one tune plays along with twinkling lights.
- Page 15 Room-to-Room Portability • To prevent falls: Never use on any elevated surface. • To prevent injury or death from falls or sliding out, always use restraint system. • Make sure your child is properly secured in the swing seat. • With baby facing forward and outward, lift the swing using the handle. •...
- Page 16 Take-Along Seat Bottom Lift Seat Back Lift Seat Bottom • Lift the seat back and seat bottom together. Straps Seat Back Press Tab Press Tab • Tip the swing backwards the seat back down. • Unfasten the straps on the seat bottom. •...
- Page 17 Take-Along • Rotate the lower frame tube around to the top of frame, as shown. Strap Lower Frame Tube • Fit the straps on the seat bottom between the upper and lower frame tubes, as shown. • Wrap the straps around the lower frame tubes and fasten the straps. To set the swing back up for use: •...
- Page 18 Care • The pad is machine washable. Wash the pad separately in cold water on the gentle cycle. Do not use bleach. Tumble dry separately on low heat and remove promptly. The frame, liner and toys may be wiped clean using a mild cleaning solution and a damp cloth.
- Page 19 Purchaser is responsible for shipping the product to Consumer Relations at the address indicated above and for all associated freight and insurance cost. Fisher-Price, Inc. will bear the cost of shipping the repaired or replaced item to you.This warranty is void if the owner repairs or modifies the product.This warranty excludes any liability other than that...
- Page 20 Consumer Advisory Service 1300 135 312. New Zealand: 16-18 William Pickering Drive, Albany 1331, Auckland. Fisher-Price, Inc., a subsidiary of Mattel, Inc., East Aurora, NY 14052 U.S.A. ©2001 Mattel, Inc. All Rights Reserved. ® and ™ designate U.S. trademarks of Mattel, Inc.
Need help?
Do you have a question about the DELUXE TAKE-ALONG 79618 and is the answer not in the manual?
Questions and answers