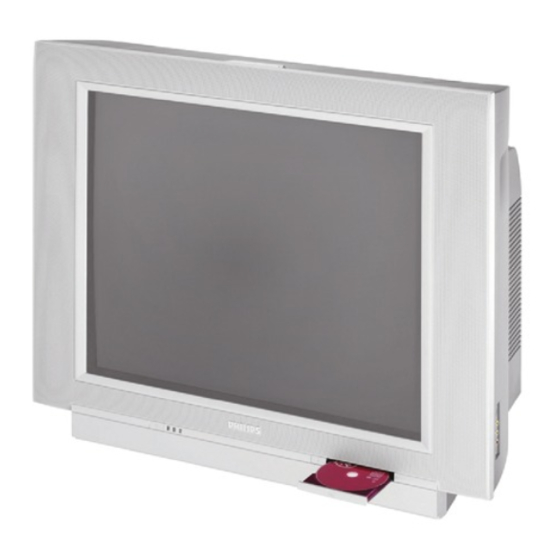
Philips 20DV693R Directions For Use Manual
Tv/dvd
Hide thumbs
Also See for 20DV693R:
- Quick use and hookup manual (4 pages) ,
- Directions for use manual (52 pages) ,
- Specifications (2 pages)
Advertisement
Quick Links
Advertisement

Related Manuals for Philips 20DV693R


Summary of Contents for Philips 20DV693R
- Page 1 Directions for Use 3139 125 31441...
- Page 2 Dear PHILIPS product owner: Thank you for your confidence in PHILIPS. You've selected one of the best-built, best-backed [ available today. And we'll do everything in our power to keep you happy with your purchase for many years to come.
- Page 3 IMPORTANT SAFETY INSTRUCTIONS Read before operating equipment Read these instructions. Objects have fallen, or liquid has been spilled into the appli- ance; or Keep these instructions. The appliance has been exposed to rain; or Heed all warnings. The appliance does not appear to operate normally Follow all instructions.
- Page 4 Trade Name: Philips and used in accordance with the instructions, may cause harmful inter- Responsible Party: Philips Consumer Electronics North America ference to radio communications. However, there is no guarantee that P.O. Box 14810 interference will not occur in a particular installation. If this equipment...
- Page 5 Introduction ODeratin_ Plaver Operating-- the DVD Player - Basic Operation ..Welcome/Registration of Your TV ...... Safety Instructions ........ Operating the DVD Player - Menu Bar Operation ..Table of Contents ........User Preference Settings - Picture ..... Features .......... User Preference Settings - Sound .....
- Page 6 DVD Player plays DVD discs, Video CDs, Audio CDs, etc. Create Favorite Track Programs and store them in the TV/DVD Players memory. Auto Lock, Auto Pictme, Auto Sound, Active Control, QuadraSurf are all registered trademarks of Philips Consumer ELectronics Company. Copyright © 2002 All rights reserved.
- Page 7 our Spanish speaking TV owners an on- screen LANGUAGE option is present. With the LANGUAGE control you can set the TV's on-screen menu to be shown hi either English Vpk;ture Bfight_less o Sound or Spanish. ColOr o Features P_atur_ IMa_ •...
- Page 8 Tehe TUNER MODE control allows you to hange the TVs signal input to either ANTENNA, CABLE or AUTO mode. It's importantJbr the TV to know what type of signal to lookJM (From a Cable TV signal o Soul_d Color o Features Picture a normal Antenna signal.)
- Page 9 your TV can automatically set itself fi)r $_ local area (o1" Cable TV) channels. This makes it easy fbr you to select only the TV stations in your area when the CHANNEL Main ,€ Pickle I, ] Brightness (+), (-) buttons are pressed.
- Page 10 Channel Edit makes it easy fiJr you to ADD or DELETE channels from the list of channels stored in the TV's memory. Press the MENU button on the o Sound Color remote to show the on-screen menu, o Fealu res Picture o Install SI_arpn_ss...
- Page 11 Te o adjust your TV picture controls, select a hannel and Jbllow the steps shown below." ['Zpictu_e _ IBrightness Press the MENU button on the remote o Sound Color to display lhe on-screen menu, o Fealures P_re Press the CURSOR UP or DOWN o Cobr Sharpness...
- Page 12 Besides the normal volume level control, your TV also has Treble, Bass, Balance, A VL (automatic volume leveler), lno: Surround, Ultra Bass, and Sound • (Stereo/Mono) controls. Main o Sound Color <>P_s_re Treble o Features Pic_re ['/Sound Bass o Install Sharpness o Features Balaece...
- Page 13 ..ThTe Timer controls allow you to use your V as an alarm clock if set to turn itself on and off at a specific time. It also can be set to tune to a specific channel at a specific I_io •...
- Page 14 MDnY times while watching movies fi'om a VD player the image is shown "letter box" Jbrmat. This is theJbrmat that is I %ure shown in movie theaters. When shown on a TV screen, the image will have areas of black on o Sound Color o Features...
- Page 15 Tehe AutoLocU Mfeature is an integrat- d circuit that receives and processes data sent by broadcasters, or other pro- TVRa_ng • MM_mv'_ Rating A CTV-Y gram providers, that contain program con- o PG o TV-Y7 tent advisories. When programmed by the o PG-13 eTV-G viewel;...
- Page 16 Overthe ne t pages y dll I u n to block channels and get a better under- standing of the rating terms fi)r certain pro- gramming. o .£ound Color First, let's start by learning how to set a per- T_nt sonal access code:...
- Page 17 After your personal access code has been set (see previous page), you are now ready to select the channels you want to block out or censo1: Press the NUMBERED (or CH +, -) buttons to tune the channel you wish to block or censor, Press the MENU button on the remote to show tile on-screen menu.
- Page 18 After blocking specific channels there may come a time when you wang go clear all the channels so they can be viewed. The fol- 8ngh_e_ lowing steps e_plain how to CLEAR o So_ Color o Features P_re blocked channels. o lr_a_ Sharpness More Press the MENU button on the...
- Page 19 ThBere may come a time when you want to lock All the television s channels. Maybe you don't want your children to watch TV/br a given time. With the BlockAll control, ALL o Sound Co_r available channels (including the A/V Inputs) o F_aK_'eS p_t _¢e can be set to block at the same time.
- Page 20 Twhere are two types of program ratings ithin the AutoLockYM feature. One is based on the Movie Industry ratings while the other is based on the TV Industry ratings. Both can be used to block or censor programming that has been rated in either mannel: Let_ first look at the Movie Rating options of AutoLock...
- Page 21 This portion of the AutoLock features To view a program "over program ratings based on the TV blocked by 1he TV Industry rating system. This is known as TV Rating options, enter Rating within AutoLock your 4 digit access After selecting the Autolock f_ature code.
- Page 22 utoLock offers the viewer other block- ing fbatures as well. With these Blocking Options, the censoring can be turned ON o1" o 9,ouzel Corot o D,_atums Pietum Press the MENU button on the remote to show the on-screen menu. Mor_ Press the CURSOR UP or DOWN button until the word FEATURES is highlighted.
- Page 23 Tine Active Control monitors and adjusts coming video signals to help provide best picture quality. When you choose to turn the Active Control ON, the Brighmess, Picture, Sharpness, o Sou0d Color Contrast + and DNR (dynamic noise reduc- _i;i!ii!i o Features Picture I Ma_ tion) J_atures...
- Page 24 O_ve you ever fallen asleep in front of the V only to have it wake you up at two in the morning with a test pattern screeching your ears? Well, your TV can save you all that trouble by automatically turning itself off Press the SLEEP...
- Page 25 Closed Captioning (CC) allows you to read the voice content of television pro- grams on the TV screen. Designed to help the hearing impaired, this feature uses on-screen "text boxes" to show dialogue and conversa- tions while the TV program is in progress.
- Page 26 W_pether you' re watching a movie or a orting event, your TV has automatic" video control settings matched for your cur- rent program source or content. SmartPicture feature quickly resets your TV's video controls for a number of different types of programs and viewing conditions may have in your home.
- Page 27 Tthe SmartSound feature allows the lis- ener to select between four diff_rent /bc- tory set sound options. Personal (which can be set by the user), Theatre (for movie view- ing), Music (/'or musical type programming) and Voice (when the program is mainly dia- logue).
- Page 28 "list" o1"series of previously viewed channels can be selected with the QuadraSurf (colored) buttons on your remote control. With this feature you can easi- ly switch between different TV programs that currently interest you. The QuadraSuff con- trol allows you set up four different personal Smf lists using the colored buttons (on the...
- Page 29 QuadraSurf rM buttons on your remote ontrol allow you to store up to 10 chan- nels per button (40 total). This is a greatJk, a- ture if you want to store all your favorite Sports channels, Movie channels, or News channels in one surf list.
- Page 30 This section of the Directions for Use manual begins to explain the operating procedures of the DVD Player portion of this television. Let's learn the simple operation of the TV's built-in DVD Player. Unless otherwise stated, all operations can be pelformed by using the remote control.
- Page 31 T_piS manual gives the basic" instructions erating this DVD Playel: Some DVD s When the "X" icon appears on require specific operation or allow only limit- the TV screen, it means the function ed operation during playback. In these cases, cannot be preformed or is not an the player may not respond to all operating...
- Page 32 Many of the DVD Player's fi, atures can be set €,t I_r_ to suit your personal prefi, rence. Let's start by looking at the PICTURE features. Press the SYSTEM MENU (OSD) button on the remote control to dis- play the on-screen menu. Press the CURSOR LEFT or RIGHT until the User Preference Settings Icon [] is highlighted.
- Page 33 77_ePersonal Preference area of the menu has various SOUND features to customize and com- pliment your viewing and listening pleasure. Press the SYSTEM MENU (OSD) button on the remote control to display the on-screen menu. Press the CURSOR LEFT or RIGHT until the User Preference Settings Icon [] is highlighted.
- Page 34 Many DVDs are capable of multi-lingual set- tings. The Lunguage f_ature within the Personal Preference area of the DVD on-screen menu will let the user set the Audio and Subtitle language. Press the SYSTEM MENU (OSD) but- ton on the remote control to display the on-screen menu, Press the CURSOR LEFT or RIGHT...
- Page 35 ° ° The Features section of the Personal Preference options contain an area where an Access (_de and Parental censoring can be set. "ITwre also are .features that can be turned On or Off (Access Control, Status Window, Low Power Standby, PBC - Playback Control, and Help text).
- Page 36 Also note that at the time of release of lais TV/DVD Playe_; certain aspeds of the technical stan- dards hid not been settled between lhe set maker and the disc industries. On this basis Philips Consumer Electronics cannot guarantee functioning...
- Page 37 Wl!en the Child Lock or Parental Level ontrols are on and a disc" containing material that will be blocked is inserted, disc" must first be authorized be_bre playback OCCH12 With the TV/DVD press the EJECT button on the Player turned on, remote control or TV.
- Page 38 l_ tier inserti1_g a DVD or Video CD and l_[closing the tray, playback will start auto- matically and the Status Window will show the type of disc loaded and the disc's playing time. You may be asked to select an item from a menu on the disc itself.
- Page 39 4 iv_ When a disc has more than one Title or "ack you can move to another Title or 7)'ack by the following steps: With a disc in the tray; Press the SYSTEM MENU (OSD) button to display the DVD Player's on-screen menu, I _v I...
- Page 40 When a disc has more than one Title or "ack you can move to another Title or 7)'ack by the following steps: With the disc playing, press the PAUSE button. The playback will freeze the picture on the screen, Press the PAUSE button repeatedly to advance the playback of the disc "picture by picture,"...
- Page 41 Repeat chapter/Title/Index on DVD Video stE_ discs, or repeat 7_'acks or the disc on Video CDs. Press the REPEAT button once to repeat the playback of the current chapter. Press the REPEAT repeat playback of the current title. button twice to Press the REPEAT to repeat the entire disc.
- Page 42 r-l'Whe Time Search control allows you to start the playback at any chosen time on the disc Press the SYSTEM MENU (OSD) but- ton to display the on-screen menu bar. Press the CURSOR RIGHT button until the Time Search _ Icon is high- lighted.
- Page 43 rr_e P 1S- "tdeo control allows you to store yourjhvorite titles/chapters (D_D) arm fitvorite tracks/indexes (Video CD ) jor a par- titular disc in the players memory', Storing a FTS-Video Program: Press the SYSTEM MENU (OSD) but- loll on the remote control todisplay fhe on-screen menu.
- Page 44 FTS-Video control also allows you to ustomize o1"erase programming set up in ? ;: the Favorite 7?ack Selection memory of the TV/DVD Playel: Erasing a FTS-Video Program: Press the SYSTEM MENU (OSD) but- ton on the remote control to display the on-screen mena, Press the CURSOR RIGHT button...
- Page 45 o_o00 ® _LEE_ mClgHS titles and chapters, selection be included on the disc. The DVD s menu /_ature allows you to make selections /Pom 0000 these menus. Press the appropriate numerical buttons or use the CURSOR UP/DOWN, RIGHT/LEFT buttons to highlight your selec- tion, then press the OK button to cor_irm.
- Page 46 _Tthe following steps describe how to change e Audio Language control. Press the AUDIO button. The onscreen menu will be displayed will] lhe Audio Language I_ Icon highlighted. Press the CURSOR UP or DOWN button repeatedly to scroll and select the available language options.
- Page 47 of the disc" through Some Video CDs contain information that allow you to control the playback a special playback menu. Load a Video CD with Playback control and press the PLAY button to start the disc. Go through the menu with the buttons indicated on the TV screen...
- Page 48 F_'S allows you to store your favorite tracks for particular disc in the 7_/DVD Player mem- ory. Each FIS program can contain up to 20 tracks. Storing an FTS Program: Load an audio CD and press the STOP button. Press the CURSOR DOWN button to highlight the list of available tracks.
- Page 49 No Power • Check the TV power cord. Unplug the TV, wait 10 seconds, then reinsert the plug into the outlet and push the POWER but- • Check the TV power cord. Unplug the TV, wait 10 seconds, ton again. then reinsert the plug into the outlet and push the POWER but- •...
- Page 50 Auto Programming • The procedure of adding or deleting Side Audio/Video Inputs ° Located on the side of the TV channel numbers into the Television's memory circuits. In this these connectors (phono type plug) are used for the input way the Television "remembers"...
- Page 51 NEARYOU. YOUR PRODUCTWILL RECEIVEEFFICIENTAND EXPEDIENTCARRY'IN, MAIL'IN, OR IN'HOME SERVICE, AND YOU WILL RECEIVEPEACEOF MIND, KNOWING YOUR PRODUCTIS BEING GIVEN THE EXPERTATTENTIONOF PHILIPS' FACTORY SERVICE. COMMERTOSTENIRNOTRESERVICE APRESVENTERAPIDEETEEEICACE SOIT PARCOUBRIER,_ DOMICILE,OU EN SE PRESENTANT _ UN CENTRE DE SERVICEPHIUPS. PLUS DE 600 CENTRES DE RECEPTION DE PRODUITS_ REPARER._TRAVERSLEPAYS:CONTACTER LECENTREDE SERVICEAUXCONSOMMATEURS LEPLUS PROCNE POUR SAVOIRL'EMPLACEMENT D E CES DEPOTSOANS...
- Page 52 RICO OR U,S. VIRGIN ISLANDS,.. or repairof all parts, and foralt laborcharges. Contact a Philips factoryservicecenter (seeenclosed list) or author_ Allparts, including repairedand replacedparts, are covered only for izedservicecenter to arrangerepair. the original w arrant)" period. When the warranty on the product (in U.S.A., Puerto Rico and U,S,Virgin Islands, all implied warranties,...
- Page 53 Quick Use and Hookup Guide IMPORTANT NOTE: This owner's manual h used with sever',d different telavi_on Basic Antenna T_ r Connecti(ms ....Im port_tt Notice/Warning ..... medals, Not all features (and dra_) _'ussed in thi_ manual will necvlsarily match thnsefound wi_ your W.lesi_on set, 'l_tis i_normal Basic T_ r Operation ......
- Page 54 Direct Cable Connection: C_blordby_l Vour Cable TV input into your home may be a single (75 ohm) X cable or use a cable box decoder; In either case the eonna> comi_gDom Cable Company lion is very simple. (Round 7511 Follow the steps below to connect your cable signal to your new coa.6alcable) television.
- Page 55 ®®© PLAY button t_ view rite tape on rite _levision. Note: The Audio!_rldeo cables needed for fltis connection are not supplied wiflt your T_L Please contact your de*der or Philips at 800-531-0039 for information about purchasing rite needed cables. O_r[wt!'l...
- Page 56 S(uper)4qdeo connection on the rear of the 77/can provide ou with better picture detail and clarity fi_r the playback of ! 1' accessory sources than the normal antenna picture connections. ,VOTE: The accessory device must have an S4"TDEO OUT(put) jack in onter fi_r you to complete the connection on this page. Connect one end of the S-VIDEO CABLE to the S- VqDEO jack on fire back of the TV.