Advertisement
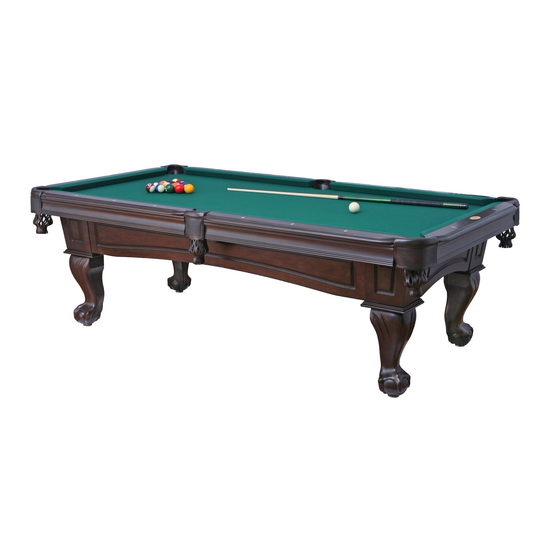
The Ultimate
Slate Pool Table
Thomas Aaron Billiards, Inc.
365 NE Baker Road, Stuart, FL 34994
Phone; 866 659-3930
Online:www.thomasaaronbilliards.com
Email: info@thomasaaronbittiards.com
2010 Thomas Aaron Billiards, Inc.
THO
The UW_ate
Patents Pending
Slate Pool Tabl& _
Installation
Manual
Model No. 8 UT-HR-ES
Advertisement
Table of Contents

Summary of Contents for Thomas Aaron The Ultimate Slate Pool Table
- Page 1 The Ultimate Slate Pool Table Slate Pool Tabl& _ The UW_ate Thomas Aaron Billiards, Inc. 365 NE Baker Road, Stuart, FL 34994 Installation Manual Phone; 866 659-3930 Online:www.thomasaaronbilliards.com Email: info@thomasaaronbittiards.com Model No. 8 UT-HR-ES Patents Pending 2010 Thomas Aaron Billiards, Inc.
-
Page 2: Contact Information
"e y{:Mey<:_nce zf// "--_. Congratulations on your purchase of the new Ultimate t i>: heipfTU D_,,, p_od yg Slate Pool Table from Thomas Aaron Billiards, Inc. \\\\ ,_7_ 7d/77r?hTte r? 7co The most accurate playing slate table available with: \\\\\\ Before you begin page x... -
Page 3: Parts Identification
For questions or missing parts, DO NOT RETURN THE TABLE TO THE STORE, Please layout the parts to assure they are all present. Thomas Aaron Billiards. please contact us at F_.. © ¢", . ."* s°.. 9 .<., .,"_ y'., ¢*_ J "... -
Page 4: Tool Identification
page 4 page 5 Tool Identification Accessories Included Leg Leveler wrench (with drive ti Level Socket Wrench Socket & Socket Billiard Ball Set Table Brush 4 Pcs Chalk Ball Rack on end of handle for slate bolts) Optional- to fill slate seems Optional- to level slate seems if needed... -
Page 5: Step 1 Frame Assembly
page 6 page7 Step 1 Frame Assembly Beam Placement PLEASE WATCH THE INSTALLATION DVD AND READ 2 Cross Step THE INSTALLATION MANUAL BEFORE ASSEMBLY FIG 1 Shows the positioning of side frame panels (P5), end frame panels (P6) and leg posts (P8). Assemble parts upside down on the floor as shown in Place both cross beams (P7) into frame FIG 2, Adjust cross beam levelers installation DVD. - Page 6 page 8 page 9 Step 3 Table Location Position assembled table frame in your desired location BEFORE To level the table you will find the Floor Guard leg leveler on the bottom Step 4 Table Leveling LEVELING the frame. Take a cue stick and hold the tip approximately 1"...
- Page 7 page 10 page 11 Slate Unpacking Step 5 Slate Indexing SLATE IS A MATCHED 3 PC SET. Locate the 8 red indexing lines on the edges of the slate FIG 5 and the 4 red indexing lines on the top of the side frames (P5) FIG 5A. BE CAREFUL WHEN LIFTING, IT CAN BE EASILY DAMAGED...
- Page 8 page 12 page 13 Placement CAUTION! Be carefuJ to keep your fingers from Next, place the middle piece of slate onto the table in position FIG 7 Step 6 Slate Slate 7 Attaching Step using the indexing marks for correct slate placement. being caught between sJate and frame when pJacing the slate on the table.
- Page 9 page 14 page 15 Step 8 Slate Adjustment Step 9 Cloth Layout Top of playing "_ surface must flush at seams! Next, make sure slate pieces are pushed together and there is no gap Lay out cloth (Pll) on slate with markings on cloth facing up. At between them.
- Page 10 page 16 page 17 Once cloth is installed around perimeter of the slate, you will now attach Installation Step 10 Cloth Installation Step 11 Cloth the cloth at each pocket opening to the bottom of the slate liner. Continued Do this by pulling down firmly on the precut tabs to remove any wrinkles or loose cloth on playing surface before fastening Velcro.
-
Page 11: Step 12 Rail Assembly
page 18 IG t Step 12 Rail Assembly Locate the 6 rails and identify which ends of rails are the corners and which are sides. Next, locate Rail/Pocket Assembly Step I -Assemble two Corner Pockets (P9) to End Rail (P4). all 6 pockets and identify the corner pockets and No hardware is needed to assemble pocket to rail. - Page 12 Step 4. Roll the ball down the table as before to confirm that the ball rolls in a straight line. Note You are now ready to experience the new Breakthrough in Billiards rM and Discover the Difference TMwith the Thomas Aaron Ultimate Slate Pool Table TM. Lower clockwise...
-
Page 13: Care And Maintenance
page 22 page 23 Limited Lifetime Warranty CARE & MAINTENANCE OF YOUR TABLE Thomas Aaron Billiards Inc. (The "Company") warrants the Product to be free from defects in workmanship matedals under normal and conditions FOR A PERIOD OF ONE YEAR FROM DATE OF ORIGINAL...
Need help?
Do you have a question about the The Ultimate Slate Pool Table and is the answer not in the manual?
Questions and answers