Table of Contents
Advertisement
OWNER'S MANUAL
fISANSUIo
DVD PLAYER/Hi-Fi VIDEO CASSETTE RECORDER
VRDVD4001
V I D E O
DIGITAL AUDIO
Hi-Fi
OOIDOLBvl
DIGITAL
/
o I1-_-_7,_
i
w
000
j_
0
:/
//
HI
I
000000o/
w
f
ATTENTION
f you purchase a universal remote control from your local retailer, please contact
he remote manufacturer for the required programming
code.
I_
W/CAW
MODE SELECTION
hen shipped from the factory, the TV/CATV
menu option is set to the "CAW"
Cable Television) mode.
f not using CATV (Cable TV), set this menu option to the "TV" mode.
ORION WEBSITE
FOR INFORMATION
ON OUR OTHER
PRODUCTS,
PLEASE
VISIT OUR WEBSITE
AT
WWW.ORIONSALESINC.COM
Before operating the unit, please read this manual thoroughly.
I I IIllllMlllllllllllll
*12C50901B*
J2C50901A
OWNER8 MANUAL
06718001J2CB0901A
Advertisement
Table of Contents

Subscribe to Our Youtube Channel
Related Manuals for Sansui VRDVD4001


Summary of Contents for Sansui VRDVD4001
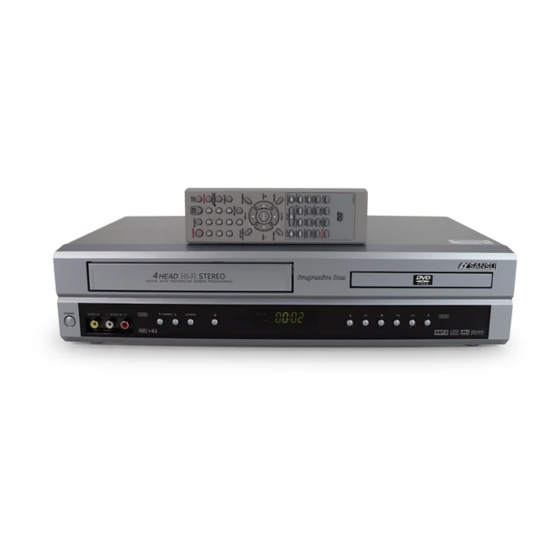
- Page 1 fISANSUIo OWNER'S MANUAL DVD PLAYER/Hi-Fi VIDEO CASSETTE RECORDER VRDVD4001 OOIDOLBvl DIGITAL V I D E O DIGITAL AUDIO Hi-Fi 000000o/ o I1-_-_7,_ ATTENTION f you purchase a universal remote control from your local retailer, please contact he remote manufacturer for the required programming code.
- Page 2 lightning flash with arrowhead symbol, within an equilateral triangle intended to alert the user to the presence of uninsulated dangerous voltage within the product's enclosure that may be of sufficient magnitude to constitute a risk of electric shock to persons. CAUTION: TO REDUCE THE RISK OF ELECTRIC The exclamation point within an equilateral...
-
Page 3: Important Safeguards
IMPORTANT SAFEGUARDS 1. READ INSTRUCTIONS All the safety and operating instructions should be read before the unit is operated. 2. RETAIN INSTRUCTIONS The safety and operating instructions should be retained for future reference. 3. HEED WARNINGS All wamings on the unit and in the operating instructions should be adhered to. 4. - Page 4 IMPORTANT SAFEGUARDS 13. LIGHTNING To protect your unit from a lightning storm, or when it is left unattended and unused for long periods of time, unplug it from the wall outlet and disconnect the antenna or cable system. This will prevent damage to the unit due to lightning and power line surges.
-
Page 5: Power Source
IMPORTANT SAFEGUARDS Power Source 25. LASER BEAM Donot look intothe openingof the disc tray or ventilationopening of the productto see the sourceof the laser beam. It may cause sight damage. 26. DISC Do not use a cracked,deformed,or repaireddisc.These discsare easily brokenand may cause serious personalinjuryand product malfunction. -
Page 6: Features
Features DVD/CD Player/Video Cassette Recorder • DVDICD player with Video Cassette Recorder- Unique space saving desk.n combines a DVD/CD player and a Hi-Fi V_deo cassette recorder.The DVD disc has much more capacity, but isthe same stze as the audio CD disc. Picture quality is higher than Super VHS. -
Page 7: Table Of Contents
Contents ! Bef°reusingY0urunit i, ,,,: IMPORTANT SAFEGUARDS ......Disc ...... :......... Power Source ........... Setting setup language ........Features ............Playback procedure ........Contents ............Special playback ..........Parts and functions .......... Zooming ............Display .............. Locating desired scene ........Remote control .......... -
Page 8: Parts And Functions
Parts functions Front VCR/DVD mode selector button PLAY button OPEN/CLOSE button Cassette LoadingSlot STOP button Disc tray EJECT button Display window Remote sensor DVD indicator REC/OTR button CHANNEL buttons REW (Rewind) button AUDIO (L/R)/ Fast Forward) button VIDEO IN jacks VCR indicator Rear DVD COAXIAL... -
Page 9: Display
Display Display window • "0 (il 'LI0"0 LI'' Display Description VCR mode _b" Playback (lights) / Auto resume (flashes) ® II Stillpicture DVD disc is inserted. CD is inserted. Display for afternoon (lights out in the morning) 10 : 00 Clock display (colon[ : ] flashes) 01 : O0 Counter display by hour/minute... -
Page 10: Remote Control
Remote control Page POWER Power on/off EJECT Eject a cassette tape OPEN/CLOSE Open or Close the tray VCR/DVD Switch to operate VCR or DVD 18,34 Direct channel selection of TV 21,26,28 Input setting 37,39 Enter a password 44,45 DISPLAY/CALL Display VCR or DVD operation status 27,50 INPUT SELECT Switch the connected TV to external mode... - Page 11 Remote control Inserting Batteries Open the battery Install two "AAA"batteries (not Replace the compartment compartment cover in the supplied), paying attention to the cover. directionof the arrow, polarity diagram in the battery compartment. Battery precautions The precautionsbelow shouldbe followed when usingbatteriesin thisdevice: 1.Use onlythe size andtype of batteriesspecified.
-
Page 12: Basic Connections
Basic connections If you are using an antenna system, follow these instructions. If you are a cable (CA'IV) subscriber skip ahead to page 14 for the proper connections. IA"TE""A T oDvDNc. co..ECT, O.I The DVD/VCR must be connected =between" the antenna and the TV. First, disconnect the antenna from the TV and connect it to the DVD/VCR. - Page 13 Basic connections I DVD/VCR TO TV CONNECTION After you have connected the antenna to the DVD/VCR, you must connect the DVDNCR to the TV Below are 3 common methods of connecting your DVDNCR to a TV Find the type of TV you are using and follow the connection diagram This DVDNCR has a single 75 ohm output for connection to a TV.
-
Page 14: Catv (Cable Tv) Connections
CATV (CABLE TV) connections Many cable companies offer services permitting reception of extra channels including pay or subscription channels. This DVDNCR has an extended tuning range and can be tuned to most cable channels without using a cable company supplied converter box, except for those channels which are intentionally scrambled. If you subscribe to a special channel which is scrambled, you must have a descrambler box for proper reception. - Page 15 CATV (CABLE TV) connections IMPORTANT: Make sure the TV/CATV menu option is set to the "CA'rV" mode. This DVD/VCR cannot receive scrambled programs since it does not contain a descrambler. In order to receive scrambled programs, your existing descrambler must be used. Descrambler boxes are available from cable companies. Consult your local cable company for more information concerning connection to their descrambler equipment.
-
Page 16: Playback Connection
Playback connections Theexactarrangementyouuseto interconnect v ariousvideoand audiocomponentsto the DVD/VCR isdependent on the modeland features of each component.Check the Owner'sManual providedwith eachcomponentfor the locationof video and audio inputsand outputs. Connect to a I"V with Audio/Video Output You can enjoy playbackbyconnectingthe unitto a TV. Connectthe unitto a TV equippedwithaudioinput(L/R) and videoinputjacksusingthe supplied audio/video cable. - Page 17 Playback connections Connect to a Stereo Amplifier with Audio Output You can enjoy high quality audio byconnecting the audiooutputto youramplifier. Connect the AUDIO OUT jacks to any line-levelinputs (suchas AUX, DVD, CD, etc.) of an audioamplifier. DVDNCR ," ....: StereoAmplifier 0 ooo 00°00 ToAudio (L) Input...
-
Page 18: Setting The Video Channel
/ Setting the language Setting the video channel Setting the video channel When a TV is connected with the 75 ohm coaxial cable only. To view playback of a recorded tape or DVD disc, or to watch a program Pressandh°ld3°r4°ntherem°te control for 3 seconds in the standby I "_ "... -
Page 19: Manual Clock Setting
Manual clock setting You must s et t hedate and time for Preparation: timer r ecordings. • Turn ON the TV and set to the video input mode. • Press VCR/DVD to select the VCR mode. (The VCR indicator will light.) EXAMPLE: Setting the clock to =8:30 AM"... -
Page 20: Tuner Setting
Tuner setting This DVD/VCR is equipped with a channel memory feature which allows channels to sldp up or down to the next channel set into memory, skipping over unwanted channels. Before selecting channels, they must be programmed into the DVDNCR's memory. -
Page 21: To Add/Delete Channels
To ADD/DELETE channels / Noise:elimination To ADD/DELETE channels Preparation: •Tum ON the TV and set to the video input mode. You can add the channels you want • Press VCR/DVD to select the VCR mode. (The VCR indicator or delete the channels you do not will light.) want manually. -
Page 22: Loading And Unloading A Cassette Tape
Loading and Unloading a cassette tape Use only video cassette tapes marked _. Loading Insertthe cassettetapewithitslabeledsidefacingup Push the center of the tape until it is automatically andthe erase preventiontab positionedat your left. inserted. An inverted cassettetape cannot be inserted. Erase preventiontab Automatic power ON When you inserta cassette tape the VCR powerwillturn ON automatically. -
Page 23: Cassette Tape Playback
Cassette tape playback Preparation: •Tum ON the TV and set to the video input mode. • Press VCR/DVD to select the VCR mode. (The VCR indicator will light.) Load a prerecordedtape (When loadinga cassette tape withoutthe erase prevention tab, playbackwill startauto- matically). -
Page 24: Special Playback
Special playback Picture Search Repeat playback Reverse picture search function The entire video tape will be played until its end. The Press REW x 1 or x 2 during the playback. tape will then automatically rewind to the beginning and Forward picture search function the playback will be repeated. -
Page 25: Zero Return Function
ZERO RETURN function / Video index search system Preparation: ZERO RETURN function • Turn ON the TV and set it to the video input mode. This function makes tape-rewinding • Press VCR/DVD to select the VCR mode. (The VCR indicator stop at the counter 00:00:00 position will light.) automatically. -
Page 26: Recording A Tv Program
Recording a TV program Recording and viewing the Preparation: same TV program • Turn ON the "IV and set to the video input mode. • Press VCR/DVD to select the VCR mode. (The VCR indicator will light.) erase tape Load a cassette with the preventiontab intact. - Page 27 Recording a TV program To stop recording Press STOP to stop recording. = •" will appear on screen for about 4 seconds. To stop recording temporarily Press PAUSE/STILL to avoid recording unwanted material. "ell" will appear on screen for about 4 seconds.
-
Page 28: One-Touch Timer Recording (Otr)
One-touch Timer Recording (OTR) The One-touch Timer Recording Preparation: feature provides e simple and • Turn ON the TV and set to the video inputmode. convenient way to make a timed • Press VCR/DVD to select the VCR mode. (The VCR indicator recording. -
Page 29: Timer Recording
Timer recording Preparation: Timer recording can be programmed on-screen with the remote control. • Press VCR/DVD to selectthe VCR mode. The built-in timer allows automatic Load a cassette tape with the erase prevention tab intact, unattended recording of up to 8 •... - Page 30 Timer-recording Timer recording special case Confirmation / Cancellation of the Timer recording Weekly (e.g. WKL-TU: each Tuesday) or dally (e.g. MO-SA: Monday to Saturday) Timer recording If the Timer has been activated,pressTIMER REC Follow the procedureoftimerrecording on the previous page.At picture3 pressSET + or- repeatedlyuntilthe to deactivate the Timer.
-
Page 31: Stereo Recording And Playback
Stereo recording and playback / Second Audio Program (SAP) Stereo recording When a MTS STEREO broadcast playback received, the word STEREO will ap- pear on the screen and the program can The VHS HI-FI audio system permits high be viewed or recorded in stereo. fJde|JP/recording of MTS STEREO "IV broadcasts. -
Page 32: Duplicating A Video Tape
Duplicating a video tape Duplicating a video tape If you connect the VCR to another VCR or camcorder, you can duplicate a previously recorded tape. Make all connections before turning on the power. REC/OTR Load a blankcassette tape with the erase preven- Press on the recordingVCR, then press tiontab intactintothe recordingVCR. -
Page 33: Disc
Disc This unitappliesto DVD discsfrom Region 1 only. The loaded Disc (DVD, Audio-CDand MP3-CD) willbe recognizedautomatically. The suitableDisc-formatsare: DVD, CD-R and CD-RW. Some CD-R/RW discsmay be incompatible. Do not play DVD-ROM, DVD-Audio,CDV, Video-CD,CD-G or Photo CD to prevent accidentalerasure of prere- cordedmaterial. -
Page 34: Setting Setup Language
Setting setup language The setup language can be selected. Preparation: • Tum ON the TV and set to the video input mode. • When using an amplifier, switch on the amplifier. Press VCR/DVD to select the I Rea_g - DVD mode. (The DVD indicator "No Disc"... -
Page 35: Playback Procedure
Playback procedure Preparation: • Tum ON the TV and set to the video input mode. • Press VCR/DVD to select the DVD mode. (The DVD indicator will light.) Pre=o, c os The disc tray will open. Place a disc onto the tray, Hold the disc, position it with the printed label side up, align it with the guides, and place it in its... -
Page 36: Special Playback
Special playback Note: There may be a slight delay Fast Forward Playback between pressing the button and the Press F.FWD duringnormal playback. function activation. Each pressof F.FWD will increasethe speed ofthe seamhIb_l_ (x2), (x_4),)4HI_ (xS),_ (x20). • To resume normal playback, press PLAY. Review Playback Press REW during normal playback. -
Page 37: Zooming
Zooming/Locating desired scene Preparation: • Turn ON the TV and set to the video input mode. • Press VCR/DVD to select the DVD mode. (The DVD indicator wJJJ J Jght.) Zooming This unit will allow you to zoom in on the frame image. You can then make selections by switching the position of the frame. -
Page 38: Repeat Playback
Repeat playback Preparation: •Tum ON the TV and set to the video input mode. • Press VCR/DVD to select the DVD mode. (The DVD indicator will light.) Title, Chapter, Track Playback Press PLAY MODE duringplaybackor stop mode. Repeat : oFr.n_ M0de P=pe= 4 =,Av/Emr,1_ay M ode... -
Page 39: Program Playback/Random Playback (Cd)
Program playback/Random playback (CD) Preparation: • Turn ON the TV and set to the video input mode. • Press VCR/DVD to select the DVD mode, (The DVD indicator will light.) Program playback You can arrange the order of tracks on the disc. Press PLAY MODE in the stop mode. -
Page 40: Mp3 Playback
MP3 playback This player can play back the MP3-data Preparation: which has been recorded on CD-R or CD- • Turn ON the TV and set to the video input mode. RW. To produce the MP3-data, you need a • Press VCR/DVD to select the DVD mode. -
Page 41: Marking Desired Scenes
Marking desired scenes Preparation: The unit stores the points that you • Turn ON the TV and set to the video input mode. want to watch again up to 3 points. • Press VCR/DVD to selectthe DVD mode. (The DVD indicator You can resume playback from each scene. -
Page 42: Changing Soundtrack Language
Changing soundtracklanguage/ Subtitles/ Karaokeplayback Preparation: • Tum ON the TV and set to the video inputmode. • PressVCPJDVD to selectthe DVD mode. (The DVD indicator will light.) Changing soundtrack language You can select the language when you play a multilingual disc. -
Page 43: Changing Angles
Changing angles /Title selection / DVD menu Preparation: • Turn ON the TV and set to the video input mode. • Press VCR/DVD to select the DVD mode. (The DVD indicator will light.) Changing Angles When playing back a disc recorded with multi-angle facility, you can change the angle that you are viewing the scene from. -
Page 44: Parental Control
Parental control Some discs are specified not suitable Preparation: for children. Such discs •Tum ON the TV and set to the video input mode. prevented from play back with the • Press VCR/DVD to select the DVD mode. (The DVD indicator uniL will light.) Parental... -
Page 45: Temporarydisablingof Ratinglevel Bydvd Disc
Temporary disabling of rating level by DVD disc Depending on the DVD disc, the Preparation: disc may try to temporarily cancel • Turn ON the TV and set to the video input mode. the rating level that you have set. •... -
Page 46: Setting Menu Language
Setting menu language You can select the language of the Preparation: disc menu messages of DVDs. •Tum ON the TV and set to the video input mode. • Press VCR/DVD to select the DVD mode. (The DVD indicator will light.) stop PressSETUP in the mode. -
Page 47: Setting Subtitle Language
Setting subtitle language same subtitle language Preparation: • Turn ON the TV and set to the video input mode. always be selected even if you replace • Press VCR/DVD to select the DVD mode, (The DVD indicator the disc or turn the power off. will light.) Press SETUP in the stop mode. -
Page 48: Setting Audio Soundtrack Language
Setting audio soundtrack language The same audio soundtreck language Preparation: can always be selected by your unit • Turn ON the TV and set to the video input mode. even if you replace the disc or turn • Press VCR/DVD to select the DVD mode. -
Page 49: Setting The Aspect Ratio Of "Iv Screen
Setting aspect ratio of TV screen You can select the aspect ratio for Preparation: • Turn ON the TV and set to the video inputmode. your TV. • Press VCR/DVD to selectthe DVD mode. (The DVD indicator willlight.) Press SETUP in the stopmode. Press <... -
Page 50: Setting On Screen Display
/ Status display of disc Setting on screen display Preparation: On screen display can be switched on or off when you press the • Tum ON the "IV and set to the video input mode. DISPLAY button. • Press VCR/DVD to select the DVD mode. -
Page 51: Dynamic Range Control
Dynamic Range Control Preparation: DRC (Dynamic Range Control) ona- • Turn ON the TV and set to the video inputmode. bles you to control the dynamic range so as to achieve a suitable sound for * Press VCR/DVD to selectthe DVD mode. (The DVD indicatorwill light.) your equipme_t. -
Page 52: Progressive Scan
Progressive scan Preparation: unit supports Progressive scanning system as well as the • Connectto a TV equippedwith componentjacks. conventional Interlaced scanning •Tum ON the -IV andset it to the corresponding video inputmode. system. If your TV is equipped with • Set the S-VIDEO/COMPONENT video solec'tor switchon the component jacks which support... -
Page 53: Language Code List
Language code list Enter theappropriate c odenumber f or theinitial s ettings "Audio', "Subtitle" and/or"Menu" ( see pages 46- Language Name Code Language Name Code Language Name Code LanguageName Code Abkhazian 1112 Fiji 1620 Lingala 2224 Singhalese 2919 Afar 1111 Finnish 1619 Lithuanian... -
Page 54: Problems And Troubleshooting
Problems troubleshooting Use the followingcheck listfor troubleshooting whenyou have problemswith yourunit. Consult your local dealer or serviceoutlet if problems persist. Be sure all connectionsare properlymade whenusingwith other units. SYMPTOMS POSSIBLE SOLUTIONS PAGE _ DVDNCR • Make surethe powercord is plugged in. •... -
Page 55: Video Head Cleaning
Problems and troubleshooting / Video head cleaning PAGE _ POSSIBLE SOLUTIONS SYMPTOMS • The S-VIDEO/COMPONENT selecteris notset correctly. No picture, or the screen is blurred • The progressivescanningmode is active through the unitis or divided into two parts. connectedto a TV via the VIDEO OUT jack. •... -
Page 56: Specifications
Specifications GENERAL Power supply: AC 120V 60Hz Power consumption: Operation: 18W Stand by: 2W Weight: 7.9 Ibs (3.6 kg) Dimensions: Width : 16-15/16 inches (430 mm) Height: 3-7/8 inches (99 mm) Depth : 9-3/4 inches (247 mm) Inputs/Outputs: Video: In: 1Vp-p/75 ohm Out: 1Vp-p/75 ohm Audio: In: -8dBm/50k... -
Page 57: Limited Warranty
limited WARRANTY DVD PLAYER / VIDEO CASSETTE RECORDER COMBINATION UNIT ORION warrantsthisproductto L_ free from manufacturing defects in materialand workmanshipunder normaluse andconditionsfor a periodof ninety(90) daysfrom date oforiginalpurchasein the United Statesonly. Should servicebe necessary underthiswarrantyfor any reasondue to a manufacturingdefector malfunc- tionduringthe first ninety(90) day periodfrom date of originalpurchase,ORION will providecarry-inrepair serviceat an ORION authorizedIndependentService Center at no charge. - Page 58 MEMO...
- Page 59 MEMO...
- Page 60 J2C50901B 03/06 Printed in Thailand...
Need help?
Do you have a question about the VRDVD4001 and is the answer not in the manual?
Questions and answers
What disks are compatible with the Sansui VRDVD4001 dvd/vcr device for recording?
The Sansui VRDVD4001 DVD/VCR device does not support DVD recording. The DVD side is a player only and does not have recording capabilities.
This answer is automatically generated