Advertisement
Table of Contents
F
ANS-E
2000
2.5
HP
• 0 _I0
J_PH
• POWER
INCLINE
• EXPANDED
RUNNING
SURFACE
SI _/AJRS o
Model No. 831.297273
Serial No.
The serial number can be found in the
location shown below. Write the serial
number in the space above.
Serial Number
Decal
Z_ CA UTION!:
Read all safety
precautions
and instructions
in this
manual before
using this
equipment.
Keep this
manual
in a safe place
for
future
reference.
OWNER'S MANUAL
SEARS,
ROEBUCK
AND
CO., HOFFMAN
ESTATES,
IL 60179
Advertisement
Table of Contents

Related Manuals for Sears Lifestyler EXPANSE 2000


Summary of Contents for Sears Lifestyler EXPANSE 2000
- Page 1 Serial Number Decal Z_ CA UTION!: Read all safety precautions and instructions in this manual before using this equipment. Keep this manual in a safe place future reference. SEARS, ROEBUCK CO., HOFFMAN ESTATES, IL 60179...
- Page 2 This is especially Important for persons over the age of 35 or persons with pre-existing health problems. Read all Instructions b_fore using. SEARS assumes no responsibility for personal Injury or property damage sustained by or through the use of this producL...
-
Page 3: Before You Begin
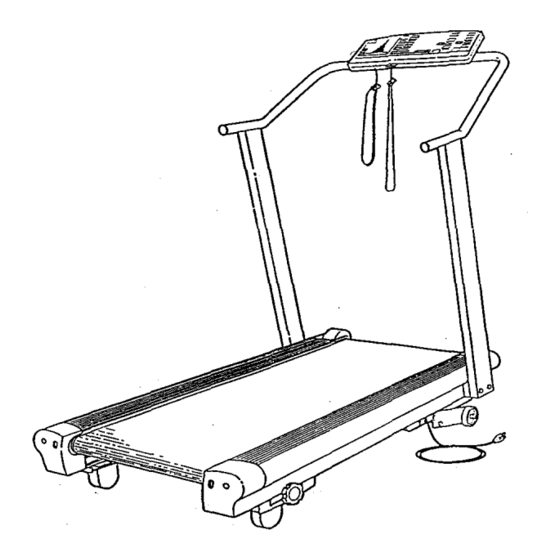
WARRANTY ..............Back Cover BEFORE YOU BEGIN Thank you for selecting the SEARS LIFESTYLEFP EXPANSE 2000 treadmill. The EXPANSE 2000 treadmill blends advanced technology with innovative design to let you enjoy an excellent form of cardiovascular exercise in the convenience and privacy of your home. -
Page 4: Tools Required For Assembly
ASSEMBLY Set the treadmill in a cleared area and remove all packing materials. Do not dispose of the packing msterials until assembly is completed. TOOLS REQUIRED FOR ASSEMBLY: An adjustable wrench (not I.nc!uded ). 1. Wlt.hthe help of a second person, raise the right Upright (3) to a vertical position. -
Page 5: Operation
OPERATION AND ADJUSTMENT PLUGGING IN THE POWER CORD This product must be grounded. If it should malfunction or break Grounded down, grounding provides a path of least resistance for electric cur- rent to reduce the risk of electric shock. This product is equipped with a cord having an equipment-greunding conductor and a ground- Grounding Plug ing plug. -
Page 6: Turning On The Power
DIAGRAM OF THE CONSOLE The head of the treadmill is the state-of-the-art programmable console. The console offers both manual and pro- gram operation, and features an array of independent LED displays to give you continUous exercise feedback. Please read these Instructions carefully before operating the console. Note: If there Is a sheet of protec- tive plastic on the face of the console, peel it off before operating the console. -
Page 7: Program Operation
Press the SPEED increase button until the walking belt begins to move at slow speed. When the walking belt begins to move, hold the handrails and step carefully onto the walking bolt. Change the speed of the walking bolt as desired by pressing the SPEED buttons. To stop the walking belt, hold down the SPEED decrease button. The walking bolt can be stopped quickly, if desired, by pressing the STOP bar. - Page 8 To start the program, press the PROGRAM START button. The first segment will be displayed in the CURRENT SEGMENT column, and the treadmill will automatically a_ust to the first speed or incline setting. Hold the handrails, step carefully onto the walking belt and begin exerdsing. The time remaining in the first segment will be shown in the SEGMENT TIMER display..
-
Page 9: Turning The Power Off
TIME:Whentheconsole is inthe manual m ode, t heTIMEdisplay willshowthetotal t imethatyouhavewalked or runduringyourworkout, u pto 99minutes and59seconds.(If thetreadmill i s run for more than 99 minutes and 59 seconds, the walking belt will automatically slow to a stop. This safety feature prevents the treadmill from being left running for long periods of time.) If desired, a time goal can be set. -
Page 10: Troubleshooting
TROUBLE-SHOOTING AND STORAGE Most treadmill problems can be solved by following the simple steps below. Find the symptom that applies to your treadmill and follow the steps listed. If further assistance is needed, please call our Customer Service Depadment toll-free at 1-800-999-3756, Monday through Friday, 6 a.m. - Page 11 c. Ifthe walking belt is overtightened, treadmill performance Rear Roller decrease and the walking belt may be permanently damaged. Remove the safety key and UNPLUG THE POWER CORD. Adjustment Bolts Using the allen wrench, turn both rear roller adjustment bolts counterclockwise, 1/4 of a turn.
- Page 12 7. SYMPTOM: THE CONSOLE DOES NOT FUNCTION PROPERLY a. tf a console malfunction occurs, an error code ("PC)" or "EEE') may appear on the display. If an error code appears, remove the safety key, wait for ten seconds and then reinsert the safety key; If the error code appears again, call our Customer Service Department.
-
Page 13: Exercise Intensity
CONDITIONING GUIDELINES The following guidelines will help you to plan your exercise program. Remember that proper nutrition and ade- quate rest are essential for successful results. tAIAr-II_lllkll_, jI:JL YVJ"_ r't |_t I |_i _1" Before beginning this or any exercise program, consult your physician. - Page 14 PART LIST Model No. 831.297273 R894B Part Part Qty. Description Qty. Description 014086 Upright Washer 109370 Optic Disk 013485 3/8" x 4 1/2" Upright Bolt 012108 114375 Upright 115523 incline Motor 114005 Handrail Endcap 117827 Left Frame Rail 114371 Handrail 013369 Incline Bolt 105477...
- Page 15 EXPLODED DRAWING--Model No. 831.297273 R894B _-16 il 93 41 60...
-
Page 16: Ordering Replacement
All parts listed herein can be ordered through SEARS, ROEBUCK AND CO. SERVICE CENTERS and most SEARS RETAIL STORES. If parts you need are not stocked locally, your order will be transmitted to a SEARS PARTS DIST,RIBUTION CENTER for handling.
Need help?
Do you have a question about the Lifestyler EXPANSE 2000 and is the answer not in the manual?
Questions and answers