Table of Contents
Advertisement
Available languages
Available languages
Operators
I
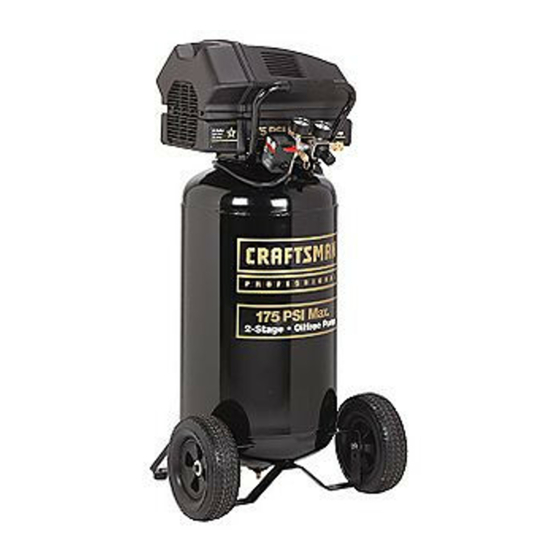
RnFTSMRH°I
Permanently Lubricated
2-Stage
Twin V
Portable
AI
CO
Model No.
919.167780
= Safety Guidelines
• Assembly
= Operation
• Maintenance
= Service and Adjustments
• Troubleshooting
• Espahol
CAUTION:
Read the Safety
Guidelines
and
All
Instructions
Carefully
Before
Operating.
Sears, Roebuck and Co., Hoffman Estates, IL 60170 U.S.A.
Visit our Craftsman website: www.sears.com/craftsman
D22130
Rev. 1
11/8/01
Advertisement
Chapters
Table of Contents

Related Manuals for Craftsman 919.167780


Summary of Contents for Craftsman 919.167780
- Page 1 • Assembly = Operation • Maintenance = Service and Adjustments • Troubleshooting • Espahol CAUTION: Read the Safety Guidelines Instructions Carefully Before Operating. Sears, Roebuck and Co., Hoffman Estates, IL 60170 U.S.A. Visit our Craftsman website: www.sears.com/craftsman D22130 Rev. 1 11/8/01...
-
Page 2: Table Of Contents
WARRANTY ......Before Starting Break-in Procedure ....Before Each Start-Up ....SAFETY GUIDELINES ....How to Start ......G LOSSARY ......MAINTENANCE ....... 12-13 Customer Responsibilities ....ACCESSORIES ......To Check Safety Valve ....To Drain Tank ......ASSEMBLY ......Air Filter - Inspection and Replacement .. -
Page 3: Safety Guidelines
SAFETY and PREVENTING EQUIPMENT PROBLEMS. To help you recognize this information, we use the symbols below. Please read the manual and pay attention to these sections. Indicates an imminently hazardous Indicates a potentially hazardous situation which, if not avoided, will situation which, if not avoided, result in death or serious iniury. - Page 4 RiSK OF BURSTING TANK: FOLLOWING CONDITIONS COULD LEAD TO A WEAKENING OF THE TANK, RESULT JN A VIOLENT TANK EXPLOSION COULD CAUSE PROPERTY DAMAGE OR SERIOUS iNJURY. WHAT CAN HAPPEN HOW TO PREVENT iT FAILURE TO PROPERLY DRAIN CONDENSED DRAIN TANK DAILY OR AFTER EACH USE.
- Page 5 RiSK OF ELECTRICAL SHOCK HOW TO PREVENT iT WHAT CAN HAPPEN YOUR AiR COMPRESSOR iS POWERED BY ELECTRICI= NEVER OPERATE THE COMPRESSOR OUTDOORS WHEN TY. LIKE ANY OTHER ELECTRICALLY POWERED DEVICE, IT IS RAINING OR IN WET CONDITIONS. iF iT iS NOT USED PROPERLY iT MAY CAUSE ELECTRIC NEVER OPERATE COMPRESSOR...
- Page 6 RISK OF BURNS HOW TO PREVENT iT WHAT CAN HAPPEN NEVER TOUCH ANY EXPOSED METAL PARTS ON TOUCHING EXPOSED METAL SUCH AS THE COMPRES- COMPRESSOR DURING OR IMMEDIATELY AFTER OPER- SOR HEAD OR OUTLET TUBES, CAN RESULT IN ATION. COMPRESSOR WILL REMAIN HOT FOR SEVERAL SERIOUS BURNS.
-
Page 7: G Lossary
Become familiar with these terms before operating the Cut-in Pressure: While the motor is off, air tank unit. pressure drops as you continue to use your accesso- ry. When the tank pressure drops to the factory set CFM: Cubic feet per minute. low pressure the motor will restart automatically. -
Page 8: Unpacking
Tighten securely. NOTE: The outfit will sit level if Unpacking the wheels are properly installed. Remove all packaging leaving the air compressor on the pallet. The wheels and handle do not provide adequate Remove and discard the (4) screws holding the air clearance, stability or support for pulling compressor to the pallet. -
Page 9: Installation
iMPROPER GROUNDING HOW TO SET UP YOUR UNiT RESULT iN ELEC- TRICAL SHOCK. Location of the Air Compressor Locate the air compressor in a clean, dry and well Do not modify the plug provided. If it does ventilated area. The air compressor should be located not fit the available outlet, a correct outlet at least 12"... -
Page 10: Operating Procedures
Know Your Air Compressor READ THIS OWNER'S MANUAL AND SAFETY RULES BEFORE OPERATING YOUR UNIT. Compare the illustra- tions with your unit to familiarize yourself with the location of various controls and adjustments. Save this manual for future reference. Drain Valve: The drain Description of Operation valve is located at the... -
Page 11: How To Stop
How to Use Your Unit Move the On/Auto/Off lever to "ON/AUTO" posi- tion. The compressor will start. How to Stop: Run the compressor for 15 minutes. Make sure Set the On/Auto/Off lever to "OFF". the drain valve is open and there is minimal air pressure build-up in tank. -
Page 12: Maintenance
Customer Responsibilities Before Daily or after Frequently Yearly each use each use Check Safety Valve • Drain Tank • Air Filter ® Air compressor pump intake and exhaust valves • Unit cycles automatically when power is on. When performing maintenance, you may be exposed to voltage sources, compressed air, or moving parts. -
Page 13: Air Compressor Pump Intake And Exhaust Valves
If dirty, rinse air filter with warm water and Motor squeeze dry. The motor has an automatic reset thermal overload Replace air filter and air filter cover. protector. If the motor overheats for any reason, the overload protector will shut off the motor. The motor NOTE: If the air filter is extremely dirty it will need to must be allowed to cool down before restarting. -
Page 14: Service And Adjustments
Unit automatically when power is on. When doing Maintenance, you may be exposed ge sources, compressed air or moving parts. Personal injuries can occur. Before per- forming any Maintenance or repair, unplug the compressor and bleed off all air pressure. ALL MAINTENANCE AND REPAIR OPERATIONS NOT LISTED MUST BE PERFORMED... -
Page 15: To Replace Regulator
Assemble the regulator and orient as shown. To Replace Regulator Release all air pressure from air tank. See "To Drain Tank" in the Maintenance section. Unplug outfit. Remove the outlet pressure gauge and quick connect (if equipped) from the regulator. Remove the regulator. -
Page 16: Troubleshooting Guide
Performing repairs may expose voltage sources, moving parts or compressed air sources, moving parts or compressed air sources. Personal injury may occur. Prior to attempting any repairs, unplug the air compressor and bleed off all air tank air pressure. CAUSE PROBLEM CORRECTION Pressure switch does not shut off... - Page 17 CAUSE PROBLEM CORRECTION Knocking Noise. Possible defect in safety valve. Operate safety valve manually by pulling on ring. If valve still leaks, it should be replaced. Defective check valve. Remove and clean, or replace. Compressor is not supplying Prolonged excessive use of air. Decrease amount of air usage.
- Page 18 CAUSE PROBLEM CORRECTION Let motor cool off and overload Motor will not run. Motor overload protection switch has tripped switch will automatically reset. Tank pressure exceeds pressure Motor will start automatically switch "cut-in" pressure. when tank pressure drops below "cut-in" pressure of pressure switch.
-
Page 19: Espa_Iol
GARANTJA ......OSmo usar su unidad ....C6mo detenerla ....... HOJA DE ESPECIFICACIONES ..20-23 Antes de poner en marcha ...... NORMAS DE SEGURIDAD ....Antes de poner en marcha ...... GLOSARIO ......C6mo de poner en marcha ...... MANTENJMJENTO .... -
Page 20: Hoja De Especificaciones
SEGURIDAD Y PREVENCION DE PROBLEMAS DEL EQUIPO: Para ayudar al reconocimiento de esta informaci6n, hemos utilizado los simbolos mostrados abajo. Sirvase leer el manual y prestar atenci6n a dichas secciones. Indica una situaci6n de inminente riesgo, la Indica una situaci6n potencialmente cual, si no es evitada, causara la muerte o peligrosa, la cual, si no es evitada, lesiones serias. -
Page 21: Accesorios
RIESGO DE EXPLOSI(_N TANQUE DE AIRE: LAS SIGUIENTES CONDICIONES PUEDEN DETERMINAR EL DEBILITAMIENTO DEL TANQUE, Y ORIGiNAR UNA VIOLENTA EXPLOSION DEL MISMO, SIENDO CAUSA DE DAKIOS A LA PROPIEDAD 0 LESIONES SERIAS. _,QU_: PUEDE OCURRIR? _,C6MO PREVENIRLO? DRENAJE INADECUADO DEL AGUA CONDENSADA DRENE EL TANQUE DIARIAMENTE O DESPUES DE CADA USO. - Page 22 RIESGO DE DESCARGA ELC:CTRICA _,QU_: PUEDE OCURRIR? &COMO PREVENIRLO? SU COMPRESOR DE AIRE EST/_ ACCIONADO POR ELECTRICIDAD. JAMAS OPERE EL COMPRESOR A LA INTEMPERIE CUANDO COMO CUALQUIER OTRO DISPOSITIVO ELCCTRICO IMPULSADO EST/_ LLOVlENDO O EN CONDICIONES DE HUMEDAD. EL¢CTRICAMENTE, 81 NO SE LO UTILIZA ADECUADAMENTE, NUNCA OPERE EL COMPRESOR...
- Page 23 RIESGO DE QUEMADURAS _QUEPUEDE OCURRIR? &COMO PREVENIRLO? JAMAS TOQUE PARTES DE METAL EXPUESTAS EN EL TOCAR EL METAL EXPUESTO TAL COMO EL CABEZAL COMPRESOR DURANTE O INMEDIATAMENTE DESPUES DE LA COMPRESOR O LOS TUBOS DE SALIDA DEL ESCAPE, PUEDE OPERACION. COMPRESOR PERMANECERA CALIENTE...
-
Page 24: Glosario
Familiarfcese con los siguientes terminos, antes de operar la Presi6n minima de corte: Cuando el motor esta apagado, unidad: la presi6n del tanque de aire baja a medida que usted con- tint_a usando su accesorio. Cuando la presi6n del tanque Cfm: (Cubic feet per minute) Pies cubicos per minute. -
Page 25: Desempaque
Apriete firmemente. NOTA: El equipo se asentara nive- Desempaque lado si las ruedas estan debidamente instaladas. Retire todo el material de empaque dejando al compre- Las ruedas y el mango sot de aire sobre la tarima. no proporcionan Retire y descarte los (4) tornillos que sostienen al com- despeje, estabilidad o soporte... -
Page 26: Jnstalaclon
COMO PREPARAR LA UNIDAD LA CONEXION INADECUADA A TIERRA PUEDE DETERMINAR UNA DESCARGA ELI_CTRICA. Ubicaci6n del compresor de aire No modifique el enchufe provisto. Si el mismo no Ubique al compresor de aire en una zona limpia, seca y penetrara el tomacorriente disponible, un electricista... -
Page 27: Operaclon
Conozca su compresor de aire LEA ESTE MANUAL DEL PROPIETARIO Y SUS NORMAS DE SEGURIDAD ANTES DE OPERAR LA UNIDAD. Compare las ilustraciones contra su unidad a fin de familiarizarse con la ubicaci6n de los distintos controles regulaciones. Conserve este manual para referencias futuras. -
Page 28: Osmo Usar Su Unidad
C6mo utilizar su unidad Mueva la paianca On/Auto/Off a la posici6n "ON/AUTO". El compresor se pondra en marcha. C6mo detenerla: Haga funcionar el compresor durante 15 minutos. AsegQrese de que la valvula de drenaje este abierta y que la presi6n de Coloque la posici6n de la Ilave interruptora On/Auto/Off aire acumulado en el tanque sea minima. -
Page 29: Mantenjmjento
Responsabilidades del cliente Antes Diariamente o luego de Frecuentemente Anualmente cada uso cada uso Verifique la valvula de seguridad • Drenaje del tanque • Filtro de aire • Valvulas de entrada y escape de la bomba del compresor • de aire La unidad funciona automaticamente en ciclos cuando esta conectada a la energia. -
Page 30: Wlvulas De Entrada Y Escape De La Boma Del Compressor De Aire
Motor Si esta sucio enjuague el filtro de aire con agua tibia y exprfmalo hasta que seque. El motor tiene un protector de sobrecarga termico de reposici6n automatica. Si el motor se sobrecalienta 4. Vuelva a colocar el filtro de aire y su cubierta. alguna raz6n, el protector de sobrecarga apagara el motor. -
Page 31: Serviclos Y Regulaclones
La unidad cicla automaticamente en cuanto la energfa electrica es conectada. AI efectuar el man- tenimiento, usted quedara expuesto a tensi6n viva, aire comprimido o partes en movimiento. Debido a tales circunstancias, podrian ocurrirle lesiones personales. Antes de efectuar manten- imiento o reparaci6n alguna, desenchufe el compresor y purgue cualquier presi6n de aire. -
Page 32: Para Reemplazar El Regulador
Ensamble el regulador y orientelo de acuerdo Para reemplazar el regulador a Io mostrado Libere toda la presi6n del aire del tanque. Yea "Drenaje del tanque" en la secci6n "Mantenimiento". Desenchufe el equipo. Usando una Ilave de tuercas ajustable retire el medidor de salida de presi6n y la conexi6n rapida del regulador (si la tiene). - Page 33 El desarrollo de reparaciones puede exponer a sitios con corriente viva, partes en movimiento o fuentes de aire comprimido que podrian ocasionar lesiones personales. Antes de intentar reparaci6n alguna, desenchufe el compresor de aire y purgue toda la presi6n de aire del tanque. CAUSA CORRECClON PROBLEMA...
- Page 34 PROBLEMA CAUSA OORREOCION Golpeteo Posible defecto en la valvula de Opere la valvula de seguridad manual- mente tirando de su anillo. Si la valvula seguridad. aun pierde, debera set reemplazada. Posible defecto en la valvula de Extraiga y limpie o reemplace. seguridad.
- Page 35 OORREOCION PROBLEMA CAUSA El motor no funciona. El interruptor de protecci6n de s Deje enfriar el motor y el interruptor obrecarga del motor se ha abierto. de sobrecarga se reajustara automaticamente. El motor arrancara automaticamente La presi6n del tanque excede la presi6n de "corte maximo"...
- Page 36 For repair of major brand appliances in your own home... iiiiiiiiiiiiiiiii_ no matter who made it, no matter who sold it! iiiiiiiiiiiiiiii 1-800-4-_WY-HOME_ SMAnytime, day or night iiiiiiiiiiiiiiii www.sears.com To bring in products such as vacuums, lawn equipment and electronics for repair, call for the location of your nearest Sears Parts &...