Epson GT-15000 User Manual
Epson user's guide scanner gt-15000
Hide thumbs
Also See for GT-15000:
- User manual (76 pages) ,
- Setup manual (39 pages) ,
- Operation user's manual (8 pages)
Table of Contents
Advertisement
Quick Links
Download this manual
See also:
Setup Manual
Advertisement
Table of Contents

Related Manuals for Epson GT-15000


Summary of Contents for Epson GT-15000
- Page 1 Epson GT-15000 ® User’s Guide...
-
Page 2: A Note Concerning Responsible Use Of Copyrighted Materials
Epson scanner. Epson is not responsible for any use of this information as applied to other scanners. Neither Seiko Epson Corporation nor its affiliates shall be liable to the purchaser of this product or third parties for damages, losses, costs, or expenses incurred by purchaser or third parties as a result of: accident, misuse, or abuse of this product or unauthorized modifications, repairs, or alterations to this product, or (excluding the U.S.) failure to... -
Page 3: Table Of Contents
Connecting the Scanner to a SCSI Interface Installing the Software Chapter 2 HOW TO SCAN Placing Your Original Document Scanning to a File With EPSON Scan Basic Scanning in Home Mode Scanning in Office Mode Advanced Scanning in Professional Mode Scanning Documents With PaperPort Deluxe... - Page 4 SOLVING PROBLEMS Diagnosing Scanner Problems Problems and Solutions Scanner Problems Software Problems Quality Problems Uninstalling and Reinstalling EPSON Scan Where To Get Help Epson Technical Support Speak to a Support Representative Purchase Supplies and Accessories Other Software Technical Support Contents...
- Page 5 Appendix A SPECIFICATIONS Appendix B REQUIREMENTS AND NOTICES System Requirements Important Safety Instructions FCC Compliance Statement Declaration of Conformity Warranty INDEX Contents...
- Page 6 Contents...
-
Page 7: Welcome
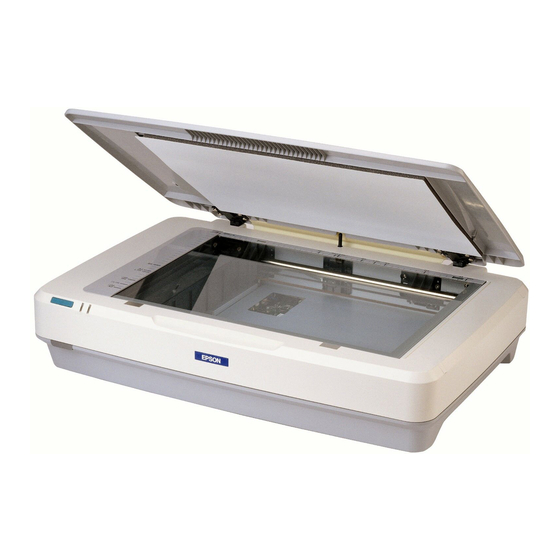
Welcome ® The Epson GT-15000 is a 48-bit color, large-format professional scanner that delivers superior results and versatility for business users. Using Epson’s ® ColorTrue II Imaging System, the scanner captures text and images with amazingly accurate detail and color. Its 600 × 1200 dpi hardware resolution and 11.7 ×... -
Page 8: About Your Software
■ ® Captiva ISIS Driver The Image and Scanner Interface Specification (ISIS) is a flexible, modular standard for acquiring, viewing, converting, printing, and storing document images. ■ ABBYY FineReader A powerful, easy-to-use OCR program that lets you scan and send the text to a word processor or spreadsheet program. -
Page 9: Getting More Information
Getting More Information There are several ways to learn more about your Epson GT-15000 scanner. In addition to this User’s Guide, here’s where to look for help: ■ Epson GT-15000 Reference Guide See the Reference Guide for complete instructions on using EPSON Scan, scanning in a network environment, and additional information about your scanner. - Page 10 Welcome...
-
Page 11: Chapter 1 Getting Started
Unpacking the Scanner Remove the scanner from the box and make sure you have these items: Remove all the tape and packing material from the scanner. Save the packaging in case you need it for transporting the scanner. Warning: The scanner is large and heavy. You might need to have someone help you unpack and lift it. -
Page 12: Choosing A Good Place For The Scanner
Choosing a Good Place for the Scanner When deciding where to place the scanner, follow these guidelines: ■ Place the scanner on a flat, stable surface. If the scanner is tilted, it can’t operate properly. ■ Be sure to place the scanner where you can easily unplug the power cord, near a grounded wall outlet, and where the interface cable can reach your computer. -
Page 13: Turning The Scanner On And Off
1. Pull up the transportation lock on the back of the scanner to the Unlock 2. Before you plug in the scanner, make sure it is turned off (the . Power button is not pushed in). 3. Plug one end of the scanner’s power cord into the AC inlet at the back of the scanner, and the other end into a grounded electrical outlet. -
Page 14: Connecting The Scanner To Your Computer
USB hub. Plug the square end into the scanner’s USB port. Note: Your scanner may not work correctly if you use a USB cable other than the one supplied by Epson, or if you connect your scanner to a multi-level USB hub system. -
Page 15: Connecting The Scanner To A Scsi Interface
2. If you have another SCSI device that uses SCSI ID 2, turn the SCSI ID switch on the back of the scanner to a new number. Do not use 0, 1, or 7. 3. Unless your scanner is connected in... -
Page 16: Installing The Software
Installing the Software You must install the software to be able to use your scanner. Follow these steps: 1. Close all open programs and turn off any virus protection programs. 2. Make sure the scanner is OFF. Note: If you see a screen like either of the ones below, click Cancel and turn off the scanner. - Page 17 6. Click and follow any instructions on the screen to install EPSON Scan Install and the other software applications. This will take a few minutes. If you have Windows XP, during the installation you’ll see a screen asking if you want to restart your computer.
- Page 18 Getting Started...
-
Page 19: Chapter 2 How To Scan
You can use EPSON Scan either in a “standalone” mode, or by starting from another program, such as PaperPort Deluxe or Photoshop Elements. This chapter provides step-by-step instructions for the following: ■... -
Page 20: Placing Your Original Document
“Scanning With the Automatic Document Feeder” on page 45. 1. Raise the scanner cover and place your document face down in the upper left corner of the document table. You can scan several pages or photos at the same time. Make sure you leave about an inch of space between them on the document table. -
Page 21: Scanning To A File With Epson Scan
PaperPort Deluxe or Adobe Photoshop to scan images directly into your application, as described later in this chapter. Or you can scan directly to your computer by starting EPSON Scan from your desktop or from the Windows Start menu. -
Page 22: Basic Scanning In Home Mode
Basic Scanning in Home Mode After you start EPSON Scan and choose , you see this window: Home Mode Select Home Mode Follow these steps to select your scan settings: 1. Click to see a preview of your scan. Preview... - Page 23 (marquee). For more information on using marquees, see page 37. Auto Detect button 3. Choose a Document Type setting in the EPSON Scan window that is appropriate for your scan. 4. Choose an Image Type setting: ■...
-
Page 24: Scanning In Office Mode
Scanning in Office Mode After you start EPSON Scan and choose , you see this window: Office Mode Select Office Mode Follow these steps to select your scan settings: 1. Click to see a preview of your scan. Preview How To Scan... - Page 25 (marquee). For more information on using marquees, see page 37. Auto Detect button 3. Make any of these adjustments in the EPSON Scan window, as necessary: ■ Select the appropriate Image Type: ■ In the Destination box, you can change the...
-
Page 26: Advanced Scanning In Professional Mode
(marquee). For more information on using marquees, see page 37. 3. In the EPSON Scan window, choose the Auto Exposure Type: exposure for photos, or 4. Either click Scan next section to fine-tune it. - Page 27 Customizing Your Scan Follow these steps to use advanced settings: 1. Choose a color depth setting from the Image Type menu: ■ for the highest quality color scans 24-bit Color ■ Color Smoothing ■ for the highest quality scans of black-and-white photos or 8-bit Grayscale images ■...
-
Page 28: Scanning Documents With Paperport Deluxe
For any of the setting windows above, you can click default settings for your image. See the EPSON Scan on-screen help for more information about the Adjustment options. 6. The Unsharp Mask Filter the image, and is on by default. You can... - Page 29 4. Click the button. EPSON Scan opens. Scan 5. Choose Office Mode of the EPSON Scan window. If you see a warning message about closing the preview window, click . Make Document from the Mode list at the top Scan...
- Page 30 You see the EPSON Scan Office Mode settings: 6. Choose an Image Type: ■ for documents with color Color ■ for documents with Grayscale grayscale images or black and white photos ■ Black&White documents 7. Click Preview 8. Click the...
-
Page 31: Scanning Text For Editing
The ABBYY FineReader Sprint software included with your scanner lets you convert almost any printed document to text you can edit. Place your document(s) on the scanner as described on page 20. Then follow these steps to scan text for editing: 1. To start ABBYY FineReader, click ABBYY FineReader 5.0 Sprint... -
Page 32: Scanning Photographs With Adobe Photoshop Elements
Adobe Photoshop Elements provides a variety of powerful tools for image editing, along with recipes and step-by-step instructions for using the tools. First, place your photo or photos on the scanner as described on page 20. Then follow these steps to scan photos with Photoshop Elements: 1. - Page 33 If you want to select part of an image, click the arrow beside the Preview button in the EPSON Scan dialog box and select Normal from the pull-down menu. Then click the Preview button to preview in normal mode.
- Page 34 . If you are scanning multiple photos, each one is scanned Scan individually. 15. Click to exit EPSON Scan and work with your image(s) in Photoshop Close Elements. For more information about using Photoshop Elements, click the Help menu at the top of the screen, or see the Getting Started Guide.pdf in the \Program Files\...
-
Page 35: Scanning With The Start Button
Scanning With the Start Button You can use the a Start button on your scanner to open EPSON Scan, and then scan your document as described below. Or, you can set up the a Start button to open any compatible program on your computer and start scanning. -
Page 36: Setting Up The Start Button In Windows 98, Me, Or 2000
Setting Up the Start Button in Windows 98, Me, or 2000 EPSON Scan opens by default when you press the a Start button. If you want to have a scanning application open instead, follow these steps: 1. Click Start > Settings > Control Panel 2. -
Page 37: Selecting The Scanning Area In The Preview Window
(a frame that you draw around the previewed image). You can create up to 50 marquees at one time. The currently selected marquee has a moving, dotted line. EPSON Scan adjusts the image quality settings to optimize each selected area. Auto Detect button ■... -
Page 38: Scanning Tips
■ To resize the marquee, move the cursor to an edge or corner of the dotted line. When the cursor turns into an arrow symbol, click and drag to resize the selection area. ■ To zoom to the selected area, click the marquees, the currently selected one appears in the Zoom preview. -
Page 39: Scaling (Resizing) Images
Also, try selecting just the area that you want to scan with a marquee (see page 37). This will let the scanner software choose the optimum color and exposure settings for that part of the image. If there is a border around your image or if the document cover is in the scanning area, this may adjust the exposure and colors in your scan. - Page 40 How To Scan...
-
Page 41: Using Optional Equipment
■ Epson Network Image Express scanner interface card (B12B808393) You can purchase these accessories from an authorized Epson reseller. To find the nearest reseller, call 800-GO-EPSON (800-463-7766). You can also purchase online at www.epsonstore.com (U.S. sales) or www.epson.ca (Canada sales). -
Page 42: Automatic Document Feeder
When you unpack the automatic document feeder, make sure you have the parts shown below. If any items are missing or damaged, contact your Epson dealer, or call Epson at (562) 276-4382 (in the United States) or (905) 709-3839 (in Canada). -
Page 43: Installing The Automatic Document Feeder
4. Attach the two smaller feet to the automatic document feeder, as shown on the right: 5. Insert the two installation screws into the holes on the back of the scanner, then tighten the screws with the screwdriver that came with the automatic document feeder. - Page 44 6. Align the screws with the holes in the automatic document feeder. Then slide the holes over the installation screws. Make sure the small pegs below the holes on the feeder go all the way into the back of the scanner. Warning: Have someone help you lift the automatic document feeder.
-
Page 45: Scanning With The Automatic Document Feeder
10. Once the automatic document feeder is attached, you can plug in the scanner’s power cord, connect the cable, and turn on the scanner. Note: If you’re using the SCSI connection, you need to restart your computer after plugging in the feeder. - Page 46 Note: Don’t push the document into the feed path or the pages may jam. 3. Move the edge guide so it touches the edge of your paper. 4. Scan your document. Follow these guidelines to use EPSON Scan: ■ Select the Office Mode the Mode list.
-
Page 47: Fixing Document Jams
Note: You can still scan individual pages, if you want. Just lift the automatic document feeder and place your document face down on the document table. Select Document Table as the Document Source in EPSON Scan. Be sure to close the automatic document feeder before scanning. If you open it while scanning, you’ll get an error. -
Page 48: Installing The Ieee 1394 Firewire Scanner Interface Card
EPSON Scan. Don’t restart EPSON Scan until the green flashing. Note: If you attempt to preview or scan before the scanner is ready, EPSON Scan may stop responding. If this happens, restart your computer. Installing the IEEE 1394 FireWire Scanner... - Page 49 2. Remove the two screws securing the shield plate to the scanner’s optional interface slot. Then remove the plate. Put the screws and shield plate in a safe place in case you want to reinstall the shield plate later. 3. Turn the card over so that the component side is facing down, and insert it in the optional interface slot.
-
Page 50: Installing The Network Image Express Card
Epson GT-15000 Reference Guide. Follow these steps to install the card in your scanner and connect it to your network: 1. Turn off the scanner and disconnect the power cord and any cables. - Page 51 Category 5 shielded twisted-pair cable. 9. Connect the other end of the cable to your network hub. For information on configuring the scanner for your network, see the Epson Network Image Express Card User’s Guide that came with the card.
- Page 52 Using Optional Equipment...
-
Page 53: Chapter 2 Maintenance
Unplug the scanner and refer servicing to qualified service personnel if the power cord or plug is damaged, if liquid has entered the scanner, if the scanner has been dropped or the case damaged, or if the scanner does not operate normally or exhibits a distinct change in... -
Page 54: Transporting The Scanner
Warning: Make sure you have someone help you lift the automatic document feeder. 2. Turn on the scanner and wait until the carriage moves left to the home position. Then turn off the scanner. 3. Push down the transportation lock at the back of the scanner to the position. -
Page 55: Chapter 5 Solving Problems
■ Where To Get Help Tip: It’s a good idea to check Epson’s support web site periodically for possible updates to your scanner software. Visit http://support.epson.com and check to see if there is new software available, free of charge, for downloading to your... -
Page 56: Diagnosing Scanner Problems
Diagnosing Scanner Problems You can diagnose some problems by checking the scanner’s lights, as described in this section. If you don’t find the answer here, see “Problems and Solutions” on page 57. Ready light a Start button Light Ready light is on or flashing. -
Page 57: Problems And Solutions
Problems and Solutions Here are some troubleshooting tips if you’re having trouble setting up your scanner, scanning, or getting the quality you want from your scans. Scanner Problems light doesn’t come on or Ready flashes. ■ light flashes when Ready scanning is in progress. - Page 58 If you see a ! or ? mark, or the scanner appears as an Unknown Device, remove the scanner. Uninstall and reinstall EPSON Scan as described on page 64. ■ If you have a SCSI connection, turn off both your scanner and computer.
- Page 59 Disconnect the ZIP drive, restart your computer, then try scanning again. ■ If you’re using the optional automatic document feeder, run EPSON Scan in Office Mode or Professional Mode, and select ADF-Single-sided or as the ADF-Double-sided Document Source. Also, make sure the original document is inserted face up.
-
Page 60: Software Problems
Software Problems EPSON Scan doesn’t work properly. ■ Make sure your system meets the minimum requirements. See the requirements on page 71. ■ Check your computer’s memory. If you’re running other software at the same time, have many device drivers, or you’re scanning a large image, the computer may not have enough memory. - Page 61 ■ Make sure you didn’t accidentally move the document during scanning. ■ Make sure the scanner is on a flat, stable surface. The edges of the document aren’t scanned. ■ Don’t place your document right up against the edges of the document table.
- Page 62 Solving Problems Your image is too dark. ■ Increase the brightness setting in EPSON Scan Office or Home Mode. ■ Select Professional Mode and adjust the exposure using the Auto Adjust button.
- Page 63 The colors in your scanned image look different from the colors in the original document. ■ Make sure the Image Type setting in EPSON Scan is correct. ■ Try different combinations of gamma and color settings in EPSON Scan. Click the...
-
Page 64: Uninstalling And Reinstalling Epson Scan
Follow the instructions on page 16 to reinstall your software. Where To Get Help If you are having problems with EPSON Scan or your scanner, see the contact information in the section below. If you are having problems with your other software, see page 65. -
Page 65: Speak To A Support Representative
Toll or long distance charges may apply. Purchase Supplies and Accessories You can purchase accessories from an authorized Epson reseller. To find the nearest reseller, call 800-GO-EPSON (800-463-7766). Or you can purchase online at www.epsonstore.com (U.S. sales) or www.epson.ca (Canada sales). - Page 66 Solving Problems...
-
Page 67: Appendix A Specifications
600 dpi (main scan) 1200 dpi with Micro Step Drive (sub scan) * The maximum hardware resolution of 600 × 1200 dpi is achieved using Epson’s Micro Step Drive technology Maximum interpolated resolution 4800 dpi Speed (600 dpi, draft mode) Color: Grayscale: 1.3 msec/line (approx.) - Page 68 Digital halftoning AAS (Auto Area Segmentation, enable/disable selectable) 3 error diffusion modes (A, B, and C) 4 dither patterns (A, B, C, and D) for bi-level and quad-level data (2 downloadable dither patterns) Gamma correction 2 types for CRT display 3 types for printer 1 type user-defined Color correction...
- Page 69 SCSI Interface Interface type ANSI X3T9.2/375R Revision 10L (SCSI 2) Logic level TTL-compatible ID setting Selectable from 0 to 7 Terminator Internal terminator (enable/disable selectable) Connector type Two half pitch 50-pin connectors USB Interface Interface type Universal Serial Bus Specification Revision 2.0 Electrical standard Full speed mode (12Mb) and High...
- Page 70 Initialization Methods SCSI interface Hardware: Initialized when the scanner is turned on or the scanner receives a SCSI Reset signal from the SCSI interface Software: Initialized when the software sends the Esc @ (initialize the scanner command), or the scanner...
-
Page 71: Appendix B Requirements And Notices
Appendix B Requirements and Notices System Requirements The minimum system requirements are listed below. For optimum performance, a faster processor and more memory are recommended. If you’re scanning high resolution images, you need more than the minimum available hard disk space. Note: Color and tone reproduction are subject to the display capability of your computer system, including the video card, monitor, and software. -
Page 72: Important Safety Instructions
Unplug the scanner and refer servicing to qualified service personnel under the following conditions: if the power cord or plug is damaged; if liquid has entered the scanner; if the scanner has been dropped or the cabinet damaged; if the scanner does not operate normally or exhibits a distinct change in performance. -
Page 73: Fcc Compliance Statement
FCC Compliance Statement For United States Users This equipment has been tested and found to comply with the limits for a Class B digital device, pursuant to Part 15 of the FCC Rules. These limits are designed to provide reasonable protection against harmful interference in a residential installation. -
Page 74: Declaration Of Conformity
Epson Dealer or Epson Customer Care Center. You are responsible for all costs (shipping, insurance, travel time) in getting the product to the service location. - Page 75 Epson standard of quality, and at Epson’s option, the replacement may be another model of like kind and quality. Epson’s liability for replacement of the covered product will not exceed the original retail selling price of the covered product. Exchange or replacement products or parts assume the remaining warranty period of the product covered by this limited warranty.
- Page 76 Requirements and Notices...
-
Page 77: Index
Environmental requirements, 68 Epson help, 64 to 65 Store, 41, 65 EPSON Scan Home Mode, 19, 21 to 23, 33 to 34 installing, 16 to 17 Office Mode, 19, 24 to 25, 29 to 30 previewing scans, 37 to 38, 59... - Page 78 48 to 49 scanner card specifications, 69 system requirements, 48 Gamma adjustment, 27, 63 Help Epson, 64 to 65 software, 65 Histogram adjustment, 27 Home Mode, 19, 21 to 23, 33 to 34 IEEE 1394, see FireWire...
- Page 79 64 Specifications automatic document feeder, 70 electrical, 68 environmental, 68 FireWire card, 69 scanner, 67 to 70 Start button, 35 to 36 Support, 64 to 65 System requirements, 48, 71 Target Size setting, 27, 34 Technical support, 64 to 65...
- Page 80 Index...
Need help?
Do you have a question about the GT-15000 and is the answer not in the manual?
Questions and answers