Advertisement
Quick Links
SHARI?
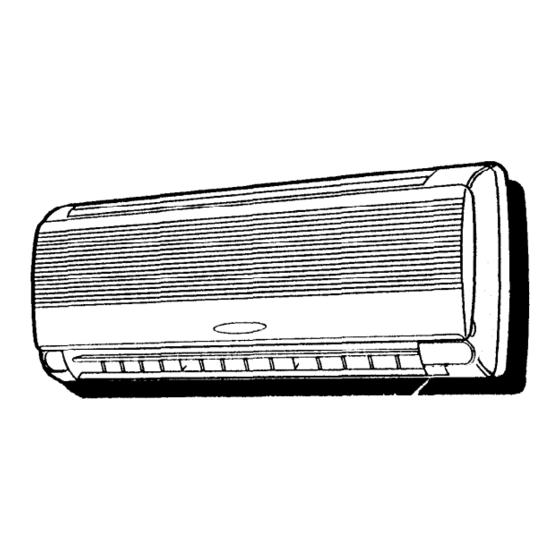
SPLIT TYPE
"I
ROOM AIR CONDITIONER
OPERATION MANUAL
CONTENTS
r\
PAGE
Thank you for purchasing a Sharp Split
Type Room Air Conditioner. Please read
this manual carefully before operating the
air conditioner, and keep this manual and
the Installation
Manual
as handy
references.
0
l
l
0
0
0
0
0
0
l
0
l
l
0
l
0
0
MAIN FEATURES . . . . . . ..r..........o....*.*.......*.,1. 2
PRECAUTIONS FOR USE ~.r~.,.~~~rrbr.
. . . .
b . . . . .
3
TIPS ON SAVING ENERGY ai.rrbrrr.a . . . .
. . . . . .
l
.
3
PART NAMES . . . . . . . . . . . . . . . ..~i.r...r.'.tr..'............ 4
USING THE REMOTE CONTROL . . . . . . . . . . . . . . 8
BASIC OPERATION
. I-
AUTO MODE ..*.......'.'r.rr.'lrr~~cb~b.~*~*...*~.
IO
,I
b
HEAT MODE . . . ..*.....*.*.*rr..$.~~s*..~...*..~.,.
12
COOL MODE . . . . . . ..'..*.tr.'r~~~~~~8bb~&~b~b....'.
DRY MODE
-" f* >*z.
:, lb,% : * 1
13
. . ?I:" ,
. . . . ..r..*.i.trrrtrr~lbbli~~~~m~b.b~b~~~kbd'
14
FAN ONLY MODE
'
"<".q'-
' ,5
.i,',iil.lii,l,liJilrSlsrllrctl
ADJUSTING THE AIR FLOW, D!,~EGTION 16
SAVE MODE
.
^
;.
. . . . . . . . . . ..rr~..~~~.~b.~b~~~~~bi~b~~b~~.~..b
17
;*<,'2 &P' '
TIMER OPERATION
TIMER ON
( <,/- ,..5_._'
*
.,'
. . . . . . . ..rb~.~.icrir~~~k#b~i~brPl.ib~.r~.ic
18
' t :_
TIMER OFF . . . . . . . . . . . ..r.r.r~t~~~~~.~~~..~'..~.b...
19
ONE-HOUR TIMER
'
':
. . . . . . ..c..~LI~.~.rl~~~b~b.........
21
USING THE AUXILIARY MODE ~~..r~..ir.i..r 22
USING TEST RUN MODE .!..*,.,..,..,; . . ...*... 22
IMPORTANT OPERATIONAL POINTS
l
., 23
MAINTENANCE . . . . . . . . . . . . ..~r.'...*irrr.............. 24
ADDITIONAL NOTES ON OPERATION .a. 26
BEFORE CALLING FOR SERVICE . . . . . . . . . . 27
SPECIFICATIONS ..*,..,.r.,..*.."r..'*.....*...,... 28
-
Advertisement

Related Manuals for Sharp AE-A126J


Summary of Contents for Sharp AE-A126J
- Page 1 ’ ‘: USING THE AUXILIARY MODE ~~..r~..ir.i..r 22 USING TEST RUN MODE .!..*,.,..,..,; ..*... 22 Thank you for purchasing a Sharp Split IMPORTANT OPERATIONAL POINTS ., 23 Type Room Air Conditioner. Please read MAINTENANCE ....~r.‘...*irrr....24 this manual carefully before operating the ADDITIONAL NOTES ON OPERATION .a.
- Page 2 AUTOMATIC OPERATION (When the mode is set to AUTO.) When using the AUTO mode,the temperature setting and mode (HEAT,COOL or DRY) are automatically selected based on the room temperature when the unit is turned on. AUTO SLEEP FUNCTION (TIMER OFF) When this feature is selected, the air conditioner will automatically...
- Page 3 USE A 230-240 VOLT POWER CIRCUIT ONLY. Using a power circuit with improper voltage and frequency can result in damage to the unit and possibly fire. Use a circuit with a 230-240 volt (+lO%) rating. VENTILATE THE ROOM OCCASIONALLY DURING USE. room, especially Open the window or door periodically to ventilate the...
- Page 4 INDOOR UNIT > @Inlet (Air) @ Filter Cover @Operation panel @I Air Filters @ Indicator Panel @ Power Supply Cord @Vertical Adjust- ment Louvre @ Horizontal Ad- justment Louvres @ Outlet (Air) @I Remote Control @Inlet (Air) @ Refrigerant Tube and Interconnect- ing Cord @ Drainage Hose...
- Page 5 ( OPERATION AND INDICATOR PANELS ) Hold the bottom corner of the fil- ter cover on both sides and gen- tly pull outwards. A TEST RUN Button Used only for checking the op- eration of the unit. Do not use this feature during normal op- eration.
- Page 6 ( REMOTE CONTROL ) (:i: TRANSMITTER Sends the control signal to the unit. DISPLAY (Liquid Crystal Display) Indicates the operation modes, set temperature, speed and time. (See p. 7) ON/OFF Button Press to start or stop the unit. THERMO. (Thermostat) Button 2 .
- Page 7 ( L.C.D. REMOTE CONTROL DISPLAY> (i., TRANSMITTING SYMBOL @ MODE SYMBOL Appears when a control signal is Indicates the set mode. being transmitted by the remote : AUTO control. The operation mode is selected based on the room temperature when the unit is turned on. (See p. @ SAVE OPERATION MODE SYMBOL...
- Page 8 LOADING BATTERIES Use two high-quality size-AAA (R03) batteries. Open the remote control cover by sliding it in the direction of the arrow.Remove remote control the cover by pressing the mark “77 ” and carefully pulling it in the direction the arrow. Insert the batteries in the compartment, making sure the @ and @ polarities...
- Page 9 CAUTION Do not expose the receiver to strong, direct sunlight, which can adversely affect its operation. In such case, close the curtains to block the sunlight. starter in the same room may interfere with Use of a fluorescent lamp with a quick transmission of the signal.
- Page 10 MODE -) (- AUTOMATIC OPERATION In this mode, the temperature setting and mode (HEAT,COOL or DRY) are auto- matically selected depending on the room temperature when the unit is turned on. Press the MODE button to select the AUTO mode. Press the ON/OFF button to start op- eration.
- Page 11 HOW THE AUTOMATIC OPERATION MODE WORKS In AUTO MODE, the HEAT, COOL, or DRY mode is selected based on the room temperature when the unit is turned on. Room temp. Automatic Operation when the unit turned on Mode Selected Thermostat Setting Below 21 “C HEAT...
- Page 12 Press the MODE button to select the HEAT mode. ( T# ) Press the ON/OFF button to start op- eration. The red OPERATION lamp of the unit will light up. Press the THERM0 button to set the desired temperature. recommended temperature range is from 20 to 23°C.
- Page 13 (COOL MODE > Press the MODE button to select the COOL mode. Press the ON/OFF button to start op- eration. The red OPERATION lamp of the unit will light up. Press the THERM0 button to set the desired temperature. recommended temperature range is from 26 to 28°C.
- Page 14 In the DRY mode, the air condi-- tioner reduces the humidity in the room without lowering the room temperature. Press the MODE button to select the DRY mode. ( & ) The fan speed and temperature set- tings are set automatically. Press the ON/OFF button to start op- eration.
- Page 15 (FAN ONLY MODE ) Press the MODE button to select the FAN ONLY mode. Press the ON/OFF button to start op- eration. The red OPERATION lamp of the unit will light up. Press the FAN button to set the de- sired fan speed.
- Page 16 VERTICAL AIR FLOW The direction of the air flow is automatically preset for the optimum effect in each mode as follows; COOL mode Horizontal air flow and DRY HEAT and FAN ONLY mode Diagonal air flow (45’1 The air flow direction can be changed as desired. Adjustment range AIR SWING MODE mode...
- Page 17 Designed for greater energy efficiency, use of this mode reduces power energy savings by up to 10% compared with the consumption and offers normal operation. To activate the SAVE mode, press the SAVE button during operation. SAVE is displayed on the remote con- trol.
- Page 18 NOTE: Before setting the timer, check to see if the current clock time is properly set. “WAKE UP” FUNCTION (TIMER ON MODE) Use the “WAKE UP” function to turn the unit on at a programmed time. Press the TIMER ON button.
- Page 19 “AUTO SLEEP” FUNCTION (TIMER OFF MODE) function to turn the unit off at a programmed time.During Use the “AUTO SLEEP” this mode,the room temperature is automatically adjusted slightly to prevent the room from becoming too hot or too cold while you sleep.(See explanation below) Press the TIMER...
- Page 20 (COMBINED USE OF ON AND OFF TIMERS) Stop + ON + obtain the desired room temperature 530 p.m. and to stop operation at 1 I:00 p.m. TIMER ON to 5:30 p.m. Set the The yellow TIMER lamp on the unit lights up. An audible sound indicates that the unit has received the signal.
- Page 21 When ONE-HOUR TIMER is set, the unit will turn off automatically after one hour. 1 Press the ONE HOUR TIMER button. “1 H” will be displayed on the remote control. The unit will operate for one hour. off the unit within one hour, press the To turn ON/OFF button.
- Page 22 Use this mode when the remote control is not available. TO TURN ON Lift the panel of the indoor unit and press the AUX. button on the operation panel. red OPERATION lamp on the unit will light up and the unit will start operating in the AUTO mode. The fan speed and temperature setting are set to AUTO.
- Page 23 AIR CONDITIONER OPERATION DURING A built-in protective device may prevent the unit from operating when the ambient temperature is extremely high or low. Dew may form on the air outlet when the unit operates continuously in the COOL or DRY mode when the humidity is over 80%. 3-MINUTE PROTECTION After the unit has been turned off, a protective...
- Page 24 off the circuit Be sure to unplug the power cord from the wall outlet turn breaker before performing any maintenance. CLEANING THE FILTERS The air filters should be cleaned every 2 weeks. Clean the filters once a week, how- ever, if there is a lot of dust in the room. TURN OFF THE UNIT.
- Page 25 SEASONAL POST- SEASONAL INSPECTION OPERATION CHECK RUN FAN FOR HALF A DAY ALWAYS INSTALL THE FILTERS When you have finished using the unit for the season, run it in the FAN ONLY If the unit operates without a filter in mode for about half a day to allow the place, dust can enter the machine mechanism...
- Page 26 UNIT. THE FOLLOWING ARE NORMAL CONDITIONS FOR THE UNIT DOES NOT OPERATE LOW NOISE A soft, swishing noise can be heard dur- If you restart the air conditioner within 3 ing operation or immediately after the minutes after turning it off, or change the unit is turned off.
- Page 27 If the unit appears to be malfunctioning, check the following points before calling for service. IF THE UNIT FAILS TO OPERATE Check to see if the circuit breaker has tripped or the fuse has blown. IF THE UNIT FAILS TO COOL THE ROOM PROPERLY Check the filter.
- Page 28 AY-A126J Models AE-A126J 230-240V Rated A.C.voltage 50Hz Rated frequency ( 3.50kW 1 Cooling Capacity 1 4.1OkW 1 Heating Capacity SHARP CORPORATION OSAKA, JAPAN TINSEA JBRO (TL) 6C0...