Table of Contents
Advertisement
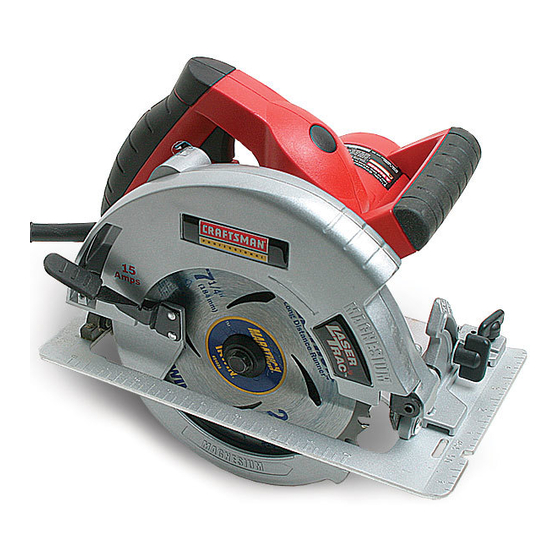
Owner's Manual
CRRFTSMR
LL
I
'
_
IL
_
L
:
P
R
0
F E S
S
!
O
H
A
L
71/4=in. CIRCULAR
with Laser Trac ®
Model No.
320.28060
SAW
CAUTION:
Read, understand
and follow
alt Safety Rules and Operating
instructions
in this manual before using this product
• SAFETY
° ASSEMBLY
• OPERATION
° MAINTENANCE
• ESPA_IOL
Sears, Roebuck and Co., Hoffman
Estates, IL 60179 U.S.A.
Advertisement
Table of Contents

Related Manuals for Craftsman 320.28060


Summary of Contents for Craftsman 320.28060
- Page 1 Owner's Manual CRRFTSMR F E S 71/4=in. CIRCULAR with Laser Trac ® Model No. 320.28060 • SAFETY ° ASSEMBLY • OPERATION CAUTION: Read, understand and follow ° MAINTENANCE alt Safety Rules and Operating instructions • ESPA_IOL in this manual before using this product Sears, Roebuck and Co., Hoffman Estates, IL 60179 U.S.A.
- Page 2 Page Repair Parts ..........Pages 27-29 Service Numbers .......... Back cover ONE FULLYEAR WARRANTY ON CRAFTSMAN PROFESSIONAL CIRCULAR SAW tf this product fails due to a defect in material or workmanship within one year from the date of purchase, RETURN...
-
Page 3: Safety Precautions
WARNING: BE SURE to read and understand all instructions. Failure to follow all instructions listed below may result in electric shock, tire and!or serious personal injury SAFETY PRECAUTIONS FOR LASER This saw has a built-in laser light.. The laser is a Class Ilia and emits output power of a maximum 1mW and 400nm - 700nm wavelengths. -
Page 4: Work Area Safety
SAFETY PRECAUTIONS FOR LASER cont. 6. DO NOT use on surfaces such as sheet steel that have a shiny, reflective surface_ The shiny surface could reflect the beam back at the operator° 7. ALWAYS be aware that laser light reflected off of a mirror or any other reflective surfaces can also be dangerous. -
Page 5: Personal Safety
ELECTRICAL SAFETY cont. 5. If operating the power tool in damp locations is unavoidable, ALWAYS use a Ground Fault Circuit Interrupter to supply power to your tool. ALWAYS wear electrician's rubber gloves and footwear in damp conditions, 6. DO NOT expose power tools to rain or wet conditionsr Water entering a power tool will increase the risk of electric shock. - Page 6 PERSONAL SAFETY cont. 3. ALWAYS avoid accidental starting. BE SURE switch is in the "Off" position before plugging in, DO NOT carry tools with your finger on the switch Carrying tools with your finger on the switch or plugging in tools that have the switch in the "On" position invites accidents_ 4.
-
Page 7: Service Safety
TOOL USE AND CARE SAFETY cont, I /t", WARNING: USE OF ACCESSORIES THAT ARE NOT RECOMMENDED FOR USE I WITH THIS TOOL MAY CREATE A HAZARDOUS CONDITION 8. ALWAYS use only accessories that are recommended for this tool. Accessories that may be suitable for one toot may become hazardous when used on another tool. - Page 8 SAFETY RULES FOR CIRCULAR SAWS cont. 7. NEVER hold the piece being cut in your hands or across your legs. tt is important to support the work properly in order to minimize body exposure, blade binding, or loss of control 8.
- Page 9 Ways to PreventKickback 1.ALWAYS maintaina firm grip with bothhandson the sawandpositionyourbodyand armsto allowyou to resist KICKBACK forces. KICKBACK forces can be controlled by the operator, if the proper precautions are taken. 2. If the blade is binding, or when you are interrupting a cut for any reason, ALWAYS release the trigger and hold the saw motionless...
- Page 10 ADDITIONAL RULES FOR SAFE OPERATION WARNING: BE SURE to read and understand atl instructions. Failure to follow all instructions listed below may result in electric shock, fire and/or serious personal injury° 1. Know your power tool. Read operator's manual carefully. Learn the applications limitations, as well as the specific potential hazards related to this tool.
- Page 11 ADDITIONAL RULES FOR SAFE OPERATION conL 9_ALWAYS inspect and remove all nails from lumber before sawing. 10. DO NOT use the tool while tired or under the influence of drugs, alcohol or any medication. 11_ SAVETHESE INSTRUCTIONS. Refer to them frequently and use them to instruct others who may use this toolo If someone...
- Page 12 UNPACKING Your circular saw has been shipped completely assembled, except for the blade which is packed unassembled, inspect the saw carefully to make sure that no breakage or damage has occurred during shipping. If any parts are damaged or missing return the saw to your nearest Sears Store to have it replaced, i Z_WARNING: If any parts are missing, DO NOT operate this saw until the missing parts...
-
Page 13: Removing The Blade
MOUNTING THE BLADE TO SAW cont. '10. Replace the "D" washer (See Fig 1).. 11. Firmly hold down spindle lock button as you replace blade screw and hand tighten it in a clockwise direction Spindle (See Fig. 1), Then use blade wrench to tighten blade screw thoroughly., 12. - Page 14 Fig. 2 Laser Light OnlOff Button Asist Handle Light Aperture Lower Blade NK_'_ __X, Upper Blade Guard Scale Base_ 7_!_ Adjustment Knob Lower Blade Guard _____ Guide Retaining Screw Blade _ "_ _Edge Guide Trigg Depth-Of-Cut Scale Spindle Lock Butte ustment _Tighten Input...
- Page 15 CAUTION: DO NOT let familiarity with your saw make you careless, Remember that ! aca_fe_s f_aot_on ofasecond issu.icient tocause severe hjury Before attempting to use any toot, be sure to familiarize yourself with all the operating features and safety instructions Using the Laser Light Feature (see Figs.
-
Page 16: Saw Blades
SAW BLADES All saw blades need to be kept cIean, sharp and properly set in order to cut efficiently Using a dull blade places a heavy load on the saw and increases the danger of kickback.. Keep extra blades on hand, so sharp blades are always available. Gum and wood pitch hardened on the blade slows the saw down Use gum and pitch remover, hot water or kerosene to remove them DO NOT use gasoline.. - Page 17 KICKBACK Kickback o ccurswhenthebladestallsrapidly andthesawisdrivenbacktowards you.Blade stallingis caused by anyactionwhichpinches thebladeinthewood. IMPORTANT: Thebest guard against kickback is to avoid dangerous practices, ,, ,pJ=,pI=L.,,=I,=LI,LU, DANGER: ALWAYS release trigger switch immediately if the blade binds or the saw stalls. Kickback could cause you to lose control of the saw Loss of control can lead to serious injury., Fig.
-
Page 18: Depth-Of-Cut Adjustment
To Lessen the Chance of Kickback: cont. 2, ALWAYS inspect the workpiece for knots or nails BEFORE beginning to cut° NEVER saw into a knot or nail. 3. Make straight cuts_ ALWAYS use a straight edge guide when rip cutting, This will help prevent twisting the blade in the cuL 4. -
Page 19: To Adjust Blade Depth
TO ADJUST BLADE DEPTH 1. Unplug the saw ,,,,,, ,,,,,,,,,,,,,,,,,un=, Z_ WARNING: Failure to unplug the saw could result in accidental starting causing POSSibleserious personal iniury_ ,,,,,,,1 ,uuHuu, ......2_ Raise depth adjust lever to loosen, (See Fig, 10).. 3. Determine the desired depth of cut, 4. - Page 20 TO HELP MAINTAIN CONTROL cont, I z_ WARNING: If the cord hangsup on the workplace during a cut, release the trigger switch. " immediately To avoid injuryunplug the saw and move the cord to prevent it from hangtng up again i,,l,,,,,,, ,,Jl,u,l,,, ,,,,,...
-
Page 21: Making Bevel Cuts
MAKING CROSS CUTS ORRIPCUTS 1.Whenmaking cross or ripcuts,alignyourlineofcut withtheouterbladeguidenotchonthe baseof the Fig, 14 _--nl saw(SeeFig 14) 2.Sinceblade thicknesses vary,ALWAYS makeatriaicutin scrapmaterial alongtheguideline todetermine howmuch, if any,theguideline mustbeoffset t o getanaccurate cut i Laser Light /° on ine of cut Align Outer Blade Guide Notch on Saw Base with Line of Cut (as shown) When Making Cross Cuts or Rip Cuts... -
Page 22: Bevel Setting
TO ADJUSTTHE BEVEL SETTING 1. Unplug the saw, WARNING: Failure to unplug the saw could result in accidental starting causing possible serious personal injury 2, Loosen bevel adjustment knob (See Fig, 17) 3. Raise the motor housing end of the saw until you reach the desired angle setting on the bevel scale (See Fig, 17), 4. - Page 23 TO MAKE POCKET CUTS WARNING: ALWAYS adjust bevel setting to zero before making a pocket cut Attempting a pocket cut at any other setting can result in a toss of control of the saw, possibly H,n,,,,,,, =,,,,,,,,nit, uJ= = , H,,,u,,,,,, causing serious,i,n!ury ........
- Page 24 MAKING RIP CUTS cont. Using The Edge Guide Your saw comes with an edge guide that alfows you to make parallel cuts in a sheet of wood To Attach the Edge Guide 1. Unplug the saw, ,i.=, Z_ WARNING: Failure to unplug the saw could result in accidental starting I causing possible serious personal injury.
- Page 25 SERVICE result in misplacing of internal wires and components, which could cause a serious I z_ WARNING: Preventive maintenance performed by unauthorized personnel may hazard. H.,.,,, ii ,11111 IIIN,,. i Z_ WARNING: To avoid accidents, ALWAYS disconnect the tool from the power source I BEFORE cleaning or performing any maintenance - All service that requires opening the saw MUST only be performed by a Sears Service Center All motor part represent an important part of the double insulation system and MUST only be...
-
Page 26: Extension Cords
Thefollowing recommended accessories arecurrently a vailable at yourlocal S earsStore, ....ii ,,Ju,,,,, WARNING: The use of attachments or accessories that are not recommended might be dangerous and could result in serious injury EXTENSION CORDS Sears offers a targe selection of extension cords that help extend your working range The use of any extension cord will cause some toss of power, To keep the loss at a minimum and to prevent overheating, use an extension cord that is heavy enough to carry the current that the tool will draw,... - Page 27 CIRCULAR SAW WITH LASER TRAC - MODEL NUMBER 320.28060 The Model Number will be found on the Nameplate. Always mention the Modet Number when calling about your toot. t..O _o _ < < 030303o_ 03_o_ [_g03 03'i ¢0 03 03 __n_-iF-___ ___ _ -._ _0303_r--00=io...
- Page 28 CIRCULAR SAW WITH LASER TRAC-- MODEL NUMBER 320.28060 The Model Number will be found on the Nameplate, Always mention the Model Number when calling about your t0ol i:,= < -=o_ _o "r-O BP--- _oo _1 _J _.1 _/_.1 _ _or-- r-- r--r,-ir- i_ r--...
- Page 30 NOTES...