Table of Contents
Advertisement
Operator's
Manual
I CRAFTSMAN °
1.9 cu.in./32cc
2-Cycle
175 MPH/370
CFM
GASOLINE
BLOWERNAOUUM
Model No.
358.797251
WARNING:
Read and follow
all Safety
Rules and Operating
Instructions
before first use of this product.
For answers
to your questions
about this product:
Call 7 am-7
pm, Mon.-Sat.,
or 10 am-7
pm, Sun.
1-800-235-5878
(Hours
listed are C entral
Time)
Sears,
Roebuck
and Co., Hoffman
Estates,
IL 60179 U.S.A.
530088701
7/28/00
Advertisement
Table of Contents

Related Manuals for Craftsman 358.797251


Summary of Contents for Craftsman 358.797251
- Page 1 Operator's Manual I CRAFTSMAN ° 1.9 cu.in./32cc 2-Cycle 175 MPH/370 GASOLINE BLOWERNAOUUM Model No. 358.797251 WARNING: Read and follow all Safety Rules and Operating Instructions before first use of this product. For answers to your questions about this product: Call 7 am-7 pm, Mon.-Sat.,...
- Page 2 Maintenance Spanish Service & Adjustments Parts and Ordering Back FULL ONE YEAR WARRANTY ON CRAFTSMAN ® GAS BLOWER For one (1) year from date of purchase, when this Gas Blower is maintained, lubri- cated, and tuned up according to the instructions...
- Page 3 • Mix and pour fuel inanoutdoor area; people, animals, glass, and solid objects store f uel inacool, dry, well ventilated such as trees, automobiles, walls, etc. place; use anapproved, marked con- The force of air can cause rocks, dirt, or tainer for a ll f uel p urposes.
-
Page 4: Blower Assembly
SPECIAL NOTICE: For u sers onU.S. nozzles must beassembled tounit t obe Forest Land a nd insome s tates, including infull c ompliance with regulations. California(Public Resources Codes 4442 SPECIAL NOTICE: Exposure tovibra- and 4443), Idaho, Maine, Minnesota, tions t hrough prolonged use ofgasoline Jersey, Oregon, and Washington: Certain... - Page 5 6. Insert the elbow tube into the blower VACUUM ASSEMBLY VACUUM BAG ASSEMBLY outlet by placing tabs (inside blower If you have already assembled your unit outlet) in grooves and turning coun- for use as a blower, remove the blower terclockwise until locked in position.
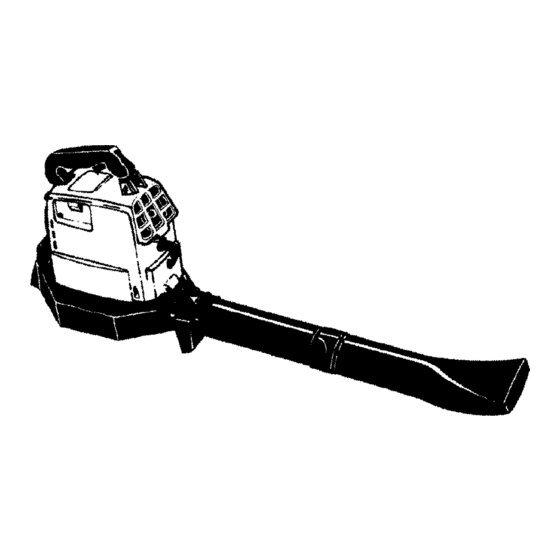
- Page 6 KNOW YOUR BLOWER READ THIS OPERATOR'S MANUAL AND SAFETY RULES BEFORE OPERATING YOUR UNIT Compare illustrations with your unit to familiarize yourself with the location of various con- trois and adjustments. Save this manual for future reference. MULCHING BLADES Your blower is equipped with mulching blades as a standard feature.
- Page 7 CLEAN UP! Dispose of debris in tive in minimizing the formation of fuel trash receptacles. gum deposits during storage. Craftsman OPERATING POSITION brand oil is already blended with fuel sta- bilizer. See the STORAGE section for Protection additional information.
- Page 8 airintake and thrown out t hrough the dis- 8. Squeeze and release the throttle trig- charge opening, damaging the unit o r ger to release the throttle lock and property, orcausing serious injury toby- allow engine to idle. standers orthe operator. NOTE: If engine dies with choke at OFF CHOKE position, move the choke lever to...
- Page 9 CLEAN AIR FILTER WARNING: Stop engine and be Screw Air Filter sure the impeller blades have stopped Cover turning before opening the vacuum inlet door or attempting to insert or remove the vacuum or blower tubes. The rotat- ing blades can cause serious injury. Al- Filter ways disconnect the spark plug before...
- Page 10 ADJUSTING PROCEDURE We recommend all service and adjust- CAUTION: Do not force plastic limiter ments not listed in this manual be per- caps on screws beyond the built-in formed by your Sears Service Center. stops or damage will occur. CARBURETOR ADJUSTMENT Initial Settings Carburetor...
- Page 11 Run engine at least 5 minutes after ad- • Allow engine to cool, and secure the ding stabilizer. unit before storing or transporting. Craftsman 40:1,2-cycle engine oil (air • Store unit and fuel in a well ventilated cooled) is already blended with fuel sta- area where fuel vapors cannot reach bilizer.
- Page 12 TROUBLESHOOTING TABLE WARNING: Always stop unit and disconnect spark plug before performing any of the recommended remedies below other than remedies that require operation of the unit. TROUBLE CAUSE REMEDY Engine will not 1. Ignition switch off. 1. Move Ignition switch to ON.
- Page 13 Emissions Control Warranty Parts List) is RIOD: Any warranted part which is not defective or a defect in the materials scheduled for replacement as required workmanship of the engine causes the maintenance, or which is scheduled only failure of such an emission related part, for regular inspection to the effect of "re-...