Table of Contents
Advertisement
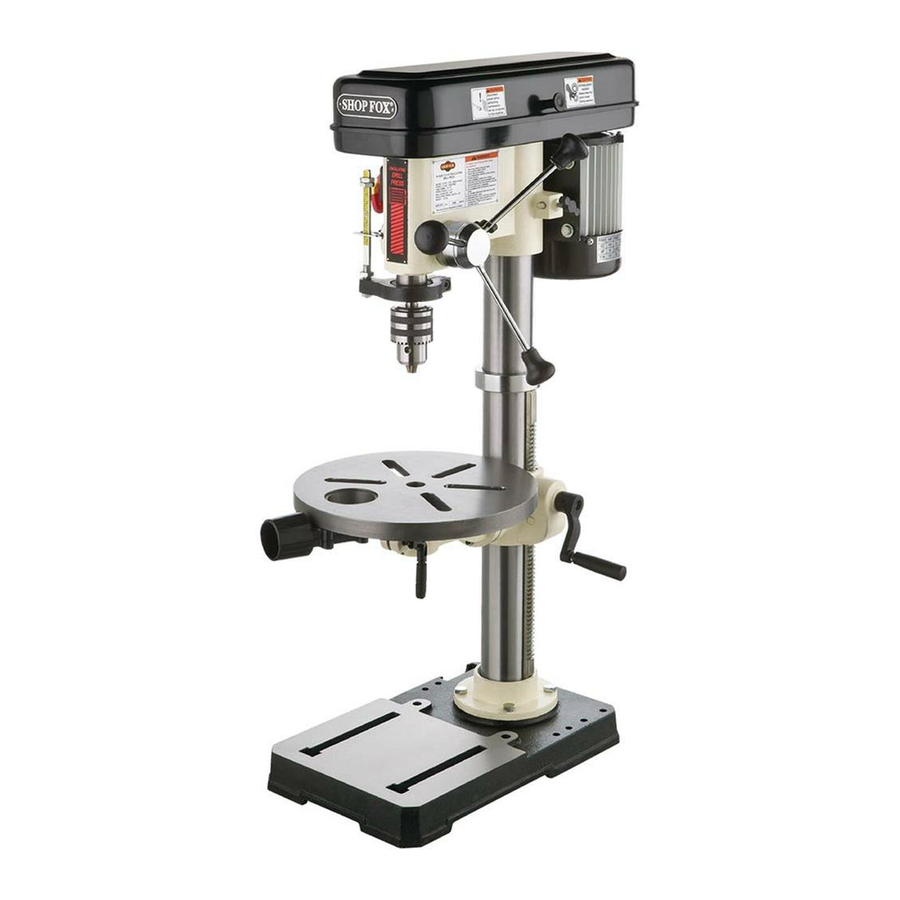
MODEL W1668
13
⁄
" OSciLLAtiNg
1
4
DRiLL PRESS
OWNER'S MANUAL
Phone: (360) 734-3482 • Online technical Support: tech-support@shopfox.biz
cOPYRigHt ©2000 BY WOODStOcK iNtERNAtiONAL, iNc. REViSED APRiL, 2008 (BL)
WARNiNg: NO PORtiON OF tHiS MANUAL MAY BE REPRODUcED iN ANY SHAPE OR FORM WitHOUt
tHE WRittEN APPROVAL OF WOODStOcK iNtERNAtiONAL, iNc.
Printed in china
#4725cR
Advertisement
Table of Contents

Related Manuals for Shop fox SHOP FOX W1668


Summary of Contents for Shop fox SHOP FOX W1668
- Page 1 MODEL W1668 ⁄ " OSciLLAtiNg DRiLL PRESS OWNER'S MANUAL Phone: (360) 734-3482 • Online technical Support: tech-support@shopfox.biz cOPYRigHt ©2000 BY WOODStOcK iNtERNAtiONAL, iNc. REViSED APRiL, 2008 (BL) WARNiNg: NO PORtiON OF tHiS MANUAL MAY BE REPRODUcED iN ANY SHAPE OR FORM WitHOUt tHE WRittEN APPROVAL OF WOODStOcK iNtERNAtiONAL, iNc. Printed in china #4725cR...
-
Page 3: Table Of Contents
CONTENTS OPERATIONS........23 INTRODUCTION ........2 Drill Press ........23 Woodstock Technical Support ....2 Drill/Drum Changes ......24 Specifications ........3 Using the Oscillator ......25 SAFETY ..........4 MAINTENANCE ........27 Standard Safety Instructions ....4 General .......... 27 Additional Safety for Drill Presses ..... 6 Lubrication ........ -
Page 4: Introduction
Woodstock International, Inc. is committed to customer satisfaction. Our intent with this manual is to include the basic information for safety, setup, operation, maintenance, and service of this product. -
Page 5: Specifications
W1668 13 ⁄ " Oscillating Drill Press Specifications Motor Type: ..........TEFC Capacitor Start Induction Motor: ........... ⁄ HP, 110V, 9 Amp., Single Phase ⁄ 60 Hz RPM: ..................1725 Power Transfer: ..............V-Belt Drive Bearings: ..........Shielded & Lubricated Ball Bearings Switch: ........ -
Page 6: Safety
W1668 13 ⁄ " Oscillating Drill Press... - Page 7 W1668 13 ⁄ " Oscillating Drill Press...
-
Page 8: Additional Safety For Drill Presses
W1668 13 ⁄ " Oscillating Drill Press Additional Safety for Drill Presses READ and understand this USE this and other machinery with caution entire instruction manual and respect. Always consider safety first, before using this machine. as it applies to your individual working Serious personal injury conditions. -
Page 9: Avoiding Potential Injuries
W1668 13 ⁄ " Oscillating Drill Press Avoiding Potential Injuries Figure 3. Keep fingers away from spinning drill Figure 1. Never drill while holding the bits, cutters, and sanding surfaces. workpiece by hand. Figure 2. Remove switch safety key when Figure 4. -
Page 10: Electrical
W1668 13 ⁄ " Oscillating Drill Press ELECTRICAL The machine must be properly set up before it is safe to operate. DO NOT connect this machine to the power source until instructed to do so in the "Test Run" portion of this manual. 110V Operation The Model W1668 is wired for 110V operation. -
Page 11: Setup
W1668 13 ⁄ " Oscillating Drill Press SETUP Unpacking This machine has been carefully packaged for safe trans- portation. If you notice the machine has been damaged during shipping, please contact your authorized Shop Fox dealer immediately. Inventory The following is a description of the main components shipped with the Model W1668. -
Page 12: Base And Column
W1668 13 ⁄ " Oscillating Drill Press Base and Column The base and column must be securely mount- ed, so the machine will not fall over. To install the base and column, do these steps: 1. Position the drill press base on a flat and stable surface. -
Page 13: Table Support
W1668 13 ⁄ " Oscillating Drill Press Table Support When secured to the column, the table support supports the table, provides smooth table height adjustment, and locks in position with firm lever torque. Additionally, when the table 12mm Lock Handle is rotated, the rack will slide with the table support. -
Page 14: Table
W1668 13 ⁄ " Oscillating Drill Press 6. Position the rack so the long un-toothed end is facing upward (see Figure 13). Long Un-toothed 7. Insert the rack into the table support Rack End is bracket so the teeth face out and mesh Facing Upward with the pinion (see Figure 13). -
Page 15: Headstock
W1668 13 ⁄ " Oscillating Drill Press Headstock The headstock must be tightened in position with two set screws, so the headstock is aligned Belt Cover Knob with the drill press foot for balance and weight distribution. DO NOT over tighten the set screws and strip the threads or bend the col- umn. -
Page 16: Drill Chuck
W1668 13 ⁄ " Oscillating Drill Press Drill Chuck The drill chuck is seated to the spindle with a JT-33 tapered surface and a screw. To install the drill chuck, do these steps: 1. Clean the drill chuck and spindle with min- eral spirits and follow all safety warnings on the container. -
Page 17: Adjustments
W1668 13 ⁄ " Oscillating Drill Press ADJUSTMENTS Belt Tension Motor Lock Screw The drill press main drive belts last a long time; however, during machine life, a belt may stretch slightly which can cause the pulleys to slip under a load. You will then need to adjust the motor-to-idler pulley belt tension to com- pensate for this normal stretching. -
Page 18: Feed Shaft Spring Tension
W1668 13 ⁄ " Oscillating Drill Press Feed Shaft Spring Tension The feed shaft return spring is adjusted at the factory; however, during the life of the drill Cover Nut press you may want to adjust the feed shaft return spring to a stronger return pressure. MAKE SURE your machine is unplugged during... -
Page 19: Quill-Shaft Screw
W1668 13 ⁄ " Oscillating Drill Press 7. Engage the next available spring-cover lock slot with the locking lug, and hold the spring lock cover tightly against the side of the headstock (see Figure 27). Cover Nut 8. Snug the cover nut against the spring cover just until the nut stops, and then back-off the nut approximately ⁄... -
Page 20: Table Height And Tilt
W1668 13 ⁄ " Oscillating Drill Press Table Height and Tilt You can adjust the table height and tilt to accommodate for workpiece height or achieve special drilling/sanding angles. You can also move the table out of the way and use the drill press base as a table for drilling/sanding. -
Page 21: Drilling Speed
W1668 13 ⁄ " Oscillating Drill Press Drilling Speed The Model W1668 13 ⁄ '' Oscillating Drill Press has 12 speeds ranging from 250 to 3050 RPM. Motor Lock Screw Refer to the speed charts located under the belt guard while following the instructions below. -
Page 22: Drill Press Rpm Chart
W1668 13 ⁄ " Oscillating Drill Press Drill Press RPM Chart Use Figure 35 to select the optimum motor-to-spindle pulley ratio for drilling, cutting, and sanding operations. The belt setting in the example in Figure 36 shows the spindle belt in the #1 spindle pulley position and the motor belt in the #7 motor pulley location. - Page 23 W1668 13 ⁄ " Oscillating Drill Press -21-...
- Page 24 W1668 13 ⁄ " Oscillating Drill Press -22-...
-
Page 25: Operations
W1668 13 ⁄ " Oscillating Drill Press OPERATIONS Starting the Drill Press Once assembly is complete and adjustments are done to your satisfaction, you are ready to start the drill press. Every time you start the Keep your shop “Child drill press, you should follow these basic Safe.”... -
Page 26: Drill/Drum Changes
W1668 13 ⁄ " Oscillating Drill Press Drill/Drum Changes NEVER troubleshoot or adjust the machine while it is running. Wait until the machine is turned off, unplugged and all working parts have come to a stop before proceeding! To change drill bits and sanding drums, do these steps: 1. -
Page 27: Using The Oscillator
W1668 13 ⁄ " Oscillating Drill Press Using the Oscillator One of the great features of the Model W1668 ⁄ '' Oscillating Drill Press is its sanding capa- bility. The drill press can be converted from drilling operations to sanding operations in just a few steps. - Page 28 W1668 13 ⁄ " Oscillating Drill Press 7. Remove the mandrel nut from the mandrel. 8. Install the sanding drum, sandpaper, and top and bottom mandrel washers on the Bottom Mandrel Insert Washer mandrel, then secure with the mandrel nut, as shown in Figure 46. 9.
-
Page 29: Maintenance
W1668 13 ⁄ " Oscillating Drill Press MAINTENANCE Table and Base General Keep the table and other unpainted surfaces Periodic maintenance on your Model W1668 ⁄ '' Oscillating Drill Press will ensure its opti- rust-free with regular applications of products mum performance. -
Page 30: Troubleshooting
W1668 13 ⁄ " Oscillating Drill Press Troubleshooting Use this table to isolate and correct any problems with your drill press. If you cannot correct a problem, contact Woodstock International, Inc. at 1-360-734-3482 or tech-support@shopfox.biz. Page 17 -28-... -
Page 31: Wiring Diagram
W1668 13 ⁄ " Oscillating Drill Press Wiring Diagram -29-... -
Page 32: Drill Press Accessories
Dealer. If you do not have a dealer in your area, these products are also available through online deal- ers. Please call or e-mail Woodstock International Inc. Customer Service to get a current listing of deal- ers at: 1-800-545-8420 or at sales@woodstockint.com. - Page 33 ⁄ " pilot drill. Woodstock offers a full line of Brad Point Bits,Tenon/Plug Cutters, Countersink Bits, and Stubby Drill Bits to satisfy every need. Whether for do-it-yourselfers or professional woodworkers, you can depend on Woodstock International Inc. to manufacture a useful selection of drilling and cutting tools.
-
Page 34: Parts
W1668 13 ⁄ " Oscillating Drill Press PARTS W1668 Parts Breakdown -32-... -
Page 35: Parts List
W1668 13 ⁄ " Oscillating Drill Press Parts List REF PART # DESCRIPTION REF PART # DESCRIPTION X1668001 BASE X1668057 PUSH ROD X1668003 COLUMN X1668058 SPRING X1668003-1 COLUMN & COLUMN FLANGE ASSEMBLY X1668059 RUBBER WASHER XPB32M HEX BOLT M10-1.5 X 25 X1668060 OSCILLATING MECHANISM X1668007A... - Page 36 W1668 13 ⁄ " Oscillating Drill Press REF PART # DESCRIPTION REF PART # DESCRIPTION X1668103 TABLE INSERT 1" I.D. XD2677003 RUBBER DRUM 2" X 4-1⁄4" X1668104 TABLE INSERT 1 3/8" I.D. XD2677002 RUBBER DRUM 1-1⁄2" X 4-1⁄4" X1668105 TABLE INSERT 1 7/8" I.D. XD2677001 RUBBER DRUM 1"...
-
Page 37: Warranty Registration
Warranty Registration Name ___________________________________________________________________________________ Street __________________________________________________________________________________ City _________________________ State ___________________________Zip ________________________ Phone # ______________________ Email___________________________Invoice # ___________________ Model #_________Serial #______________Dealer Name__________________Purchase Date___________ The following information is given on a voluntary basis. It will be used for marketing purposes to help us develop better products and services. - Page 38 FOLD ALONG DOTTED LINE Place Stamp Here WOODSTOCK INTERNATIONAL INC. P.O. BOX 2309 BELLINGHAM, WA 98227-2309 FOLD ALONG DOTTED LINE TAPE ALONG EDGES--PLEASE DO NOT STAPLE...
Need help?
Do you have a question about the SHOP FOX W1668 and is the answer not in the manual?
Questions and answers