
Related Manuals for Tysso PRP-080 Series


Summary of Contents for Tysso PRP-080 Series
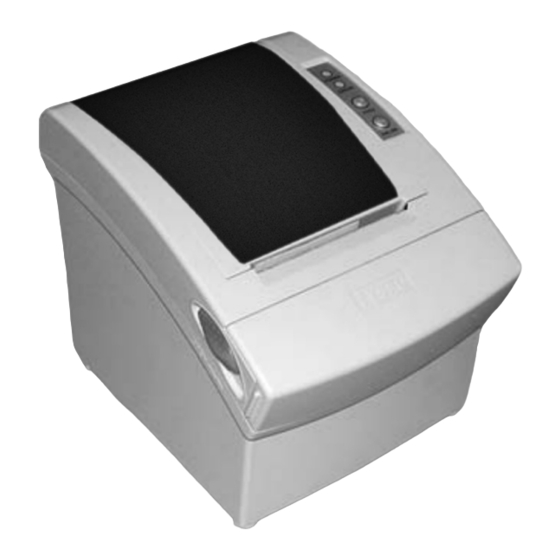
- Page 1 User's Manual PRP-080 Series THERMAL RECEIPT PRINTER Specifications subjects to change without notice...
-
Page 2: Table Of Contents
2. Quick Start 2.1) Unpacking & Parts Identification ... 4 2.2) Loading the Paper Roll ... 5 3. Printer Interface and Connection 3.1) Connecting the Interface Cable ... 8 3.2) Connecting to a Cash Drawer ... 8 3.3) Connecting the AC Adapter ... -
Page 3: General Information
14. Print with 90 rotation not supported 2. PRP-080II (Advanced) Maximum printing speed 160mm/sec (576 dots or 150mm/sec 512 dots Fully-compatible with EPSON ESC/POS commands (see PRP-080 command sets for programming reference Characters can be scaled up to 8 times larger than standard size (*... - Page 4 14. Print with 90 rotation not supported 2. PRP-080II (Advanced) Maximum printing speed 160mm/sec (576 dots or 150mm/sec 512 dots Fully-compatible with EPSON ESC/POS commands (see PRP-080 command sets for programming reference Characters can be scaled up to 8 times larger than standard size (*...
-
Page 5: Quick Start
2.2) Loading the Paper Roll a. Make sure that the paper roll matches the printer's specification. Do not use paper rolls that have the paper glued to the core because the printer cannot detect the paper end correctly. - Page 6 While observing the direction of the roll, set the paper roll into the hollow, and pull on the leading edge of the paper toward you as shown: d. Close the cover: When closing the cover, press the center of printer cover firmly to prevent paper miss-loading...
-
Page 7: Printer Interface And Connection
Connect the interface cable to the connector on the rear panel of the printer. c. In the case of a serial interface, tighten the connector screws. In the case of a parallel interface, fasten the connector clasps. -
Page 8: Configuration
· Red light OFF: Indicates that the printer is offline. · Red light flashes: Indicates the printer error(s) such as out of paper, paper jammed, or printer cover is not closed properly b. PRP-080II (Advanced) 1. Power (POWER) LED: Green... -
Page 9: Printer Self Test
Windows HyperTerminal to test the printer connection. 4.4) Driver Installation 1. To install the PRP-080 (*) driver, please insert the bundled CD disk into the CD-ROM drive. 2. In the CD-Rom menu, please go to Receipt Printer > PRP-080 and double click the setupEN 4.0.exe file to begin the driver installation process and... -
Page 10: Safety And Maintenance
9. Install the printer on the stable surface. -Choose a firm, level surface where the printer will not be exposed to vibration. 10. Do not use the printer when it is out of order. This can cause a fire or an electrocution. -
Page 11: Appendix
160 mm/second, maximum (at 24V, 20C (68F), Density level 2. Speeds are switched automatically depending on the voltage applied to the printer and head temperature conditions.) NOTE: There may be variations in printing after switching the mode of the printing speed. To prevent this for logo printing with ESC command, using a downloaded bit image is recommended. -
Page 12: Environmental Conditions
Operating: 10 to 90% RH Storage: 10 to 90% RH (except for paper) NOTE: If the printer is not used for a long time with paper installed, some part of the printing may be light due to the deformation of the paper. If the... - Page 13 XON/XOFF Host Printer receives data from host Printer Indicates printer current status, whether the printer is Busy or Ready to receive data Signal ground Printer Same as RTS (pin 4) b. IEEE 1284 Bidirectional Parallel Interface(Parallel Interface Specifications) b.1) Parallel Specifications...
- Page 14 2.2) Connectors a. Interface Connectors Refer to Interface explain. b. Power Supply Connector This connector is used to connect the printer to an external power source. Power Supply Connector Pin Assignments Pin Number Signal Name +24 VDC Shell Frame GND c.
-
Page 15: Command Lists
General Printer Commands Command Lists: Command Code Description Function Description (Hex) Horizontal tab Print and line feed Print and carriage return ESC SP n 1B 20 n 0 n 255 Set right-side character spacing ESC ! n 1B 21 n 0 n 255... - Page 16 FS S n1 n2 FS W n Command classification Executing: Printer executes the command, which does not then affect the following data. Setting: Printer uses flags to make settings, and those settings affect the following data. Name PRP-080I (Standard) General pulse...
-
Page 17: Command Classification
Command classification Executing: Printer executes the command, which does not then affect the following data. Setting: Printer use flags to make setting and those setting affect the Note: Commands for International Fonts ESC R n Select an International Character Set... - Page 18 1. To install the PRP-080 Default Code Page Setting utility, please insert the bundled CD disk into the CD-ROM drive. 2. In the CD-Rom menu, please go to Receipt Printer > PRP-080 > Code Page and double click the setup.exe file to begin the installation process and follow the installation instructions.
- Page 19 Optional multilingual character model supports printing with one of the following characters: a. B - Traditional Chinese (Big 5) b. G - Simplify Chinese (GB) c. K - Korean d. J- Japanese Kanji (JIS) To enable/disable the multilingual character code use the following commands: (*) &...
Need help?
Do you have a question about the PRP-080 Series and is the answer not in the manual?
Questions and answers