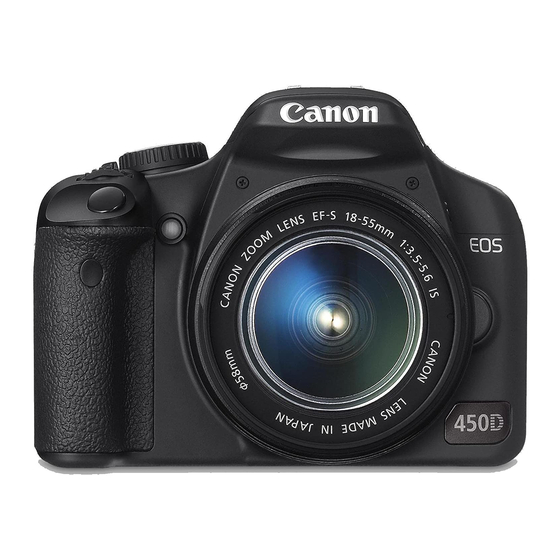
Canon EOS 450D Instruction Manual
Hide thumbs
Also See for EOS 450D:
- Instruction manual (196 pages) ,
- Product manual (36 pages) ,
- Brochure & specs (20 pages)
Table of Contents
Advertisement
Advertisement
Table of Contents

Related Manuals for Canon EOS 450D


Summary of Contents for Canon EOS 450D
- Page 2 Live View Shooting You can shoot while viewing a real-time image on the camera's LCD monitor or on a personal computer screen. This is called "Live View shooting." Convenient when the camera is mounted on a tripod for shooting still Riles, for e×ample. if you handhold the camera Pike a compact digital camera and shoot while viewing the LCD monitor,...
- Page 3 Preparing for Live View Shooting* Set the camera for Live View shooting. Set the shooting mode. ®_ Set the shooting mode to a Creative Zone mode. _ Live View shooting does not work in Basic Zone modes. ":_ Select [Live View function "_'_ settings].
- Page 4 Preparing for Live View Shooting During Live View shooting, do not point the camera toward the sun. The sun's heat can aamage me camera's internal componen[s. Live View shooting will disable a few Custom Function settings. (p. 153) Under low light or bright lign[ conaluons, the Live View image might no[ reflect the brightness ot the captured image.
- Page 5 Focusing Manually* Although autofocus can be used (p=102, 104), magnifying the image and focusing manually is recommended for precise focusing. Magnifying the mmage for Manual Focusing Set the Rens focus mode switch <MF>. _ Turn the lens focusing ring to focus roughly.
- Page 6 Shooting* Cheek the exposure. ® Press the shutter button halfway. _y,, T he shutter speed and aperture will be displayed. _ If you set exposure compensation, the image brightness will change accordingly. ake the pietureo ® Press the shutter button completely, _y,, T he picture will be taken and the captured image is displayed on the LCD monitor.
- Page 7 For Live View shooting, do not use an Extension Tube or TS-E lens. Doing so can cause irregular or unmtenaea exposures. FE lock and modeling flash (with an external Speedlite) cannot be used. A non-Canon [lash will not fire _, A grid can be displayed.
- Page 8 Shooting* About the information DispJay ® Each time you press the <DJSR> button, the information display will change, (Brightness/RGB) Picture Style frame Image-recording quality check simulation Shutter s remaining Flash exposure compensation Aperture Exposure level s_ When > is displayed in White, it indicates that the Live View image br!ghtness is cles@ to what the captured !mage will look !ike, If <_ >...
- Page 9 Using AF to Focus* Under [t_ Custom Functions (C,Fn)], when [AF during Live View shooting] (p, 157) is set to [1 : Quick mode] or [2: Live mode], you can focus with AR Quick mode and Live mode use a different AF method. If you want precise focusing, magnify the image and focus manually.
- Page 10 Using AF to Focus* Focus the subject. ® Aim the selected AF point over the subject, and hold down the <_> button, _y,, T he Live View image will turn off, the reflex mirror will go back down, and AF will be executed, _y,, W hen focus is achieved, the beeper will sound.
- Page 11 Using AF to Focus* C,Fn.-8_2:Live mode The image sensor is used to focus. Although AF is possible with the Live View image displayed, the AF operation wiii take longer than with Quick mode. Also, achieving focus may be more difficult than with Quick mode.
- Page 12 Using AF to Focus* About the AF point with Live mode ® You can press the <_._ > keys to move the AF point to where you want to focus (it cannot go to the edges of the picture). To move to the center AF point, press the <_>...
- Page 13 Using AF to Focus* With Live mode, AF can fail to achieve focus in the following cases: ® Low-contrast subject such as a blue sky and solid-color surfaces. ® Subjects in low light. ® Stripes and other patterns where there is contrast only in the horizontal direction.
- Page 14 Handy Features ® Silencing the Beeper (p.108) ® Card Reminder (p.108) ® Setting the Image Review Time (p.108) ® Setting the Auto Power-off Time (p.109) ® Setting the LCD Monitor Brightness (p.109) ® File Numbering Methods (p.110) ® Auto Image Rotation (p.112) ®...
- Page 15 Handy Features Silencing the Beeper You can prevent the beeper from sounding when focus is achieved or during self-timer operation. Under the [_'] tab, select [Beep], then press <_>. Select [Off], then press Card Reminder This prevents shooting if there is no card in the camera. Under the [_°] tab, select [Shoot wto cord], then press <_>.
- Page 16 Handy Features Setting the Auto Power-off Time To save battery power, the camera turns off automatically after the set time of idle operation elapses. You can set tMs auto power-off time. When the camera has turned off due to auto power off, you can wake up the camera by pressing the shutter button halfway or any of the following buttons: <MENU>...
- Page 17 Handy Features File Numbering Methods The file number is like the frame number on a roll of film. The captured images are assigned a sequential file number from 0001 to 9999 and saved in one folder. You can change how the file number is assigned. The file number will appear on the personal computer in tMs format: [MG O00foJPG Under the [t? °] tab, select [FHe...
- Page 18 Handy Features ®_ [Auto reset]: Resets the file numbering to 0001 whenever card is replaced° Each time you replace the card, the file numbering restarts from 0001. This is convenient if you want to organize images according to cards. However, if the replacement card contains images recorded previously, the file numbering of the new images might continue from the file numbering of the existing images in the card.
- Page 19 Handy Features Auto image Rotation Vertical images are rotated automatically so they are displayed vertically on the camera's LCD monitor and personal computer instead of horizontally. The setting of this feature can be changed. Under the [t? °] tab, select [Auto rotate], then press <_>.
- Page 20 Handy Features DISR Checking Camera Functian Settings While the menu is displayed, press the <DISR> button to display the camera's current settings. ® While the menu is displayed, press the <DISR> button to display the settings. ® Press the <DISR> button again to return to the menu.
- Page 21 Handy Features Reverting the Camera to the Default Settings* This is for reverting all the camera's shooting settings and Custom Functions to the default settings. This works in the < P > and other Creative Zone modes. Select [Clear settings]. ®...
- Page 22 Handy Features Preventing the LCB Monitor from Turning off Automatically TMs prevents the display-off sensor from turning off the shooting settings display automaticafly when your eye nears the viewfinder eyepiece. Semect [LCD auto off]. ® Under the [t? °] tab, select [LOB auto off], then press <_>.
- Page 23 Flash Control* The built-in flash and external Speedlite can also be set with the menu. The menu for the external Speedlite will be applicable only to EXosedes SpeedJites whose functions can be set with the camera. Select [Fmash control]. ® Under the [tg:] tab, select [FJash controJ], then press <_)>.
- Page 24 FlashControl* ® EoTTL [[ For normal flash exposures, set it to [EvaJuative]. if [Average] is set, the flash exposure will be averaged for the entire metered scene as with an external metering flash. Flash exposure compensation may be necessary depending on the scene, so this is for advanced users.
- Page 35 Viewing Images on TV With the video cable provided with the camera, you can connect the camera to a TV set and view images on the TV screen. Turn off the camera and the television before connecting them. onnect the camera to the TV.
- Page 36 Protecting images Protecting the image prevents it from being erased accidentally. Select [Protect images]. _ Under the [_'] tab, select [Protect images], then press <_>. _y,, T he protect setting screen will appear. Image protect icon Protect the image. _ Press the <_ >...
- Page 37 Erasing images You can either select and erase images one by one or erase them in one batch. Protected images (p.129) wiii not be erased. Once an image is erased, it cannot be recovered. Make sure you no Jonger need the image before erasing it, To prevent important images...
- Page 38 Shooting information Display When you press the <DISR> button during single-image playback, can switch to the shooting information display. most detailed shooting information is shown below. Protect Exposure compensation amount ..Flash exposure ..FoJder number - File number compensation amount ,Histogram Shutter speed ..
- Page 39 Shooting Information Display @ About the Histogram The brightness histogram display shows the exposure level distribution, overall brightness, and gradation. And the RGB histogram display is for checking the color saturation and gradation. The display can be switched with the [_" Histogram] menu.
- Page 40 The camera is compatible with "p_ PictBridge" which is the standard for direct printing. The Web site below gives more information on using your Canon camera with various printers, such as which paper types to use. http:flcanon.comlpictbridgel _ Digital Print Order Format (DPOF) (p.143)
- Page 41 Preparing to Print You do the direct printing procedure entirely with your camera while you look at the LCD monitor, Connecting the Camera to a Printer Set the camera's power switch '<OFF>. Set up the printer. ®_ For details, see the printer's instruction manual.
- Page 42 Preparing to Print _" PictBridge layback the image. ® Press the <[_]> button. _y,. T he image will appear, and the <_(> icon will appear on the upper left to indicate that the camera is connected to a printer. _y,. T he <_.v> button lamp will light in blue.
- Page 43 _{ Printing The screen dispJay and setting options wHJ differ depending on the printer. Some settings might not be available. For details, see the printer's instruction manual. Semeet the image to be printed. Printer-connected icon ® Check that the <p#'> icon is displayed on the upper left of the LCD monitor.
- Page 44 <_>= }, The paper type screen will appear, Select the type of the paper loaded the pdnter, then press <_>= ® When using a Canon pdnter Canon paper, read the printer's instruction manual to check what paper types can be used.
- Page 45 f_ Printing _,_ Set the printing effe¢%° ® Set as necessary. If you need not set printing effects, go to step 5. ® Select the option on the upper right, then press <_>. Select the desired printing effect, then press <_;>.
- Page 46 /_( Printing Set the date and file number imprinting. ® Set as necessary= ® Select <@s>,then press <_>= ® Set as desired, then press <_>= Set the number of copies° ® Set as necessary. ® Select <_>, then press <_/>= ®...
- Page 47 f'_( Printing Adjustment of Printing Effects In step 4 on page 138, select the printing effect. When the <[]> icon is displayed next to <_>, press the <DISR> button. You can then adjust the printing effect. What can be adjusted or what is displayed will depend on the selection made in step 4= ®...
- Page 48 f_( Printing Trimming the image Tilt correction You can crop the image and print only the trimmed portion as if the image was recomposed. Do the trimming right before printing. If you set the trimming and then set the print settings, you may have to set the trimming again.
- Page 49 f_ Printing Depending on the printer, the trimmed image area might no_ De printed as you specified. Tne smaller you maKe me ramming trame, the grainier the picture will lOOK Dn [ne prlnL While trimming me image, look at the camera's LCD monitor. If you EOOK at the image on a TV screen, the trimming frame might not be displayed accura[e{y.
- Page 50 =% Digital Print Order Format (DPOF) Set the print type, date imprinting, and file No. imprinting. The print settings will be applied to all print=ordered images. (They cannot be set individually for each image.) Setting the Printing Options Semect [Print order].
- Page 51 Digital Print Order Format (DPOF) Standard Prints one image on one sheet. Multiple, thumbnail images are printed on Index one sheet. Print type ® Prints both the standard and index prints. Both Date [On] imprints the recorded date on the print. File No.
- Page 52 DigitalPrintOrderFormat(DPOF) Select and order images one by one. Press the <_°Q> button to display the three-image view. To return to the single- image display, press the <(A> button. After completing the print order, press the <MENU> button to save the print order to the card.
- Page 53 Direct Printing with DPOF With a PictBridge printer, you can easily print images with DPOR _ Prepare to print. ® See page 134. Followthe "Connecting the Camerato a Pnnter"procedure up to step 5_ _ Under the [_'] tab, select [Print order]. } Select [Print].
- Page 54 E,_ Transferring mmagesto a Personal Computer By connecting the camera to a personal computer, you can transfer images from the camera's card by operating the camera. This is called direct image transfer. Before connecting the camera to the personaJ computer, sure to install the bundled software (EOS DIGITAL Solution...
- Page 55 _,_ Transferring Images to a Personal Computer _:_ Before disconnecting the cable, turn off the camera. Pull out the cable by grasping the plug (instead of the cord). Transferring images to a Personal Computer The images sent to the personal computer will be saved in the [My Pictures] folder or [Pictures] folder in subfolders organized according...
- Page 56 _,_ Transferring Images to a Personal Computer ® SeJect & transfer Press the <_ > key to select images one by one to be transferred to the personal computer. To exit, press the <MENU> button. ® Wallpaper The image you select and transfer will appear as the personal <MENU>...
- Page 57 _,,_ Transferring Images to a Personal Computer Select the image to be transferred. ® Press the <_> key to select an image, then press the <AY> key to place a checkmark <V'> on the upper left. ® Repeat this step for all the images you want to transfer.
- Page 58 Customizing You can customize various camera features to suit your picture-taking preferences. You can do it with Custom Functions. Custom Functions can be set and used only in Creative Zone modes.
- Page 59 Setting Custom Functions* ff_ Semect [Custom Functions (C.Fn)]. ® Under the [t?_] tab, select [Custom Functions (C.Fn)], then press <_>. Custom Function No. emeet the Custom Function ® Press the <_> key to select the number of the Custom Function to be set, then press <_>.
- Page 60 Setting Custom Functions* Custom Functions C.Fn I: Exposure Exposure ievei increments p,154 Fiash sync, speed in Av mode C.Fn ll: image Long exposure noise reduction p,155 High ISO speed noise reduction Highlight tone priority p,156 Auto Lighting Optimizer C.Fn ill: Auto focus/Ddve AFoassist beam firing AF during Live View shooting p,157...
- Page 61 Custom Function Settings* Custom Functions are organized into four groups based on the function type: C.Fn i: Exposure, C.Fn ii: image, C.Fn ili: Auto focustDrive, C.Fn iV: Operation/Others. C,Fn [: Exposure 0: lt3-etop 1: lt2-etop Sets 1/2=stop increments for the shutter speed, aperture, exposure...
- Page 62 Custom Function Settings* C,Fn [[: linage 0: Off 1: Auto For 1 sac. or longer exposures, noise reduction is performed automatically if noise typical of _ong exposures is detected. This [Auto] setting is effective in most cases. 2: On Noise reduction is performed for all exposures 1 sac.
- Page 63 Custom Function Settings* 0: Disable 1: Enable improves the highlight detai!. The dynamic range is expanded from the standard 18% gray to bright highlights. The gradation between the grays and highlights becomes smoother. With Setting i ithe Settable [SO speed [ange wil! be 200 _ i600. Also, the ISQ speed displayed in the viewfinder, will have the '!0'_displayed...
- Page 64 Custom Function Settings* C,Fn Ill: Auto foeustDdve The AF-assist beam can be emitted by the camera's builtdn flash or by the external, EOS-dedicated Speedlite. 0: Enable 1: Disable AF-assist beam not emitted. 2: Only external flash emits If an external, EOS-dedicated Speedlite is attached,...
- Page 65 Custom Function Settings* C,Fn IV: Operation/Others 0: AFIAE Boek 1: AE IoeklAF Convenient when you want to focus and meter separately. Press the <-X_> button to autofocus and press the shutter button halfway to attain AE Iock. 2: AFIAF Boek, no AE Boek In the A_ Servo AF mode, you can press the <--X_>...
- Page 66 Custom Function Settings* If the [L!ve View Shoot.] menu has been Set to [F-nab!el, the Live View shooting will override any setting [rom 1 to 4. When the camera is ready to shoot, pressing <_)> wi!! show the Live View image instead. 0: Display When the power switch...
- Page 67 Registering My Menu* For faster access, you can register up to six menus and Custom Functions whose settings you change frequently. Semeet [My Menu settings]. ® Under the [4_] tab, select [My Menu settings], then press <_>. Select [Register]. ® Select [Register], then press <_>.
- Page 68 Reference This chapter provides reference information for camera features, system accessories, etc. The back of this chapter also has an index to make it easier to took up things.
- Page 69 When Autofocus Fails Autofocus can fail to achieve focus (the focus confirmation light <O> blinks) with certain subjects such as the following: Subjects difficult to focus ® Low=contrast subjects Example: Blue sky, solid-color walls, etc. ® Subjects in low light ®...
- Page 70 Using a Household Power Outlet With AC Adapter Kit ACKoE5 (sold separately), you can connect the camera to a household power outlet and not worry about the battery level. Connect the power cord. ® Connect the power cord as shown in the illustration.
- Page 71 Remote ControJ Shooting Remote Controller RC_I/RC_5 (Sold separately} Remote controller to shoot wireiessiy up to about 5 meters/16A feet from the camera= The RC=I can trip the shutter immediately or after a 2=sec. delay, and the RC=5 trips the shutter after a 2=sec. delay. RC-! RC-5 ®...
- Page 72 Remote Controt Shooting Using the Eyepiece COver if you take a picture without looking at the viewfinder, light entering the eyepiece can throw off the exposure. To prevent this, use the eyepiece cover attached to the camera strap. emove the eyecup. _ Push the bottom of the eyecup upward.
- Page 73 External Speed[ites EOS-dedicated, EX,series Speedtites Basically operates Hke a buHt4n flash for easy operation, When an EX-sedes Speedlite is attached to the camera, almost all the autoflash control is done by the camera. In other words, it is like a higho output flash attached externally in place of the builtqn flash.
- Page 74 Using Nun-Canon Flash Units Syne Speed The camera can synchronize with compact, non-Canon flash units at 11200 sec. or slower. Be sure to test the flash unit beforehand to make sure it synchronizes properly with the camera. Cautions for Live View shooting A non-Canon flash will not fire during Live View shooting.
- Page 75 Menu Settings _" Shooting 1 (Red) page JIL / .dL / AM / ,_M / AS / .dS / Quality t_S_+AL Red-eye On/Off Off / On Beep On / Off Shoot w/o card On / Off Review time Off / 2 sec. / 4 sec. / 8 sec. / Hold Shooting 2 (Red) !/3-stop...
- Page 76 Menu Settings t?" Set-up 1 (Yellow) page 30 sec, / lmin, / 2 min,/4 min, / 8 min, / 15 min. Auto power / Off Continuous / Auto reset / Manual reset File numbering Auto rotate On _/On _/Off Format Initialize and erase data in the card LCD auto off Enabled / Disabled...
- Page 77 Function Availability Table @: Set automatically User selectable : Not selectable JPEG ..RAW + JPEG ..Auto Manual ..Standard Portrait .._" Landscape Neutral ..FaithfW ..Monochrome ..User Defined ..sRGB Adobe Auto WB Preset WB 8"...
- Page 78 Function Availability Table @: Set automatically User selectable : Not selectable Evaluative Partiat ,..Spot ..Center-weighted average Program shift ..Exposure compensation ..AE lock Depth-0f-fbld preview ..Single Continuous 10 sec. self timed Remotecontrol _" 2 sec, self-timer ..
- Page 79 Troubleshooting Guide does not resolve the problem, contact your dealer or nearest Canon Service Center. Thecameradoes not Operat÷ evenWhen the powerSWitCh i s set to < ON >. ® The battery, is not properly installed in the camera. (p.26) ® Recharge the battery.
- Page 80 Troubleshooting Guide No images be shot recorded. ® The card is not properly inserted. (p=31) ® If the card is full, replace the card or delete unnecessary images make room. (p=31, 130) ® If you try to focus in the One-Shot AF mode while the focus confirmation light <@>...
- Page 81 Troubleshooting Guide built=in flash does fire. ® if you shoot continuously with the builtoin flash at short intervals, flash might stop operating to protect the flash unit. _mage cannot be erased. ® If the image has been erase-protected, it cannot be erased. (p.129) shooting date...
- Page 82 [f the same error keeps occurring, there may be a probJemo Write down the error code and consuJt your nearest Canon Service Center. if an e;;0r code appears right after Shooting, the picture might not have been captured. After the error is resolved, press the <[]_>...
- Page 83 System Eyepiece Extender EP-EX151t ST-E2 220EX 430EX 580EX II Macro Ring Lite MacroTwin Lite Rubber Frame Ef MR 14EX MT_24EX E_series Dioptric Adiustment Lenses Eyecup Ef Angle Finder C Semi Hard Case EH19*L AC Adapter ACK-E5 Battery Grip BG*E5 Battery Charger Car Battery Charger Compact Power...
- Page 84 System Remote Remote Controller Controller Remote Switch RC_5 RS_60E3 EF l enses EF_S lenses _f_f_ff_L_o ..__ VC-100 TVNideo DiGiTAL Software Instruction Solution Disk Manual interface Cable =C-200U Interface Cabte IFC*500U _,_ [ Personal l USB port computer Windows Original Data_f_ .
- Page 85 Recording media: SD memory card, SDHC memory card 22_2 mm x 14.8 mm Image sensor size: Compatible lenses: Canon EF lenses (including EF-S lenses) (35ram-equivalent focal length is approx.1.6 times the lens focal length) Lens mount: Canon EF mount Image Sensor...
- Page 86 Specifications Color temperature compensation: White balance correction: _+9stops in full-stop increments White balance bracketing: _+3stops in full-stop increments * Blue/amber direction or magenta/green direction possible Color temperature information transmission: Provided Noise reduction: Noise reduction for long exposures High ISO speed noise reduction Automatic image brightness...
- Page 87 Specifications Exposure Contro! Metering modes: 35-zone TTL fuIFaperture metering • Evaluative metering (linkable to any AF point) • Partial metering (approx. 9% of viewfinder at center) • Spot metering (approx. 4% of viewfinder at center) • Center-weighted average metering Metering range: EV 1 - 20 (at 23°C/73°F with EF50mm f/1.4 USM tens, ISO 100) Exposure control:...
- Page 88 Maximum burst: JPEG (Large/Fine): Approx. 53, RAW: Approx. 6, RAW+JPEG (Large/Fine): Approx. 4 * Based on Canon's testing standards with a 2GB SD memory card, ISO 100, and Standard Picture Style * Varies depending on the subject, SD memory card brand, image-recording quality, etc.
- Page 89 Specifications Image PBayback Display format: Single image, Single image + Image-recording quality, shooting information, histogram, 4- or 9-image index, magnified view (approx. 1.5x - 10x), rotated image, image jump (by 1/!0/!00 images, or shooting date) Highlight alert: Provided (Overexposed highlights blink) image Protection...
- Page 90 Specifications Battery life: [Number of shots • approx,] Shooting Conditions Temperature No Flash 50% Flash Use At 23°C / 73°F At 0°C / 32°F • With fully-charged Battery Pack LP-E5 • The figures above are based on ClPA (Camera & Imaging Products Association) testing standards Battery check:...
- Page 91 ¢_ All specifications above are based on Canon's testing standards. ¢_ The camera's specifications and exterior are subject to change without notice. ¢_ If a problem occurs with a non-Canon lens attached to the camera, consult the respective lens maker.
- Page 92 Trademarks ® Adobe is a trademark of Adobe Systems Incorporated. ® Windows is a trademark or registered trademark of Microsoft Corporation the United States and other countries. ® Macintosh and Mac OS is a trademark or registered trademark of Apple Inc. in the United States and other countries.
- Page 93 Follow these safeguards use the equipment properly to prevent injury, death, material damage, To prevent fire, excessive heat, chemical leakage, and explosions, follow safeguards betow: - Do not use any batteries, power sources, and accessories not specified in this booklet. Do not use any home-made or modified batteries.
- Page 94 • Do not use paint thinner, benzene, or other organic solvents to clean the equipment. Doing so may cause fire or a health hazard. If the product does not work properly or requires repair, contact your dealer or your nearest Canon Service Center.
- Page 95 If such changes or modifications should be made, you could be required to stop operation of the equipment. Canon U.S.A. Inc. One Canon Plaza, Lake Success, NY 11042, U.S.A. Tel No. (516)328-5600 This digital apparatus does not exceed the Class B limitsfor radio noise...
- Page 96 4. Do not expose the charger to rain or snow. 5. Use of an attachment not recommended or sold by Canon may result in fire, electric shock, or personal injury. 6. To reduce risk of damage to electric plug and cord, pull by plug rather than by cord when disconnecting charger.
- Page 97 lnde× Camera Access lamp ........Clear camera settings ....! 14 A-DEP Holding the camera ....(Automatic depth-of-field AE) ..76 Camera shake ....35 - 37, 94 Adobe RGB ........image Stabilizer ......AE lock ..........Card ........2, 13, 31 AEB (Auto Exposure Bracketing).._80 Card reminder ......
- Page 98 Index Dust ........34, 1!8 Flash exposure compensation ......79, 1 !6 Dust Delete Data ......1/2-stop increments ....! 54 Focus lock ........Erase (image) ....... Focus mode switch ....33, 62 Error ..........Focusing Evaluative metering ......AF mode ........AF point selection ......
- Page 99 Index Image Landscape ......48, 67 Auto playback ......Language ......Erase ........LCD monitor......Highlight ........Brightness adjustment ..... ! 09 Histogram ......... Display switching ....Index ......... Image playback ...... Jump ......... Menu operation ...... Magnified ........Off ......... 42, 1!5 Playback......
- Page 100 Index Mirror Iockup ......94, 157 PictBridge ........! 33 Mode Dial -> Shooting mode Picture Style Customize ........Monitor -> LCD monitor Selection ........Monochrome image ......User defined ......My Menu ........Pixel count selection ...... Playback -> Image Neutral ..........
- Page 101 Index Remote control shooting ....Strap ........Revert todefault settings ....1 !4 System map ......Rotate (image) ...... 112, 126 Toning effect (Monochrome) ... Sepia Safety warnings ....../ Blue / Purple 1 Green Saturation ........Transfer order (image) ....149 SD card -->...
- Page 102 1 Thomas Holt Drive, North Ryde, N.S.W. 2113, Australia CANON NEW ZEALAND LTD, Akoranga Business Park, Akoranga Drive, Northcote, Auckland, New Zealand JAPAN CANON MARKETING JAPAN 16_6, Kohnan 2-chome, Minato-ku, Tokyo 108-8011, Japan CT1-1020-000 © CANON INC. 2008 PRINTED IN JAPAN...
Need help?
Do you have a question about the EOS 450D and is the answer not in the manual?
Questions and answers