Fujitsu fi-5120C Operator's Manual
Image scanner
Hide thumbs
Also See for fi-5120C:
- Cleaning and maintenance (55 pages) ,
- Getting started manual (29 pages) ,
- Operator's manual (153 pages)

Related Manuals for Fujitsu fi-5120C


Summary of Contents for Fujitsu fi-5120C
- Page 1 fi-5120C / fi-5220C Image Scanner Operator Guide TROUBLE SHOOTING CONTENTS MAP fi-5120C / fi-5220C Image Scanner Operator Guide P3PC-1322-05ENZ2 All Rights Reserved Copyright 2006-2009 © PFU LIMITED...
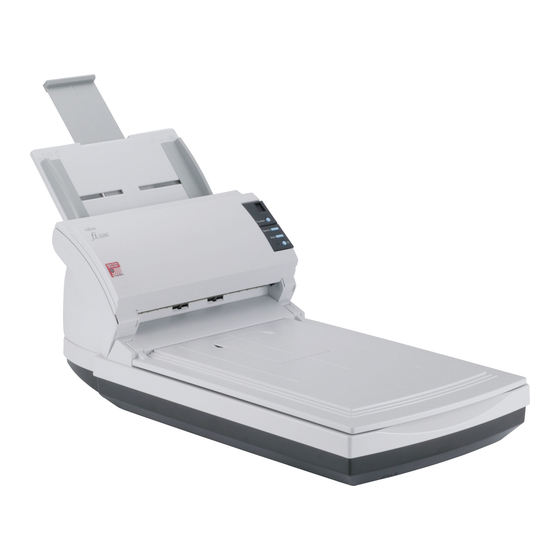
- Page 2 fi-5120C / fi-5220C Image Scanner Operator Guide TROUBLE SHOOTING CONTENTS MAP INTRODUCTION Thank you for purchasing the fi-5120C / fi-5220C Duplex Color Scanner product. This document describes how to handle fi-5120C / fi-5220C Duplex Color and basic operation methods. Before you start using fi-5120C / fi-5220C Duplex Color be sure to thoroughly read this manual to ensure correct use.
-
Page 3: Fcc Declaration
fi-5120C / fi-5220C Image Scanner Operator Guide TROUBLE SHOOTING CONTENTS MAP Regulatory Information (1) FCC Declaration This equipment has been tested and found to comply with the limits for a Class B digital device, pursuant to Part 15 of the FCC Rules. -
Page 4: International Energy Star Program
fi-5120C / fi-5220C Image Scanner Operator Guide TROUBLE SHOOTING CONTENTS MAP Regulatory Information (2) International ENERGY STAR Program As an ENERGY STAR Partner, PFU LIMITED has determined that this product meets the ENERGY STAR guidelines for energy efficiency. The International ENERGY STAR Office Equipment Program is an international program that promotes energy saving through the penetration of energy efficient computers and other office equipment. - Page 5 fi-5120C / fi-5220C Image Scanner Operator Guide TROUBLE SHOOTING CONTENTS MAP Trademarks Trademarks Microsoft, Windows, and Windows NT are registered trademarks of Microsoft Corporation in the United States and/or other countries. ISIS and QuickScan are trademarks or registered trademarks of EMC Corporation in the United States. Adobe, the Adobe logo, and Acrobat are either registered trademarks of Adobe Systems Incorporated in the United States and/or other countries.
-
Page 6: Note, Liability
fi-5120C / fi-5220C Image Scanner Operator Guide TROUBLE SHOOTING CONTENTS MAP Note, Liability BEFORE USING THIS PRODUCT, PLEASE READ THIS MANUAL CAREFULLY. IF THIS PRODUCT IS NOT USED CORRECTLY, UNEXPECTED INJURY CAN OCCUR TO USERS OR BYSTANDERS. Keep this manual in a safe place so that it can be easily referred to during use of this product. While all efforts have been made to ensure the accuracy of all information in this manual, PFU assumes no liability to any party for any damage caused by errors or omissions or by statements of any kind in this manual, its updates or supplements, whether such errors are omissions or statements resulting from negligence, accidents, or any other cause. -
Page 7: Safety Precautions
fi-5120C / fi-5220C Image Scanner Operator Guide TROUBLE SHOOTING CONTENTS MAP PREFACE (1) Safety Precautions This manual describes important details for ensuring the safe and correct use of this product. Thoroughly read this manual before you start to use this product. In particular, be sure to read and fully understand the Safety Precautions described in this manual before you use this product. -
Page 8: Screen Examples In This Manual
About Maintenance The user must not perform repairs on this scanner. Contact the store where you purchased the scanner or an authorized FUJITSU Image Scanner service provider to have repairs done on this product. All Rights Reserved Copyright 2006-2009 © PFU LIMITED... - Page 9 fi-5120C / fi-5220C Image Scanner Operator Guide TROUBLE SHOOTING CONTENTS MAP Safety Precautions (1) WARNING Do not damage the AC cable. A damaged AC cable may cause fire or electric shock. Do not place heavy objects on AC cables, or pull, bend, twist, heat, damage or modify AC cables.
- Page 10 Then, contact the store where you bought the scanner or an authorized FUJITSU scanner service provider. Pay particular attention to this warning in households where there are small children.
- Page 11 fi-5120C / fi-5220C Image Scanner Operator Guide TROUBLE SHOOTING CONTENTS MAP Safety Precautions (3) CAUTION Do not install the scanner on unstable surfaces. Make sure that the scanner is installed on a flat, level surface and that none of its parts extend beyond the surface top, such as a desk or table.
- Page 12 fi-5120C / fi-5220C Image Scanner Operator Guide TROUBLE SHOOTING CONTENTS MAP Safety Precautions (4) CAUTION Protect the scanner from static electricity. Install the scanner away from strong magnetic fields and other sources of electronic noise. Also, protect the scanner against any static electricity, which can cause the scanner to malfunction. Do not use aerosol sprays near the scanner.
- Page 13 fi-5120C / fi-5220C Image Scanner Operator Guide TROUBLE SHOOTING CONTENTS MAP Chapter 1 NAMAES AND FUNCTIONS OF PARTS This chapter describes the scanner parts and their functions. All Rights Reserved Copyright 2006-2009 © PFU LIMITED...
-
Page 14: Checking The Contents Of The Scanner Package
Make sure it contains all the parts listed in the package contents list that is included in the package box. If any parts are missing or defective, contact the dealer were you purchased the scanner or an authorized FUJITSU scanner service provider... -
Page 15: Names And Functions Of Parts
fi-5120C / fi-5220C Image Scanner Operator Guide TROUBLE SHOOTING CONTENTS MAP 1.2 Names and Functions of Parts (1) This section describes the scanner parts and their functions. Front Name Function It transports the document to the reading position automatically. (Automatic Document Feeder) 2 ADF paper chute Holds in place the document pages / sheets that are fed into the ADF. - Page 16 fi-5120C / fi-5220C Image Scanner Operator Guide TROUBLE SHOOTING CONTENTS MAP 1.2 Names and Functions of Parts (2) Rear Name Security Slot Imprinter connector (fi-5120C only) SCSI Interface connector SCSI ID switch USB Interface connector DC Inlet All Rights Reserved Copyright 2006-2009 © PFU LIMITED...
- Page 17 fi-5120C / fi-5220C Image Scanner Operator Guide TROUBLE SHOOTING CONTENTS MAP 1.2 Names and Functions of Parts (3) Inside (for fi-5220C) Name Document cover Document holding pad Document bed Shipping lock (located on base) All Rights Reserved Copyright 2006-2009 © PFU LIMITED...
-
Page 18: Removable Parts
fi-5120C / fi-5220C Image Scanner Operator Guide TROUBLE SHOOTING CONTENTS MAP 1.2 Names and Functions of Parts (4) Removable Parts Parts that can be removed from the scanner are displayed below. Name 1 Document cover (fi-5220C only) 2 Pad ASSY 3 Pick roller (can be removed) 4 ADF paper shute 5 Sheet guide... -
Page 19: Functions Of The Operator Panel
5 Power Button Turns the scanner ON and OFF. 6 LED Lights when the scanner is turned ON. * About the settings on the launcher, refer to FUJITSU TWAIN32 scanner driver help. Indications on the Function Number display Indication Function Blinks only one time upon turning on the scanner. - Page 20 In this chapter Windows XP screenshots are illustrated. The screens and operations may differ slightly if the OS that you are using is other than Windows XP. Also, when FUJITSU TWAIN32 or FUJITSU ISIS is updated the screens and operations noted in this chapter will differ slightly. All Rights Reserved Copyright 2006-2009 © PFU LIMITED...
-
Page 21: Turning The Scanner On
fi-5120C / fi-5220C Image Scanner Operator Guide TROUBLE SHOOTING CONTENTS MAP 2.1Turning the Scanner ON (1) This section describes how to turn the scanner ON. The following shows the procedure for turning the scanner ON. 1. Press the power button on the operator panel. The scanner is turned ON, and the green LED on the operator panel lights. - Page 22 fi-5120C / fi-5220C Image Scanner Operator Guide TROUBLE SHOOTING CONTENTS MAP 2.1 Turning the Scanner ON (2) 2) Double click the "Printer and Other Hardware" icon on the Control panel of your PC. The [Printer and Other Hardware] window appears. 3) On the [Printers and Other Hardware] window, double click the [Scanners and Cameras] icon.
- Page 23 fi-5120C / fi-5220C Image Scanner Operator Guide TROUBLE SHOOTING CONTENTS MAP 2.1 Turning the Scanner ON (3) 4) Right click [fi-5120Cdj] or [fi-5220Cdj], and select [Properties] from the menu. The properties dialogbox of fi-5120C or fi-5220C appears. Click the "Device Set" tab. All Rights Reserved Copyright 2006-2009 ©...
- Page 24 fi-5120C / fi-5220C Image Scanner Operator Guide TROUBLE SHOOTING CONTENTS MAP 2.1 Turning the Scanner ON (4) The following screen appears. All Rights Reserved Copyright 2006-2009 © PFU LIMITED...
- Page 25 fi-5120C / fi-5220C Image Scanner Operator Guide TROUBLE SHOOTING CONTENTS MAP 2.1 Turning the Scanner ON (5) 2. Click [Power Control] button The following screen is displayed. 3. Select a power ON/OFF control To power on/off the scanner by pressing the Power button: ●...
-
Page 26: Power Save Mode
fi-5120C / fi-5220C Image Scanner Operator Guide TROUBLE SHOOTING CONTENTS MAP 2.1 Turning the Scanner ON (6) Power Save Mode The Power Save mode keeps the scanner in a low-powered state after it has been turned ON. If no operation is performed on the scanner for 15 minutes, the scanner automatically switches to the Power Save mode. In the Power Save mode, the indication of the Function Number display on the operator panel goes out, but the green LED stays lit. -
Page 27: Loading Documents On The Adf For Scanning
fi-5120C / fi-5220C Image Scanner Operator Guide TROUBLE SHOOTING CONTENTS MAP 2.2 Loading Documents on the ADF for Scanning 1. Align the edges of the documents. Confirm that all the documents have the same width. Check the number of sheets in the document stack. The standard number of sheets that can be loaded on the scanner is as follows: (For details, see "7.3 Maximum Document Loading... -
Page 28: Load The Document On The Adf Paper Chute
fi-5120C / fi-5220C Image Scanner Operator Guide TROUBLE SHOOTING CONTENTS MAP 2.2 Loading Documents on the ADF for Scanning 3. Load the document on the ADF paper chute. Pull out the ADF paper chute extension. Set the documents face-down in the ADF paper chute (so that the side to be scanned faces towards the ADF paper chute). - Page 29 The card to be scanned should be within the ISO7810 compliance, type ID-1. ● ISO7810-compliant, Type ID-1 card Material: PVC (Poly vinyl chloride) or PVCA (Polyvinyl chloride acetate) Dimensions: 3.4 inch (height) x 2.1 inch (width) / 86 mm x 54 mm Thickness: 0.03 ±...
- Page 30 fi-5120C / fi-5220C Image Scanner Operator Guide TROUBLE SHOOTING CONTENTS MAP 2.2 Loading Documents on the ADF for Scanning 4. Adjust the side guides to the width of the documents. Move the side guides so that they touch both sides of the documents. If there is any space between the side guides and the edges of documents, the scanned image may be skewed.
- Page 31 fi-5120C / fi-5220C Image Scanner Operator Guide TROUBLE SHOOTING CONTENTS MAP 2.2 Loading Documents on the ADF for Scanning HINT The stacker prevents document sheets from dropping after they are scanned. Lift the paper stop and swing it forward by inserting your fingertips into the indentaitons on the scanner as shown in the figure below.
-
Page 32: Loading Documents On Flatbed For Scanning
fi-5120C / fi-5220C Image Scanner Operator Guide TROUBLE SHOOTING CONTENTS MAP 2.3 Loading Documents on the Flatbed for Scanning 1. Lift up the document cover. 2. Load the document on the document bed with the scanning face down and the top left corner aligned with the reference point ( ). -
Page 33: Scanning Documents
Select [Select Source] from the [Scan] menu. The [Select Source] dialog box appears. Select "FUJITSU fi-5120Cdj" or "FUJITSU fi-5220Cdj" and click the [Select] button. 4. Click the [Scan To View] button on the tool bar. The [TWAIN Driver] dialog box (screen for setting the scan conditions) appears. - Page 34 All Rights Reserved Copyright 2006-2009 © PFU LIMITED...
- Page 35 fi-5120C / fi-5220C Image Scanner Operator Guide TROUBLE SHOOTING CONTENTS MAP 2.4 Scanning Documents (2) 5. Set the scan resolution, paper size and other scan conditions, and click the [Scan] button. For details on settings in the [TWAIN Driver] dialog box, refer to "2.5 How to Use the Scanner Driver".
- Page 36 All Rights Reserved Copyright 2006-2009 © PFU LIMITED...
-
Page 37: Fujitsu Twain32 Scanner Driver
2.5 How to Use the Scanner Driver (1) FUJITSU TWAIN32 Scanner Driver FUJITSU TWAIN32 Scanner Driver is designed for scanning documents with FUJITSU image scanner fi series by using application software that complies with the TWAIN standard. The following describes the procedure with examples of ScandAll 21 for ordinary scanning by using this driver software. -
Page 38: How To Use The Scanner Driver
For details, refer to "ScandAll 21 Help". Configure settings for scanning and click the [Scan] button. For details about the settings on this window, refer to "Setting Window for FUJITSU TWAIN32 Scanner Driver". All Rights Reserved Copyright 2006-2009 © PFU LIMITED... - Page 39 fi-5120C / fi-5220C Image Scanner Operator Guide TROUBLE SHOOTING CONTENTS MAP 2.5 How to Use the Scanner Driver (3) The images of scanned documents are displayed on the [ScandAll 21] window. Depending on the settings of the application software, images may not be displayed. For details, refer to the documentation or Help file of your application.
-
Page 40: Paper Size
2.5 How to Use the Scanner Driver (4) 2. Setting Window for FUJITSU TWAIN32 Scanner Driver You can configure settings for the FUJITSU TWAIN32 Scanner Driver on this window. The following describes the main setting items. For details on each functions, refer to "FUJITSU TWAIN32 Scanner Driver Help"... - Page 41 [Reset] button Used to undo changes of settings. [Help] button Opens the "FUJITSU TWAIN32 Scanner Driver Help" window. The window also opens by pushing the [F1] key. [About...] button Opens an information window about the FUJITSU TWAIN32 Scanner Driver's version.
- Page 42 Selects this tab when setting cache mode, multi feed detection, blank page skipping, etc. [Generic] tab Selects this tab to change the unit displayed on the Setting Window for the FUJITSU TWAIN32 Scanner Driver. (Millimeters, Inches, and Pixels are available) [Startup] tab Selects this tab for setting the Scanner Operation Panel.
- Page 43 All Rights Reserved Copyright 2006-2009 © PFU LIMITED...
-
Page 44: Fujitsu Isis Scanner Driver
2.5 How to Use the Scanner Driver (7) FUJITSU ISIS Scanner Driver FUJITSU ISIS Scanner Driver is designed for scanning documents with FUJITSU image scanner fi series by using application software that complies with the ISIS standard. The following describes the procedure with examples of QuickScan for ordinary scanning by using this driver software. - Page 45 Scanning will be started according to the settings of the selected profile. Go to procedure Open the window of ISIS Driver. Select the [Scan] tab and click the [Scanner Settings] on the [Profile Editor] window. The configuration window of FUJITSU ISIS driver appears.
- Page 46 All Rights Reserved Copyright 2006-2009 © PFU LIMITED...
- Page 47 2.5 How to Use the Scanner Driver (9) Configure settings for scanning and click the [OK] button. For details on this dialog box, refer to "Configuration Window of FUJITSU ISIS Scanner Driver". The [Profile Editor] window appears. Click the [OK] button to return to [New batch] dialog.
-
Page 48: Image Mode
Guide TROUBLE SHOOTING CONTENTS MAP 2.5 How to Use the Scanner Driver (10) 2. Configuration Window of FUJITSU ISIS Scanner Driver Image Mode Selects a color mode suitable for the purpose from the menu. Black & White Scans data in binary (black and white). Distinguishes black from white according to the fixed threshold. - Page 49 fi-5120C / fi-5220C Image Scanner Operator Guide TROUBLE SHOOTING CONTENTS MAP 2.5 How to Use the Scanner Driver (11) Halftone Selects the halftone pattern for halftone scanning. This setting is available when "Black & White" is selected in the "Image Mode". Dither Pattern 0 This setting is suitable for scanning dark photographs.
-
Page 50: Paper Layout
fi-5120C / fi-5220C Image Scanner Operator Guide TROUBLE SHOOTING CONTENTS MAP 2.5 How to Use the Scanner Driver (12) Paper Size Selects a paper size according to the size of the document to be scanned. Select a standard paper size from the list. Paper Layout Specifies orientation of the documents as portrait or landscape. - Page 51 fi-5120C / fi-5220C Image Scanner Operator Guide TROUBLE SHOOTING CONTENTS MAP 2.5 How to Use the Scanner Driver (13) [JPEG...] button Opens the JPEG Settings dialog box. Used for setting the compression rate of JPEG transfer. [About...] button This button displays the version information. All Rights Reserved Copyright 2006-2009 ©...
- Page 52 fi-5120C / fi-5220C Image Scanner Operator Guide TROUBLE SHOOTING CONTENTS MAP 2.5 How to Use the Scanner Driver (14) [More...] button Opens [More Settings] window. Used for setting advanced features. End of Page Detection Scans the edge (bottom) of the documents and outputs data adjusted to the document length. When any page shorter than specified "Paper Size"...
- Page 53 fi-5120C / fi-5220C Image Scanner Operator Guide TROUBLE SHOOTING CONTENTS MAP 2.5 How to Use the Scanner Driver (15) Edge Processing This option specifies the sharpness of contour extraction. Low, Mid, High Emphasizes contour of images. Available settings are: Low, Mid, High Smoothing Smoothes jaggy images.
- Page 54 The screens and operations may differ slightly if the OS that you are using is other than Windows XP. Also, when FUJITSU TWAIN32 or FUJITSU ISIS is updated the screens and operations noted in this chapter will differ slightly. All Rights Reserved Copyright 2006-2009 © PFU LIMITED...
-
Page 55: Scanning Double Sided Docments
fi-5120C / fi-5220C Image Scanner Operator Guide TROUBLE SHOOTING CONTENTS MAP 3.1 Scanning Double Sided Docments (1) The following shows the procedure for reading the double sided documents. 1. Load the document on the ADF paper chute. For details on how to load documents, see "2.2 Loading Documents on the ADF for Scanning". - Page 56 All Rights Reserved Copyright 2006-2009 © PFU LIMITED...
- Page 57 fi-5120C / fi-5220C Image Scanner Operator Guide TROUBLE SHOOTING CONTENTS MAP 3.1 Scanning Double Sided Docments (2) 6. Select [ADF (Duplex)] from [Scan Type]. 7. Click the [Scan] button. For [TWAIN Driver] dialog box setting, refer to "2.5 How to Use the Scanner Driver".
- Page 58 fi-5120C / fi-5220C Image Scanner Operator Guide TROUBLE SHOOTING CONTENTS MAP 3.2 Scanning Books [fi-5220C only] (1) CAUTION Never look directly the light source during scanning. 1. Open the document cover. 2. Remove the document cover as shown in the figure below. 3.
- Page 59 fi-5120C / fi-5220C Image Scanner Operator Guide TROUBLE SHOOTING CONTENTS MAP 3.2 Scanning Books [fi-5220C only] (2) 4. Refer to "2.4 Scanning Documents" and perform the scanning. ATTENTION Do not move the document during scanning. 5. When scanning ends, re-attach and gently close the document cover. All Rights Reserved Copyright 2006-2009 ©...
- Page 60 fi-5120C / fi-5220C Image Scanner Operator Guide TROUBLE SHOOTING CONTENTS MAP 3.3 Scanning Large Documents with Flatbed [fi-5220C only] 1. Remove the document cover as shown in the figure below. 2. Load the document on the document bed face down. 3.
-
Page 61: Scanning Documents Longer Than A4 Size
fi-5120C / fi-5220C Image Scanner Operator Guide TROUBLE SHOOTING CONTENTS MAP 3.4 Scanning Documents longer than A4 size (1) 1. Load the documents on the ADF paper chute. For details on loading documents, refer to "2.2 Loading Documents on the ADF for Scanning". - Page 62 fi-5120C / fi-5220C Image Scanner Operator Guide TROUBLE SHOOTING CONTENTS MAP 3.4 Scanning Documents longer than A4 size (2) 6. Select [Long page (Front Side)] or [Long page (Duplex)] from [Scan Type]. 7. Specify the length of documents and then click the [OK] button. All Rights Reserved Copyright 2006-2009 ©...
- Page 63 fi-5120C / fi-5220C Image Scanner Operator Guide TROUBLE SHOOTING CONTENTS MAP 3.4 Scanning Documents longer than A4 size (3) 8. Click the [Scan] button. For settings in the [TWAIN Driver] dialogbox, refer to "2.5 How to Use the Scanner Driver" . Images of scanned documents are displayed on the window of ScandAll 21.
-
Page 64: Scanning Different-Width Documents
fi-5120C / fi-5220C Image Scanner Operator Guide TROUBLE SHOOTING CONTENTS MAP 3.5 Scanning Different-width Documents When you scan a batch of documents with different widths by using the ADF, you may get skewed images from smaller sized documents. Be sure to scan only documents of the same width together. The following shows the procedure for scanning a batch of mixed size documents. -
Page 65: Saving Scanned Images In Pdf Format
fi-5120C / fi-5220C Image Scanner Operator Guide TROUBLE SHOOTING CONTENTS MAP 3.6 Saving Scanned Images in PDF Format (1) To save scanned images in PDF format, Adobe Acrobat must be installed on your PC. Adobe Acrobat can be installed from the provided Adobe Acrobat CD-ROM. -
Page 66: Using Scandall
fi-5120C / fi-5220C Image Scanner Operator Guide TROUBLE SHOOTING CONTENTS MAP 3.6 Saving Scanned Images in PDF Format (2) Using ScandAll 21 1. Load the documents on the ADF paper chute or flatbed. 2. Start up ScandAll 21.. From [Start] menu, select [Program] - [Scanner Utility for Microsoft Windows] - [ScandAll 21]. - Page 67 All Rights Reserved Copyright 2006-2009 © PFU LIMITED...
- Page 68 fi-5120C / fi-5220C Image Scanner Operator Guide TROUBLE SHOOTING CONTENTS MAP 3.6 Saving Scanned Images in PDF Format (3) 5. To end scanning, click the [Close] button. 6. Enter the file name and select the destination to save the scanned image. For details, refer to ScandAll 21 Help.
-
Page 69: Using Adobe Acrobat
Select [All Programs] - [Adobe Acrobat] from the [Start] menu. This starts up Adobe Acrobat. 3. From the [File] menu select [Create PDF] - [From Scanner]. "Acrobat Scan Plug-in"dialog box is displayed. 4. Select "FUJITSU fi-5120Cdj or "FUJITSU fi-5220Cdj" at [Scanner] and click [Scan] button. - Page 70 ATTENTION The image may be generated in poor quality when scanning with the default settings. It is recommended to change the settings with the following procedure. 1. Uncheck "Recognize Text Using OCR". 2. Click the [Image Settings...] button. The "Image Settings" dialog box appears. 3.
- Page 71 fi-5120C / fi-5220C Image Scanner Operator Guide TROUBLE SHOOTING CONTENTS MAP 3.6 Saving Scanned Images in PDF Format (5) 5. Select the scan resolution, document size and other scan conditions, and click the [Scan] button. 6. To end scanning, click the [Done] button. All Rights Reserved Copyright 2006-2009 ©...
- Page 72 fi-5120C / fi-5220C Image Scanner Operator Guide TROUBLE SHOOTING CONTENTS MAP 3.6 Saving Scanned Images in PDF Format (6) The scanned image is displayed. 7. Select [Save as...] or [Save] from [File] menu to save the scanned image. For the details on Adobe Acrobat operations, refer to the Adobe Acrobat manual and Help. All Rights Reserved Copyright 2006-2009 ©...
- Page 73 fi-5120C / fi-5220C Image Scanner Operator Guide TROUBLE SHOOTING CONTENTS MAP 3.6 Saving Scanned Images in PDF Format (7) HINT If you save scanned documents using this procedure, the file size may increase. For reducing the file size, please follow the procedure below. (It may take more time than usual) 1.
- Page 74 fi-5120C / fi-5220C Image Scanner Operator Guide TROUBLE SHOOTING CONTENTS MAP 3.6 Saving Scanned Images in PDF Format (8) HINT 5. Select one from [Default Settings]. The following shows an example of [Smallest File Size]. 6. Click [OK] button. 7. Enter a file name and click the [Save] button on the [Save PDF File As] dialogbox. All Rights Reserved Copyright 2006-2009 ©...
-
Page 75: Excluding A Color In The Image (Dropout Color)
fi-5120C / fi-5220C Image Scanner Operator Guide TROUBLE SHOOTING CONTENTS MAP 3.7 Excluding a Color in the Image (dropout color) A selected color (primary colors: red, green or blue) can be removed (dropped out) from the scanned image data. For example, if the document contains black text in a green frame, you can set the scanner to read only the text and eliminate (drop out) the green frame.To set the scanner to drop out a color, change the settings in the [TWAIN Driver] dialogbox before scanning. - Page 76 3. Click the [OK] button. The [TWAIN Driver] dialog box will be redisplayed. Continue scanning from this dialog box. All Rights Reserved Copyright 2006-2009 © PFU LIMITED...
- Page 77 fi-5120C / fi-5220C Image Scanner Operator Guide TROUBLE SHOOTING CONTENTS MAP 3.8 Skipping blank pages (1) Change settings in the [TWAIN Driver] dialog box for skipping blank pages at scanning documents. 1. Click [Option] button in the [TWAIN Driver] dialogbox. The [Option] dialogbox appears.
- Page 78 fi-5120C / fi-5220C Image Scanner Operator Guide TROUBLE SHOOTING CONTENTS MAP 3.8 Skipping blank pages (2) 3. Check the [Blank Page Skip] box. If an item other than "Ram cache" or "Use Both Memory" has been selected in the [Cache Mode:] and this check box is marked, it will change to "Ram cache".
-
Page 79: Detecting Multi Feeds
fi-5120C / fi-5220C Image Scanner Operator Guide TROUBLE SHOOTING CONTENTS MAP 3.9 Detecting Multi feeds (1) "Multi feed" is a feeding error that occurs when two or more sheets in the ADF paper chute are fed simultaneously into the scanner. You can set the scanner to detect multi feed, stop scanner operation, and display an error message. - Page 80 All Rights Reserved Copyright 2006-2009 © PFU LIMITED...
- Page 81 fi-5120C / fi-5220C Image Scanner Operator Guide TROUBLE SHOOTING CONTENTS MAP 3.9 Detecting Multi feeds (2) The following detection conditions are provided: None Multi feed detection is not performed. Check overlapping The scanner monitors the overlapping of documents. The scanner detects a multi feed by the differences in ultrasonic propagation.
- Page 82 fi-5120C / fi-5220C Image Scanner Operator Guide TROUBLE SHOOTING CONTENTS MAP 3.9 Detecting Multi feeds (3) 3) On the [Printers and Other Hardware] window, double click the [Scanners and Cameras] icon. The [Scanners and Cameras] window is displayed. 4) Right click [fi-5120Cdj] or [fi-5220Cdj], and select [Properties] from the menu. All Rights Reserved Copyright 2006-2009 ©...
- Page 83 fi-5120C / fi-5220C Image Scanner Operator Guide TROUBLE SHOOTING CONTENTS MAP 3.9 Detecting Multi feeds (4) The properties dialogbox of fi-5120Cdj or fi-5220Cdj appears. Click the "Device Set" tab. The following screen appears. All Rights Reserved Copyright 2006-2009 © PFU LIMITED...
- Page 84 fi-5120C / fi-5220C Image Scanner Operator Guide TROUBLE SHOOTING CONTENTS MAP 3.9 Detecting Multi feeds (5) 2. Click the [Multi feed] button. The following screen is displayed. All Rights Reserved Copyright 2006-2009 © PFU LIMITED...
- Page 85 fi-5120C / fi-5220C Image Scanner Operator Guide TROUBLE SHOOTING CONTENTS MAP 3.9 Detecting Multi feeds (6) 3. Specify the settings on the "Area for Multi feed Detection..." screen. 1) Mark the "Enable" check box. HINT You can select an area meassured from the top of the document, for which ●...
-
Page 86: Correcting Skewed Documents
fi-5120C / fi-5220C Image Scanner Operator Guide TROUBLE SHOOTING CONTENTS MAP 3.10 Correcting skewed documents (1) You can set the scanner so that skew of documents are detected and corrected automatically when skewed documents are fed into the ADF. Change the setting in the [TWAIN Driver] dialog box to enable this function. The following shows the procedure for changing the setting in the dialogbox: 1. - Page 87 All Rights Reserved Copyright 2006-2009 © PFU LIMITED...
- Page 88 fi-5120C / fi-5220C Image Scanner Operator Guide TROUBLE SHOOTING CONTENTS MAP 3.10 Correcting skewed documents (2) 3. Select the [Automatic Page Size Detection] from the "Automatic Size and Skew Detection" menu. 4. Click the [OK] button. The display returns to [TWAIN Driver] dialogbox. HINT With [Priority] slider control, you can change accuracy of Automatic Page Size Detection.
- Page 89 fi-5120C / fi-5220C Image Scanner Operator Guide TROUBLE SHOOTING CONTENTS MAP Chapter 4 DAILY CARE This chapter describes how to clean the scanner. WARNING When operating the scanner, the ADF's glass becomes very hot. Before you clean inside the scanner, turn off its power and unplug the AC adapter from the outlet.
-
Page 90: Cleaning Materials
For details on Cleaner F1, consult the agent where you bought your scanne or an authorized FUJITSU service providerr. Locations and Cycle for Cleaning... -
Page 91: Cleaning The Flatbed
fi-5120C / fi-5220C Image Scanner Operator Guide TROUBLE SHOOTING CONTENTS MAP 4.2 Cleaning the Flatbed [fi-5220C only] (1) ATTENTION Detergent for cleaning windows or glass cleaner can be used instead of cleaner F1. However, do not use paint thinner or other organic solvents. Cleaning the Flatbed The following parts needs to be cleaned in the Flatbed area: :Document holding pad... - Page 92 fi-5120C / fi-5220C Image Scanner Operator Guide TROUBLE SHOOTING CONTENTS MAP 4.2 Cleaning the Flatbed [fi-5220C only] (2) 1. Open the document cover. 2. Clean the following locations using a soft cloth moistened with cleaner F1. : Document holding pad. : Document bed.
- Page 93 All Rights Reserved Copyright 2006-2009 © PFU LIMITED...
-
Page 94: Cleaning The Adf
fi-5120C / fi-5220C Image Scanner Operator Guide TROUBLE SHOOTING CONTENTS MAP 4.3 Cleaning the ADF (1) As a Guideline, clean the ADF every 1,000 scanned sheets. Note that this guideline varies according to the type of documents you scan. For example, it may be necessary to clean the ADF more frequently if documents are scanned when the toner is not sufficiently fixed on the printout. - Page 95 fi-5120C / fi-5220C Image Scanner Operator Guide TROUBLE SHOOTING CONTENTS MAP 4.3 Cleaning the ADF (2) 2. Clean the following locations with a soft, dry cloth moistened with Cleaner F1. Item Pad ASSY (x 1) Feed rollers (x4) Pick roller (x1) Plastic rollers (x 4) Glass (x 2) Ultrasonic sensors (x 2)
- Page 96 All Rights Reserved Copyright 2006-2009 © PFU LIMITED...
-
Page 97: Pick Roller
fi-5120C / fi-5220C Image Scanner Operator Guide TROUBLE SHOOTING CONTENTS MAP 4.3 Cleaning the ADF (3) Pad ASSY Wipe the pad assy downwards. When cleaning the pad assy, be careful not to get your hand or the cloth caught on the pick spring (metal part). - Page 98 All Rights Reserved Copyright 2006-2009 © PFU LIMITED...
-
Page 99: Feed Roller
fi-5120C / fi-5220C Image Scanner Operator Guide TROUBLE SHOOTING CONTENTS MAP 4.3 Cleaning the ADF (4) Feed roller Clean lightly taking care not to roughen the surface of the rollers. Take particular care in cleaning the feed rollers since black debris on the rollers adversely affect the pickup performance. 1. - Page 100 Press center of ADF ATTENTION When the ADF has returned to its original position, make sure that it is completely closed. Paper jams or feeding errors may occur if the ADF is not closed completely. All Rights Reserved Copyright 2006-2009 © PFU LIMITED...
- Page 101 The screens and operations may differ slightly if the OS that you are using is other than Windows XP. Also, when FUJITSU TWAIN32 or FUJITSU ISIS is updated the screens and operations noted in this chapter will differ slightly. WARNING When operating the scanner, the ADFfs inside glass becomes very hot.
-
Page 102: Consumable And Replacement Cycle
Use only the consumables specified by PFU LIMITED. Do not use consumables and parts made by other manufacturers. To purchase the consumables, contact the FUJITSU scanner dealer where you purchased the scanner or an authorized FUJITSU scanner service provider. All Rights Reserved Copyright 2006-2009 © PFU LIMITED... - Page 103 fi-5120C / fi-5220C Image Scanner Operator Guide TROUBLE SHOOTING CONTENTS MAP 5.1 Consumable and Replacement Cycle (2) Guidelines for Consumable Replacement Cycle With this product, you can learn how many times the consumables are used so that you can estimate the right timing for the replace 1.
- Page 104 fi-5120C / fi-5220C Image Scanner Operator Guide TROUBLE SHOOTING CONTENTS MAP 5.1 Consumable and Replacement Cycle (3) 4. Right click on "fi-5120Cdj" or "fi-5220Cdj" icon, and select [Properties] (for Windows XP), or double click (for Windows 2000) The properties dialogbox of fi-5120Cdj or fi-5220Cdj appears. All Rights Reserved Copyright 2006-2009 ©...
- Page 105 fi-5120C / fi-5220C Image Scanner Operator Guide TROUBLE SHOOTING CONTENTS MAP 5.1 Consumable and Replacement Cycle (4) 5. Click the "Device Set" tab. The following screen is displayed. You can confirm the following information in this panel: Total number of scans ●...
- Page 106 fi-5120C / fi-5220C Image Scanner Operator Guide TROUBLE SHOOTING CONTENTS MAP 5.2 Replacing the Pad Assy (1) 1. Remove any documents on the ADF paper chute. 2. Open the ADF by pushing the ADF button. CAUTION Be careful, the ADF cover may close and pinch your finger. 3.
- Page 107 fi-5120C / fi-5220C Image Scanner Operator Guide TROUBLE SHOOTING CONTENTS MAP 5.2 Replacing the Pad Assy (2) 6. Reset the Pad Counter. When turning on the power, check that the scanner is connected to your PC. Open the [Scanners and Cameras] from the [Control Panel] of your PC. Open the properties dialogbox of fi-5120Cdj or fi-5220Cdj from the [Scanners and Cameras].
-
Page 108: Replacing The Pick Roller
fi-5120C / fi-5220C Image Scanner Operator Guide TROUBLE SHOOTING CONTENTS MAP 5.3 Replacing the Pick Roller (1) 1. Remove any documents on the ADF Paper Chute. 2. Remove the ADF paper chute. 3. Open the ADF by pulling the ADF Open Lever. ATTENTION Be careful, the ADF may close and pinch your finger. - Page 109 CAUTION The Pick roller Bushing is hard. Do not turn this bearing with your fingernails. Use a paper clip for turning the roller bushing if you can not rotate it with your finger. All Rights Reserved Copyright 2006-2009 © PFU LIMITED...
- Page 110 fi-5120C / fi-5220C Image Scanner Operator Guide TROUBLE SHOOTING CONTENTS MAP 5.3 Replacing the Pick Roller (2) 5. Remove the Pick roller from the shaft while lifting up the tab on the Pick roller. Pull out the shaft from the pick roller while lifting up its tab. ATTENTION If you push up the pick roller tab using your fingernail, it may heart or get chipped your fingernail.
- Page 111 fi-5120C / fi-5220C Image Scanner Operator Guide TROUBLE SHOOTING CONTENTS MAP 5.3 Replacing the Pick Roller (3) 7. Attach the Pick roller to the scanner. Attatch the Pick roller to the scanner in reverse order of the procedure for removing. 1.
- Page 112 fi-5120C / fi-5220C Image Scanner Operator Guide TROUBLE SHOOTING CONTENTS MAP 5.3 Replacing the Pick Roller (4) 10. Reset the Pick Roller Counter. When turning on the power, check that the scanner is connected to your PC. Open the [Scanners and Cameras] from the [Control Panel] of your PC. Open the properties dialogbox of fi-5120Cdj or fi-5220Cdj from the [Scanners and Cameras].
- Page 113 ATTENTION About troubles that are not described here, and the details of the errors, refer to the FUJITSU TWAIN32 Scanner Driver Help. All Rights Reserved Copyright 2006-2009 © PFU LIMITED...
-
Page 114: Removing Jammed Documents
fi-5120C / fi-5220C Image Scanner Operator Guide TROUBLE SHOOTING CONTENTS MAP 6.1 Removing Jammed Documents (1) If a document jam occurred, follow the procedure below to remove the jammed documents. CAUTION Take care not to get injured when removing jammed documents. ●... - Page 115 fi-5120C / fi-5220C Image Scanner Operator Guide TROUBLE SHOOTING CONTENTS MAP 6.1 Removing Jammed Documents (2) 4. Press down on the center of the ADF to return it to its original position and lock the ADF button. Press center of ADF ATTENTION Make sure that the ADF is completely closed.
- Page 116 fi-5120C / fi-5220C Image Scanner Operator Guide TROUBLE SHOOTING CONTENTS MAP 6.1 Removing Jammed Documents (3) If a document jam or Multi Feed errors occur frequenlty, follow the procedures below . 1. Align the edges of the document sheets. 2. Hold both the left and right sides of the document with both hands, and, as shown below, bend the document, bring back and release one side of the stack.
- Page 117 All Rights Reserved Copyright 2006-2009 © PFU LIMITED...
-
Page 118: Error Indications In Operator Panel
fi-5120C / fi-5220C Image Scanner Operator Guide TROUBLE SHOOTING CONTENTS MAP 6.2 Error Indications in the Operator Panel (1) When any error occurrs, the operator panel indicates "U" followed by a number for temporary errors or "E" followed by a number for device alarms (permanent error). Temporary errors can be resolved by the operator, but the device alarm requires recovery works by support engineers. -
Page 119: Device Alarms
An error in the image memory. authorized Trouble with the imprinter. FUJITSU scanner service provider. An alarm in the memory. Trouble with the SCSI interface controller. Trouble with the background switching mechanism. -
Page 120: Remedying Typical Troubles
"6.4 Items to Check Before Contacting the Agent Where You Bought the Scanner" and then contact the agent where you bought the scanner or an authorized FUJITSU scanner service provider. Scanner cannot be turned On. Indication on Function No. display goes out. - Page 121 If you cannot solve the problem after taking measures, check the items in "6.4 Items to check before contacting the dealer where you bought the scanner" and contact the dealer or an authorized FUJITSU scanner service provider . All Rights Reserved Copyright 2006-2009 © PFU LIMITED...
- Page 122 If you cannot solve the problem after taking measures, check the items in "6.4 Items to check before contacting the dealer where you bought the scanner" and contact the dealer or an authorized FUJITSU scanner service provider. All Rights Reserved Copyright 2006-2009 © PFU LIMITED...
- Page 123 fi-5120C / fi-5220C Image Scanner Operator Guide TROUBLE SHOOTING CONTENTS MAP 6.3 Remedying Typical Troubles Symptom: The scanning does not start. Back Did you unlock the shipping lock of the Turn OFF the scanner and unlock the shipping flatbed? lock. (*1) (fi-5220C only) Are the document loaded correctly on the ADF Load document correctly on ADF paper chute.
- Page 124 FUJITSU scanner service provider. *1) For details, refer to "Getting Started" 2.1 Installing the Scanner. *2) For details, refer to "Getting Started" 2.2 Connecting the scanner to your PC.
- Page 125 "6.4 Items to check before contacting the dealer where you bought the scanner" and contact the dealer or an authorized FUJITSU scanner service provider. *)For details on how to clean dirty locations, see "Chapter 4 DAILY CARE".
- Page 126 "6.4 Items to check before contacting the dealer where you bought the scanner" and contact the dealer or an authorized FUJITSU scanner service provider. *)For details on how to clean dirty locations, see "Chapter 4 DAILY CARE".
- Page 127 "6.4 Items to check before contacting the dealer where you bought the scanner" and contact the dealer or an authorized FUJITSU scanner service provider. *)For details on how to clean dirty locations, see "Chapter 4 DAILY CARE".
- Page 128 "6.4 Items to check before contacting the dealer where you bought the scanner" and contact the dealer or an authorized FUJITSU scanner service provider. *1) For cleaning the Flatbed, refer to " 4.2 Cleaning the Flatbed".
- Page 129 FUJITSU scanner service provider. *) For details, refer to "Getting Started" 2.1 Installing the Scanner. All Rights Reserved Copyright 2006-2009 © PFU LIMITED...
- Page 130 fi-5120C / fi-5220C Image Scanner Operator Guide TROUBLE SHOOTING CONTENTS MAP 6.3 Remedying Typical Troubles Symptom: Multi feed errors occur frequently. Back Do the documents satisfy the conditions Use documents that satisfy the requirements. described in "7.2 Document Quality"? (*1) When the multi feed detection is ON, are the Satisfy the multi feed detection conditions.
- Page 131 "6.4 Items to check before contacting the dealer where you bought the scanner" and contact the dealer or an authorized FUJITSU scanner service provider. *1)For details on requirements, see "7.2 Document Quality". *2)For details on multi feed, see "7.5 Multi feed Detection...
- Page 132 "6.4 Items to check before contacting the dealer where you bought the scanner" and contact the dealer or an authorized FUJITSU scanner service provider. *1) For details on requirements, see "7.2 Document Quality". *2) For details on how to install the consumables, see "5 REPLACING...
- Page 133 All Rights Reserved Copyright 2006-2009 © PFU LIMITED...
- Page 134 "6.4 Items to check before contacting the dealer where you bought the scanner" and contact the dealer or an authorized FUJITSU scanner service provider. *1) For details on requirements, see "7.2 Document Quality". *2) For details on how to clean the ADF, see "4.3 Cleaning the...
- Page 135 All Rights Reserved Copyright 2006-2009 © PFU LIMITED...
- Page 136 Have you adjusted the scan scale? scanner" and contact the dealer or an authorized FUJITSU scanner service provider. Set the scan scale. Display the properties of the scanner that you using on "Scanners and Cameras" in the control panel, then adjust the scan scale.
- Page 137 Did you adjust the offset (starting position for scanning the document)? scanner" and contact the dealer or an authorized FUJITSU scanner service provider.. Adjust the offset. Display the properties of the scanner that you using on "Scanners and Cameras" in the control panel, then adjust the [Sub-scan Setting].
- Page 138 fi-5120C / fi-5220C Image Scanner Operator Guide TROUBLE SHOOTING CONTENTS MAP 6.4 Items to Check Before Contacting the Agent Where You Bought the Scanner Check the following items before you contact the dealer where you bought the scanner. Print General Details Item findings (Example) fi-5120C...
- Page 139 Installation or PC connection issues Problem at the time of personal computer connection Item findings Windows Vista iWindowsj Displayed error message Application (Example) SCSI interface Interface controllers (Example) made by Adaptec SCSI Card 2940AU Feed system trouble Item findings Document type Main purpose of use Last cleaning date 2006...
- Page 140 Imaging system trouble Item findings Type and version of scanner driver Type of interface (Example) made by Adaptec controller SCSI Card 2940AU Windows Vista (Windows) Application software (Example) ScandAll 21, Acrobat Other Item findings Can both the original document and scanner image be sent by e-mail or Fax? available Print All Rights Reserved Copyright 2006-2009 ©...
-
Page 141: Checking Labels On The Scanner
fi-5120C / fi-5220C Image Scanner Operator Guide TROUBLE SHOOTING CONTENTS MAP 6.5 Checking Labels on the Scanner This section describes how to check the labels on the scanner. Positions of Labels on the Scanner The following shows where the two labels are located on the scanner. Label A (example): Indicates scanner information. - Page 142 fi-5120C / fi-5220C Image Scanner Operator Guide TROUBLE SHOOTING CONTENTS MAP Chapter 7 ADF AND PAPER SPECIFICATION This chapter describes the required document size and paper quality for ensuring correct operation when scanning documents on the ADF. All Rights Reserved Copyright 2006-2009 © PFU LIMITED...
-
Page 143: Document Size
fi-5120C / fi-5220C Image Scanner Operator Guide TROUBLE SHOOTING CONTENTS MAP 7.1 Document Size The following shows the size of documents that can be scanned on the ADF. Maximum Minimum 216 (8.5 in) 356 (14 in) 53 (2.1 in) 74 (2.9 in) (Unit:mm) All Rights Reserved Copyright 2006-2009 ©... -
Page 144: Document Quality
fi-5120C / fi-5220C Image Scanner Operator Guide TROUBLE SHOOTING CONTENTS MAP 7.2 Document Quality (1) Document Type The following paper types are recommended for document use: Woodfree paper ● Wood containing paper ● When using documents of paper type other than the above, check whether or not the document can be scanned by test- scanning a few sheets before executing the actual document. - Page 145 Carbonless paper contains chemical substances that may damage the Pad ASSY or rollers (e.g. Pick ● roller) when documents are fed. Pay attention to the following: Cleaning: If pick errors occur frequently, clean the Pad ASSY and Pick rollers. For details on cleaning the Pad ASSY and Pick rollers, see "4.3 Cleaning the ADF".
- Page 146 fi-5120C / fi-5220C Image Scanner Operator Guide TROUBLE SHOOTING CONTENTS MAP 7.2 Document Quality (2) ATTENTION This scanner can scan ID cards through the Automatic Document Feeder with the following precautions. Place one card at a time into the Auto Document Feeder. ●...
-
Page 147: Maximum Document Loading Capacity
fi-5120C / fi-5220C Image Scanner Operator Guide TROUBLE SHOOTING CONTENTS MAP 7.3 Maximum Document Loading Capacity The maximum number of sheets that can be loaded on the ADF paper chute is determined by the size and weight of the document. The following graph shows the maximum document loading capacity of ADF according to paper weight. Unit Conversion 64.5... -
Page 148: Area Not To Be Perforated
fi-5120C / fi-5220C Image Scanner Operator Guide TROUBLE SHOOTING CONTENTS MAP 7.4 Area not to be perforated When using the ADF, document trouble might occur if there are punched holes in the shaded area in the following figure. If hole-punched documents must be scanned, use the Flatbed. All Rights Reserved Copyright 2006-2009 ©... -
Page 149: Multi Feed Detection Conditions
fi-5120C / fi-5220C Image Scanner Operator Guide TROUBLE SHOOTING CONTENTS MAP 7.5 Multi feed Detection Conditions (1) There are three multi feed detection modes: document overlapping, document length, and both document thickness and length. The following conditions must be satisfied in each of these detection modes. Detection by Document Overlapping Sheets of the same thickness shall be set in the ADF at a time. - Page 150 fi-5120C / fi-5220C Image Scanner Operator Guide TROUBLE SHOOTING CONTENTS MAP 7.5 Multi feed Detection Conditions (2) HINT The type of document and document conditions sometimes cause the multi feed detection rate to drop. Multi feed detection monitoring area All Rights Reserved Copyright 2006-2009 © PFU LIMITED...
- Page 151 fi-5120C / fi-5220C Image Scanner Operator Guide TROUBLE SHOOTING CONTENTS MAP Chapter 8 SCANNER SPECIFICATION This chapter lists the scanner specifications. All Rights Reserved Copyright 2006-2009 © PFU LIMITED...
-
Page 152: Basic Specifications
fi-5120C / fi-5220C Image Scanner Operator Guide TROUBLE SHOOTING CONTENTS MAP 8.1 Basic Specifications Item Specification Notice Scanner Type fi-5120C: ADF(Automatic Document Feeder) fi-5220C: ADF + Flatbed Image sensor fi-5120C: CCD x 2 fi-5120C: Front / Back fi-5220C: CCD x 3 fi-5220C: Front / Back / Flatbed Light source... - Page 153 The scanning speed noted is the value when using the ADF to scan. The maximum stacking capacity varies according to the document thickness. For details, see "Chapter7 ADF AND PAPER SPECIFICATION". The Ultra SCSI and USB 2.0 / 1.1 interfaces cannot be used at the same time. If you connect the scanner with USB 2.0, it is required that the USB port and the Hub are compliant with USB 2.0.
-
Page 154: Installation Specifications
fi-5120C / fi-5220C Image Scanner Operator Guide TROUBLE SHOOTING CONTENTS MAP 8.2 Installation Specifications Item Specification Dimensions (mm) Depth Width Height (fi-5120C: Without ADF paper fi-5120C: 168 mm fi-5120C: 301 mm fi-5120C: 158 mm chute) (6.6 in) (11.8 in) (6.2 in) fi-5220C: 569 mm fi-5220C: 302 mm fi-5220C: 229 mm... -
Page 155: External Dimensions
fi-5120C / fi-5220C Image Scanner Operator Guide TROUBLE SHOOTING CONTENTS MAP 8.3 External Dimensions The following shows the external dimensions: fi-5120C fi-5220C (Unit:mm) All Rights Reserved Copyright 2006-2009 © PFU LIMITED... -
Page 156: Appendix 1 Before Using The [Scan] Or The [Send To] Button
fi-5120C / fi-5220C Image Scanner Operator Guide TROUBLE SHOOTING CONTENTS MAP APPENDIX 1 Before using the [Scan] or the [Send to] button By setting the link of the application software to the [Scan] or [Send to] button, you can launch the linked application by simply pushing the button. - Page 157 fi-5120C / fi-5220C Image Scanner Operator Guide TROUBLE SHOOTING CONTENTS MAP APPENDIX 1 Before using the [Scan] or the [Send to] button The events available for this function are: Scan button (When pushing the [Scan] button) ● Send to 1-9 (When pushing the [Send] to button) ●...
Need help?
Do you have a question about the fi-5120C and is the answer not in the manual?
Questions and answers