
Related Manuals for Emerson MS3105


Summary of Contents for Emerson MS3105
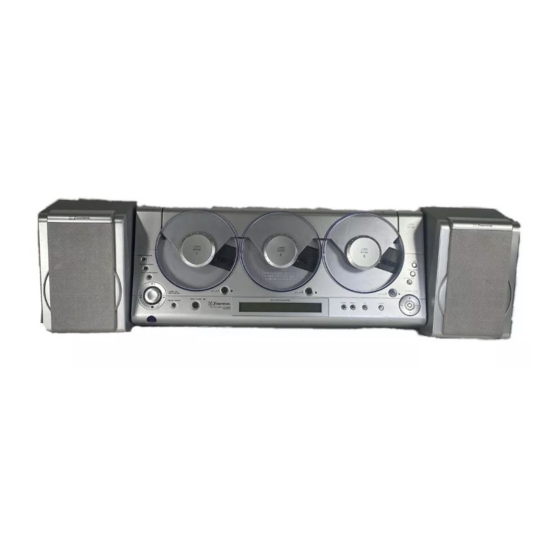
- Page 1 HOME AUDIO SYSTEM with 3 CD CHANGER and DIGITAL AM/FM RECEIVER OWNER'S MANUAL MS3105 Visit our web site at www.emersonradio.com MS3105_120503.p65 5/12/2003, 12:03...
-
Page 2: Important Safety Instructions
CAUT I ON TO PREVENT FIRE OR SHOCK HAZARD, DO NOT USE THIS PLUG WITH AN EXTENSION CORD, RECEPTACLE OR OTHER OUTLET UNLESS THE BLADES CAN BE FULLY INSERTED TO PREVENT BLADE EXPOSURE. TO PREVENT FIRE OR SHOCK HAZARD, DO NOT EXPOSE THIS APPLIANCE TO RAIN OR MOISTURE. C AU T I O N RISK OF ELECTRIC SHOCK DO NOT OPEN... - Page 3 This product was manufactured using the highest quality components and standards of workmanship. It was tested by Emerson inspectors and found to be in perfect working order before it left our factory. However, there is always the chance that some problem may occur because of rough handling during shipment to the retail store or to the final consumer.
- Page 4 IMPORTANT NOTES • Avoid installing this unit in places • Operate controls and switches as exposed to direct sunlight or close to described in the manual. heat radiating appliances such as • Before turning ‘ On’ the power, make electric heaters, on top of other stereo certain that power cord is properly equipment that radiates too much heat, installed.
- Page 5 PREPARATION FOR USE UNPACKING AND SET-UP • Carefully remove the main unit, speakers, and remote control from the carton, and remove all packing materials from the components. • Remove any descriptive labels or stickers from the front panel of the main unit.
- Page 6 PROTECT YOUR FURNITURE This model is equipped with non-skid rubber 'feet' to prevent the product from moving when you operate the controls. These 'feet' are made from non-migrating rubber material specially formulated to avoid leaving any marks or stains on your furniture.
-
Page 7: Speaker Connections
SPEAKER CONNECTIONS Connect the speakers to the red (+) and black (–) terminals on top of the unit as shown below. (Press the red (+) or black (–) terminal tab, insert wire, release tab to hold wire in place.) The speakers may be placed close to the main unit or as far apart as the cables will allow. - Page 8 CONNECTING TO EXTERNAL AUDIO SOURCES • Connect your playback* equipment (eg. MiniDisc or cassette player) to the AUX IN jacks. LINE AUX IN • Connect your recording equipment (eg. MiniDisc or cassette recorder) into the LINE OUT jacks. CASSETTE LINE IN RECORDER LINE OUT * Other examples of playback equipment include your TV, video recorder, DVD...
-
Page 9: Power Source
POWER SOURCE This system is designed to operate on 120V AC 60Hz power supply only. Connecting this system to any other power source may cause damage to the system and such damage is not covered by your warranty. Make sure that you connect this system to an AC outlet that is always “live”. Do not connect this system to an AC outlet that is controlled by a wall switch. -
Page 10: Installing Remote Control Batteries
INSTALLING REMOTE CONTROL BATTERIES The remote controller requires 2 “AAA” batteries (not included). Please use a well- known brand of alkaline batteries for longest life and best performance. Remove the remote control battery compartment cover by sliding the cover in the direction of the arrow. - Page 11 LOCATION OF CONTROLS AND INDICATORS COLOR 15.) PLAY CD 3 Button. POWER/STANDBY Button. 16.) VOLUME Up/ Down Buttons. Skip-Rev/Search Button. 17.) PRESET-UP/RANDOM Button. CD Stop Button. 18.) TIME MODE/REMAIN Button. Skip-Fwd/Search Button. 19.) PRESET-DOWN/REPEAT Button. CD Play/Pause Button. 20.) CD/DISC SKIP Button. 6.) TIME-SET/MEMORY Button.
-
Page 12: Remote Control
REMOTE CONTROL 29.) POWER/STANDBY Button. 30.) CD/DISC SKIP Button. 31.) TUNER/BAND Button. 32.) AUX Input Button. 33.) SKIP FWD Button. 34.) PLAY/PAUSE Button. DISC SKIP STANDBY 35.) REMAIN/TIME MODE Button. PLAY/PAUSE SKIP-REV. SKIP-FWD. S T O P 36.) RANDOM/PRESET-UP Button. OPEN/CLOSE 37.) MEMORY/TIME-SET Button. - Page 13 OPERATING INSTRUCTIONS TURNING THE SYSTEM ‘ON’ Plug the unit into the 120V 60Hz AC outlet. At the front of the unit, the light within the POWER/STANDBY button will be red to indicate that the unit is in standby (standby means plugged-in but not switched on).
-
Page 14: Setting The Clock
SETTING THE CLOCK Use the buttons on the unit’ s front panel to carry out this procedure. 1.) Press POWER/STANDBY button to switch the unit “On”. 2.) Press the AUX button. (Note the time setting flashes in the center of the display.) 3.) Press the TIME-SET/MEMORY button so that the hour setting flashes, then press... -
Page 15: General Controls
GENERAL CONTROLS Switch the unit “On” or “Off” by pressing the button. Selecting The Sound Source To select the sound source you wish to listen to, press: • CD/DISC SKIP to listen to compact disc, or • TUNER/BAND to listen to radio, or •... - Page 16 EQ (Graphic Equalizer) Button The graphic equalizer (EQ) adjusts the character of the sound. It provides a range of 4 tonal shapes: ROCK, CLASSIC, POP and FLAT. Press EQ repeatedly to set the graphic equalizer according to your taste or the style of music being played.
-
Page 17: Listening To The Radio
LISTENING TO THE RADIO Tuning-in A New Radio Station Pressing TUNER/BAND button selects radio operation. The display indicates the tuning frequency. At the left of the display, the band is indicated: FM or AM. Pressing the TUNER/BAND button changes the band. After selecting the required band, you can tune to a radio station in either of the following ways: Automatic Tuning... - Page 18 Presetting Stations In The Tuner Memory You can preset up to 40 stations (20 AM and 20 FM) in the tuner memory for immediate recall. 1.) Tune to the first station you wish to memorize using the either the Automatic or Manual Tuning method described on page16.
- Page 19 5.) Tune to the next station to be memorized, press the TIME-SET/MEMORY button, press the PRESET UP/RANDOM button to select Preset (Channel) number “02”, and press the TIME SET/MEMORY button again. 6.) Repeat Step 5, selecting a different Preset (Channel) number each time, until you have entered up to 20 stations on one band, then press the TUNER/ BAND button to select the other band and follow the same procedure to preset up to 20 stations on that band.
- Page 20 Recalling Preset Stations 1.) Press the TUNER/BAND button to select the Tuner function and the desired band. 2.) Press the PRESET UP/RANDOM or PRESET DOWN/REPEAT buttons on the front panel or the remote control to select the desired Preset (Channel) number.
- Page 21 PLAYING COMPACT DISCS This system can play normal CDs, and most Recordable CDs (CD-R), and Rewriteable CDs (CD-RW). However the playability of CD-R and CD-RW discs is dependent on the type of software used for ‘ ripping’ and ‘ burning’ the discs, and the quality of the blank discs used for recording.
- Page 22 Normal Playback 1.) Press the POWER/STANDBY button to turn the system ‘ On’ . The display and CD door lighting comes on. 2.) Press the CD/DISC SKIP button on the front panel or remote control to select the CD function. The display will show a series of flashing “dashes”...
- Page 23 5.) Press the OPEN/CLOSE button to close the CD door. . Do not close the door by hand. Each of the discs will spin momentarily and then the system will read the first DISC disc and the display will show the TOTAL total tracks and playing time of the first disc.
- Page 24 Immediate CD Playback If you are listening to the radio or an auxiliary audio source you can begin immediate CD playback by pressing the CD1, CD2, or CD3 buttons on the front panel or the remote control. Pause Control To Pause momentarily during CD playback press the PLAY/PAUSE button again.
- Page 25 Repeat Playback You can repeat all discs, one disc, or just one track. To select the mode you require, press PRESET-DOWN/REPEAT button until the top of the display indicates one of the following: All discs repeat ALL DISC One disc repeat DISC One track repeat To cancel repeat play, press PRESET-DOWN/REPEAT button until the repeat...
- Page 26 Programmed Playback This system has a 60 track programmable memory that allows you to program up 60 tracks on 3 discs for playback in any desired order. NOTE: YOU CANNOT PROGRAM THE PLAYER WHILE A DISC IS PLAYING. YOU MUST PRESS THE STOP BUTTON TO STOP PLAYBACK BEFORE BEGINNING THE PROGRAM STEPS BELOW.
- Page 27 5.) When the desired disc and track numbers appear in the display DISC MEMORY press the TIME-SET/MEMORY button again to enter that disc and track in Program Memory number 1. The track number display returns to “00” and the Program Memory number display advances to “P –...
- Page 28 Program Repeat Function You can use the Program and Repeat functions together to continuously repeat the programmed sequence. After programming the desired sequence press the PRESET-DOWN/REPEAT button until the “ ALL DISC” indicator appears in the display, then press the PLAY/PAUSE button to begin programmed repeat playback.
- Page 29 Track and Time Displays • The correct time is displayed when the system is in the Standby or AUX modes. • In TUNER mode the radio frequency is displayed. Press the TIME-MODE/ REMAIN button repeatedly to cycle the display as follows: Time Display Timer On setting Timer Off setting...
-
Page 30: Timer Operation
TIMER OPERATION The Timer facility allows you to set the unit to switch itself “On” and “Off” automatically, for example, to wake you up each morning. While setting up the Timer, make sure you carry out each step within 5 seconds, otherwise the operation will time out and you will have to start again. - Page 31 7.) Immediately press buttons to set the minute, then press TIME-SET/ MEMORY button. The “switch-on” and “switch-off” times have now been set. To check them at any time, press TIME MODE/REMAIN button repeatedly to step through the TIMER ON and TIMER OFF settings on the display. 8.) To activate the timer, press TIMER button (on the front panel) so that TIMER Indicator appears at the right of the display.
- Page 32 WALL MOUNTING INSTRUCTIONS NOTE: The plastic legs must be removed from the main unit before wall mounting. To remove the legs, slide them downward as shown. To re-attach the legs, slide the U-shaped cut-outs in the legs upwards over the round posts at the back of the unit.
- Page 33 • Have someone hold the main unit against the wall in the desired location and make a pencil mark on the wall to indicate center point of the top edge of the cabinet. PENCIL MARK AT CENTER • If there is no AC outlet directly below the desired mounting location you may use a UL approved extension cord.
- Page 34 TEMPLATE INSTRUCTIONS 1.) Select the desired location for wall mounting after carefully reviewing the "General Precautions and Recommendations" of the wall mounting instructions. 2.) Tape the template to the wall, or other surface, in the desired location. Align the top edge of the template with the pencil mark you made on the wall. Be sure to allow at least 3"...
- Page 35 7.) Insert the tip of the anchor into each hole and use a hammer to tap the anchors all the way in until they are flush with the wall surface. 8.) Insert the screw into the anchor and tighten the screw until it touches the collar on the anchor.
- Page 36 10.) Position the main unit over the two screw heads so that the heads of the screws fit into bottom of each "Keyhole" on the back cabinet. When the two screw heads are inside the keyholes, slide the main unit slightly downward until each screw head is in the top of the keyhole.
- Page 37 CARE AND MAINTENANCE COMPACT DISC CARE • To remove a disc from its storage case, press down on the center of the case and lift the disc out, holding it carefully by the edges. • Fingerprints and dust should be carefully wiped off the disc’ s recorded surface with a soft cloth.Unlike conventional records, compact discs have no grooves to collect dust and microscopic debris, so gently wiping with a soft cloth should remove most particles.
-
Page 38: Limited Warranty
For repair or replacement, pack your unit in a padded box, enclose your check or money order payable to Emerson Radio Corp. in the amount of $9.00 (not required by California residents) to cover shipping and handling costs, and enclose a copy of your proof of purchase. - Page 39 EMERSON Part No.: 16-2916 Printed in China 312-01 MS3105_120503.p65 5/12/2003, 12:03...
Need help?
Do you have a question about the MS3105 and is the answer not in the manual?
Questions and answers