Advertisement
Quick Links
Advertisement

Related Manuals for Skil 3110

Summary of Contents for Skil 3110
-
Page 2: General Safety Rules
Read and understand the owner’s manual and labels affixed THE USE OF ANY OTHER ACCESSORIES NOT SPECI- to the tool. Learn its application and limitations as well as the FIED IN THE CURRENT SKIL CATALOG MAY CREATE A specific potential hazards peculiar to this tool. HAzARD. -
Page 3: Assembly Time
“top-heavy” and likely to tip over. cause cancer, birth defects or other reproductive harm. Use only Skil replacement parts. Any others may create a Some examples of these chemicals are: hazard. -
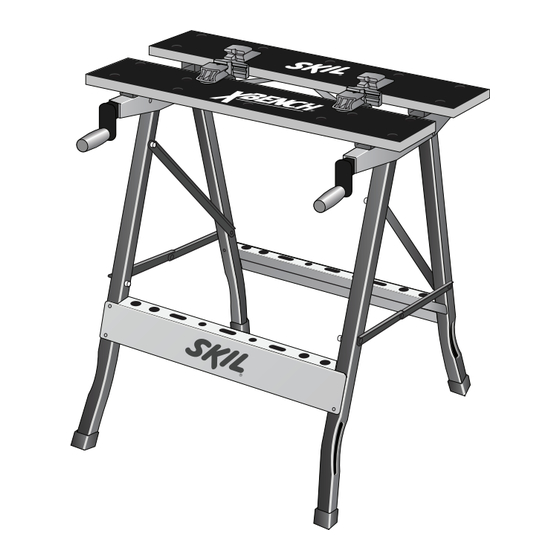
Page 4: Overall Assembly
Overall Assembly Fig. 1 Assembly Hardware... -
Page 5: Step 1: Assemble Legs
Step 1: Assemble Legs S Monteringsanvisingar Kokoonpano-Ohjeet Fig. 2... - Page 6 Step 2: Assemble Cross braces Fig. 3...
- Page 7 Step 3: Assemble Clamp Fig. 4...
- Page 8 Step 4: Assemble Table Top Fig. 5...
-
Page 9: Operating Instructions
Operating Instructions Step 1. Install clamping blocks into the holes in the workbench Step 4. Hold the workpiece with one hand between the jaws and (Fig. 6). lay it down on the clamping arms (Fig. 9). Fig. 6 Fig. 9 Step 5. - Page 10 Operating Instructions The figures below are some common clamping methods. Fig. 12 To unfold bench, pull up rear while pushing down in front. Ensure To fold bench, push up on hinged support arm, then pull up on hinged support arm is locked (Fig. 13). front of bench while pushing down on the rear (Fig.
- Page 12 emps de montage La durée prévue pour assembler et régler correctement cette scie est de deux heures.
- Page 13 Fig. 1...
- Page 14 S Monteringsanvisingar Kokoonpano-Ohjeet Fig. 2...
- Page 15 Fig. 3...
- Page 16 Fig. 4...
- Page 17 Fig. 5...
- Page 18 Fig. 6 Fig. 9 Fig. 10 Fig. 7 Fig. 11 Fig. 8...
- Page 19 Fig. 12 Fig. 13 Fig. 14...
- Page 21 emps de montage La durée prévue pour assembler et régler correctement cette scie est de deux heures.
- Page 22 Fig. 1...
- Page 23 S Monteringsanvisingar Kokoonpano-Ohjeet Fig. 2...
- Page 24 Fig. 3...
- Page 25 Fig. 4...
- Page 26 Fig. 5...
- Page 27 Fig. 6 Fig. 9 Fig. 10 Fig. 7 Fig. 11 Fig. 8...
- Page 28 Fig. 12 Fig. 13 Fig. 14...
- Page 32 2610009628 01/10 Printed in China...
Need help?
Do you have a question about the 3110 and is the answer not in the manual?
Questions and answers