Table of Contents
Advertisement
Quick Links
Advertisement
Table of Contents

Related Manuals for Sharp UP-X300CF256


Summary of Contents for Sharp UP-X300CF256
- Page 1 POS TERMINAL MODEL UP-X300 FRONT END INSTRUCTION MANUAL...
-
Page 2: Introduction
INTRODUCTION Thank you very much for your purchase of the SHARP POS Terminal Model UP-X300. This UP-X300 POS terminal operation manual explains the operation procedure of UP-X300 which is used as a terminal in the POS system. Please read this manual carefully before operating your machine in order to gain full understanding. -
Page 3: Table Of Contents
CONTENTS INTRODUCTION ································································································································ 1 CONTENTS ······································································································································· 2 SYSTEM CONFIGURATION ············································································································· 6 Peripherals connectable ································································································ 6 Printer sharing ··············································································································· 6 Multilingual remote printer ····························································································· 6 Receipt ON/OFF function ······························································································ 6 Prior to Operating the POS Terminal ···················································································· 7 How to use the touch panel ···································································································· 7 Operator display screen configuration ····················································································... - Page 4 Non-turnover sales ··············································································································· 39 PLU Menu entries ················································································································· 39 Modifier PLUs ······················································································································· 40 Promotion Function ··············································································································· 41 Mix and match function ································································································ 41 Automatic modifier ······································································································· 42 Happy hour ·················································································································· 42 Link PLU entries ··················································································································· 43 Combo meal entries ·············································································································· 44 Set PLU entries ·····················································································································...
- Page 5 Paid-out (PO) entry ··············································································································· 76 No sale (exchange) ··············································································································· 77 Transferring cash ·················································································································· 77 Cashing a cheque ················································································································· 77 Service charge ······················································································································ 78 VIP sales ······························································································································· 78 Gratuity ································································································································· 78 Text Entries ···························································································································· 79 Free text entries ···················································································································· 79 Address entries ····················································································································· 81 10 Correction ······························································································································...
- Page 6 13 Employee Function ············································································································· 125 Employee log-on/log off ······································································································ 125 Employee’s working time recording ···················································································· 127 Time-in operation ······································································································· 127 Break-in operation ····································································································· 128 Break-out operation ··································································································· 129 Time-out operation ····································································································· 130 Editing employee’s time record ··························································································· 131 Sales for employees ··········································································································· 134 Supervisor clerk ··················································································································...
-
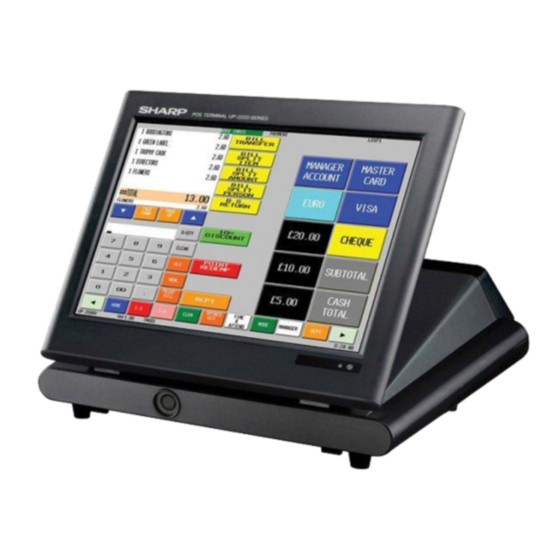
Page 7: System Configuration
POS terminal. Please refer to the following list for the peripherals connectable with your POS terminal. For the applicable peripheral models, please contact your authorized SHARP dealer. ■ Peripherals connectable... -
Page 8: Prior To Operating The Pos Terminal
To touch the panel, use your finger or a stylus. Never apply excessive force when touching the display and never use any sharp-pointed objects including your fingernails on the display. In order to display another window or to scroll to another window, touch an arrow as shown in the example below. -
Page 9: Operator Display Screen Configuration
Operator display screen configuration Your POS terminal provides five kinds of screens for the operator display, and each screen consists of some areas. In this section, general information about the screens and areas are provided. However, please note that since each screen can be created for your specific use, screens including area layout, area size, key name, key layout, key size, etc. -
Page 10: Screens
■ Screens The POS terminal provides the following four kinds of screens to execute various functions. The details of each part of each screen is described in the subsequent section. Initial screen The screen that is displayed when you turn on the POS terminal and when you make a sign-off operation. - Page 11 Table layout screen The screen to access tables for guest checks. Graphical table layout screen and open table list belong to this screen. You can go to the graphical table layout screen by sign-on operation or by touching the [TABLE LAYOUT] key, and the open table list by touching the [TABLE LIST] key. Information/ status area Graphical table...
- Page 12 Registration screen The screen for item registration, payment and other functions. You can go to a registration screen by executing a sign-on operation or by touching the [ORDER] key. Information/ status area Key window Receipt window Key window Key window Multiple numbers of the registration screens can exist on your POS terminal, and can be accessed by entering a number and touching the [SCREEN #] key.
-
Page 13: Areas Configuring Screens
■ Areas configuring screens Information/Status window This area displays information and status such as date, time, clerk name and mode. Date/Time/Clerk name Time zone/Room info. Screen name Registration information area Registration information area On this area, the following information icons will appear when the corresponding condition is satisfied. Tax shift (In case of Tax shift 1) Department shift... - Page 14 Scroll message window This area displays scroll messages for terminals, clerks and customers. Under the clerk sign-off status, the scroll message for a terminal may appear, when a clerk is signed-on, a scroll message for the clerk may appear. Item key window Sales items are displayed in the window.
- Page 15 Receipt window The receipt window appears only on registration screens. Table # key Check # key Next check key Previous check key Item area - quantity, item name and amount are displayed. Slider Separation line - previous order and new order may be separated with the line (depending on programming).
- Page 16 Pop-up window When data entry is required to execute the function you selected by touching a key, for example, when you touch the [NAME/ADDR] key to enter the name and address of a guest, a pop-up window will appear automatically. Enter the necessary information using the keyboard or keypad appeared, and/or or select (touch) an option when options are listed.
- Page 17 Table layout window The table layout window has graphical table layout and table list window, which appear on the table layout screen only. Graphical table layout window Open table list window...
-
Page 18: Viewing The Customer Display (Option)
Viewing the customer display (option) The UP-X300 has no standard customer display. However, the pole type or integrated type customer display can be attached. On the customer display, sales item, price, payment information and messages for customer may be displayed. The message is scrolled from the right to left on the display. Screen save mode To save the electrical power or the display’s life, your POS terminal is provided with a screen save function. -
Page 19: Key List (Excepting Item And Combo Keys)
Key list (except item and combo keys) Caption (default) Function 0 thru 9 Used to enter a numeric data. (0 thru 9) Used to enter a numeric data. (00) Used to enter a numeric data. (000) Used to enter a 1/2 Used to enter a fractional part. - Page 20 Caption (default) Function WITH Adds a tied PLU for combo or set PLU. WITHOUT Deletes a tied PLU from a combo or set PLU. NEXT COND. Goes to next condiment without setting current condiment. CHG COND. Changes a condiment (for dessert feature). WASTE Goes to the waste mode.
- Page 21 Caption (default) Function CASH TIP In Allows tip entry by cash. Non Cash TIP In Allows tip entry by check/charge. Tip Paid Allows payment of tip to an employee. EDIT TIP Allows to edit tip amount. Tip Transfer Allows tip transfer/split. MDSE SBTL (For US tax system) SBTL...
- Page 22 Caption (default) Function BILL Allows to print a bill. G.C.RCPT Allows to print a guest check receipt. G.C. COPY Allows a guest check copy. E.BILL Allows to print a entertainment bill. C.BILL Allows to print a cumulated bill. MACRO# Executes a macro key entry. MACRO n (macro name) Executes the macro entry.
-
Page 23: Prior To Making Item Entries
Prior to Making Item Entries General operation flow for daily registration Checking connection of peripherals and printer paper Make sure that all peripherals are connected securely. Also make sure that all printers in your system have adequate paper rolls. For more information about the peripherals and applicable paper rolls for printers, please refer to the corresponding printer manual. -
Page 24: Error Warning
Error Warning When an error occurs on your POS terminal, an error message will appear on the operator display. For displayed error messages, there are two options: Error messages are displayed with the [OK] key, touching the [OK] key makes the message clear. Another option is that an error message disappears automatically. - Page 25 • When Drink Dispenser Missoperation memory gets full The registration of drink dispenser debit is prohibited. Please call your manager. • When Reg Buffer gets full The registration is prohibited. Please call your manager. • When PLU memory gets full The registration is prohibited.
-
Page 26: Clerk Sign-On/Sign-Off Operation
Clerk sign-on/sign-off operation ■ Sign-on operation Prior to item entry, the clerk will be compelled to enter his or her assigned clerk code. However, this may not be necessary if the POS terminal has been programmed for the clerk code entry as re- designation mode. -
Page 27: Sign-Off Operation
■ Sign-off operation A signed-on clerk may be automatically signed off after finalizing a transaction. If not, the clerk should make a sign-off operation when he or she finish his or her operation. Use the following procedure. If another clerk is signed on while a clerk is signed on, the latter will automatically be signed off, unless the overlapped clerk entry is allowed. -
Page 28: Special Password
■ Special password When you make an operation, you may be required to enter the special password to execute the operation. In this case the password entry window will appear automatically. Enter the special password, and touch [Enter] key. ■ Reason code When you make some operations, you may be required to enter a reason code to execute the operation. -
Page 29: Starting Cash Memory
Starting cash memory You may be required to enter the float amount (starting cash memory) in the drawer before starting entry operations. The amount should be discriminated from the sales amount when reports are generated, or in case of cash/cheque declaration is compulsory (please refer to CCD section for details), that amount should be omitted from the total amount of money for cash/cheque declaration. -
Page 30: Item Entries
Item Entries Single item entries ■ Direct PLU entries Only preset entry is allowed: ➞ [Direct PLU key] Only open entry is allowed: ➞ Unit price ➞ [Direct PLU key] ➞ [Direct PLU key] ➞ (Key pad appears) ➞ Unit price ➞ [ENTER] Preset and open entries are allowed: ➞... -
Page 31: Ean Entries
■ EAN entries Ä Scanning EAN code: EAN code ➞ [PLU/SUB] Entering EAN code: NOTE • When scanning or entering an undefined code, your POS terminal will go into the learning function mode if the learning function is allowed. For details of the learning function, please refer to “PLU/EAN learning function”. -
Page 32: Repeat Entries
Select an item and touch [Enter]. NOTE • You can sort the list by name or the code. Touch the column title “Code” or “Name”. Repeat entries You can use this function for repetitive entries of the same items. Touch an item on the receipt window and touch the [+] key. You can repeat touching the [+] key to a desired number. -
Page 33: Repeat Round Entries
Repeat round entries This function is intended for a bar tender to accomplish reorder entries simply by touching a single key, when a guest or a group of a guest reorders drinks. You can enter reordered items based on the last order by touching the [REPEAT ROUND] key. For example, it is assumed that beer, whiskey and wine are preprogrammed so that the repeat round is allowed, and when the following orders are done, the registration are conducted as follows. -
Page 34: Multiplication Entries
Multiplication entries Use this feature when you need to enter two or more the same items. This feature helps you when you sell a large quantity of items or need to enter quantities that contain decimals. ■ Direct PLU entries Only preset entry is allowed: ➞... -
Page 35: Ean Entries
■ EAN entries Scanning EAN code: Ä Quantity ➞ (Scan EAN code) Entering EAN code: Quantity ➞ [(x)] ➞ EAN code ➞ [PLU/SUB] ■ Using PLU name search function You can use the PLU name search function for multiplication entry. Enter an quantity, and start PLU name search by touching the [PLU NAME] key. -
Page 36: Split-Pricing Entries
Split-pricing entries You will use this function when your customer wants to purchase more or less than the base quantity of a loose item. ■ Direct PLU entries Only preset entry is allowed: ➞ Selling q’ty ➞ [(x)] ➞ Base q’ty ➞ [Direct PLU key] Only open entry is allowed: ➞... -
Page 37: Plu Code Entries
■ PLU code entries Only preset entry is allowed: ➞ Selling q’ty ➞ [(x)] ➞ Base q’ty ➞ [(x)] ➞ PLU code ➞ [PLU/SUB] Only open entry is allowed: ➞ Selling q’ty ➞ [(x)] ➞ Base q’ty ➞ [(x)] ➞ PLU code ➞ [PLU/SUB] ➞ ➞... -
Page 38: Single Item Cash Sale (Sics)/Single Item Finalize (Sif) Entries
Single Item Cash Sale (SICS)/Single Item Finalize (SIF) entries The operation is the same as that for normal PLU/EAN entries. ■ SICS entries • This function is useful when a sale is for only one item and is for cash; such as a newspaper. This function is applicable only to those items that have been programmed for SICS. -
Page 39: Scale Entries
Scale entries You have a choice of either manual or automatic method for scale entry. If the first method is chosen, the clerk needs to enter the reading of the scale manually. If the second one is chosen, the weight is automatically read from the connected scale (option) and appears on the POS terminal display. -
Page 40: Non-Turnover Sales
Non-turnover sales This function is used to perform transactions in cash but not report as turnover as is the case when flowers are ordered in a restaurant. In this case, a clerk pays the bill and turnover and non-turnover sales are handled in the same transaction. It is performed by entering an item (PLU) belonging to the department. -
Page 41: Modifier Plus
Modifier PLUs The modifier function is used in pubs and restaurants for a quick and easy registration of reduced or increased item sizes. One PLU (original PLU) can have a maximum of 99 modifier PLUs . When a modifier key ([MODIFIER 1] - [MODIFIER 99]) is pressed before or after (depending on programming) an item (original PLU) is entered, the modifier PLU is registered instead of the original PLU. -
Page 42: Promotion Function
Promotion Function Your POS terminal provides three promotion functions; mix and match, automatic modifier and happy hour functions. The operation is the same as for normal item entries. You can program time conditions for executing promotion function; start/end date, time, day of week, month of year) ■... -
Page 43: Automatic Modifier
Set selling type (individual type) It is assumed the following is programmed for a mix-match. Promotion type: Amount discount Mix & match type: Individual type Discount amount: 1.00 PLU items: PLU 1 (2.30), PLU 2 (3.10) and PLU 3 (2.50) Trip level: 1 for PLU 1, 1 for PLU 2 and 2 for PLU 3 Sale 1... -
Page 44: Link Plu Entries
Link PLU entries Operation is the same as that for normal PLU entries. When a link PLU is entered, the total amount of the linked PLUs is included and the label of the linked PLU is printed automatically. All PLUs, the link (parent) PLU as well as the linked PLUs, are subjected to VAT calculation. -
Page 45: Combo Meal Entries
Combo meal entries Operation is the same as that for normal PLU entries. When a combo meal is registered using a combo key such as HAMBURG SET, the items linked to the combo meal are all registered automatically. The sum of all adjusted prices for the combo entry becomes the combo meal price. -
Page 46: Set Plu Entries
Set PLU entries Operation is the same as that for normal PLU entries. When a set PLU is entered, the items linked to the set PLU are all registered automatically. The sum of all adjusted prices for the set PLU are registered as the price. NOTE •... -
Page 47: With/Without Entries
With/Without entries This function is used to add or delete tied PLU(s) to or from a combo/set PLU entered to allow a special request by a guest or to meet other situations, such as removing tomato from a dish in a restaurant. To realize this function, use the [WITH] key to add one of the tied PLUs to combo/set PLU, and the [WITHOUT] key to delete one of the tied PLUs to combo/set PLU. -
Page 48: Condiment Entries
Condiment entries Your terminal may be programmed for prompting condiment and preparatory instructions for a menu- item PLU. When you select a menu-item PLU, a prompting message such as “HOWCOOK?” and a list of the “Condiment PLUs” will appear. You must specify one of the “Condiment PLUs” such as “without mustard”... -
Page 49: How To Make Multiple Entries
■ How to make multiple entries For a multiplication entry for a condiment menu, the registration should be either of single or multiple entry methods. (Depending on programming) Single entry method Condiment items for a menu must be entered one by one as shown below. Entry Message Receipt window... - Page 50 Multiplication item entry Condiment items can be entered by a condiment items by using multiplication entry. Entry Message Receipt window Note 3 [STEAK] 1xSTEAK 1xSTEAK 1xSTEAK HOW COOK? 2[RARE] 1xSTEAK [WELLDONE] RARE 1xSTEAK RARE 1xSTEAK WELLDONE POTATO? 2[BAKED.P] Selecting item [ENTER] * 1xSTEAK RARE...
-
Page 51: How Condiment Item Prices Are Printed
■ How condiment item prices are printed: The price of each condiment item is either rolled-up to the condiment menu price or printed independently (depending on condiment table programming). Programming Item label Unit price Condiment table #1 PLU 21 HAMB SET 6.50 Condiment Condiment... - Page 52 Entry Receipt window Note 1 [TABLE #] Table selection [TODAY'S SPECIAL] 1 TODAY'S SPECIAL 15.00 Condiment entry [Onion Soup] 1 Onion Soup [Dessert] 1 Dessert 2 dummy desserts are entered. [TODAY'S SPECIAL] 1 TODAY'S SPECIAL 15.00 [Corn Soup] 1 Corn Soup [Dessert] 1 Dessert [NBAL]...
-
Page 53: Price Shift By Menu
Price shift by menu The preset price of each PLU is changed automatically by preset hourly range for valid menu (e.g. morning time/lunch time etc.). The prices for the menu can also be changed manually be pressing the [MENU#] key. Your POS terminal provides a maximum of five prices (5 menus having different prices, one for general time zone, and others for special time zones). -
Page 54: Waste Mode
WASTE mode This mode is used to throw away an article which has already been prepared and is no longer serviceable. Touch the [WASTE] key. The POS terminal will enter to the WASTE mode. (The trash can icon appears at the information/status window.) Enter items to be wasted. -
Page 55: Plu/Ean Learning Function
PLU/EAN learning function When you enter or scan an undefined code, you are required to enter its unit price and the associated department. The code, associated department and unit price entered are stored in the PLU/EAN file or the dynamic PLU/EAN file and used for future EAN sales entries. When an undefined code is scanned or entered, the message, “Undefined code”... -
Page 56: Price Inquiry (View) Function
Price inquiry (view) function You can use this function when you want to know the unit price of the PLU/EAN item during transaction. You can register the item, and also change the price temporally while the programmed unit price is not changed. -
Page 57: Price Change Function
Price change function You can use this function when you need to change the unit price or associated department of a PLU/ EAN item. There are two methods for change: 1. Price change mode You can change the preset price and/or the associated department of a PLU/EAN item permanently. 2. - Page 58 Changing price during a transaction Enter an objective item. ➞ PLU/EAN code ➞ [PLU/SUB] • Code entry: • Direct PLU entry: ➞ [Direct PLU key] • Scanning an EAN code If the PLU has a wrong price, touch the [PRICE CHANGE] key. The key pad will appear, and the unit price and the associated department code will be displayed at the Price and Department# columns respectively.
-
Page 59: Countdown Items (86 Item)
Countdown items (86 item) This function is suitable for the control of quantity restrictions on sales (e.g. special sales, control of a small stock, etc.). The countdown value will be shown with text and/or icon of key. It is decreased by selling quantity at real time. - Page 60 Enter a quantity of the item, and touch [ENTER]. The item and stock number appear in the countdown item window. Repeat from step 2 to create another new countdown item, if necessary. To finish the operation, touch [OK]. Modifying countdown values Touch the [COUNTDOWN] key.
- Page 61 Enter a new quantity of the item, and touch [ENTER]. The item and the new quantity appear in the countdown item window. Repeat from step 2 to modify another countdown item, if necessary. To finish the operation, touch [OK]. Deleting countdown items Touch [COUNTDOWN] key.
-
Page 62: Recipe Guidance
Recipe guidance The [RECIPE] key allows employees to display recipes of sales items that have been selected on the display. For example a new bartender might use this option if he/she forgets or does not know how to prepare a drink. They can also print the recipe. Enter an objective PLU. -
Page 63: Display Of Subtotal
Display of Subtotal Your POS terminal provides the following types of subtotals: ■ Subtotal Touch the [SUBTOTAL] key at any point during a transaction. The sales subtotal including tax will appear in the receipt window. ■ Difference subtotal (Differ ST) Touch the [DIFFER SBTL] key at any point during a transaction. -
Page 64: Finalization Of Transaction
Finalization of Transaction The following types of media; cash, cheque and credit, can be used for the finalization of transaction, and the direct finalization and the amount tendering are available. When a customer gives the exact amount of money, you can finalize the transaction without entering tendered amount (direct finalization). -
Page 65: Computation Of Vat (Value Added Tax) /Tax
Computation of VAT (Value Added Tax) /Tax VAT/tax system The POS terminal supports up to 10 different tax definitions. Your POS terminal provides percent rate tax calculation and tax amount entry method. For the percent calculation, the following formula are applied for VAT or tax calculation on each taxable subtotal (taxable 1 through taxable 10). - Page 66 If programmed, VAT/tax assignment is printed at the fixed right position of the amount on the receipt and bill as follows: VAT1/tax1 - A VAT2/tax2 - B VAT3/tax3 - C VAT4/tax4 - D VAT5/tax5 - E VAT6/tax6 - F VAT7/tax7 - C VAT8/tax8 - D VAT9/tax9 - E VAT10/tax10 - F...
-
Page 67: Vat Shift Entries
VAT shift entries This feature is intended to shift the tax status of a particular item to another tax status. “VAT item shift” and “VAT transaction shift” are available to shift a tax status. VAT item shift The tax status of one item only is shifted. You can use one or more tax shift keys. VAT transaction shift Tax status of all sales items are shifted. -
Page 68: Auxiliary Entries
Auxiliary Entries Refund When a refund item (normally an item that cannot be resold) is received, use the [REFUND] key. Make a refund item registration after touching the [REFUND] key at any timing during the registration. Return When a returned item (normally an item that can be resold) is received, use the [RETURN] key. Make a return item registration after touching the [RETURN] key at any timing during the registration. -
Page 69: Discount Or Premium Entries Using A Discount Key
Discount or Premium entries using a discount key Your POS terminal allows you to deduct or add a certain amount less than a programmed upper limit from individual items and to a total amount. NOTE • Not all items allow discount/premium. The items subjected to discount/premium are limited by programming. -
Page 70: Discount Or Premium Entries Using A Percent Key
Discount or Premium entries using a percent key Your POS terminal can make percent calculations (discount and premium) with the use of percent keys ([% n]). NOTE • Not all items allow discount/premium. The items subjected to discount/premium are limited by programming. -
Page 71: Group Discount/Premium
Group discount/premium Your POS terminal gives you group discount/premium method. Items belonging to a discount/premium group are subjected to discount/premium, and discount/premium is performed according to the programmed percentage. Use the following procedure for group discount/premium operation. ■ Group discount Enter a group discount number and touch the [GROUP DSC#] key. -
Page 72: Payment Treatment
Payment Treatment Handling tips Your POS terminal provides tip-in, tip-editing, tip-transfer and tip-paid functions for treating tips. Read though this section for handling tips. ■ Tip-in entries Your POS terminal allows entries of tips that your guests give to clerks in cash or other media (cheque or credit). -
Page 73: Tip Editing
■ Tip editing This function is used for entering tip amounts after finalizing a guest check transaction. This function is available when the guest check transaction is finalized in credit tender, and also when the tip is paid in credit tender. The transaction number or bill number which is issued when the [SRVC] or [FINAL] key is touched in guest check entry must be used in order to identify the guest to edit or add tip amount. -
Page 74: Tip Transfer
■ Tip transfer This function is used to transfer tip amount from one clerk to another to share a tip with others. All or a part of tip amount can be transferred to another clerk. Make sure the clerk whose the tip should be shared is logged-on. Touch the [TIP TRANSFER] key to display a tip transfer window. -
Page 75: Currency Exchange
Currency exchange Your POS terminal allows payment entries in a foreign currency (totally nine different foreign currencies are available.) Pressing an exchange key creates a subtotal in foreign currency. Cash ([CASH 1] or [CASH 2]) alone can be handled after currency exchange. Touch the [EX n] key. -
Page 76: Received-On-Account (Ra) Entry
Received-on-Account (RA) entry Received-on-account entry is available in the following two methods depending on programming: • Cash-only entry; cash is only available. • Mixed entry; mixed entries of cash, cheque and credit are available. Discount/premium using [% n] or [(-) n] key is available once on the mixed entry. Cash-only entry Enter RA amount (max. -
Page 77: Paid-Out (Po) Entry
Paid-out (PO) entry Paid-out entry is available in the following two methods depending on programming: • Cash-only entry; cash is only available. • Mixed entry; mixed entries of cash, cheque and credit are available. Cash-only entry Enter PO amount (max. 8 digits, varies depending on HALO programming) and touch a PO ([PO n]) key. -
Page 78: No Sale (Exchange)
No sale (exchange) To open the drawer without any sales entry, use a cash key or the [Nosale] key depending on programming. Transferring cash This function is used to change cash sales amount for credit or cheque sales amount. For example, you can use this function in the following situation: You finalize a transaction by cash to issue a bill to show the guest, and the guest pays by credit. -
Page 79: Service Charge
Service charge When the payment operation is made for sales registrations, the service charge amount may be automatically calculated and printed according to the programming settings. When a service charge is involved in the payment amount, you can remove the service charge or can change the service charge rate, if necessary. -
Page 80: Text Entries
Text Entries Free text entries Free text can be printed on a remote printer by entering a free text code. You can print a preset free text by direct key entry, text code entry and text list entry, or enter free text during registration by open entry, while the method are preprogrammed. - Page 81 Text list entry: (FREE TEXT list window appears) ➞ Quantity ➞ [(X)] ➞ [TEXT#] ➞ Select a target text ➞ (Item entry) When the Quantity is “1”, it is unnecessary to enter the Quantity ( “➞ Quantity ➞ [(X)] ➞ ”). Open entry: (FREE TEXT window appears) ➞...
-
Page 82: Address Entries
Address entries The name and address of a guest can be entered during a transaction. The name and address of the guest are printed on a bill. Press the [NAME/ADDR] key. The ADDRESS ENTRY window will be displayed. Enter the address and name of the guest, and touch [OK]. To cancel the entry, touch [CANCEL]. -
Page 83: Correction
Correction Item void using the [-] key The [-] key allows you to void items. The last item, past items and printed items can be voided. To void an item: Touch the line of an item to be voided. The selected item will be highlighted. Touch the [-] key. - Page 84 To void multiple items: Touch the lines of items to be voided. The selected items will be highlighted. Touch the [-] key. The items will be voided. To void printed item Touch the line of an item to be voided. The selected item will be highlighted. Touch the [-] key.
-
Page 85: Check/Subtotal Void
Check/Subtotal void In order to cancel all of the items registered, perform a check void. In case of you open a table for the guest, perform a check void immediately after re-opening the table. Under the table control, in order to cancel only newly entered items after re-opening a check, perform a subtotal void. -
Page 86: Changing Quantity Using The [+] Key
Changing quantity using the [+] key The [+] key allows you to add quantity of registered items. The last item, past items and printed items can be added. To add an item Touch the line of an item to be added. The selected item will be highlighted. Touch the [+] key. -
Page 87: Correction After Finalizing A Transaction - Void Mode
Correction after finalizing a transaction - Void mode When you need to void incorrect entries that clerks cannot correct (incorrect entries that are found after finalizing a transaction or cannot be corrected by using the [-] key), enter the void mode by touching the [VOID mode] key, and repeat the entries that are recorded on an incorrect receipt. -
Page 88: Customer Management
Customer Management Your POS terminal can provide customer management functions. To enable the customer management function, you have three options: • Entering the customer code assigned to a customer • Swiping a customer card • Scanning a barcode (customer code) You can enter the customer code at any point during a transaction. - Page 89 Enter a customer code (max. 13 digits), swipe a customer card or scan a barcode(should be 13 digits EAN code/flag code 08). The following window will appear. Enter the customer’s name and address, then touch [OK]. Make item entries. NOTE When entering a wrong customer code, you can cancel the operation by following two methods.
- Page 90 To recall a customer information by entering the customer code Touch the [CUST] key. The customer code entry window will appear. Enter a customer code, swipe a customer card or scan a barcode. The customer name will appear on the receipt window (bottom line). Make item entries.
- Page 91 Touch [Enter] without entering any code. The following window will appear. Enter the name (the first name in case of David Brown) of a customer, and touch [OK]. The customer list will appear. Select a target customer, and touch [Enter] to start item registration for the customer.
-
Page 92: Guest Control
Guest Control Your POS terminal manages guests using tables. A group of tables are viewed and managed as a room, and a group of rooms are controlled by a revenue center. Transaction data is consolidated by each revenue center. You can view the tables in a room on the graphical table layout screen. Touch the [TABLE LAYOUT] key to display a table layout screen. -
Page 93: General Overview For Guest Control
General overview for guest control Floor planning Allocating clerks to time zone and sections, or make a change Table setting Displaying a room where the tables you are in charge are included • Checking table reservation status / Reserving a table for a guest •... -
Page 94: Floor Planning
Floor planning Each clerk should be assigned to a time zone (work time) and sections (a group of tables in an area). For example, it is assumed that your POS terminal is programmed so that 2 clerks works at daytime. Basically those settings may be done by the POS server, while you can change the setting at your POS terminal. - Page 95 Touch [Assign] of a target section. The clerk list will appear. Select clerks to be assigned and touch [OK]. Repeat the steps 3 and 4 if necessary. Touch [OK] after the selection. You will return to the screen in step 2. Touch [Exit] to finish. Changing a clerk in charge of a section using the [SECTION] key To change a clerk assigned to a section to other clerk, for example in case that the assigned clerk is off sick, you can use the [SECTION] key to display the clerk assignment screen directly.
-
Page 96: Table Setting
Table setting Your POS terminal manages guests using tables. Normally table icons and auxiliary icons on the graphical table layout screen are used to give information about tables such as smoking/non-smoking and reservation status, and also information about guests themselves such as number of a guest group, what stages (appetizer, main dish, dessert, etc.) are they in. - Page 97 • Table-join icon Each table can be joined to another one, and this status is indicated by a link line. • Reservation status Reservation status may be indicated by an icon. • Stages of a table Each table may have seven stages depending how services are progressed; free, order not open, appetizer, main dish, dessert, payment and cleaning.
-
Page 98: How To Control A Table Layout Screen
■ How to control a table layout screen Based on the table status, you can control tables using the following functions: Zooming the table layout screen You can zoom any position of the table layout screen you want to enlarge. That screen will be enlarged 4 times focusing on that position. - Page 99 Changing smoking/non-smoking status You can change the smoking/non-smoking status of a table. Touch the [SMOKING] key. Touch the table you want to change the status. The status will be automatically changed to the another one. Managing table reservation You can check reservation status by opening the reservation window by touching [RESERVATION]. Also you can enlist a guest in the reservation list and edit reservation status for enlisted guests.
- Page 100 Touch the target table to be reserved. The reservation window where the details are entered will appear. Enter the information of the guest; reservation date, time(hour/minute), number of guests (guest number) and name, and also address and phone number if necessary. After entering necessary information, touch [OK].
-
Page 101: How To Change A Room
Editing the reservation table Touch the [RESERVATION] key. The reservation list will appear on the display. To modify, select the target reservation to be modified and touch [Modify]. The reservation window will appear. To delete, select the target reservation to be deleted and touch [Delete]. The confirmation window will appear. -
Page 102: Searching A Suitable Table For Guests Using Automatic Table Search Function
Searching a suitable table for guests using automatic table search function When a guest or a group of guests comes, you can search a suitable table for the number of guest with smoking or non-smoking selection on the table layout screen. Touch the [GUEST] key. -
Page 103: Managing The Waiting List
Managing the waiting list When no table is found to be available in automatic table search function or when the [WAITING] key is touched, your POS terminal will go to the waiting list function mode showing the window below. The waiting list is managed in First-In/First-Out(FIFO) principal. -
Page 104: Modifying The Waiting List
Touch [OK]. The table layout screen will appear and the table available for the guest(s) will be highlighted. If the table is OK, touch the [ORDER] key to receive orders. ■ Modifying the waiting list You can modify a number of guests and/or smoking status for a guest enlisted in the waiting list, and also can delete an enlisted guest from the list. -
Page 105: Managing Guests
Managing guests For managing guests, your POS terminal provides various guest functions, such as room change, table change, bill separation, not only accepting orders and payments. All these functions can be performed by opening a table allocated for a guest or a group of guests. Normally you can open tables on a graphical table layout screen which is displayed when the [TABLE LAYOUT] key is touched, or when a sign-on operation is performed (depending on programming). - Page 106 Touch a suitable table for a guest or a group of guests. In case Type 1 method is used, the registration screen will appear to receive an order. In case Type 2 method is used, touch the [ORDER] key to get an order. The registration screen will appear.
-
Page 107: Opening A Table By Entering Table Number
■ Opening a table by entering table number Change a room, if necessary. Touch the [TABLE #] key or touch the table number area of the receipt window. The following window will appear. Table number area Enter a target table number and also enter a target check number if necessary in the following manner. -
Page 108: Opening A Table In Use On The Open Table List
■ Opening a table in use on the open table list Each clerk can display all the tables that are currently opened by the clerk on the table list. You can select a table out of the list for reorder and payment, and also bill separation and table transfer which are described later. -
Page 109: Changing A Table To Be Served On The Registration Screen
■ Changing a table to be served on the registration screen You can directly change a table to be served on the registration screen without displaying the table screen. Follow the procedure below. Touch the table number area. The table # window will appear. Table number area Enter the target table number and touch [ENTER]. -
Page 110: Changing Check Number
■ Changing check number Method 1 Touch a check number area. The table window will appear. Check number area Select a target check number. Method 2 Touch the previous or next check key. The check number will be increased or decreased every time you touch the previous or next check key. -
Page 111: Entering A Number Of Guests Manually
■ Entering a number of guests manually You can enter a number of guests seated on a table using the [GUEST] key when the table is open. The entry is compulsory when you open a table in case the entry is set to compulsory by programming. For the entry, enter a number of guests and touch the [GUEST] key when the table is open. -
Page 112: Transaction Migration
■ Transaction migration Your POS terminal allows you to migrate transactions which are registered without opening tables to transactions with tables opened for the guests. For example, after a guest has a drink at a bar, he has a meal at a table. His transaction at the bar can be migrated into one of guest checks which are controlled by opening tables. -
Page 113: Deposit Entries
Deposit entries Deposit refers to a prepayment on a guest check. It can be received in cash, by cheque or credit. A received deposit can be refunded by touching the [DEPO RFND] key. You cannot attempt to refund an amount larger than deposit balance. Deposit is available for regular customer accounts, and possible for normal tables. -
Page 114: Bill Totalizing/Bill Transfer
Bill totalizing/Bill transfer The [B.T.] key is used to totalize multiple bills when, for example, a particular guest pays not only his or her bill, but also the bills of other guests (bill totalizing), and also used to change a bill number to another (bill transfer). -
Page 115: Bill Totalizing/Bill Transfer Over A Room
- Registration screen Open the source table to be moved. The registration screen will appear. Touch the [B.T. IN] key. The Table # window will appear. Enter a destination table number and touch [ENTER]. The registration screen will be shown. ■... - Page 116 - Open table list Touch the [B.T. OVER] key. Touch one or more source table to be moved. The tables will be highlighted. Touch the [B.T. OVER] key again. The room selection window will appear. Select a revenue center and a room. The registration screen will appear. - Numeric table number entry Touch the [B.T.
-
Page 117: Bill Separating
Bill separating This function is used when each guest of a group pays his or her own order. With this function, you can select some items from a guest check to another guest check in the same table or of another table. The bill can be separated only under the same revenue center. -
Page 118: Transferring An Item
To change checks to be displayed using the previous/next buttons: Touch a next or previous button, the BS screen will be scrolled to right or left. NOTE The check #1 column does not scrolled. To select a target check: Touch the total window area of a target check. The selected check will be highlighted to notice you that check is selected. -
Page 119: Splitting Multiple Items
■ Splitting multiple items In case that the ordered number of a target item to be transferred is a multiple number, the following number boxes appears automatically when you drag the target item to a destination check. Drag the item to the box having the number you want to split and drop it there. The number of the items are transferred to the destination check. -
Page 120: Splitting An Item
■ Splitting an item In case that the ordered number of a target item is one and it should be split among a group of guests, such as a bottle of wine, firstly touch the total window area(s) of destination check(s). The selected check(s) will be highlighted. -
Page 121: Splitting A Check By Specified Amount Of Money
■ Splitting a check by specified amount of money A check can be split into two checks by specifying amount of money. The amount is used as a target amount for a new check. You can repeat this operation. NOTE •... -
Page 122: Splitting A Check By A Number Of A Group
■ Splitting a check by a number of a group A check can be split by a number, such as a group number. All items of the check are divided by the number. The remains are added to the original check number. Touch the [SPLIT NUMBER] key. -
Page 123: Remerging Split Checks (Bills)
■ Remerging split checks (bills) It is possible to remerge split checks. Touch the [REMERGE] key, checks will be remerged. ■ Direct payment in a BS screen On a BS screen, you can make a payment operation. Select a check and make a payment operation. Check 02 payment has done. -
Page 124: Transferring Open Tables (Guest Checks) To Another Clerk
Transferring open tables (guest checks) to another clerk Open guest checks can be transferred from a clerk to another clerk. This function may be convenient at the end of a clerk shift or whenever a clerk is relieved. It is possible to transfer one, several or all open tables. -
Page 125: Recalling Data Of Closed Tables(Guest Checks)
Recalling data of closed tables(guest checks) You can recall data of closed tables. All payment operations are canceled for the recalled guest checks, and the transaction is opened again. Following operation are available after a recall: • To edit media type •... -
Page 126: Employee Function
Employee Function You can use the following functions by using employee codes. Employee log-on/log off Employees can be logged-on by entering employee codes, or they can be signed-on by using employee cards. To use an employee card, you need a magnetic card reader (MCR). To log-on Enter your employee code and touch the [EMPLOYEE #] key, or swipe employee card. - Page 127 The default screen for the employee, which is programmed previously will be displayed. (In case of job entry menu screen) To log-off Touch the [Exit] key to log off.
-
Page 128: Employee's Working Time Recording
Employee’s working time recording You can manage your working time; time-in, time-out, break-in and break-out time. The working time can be recorded by the following operations: ■ Time-in operation Touch the [TIME IN] key. The time-in window will appear. If you has already signed-on, the POS terminal will directly display time-in message shown in step Enter your employee code or swipe your employee card, and if necessary enter your password. -
Page 129: Break-In Operation
■ Break-in operation Touch the [BREAK IN] or [PAID BREAK IN] key. The break-in window will appear. If you has already signed on, the POS terminal will directly display break-in message shown in step 2. Enter your employee code or swipe your employee card, and if necessary enter your password. Then touch [OK]. -
Page 130: Break-Out Operation
■ Break-out operation Touch the [BREAK OUT] key. The break-out window will appear. If you had already signed on, the POS terminal will directly display break-out message shown in step 2. Enter your employee code or swipe your employee card, and if necessary enter your password. Then touch [OK]. -
Page 131: Time-Out Operation
■ Time-out operation Touch the [TIME OUT] key. The time-out window will appear. If you has already signed-on, the POS terminal will directly display time-out message shown in step 2. Enter your employee code or swipe your employee card, and if necessary enter your password. Then touch [OK]. -
Page 132: Editing Employee's Time Record
Editing employee’s time record When it is necessary to edit an employee’s time record, use the following procedure. Touch the [TIME EDIT] key. The following window will appear. If you has already signed on, the POS terminal will directly display the window for entering a target employee code shown in step 2. - Page 133 Enter the target employee code for whom time is to be edit, or swipe his or her employee card. Date to be edited Current date is displayed as the default. Specify the date to be edited. Change the date on the date column, or display a calendar by touching the arrow key on the date column, and click the target date on the calendar.
- Page 134 To modify time: Touch the line to be modified and touch [Modify]. The following window will appear. The time category you selected Current setting (Hour - Minute) Change the time. To change the minute, touch the minute column. After the setting, touch [OK]. Time edit window will appear again with new setting.
-
Page 135: Sales For Employees
Sales for employees Sales for employees can be managed by entering employee codes. The sales shall be finalized by credit. Touch the [EMPL SALES] key. The following window will appear. Enter the employee code for whom sales registration is performed, or swipe his or her employee card. -
Page 136: Supervisor Clerk
Supervisor clerk This function is used to substitute a supervisor clerk for an ordinary clerk. The supervisor clerk can make entry as an ordinary clerk by assigning the ordinary clerk code. You can use the supervisor clerk function only for substituting for an ordinary clerk. Enter your clerk code, and touch the [CLK#] key, or insert your real key. -
Page 137: Overlapped Clerk Entry
Overlapped clerk entry This function allows switching from one clerk to another clerk and to interrupt the first clerks entry. When a clerk key other than the one currently in operation is pressed during a transaction operation, the entries made thereafter are treated as different clerk sales. No item is printed on a receipt during an entry operation while the overlapped clerk function is enabled, though printed on the journal. -
Page 138: Special Printing Function
Special Printing Function Printers may be connected with your POS terminal. Depending on the printers connected with your POS terminal, please refer to below for special printing function. After transaction receipt/Copy receipt printing- Receipt printer If your customer wants a receipt after you have finalized a transaction with the receipt ON-OFF function in the “OFF”... -
Page 139: Check Printing (Cheque Euro And English Check) - Slip Printer
- Slip printer The POS terminal can perform check printing (CHEQUE EURO and English cheque) when it is connected with the slip printer (SHARP model TM-295 for CHEQUE EURO, and SHARP model TM-295 or TM-U950 for English cheque). ■ CHEQUE EURO Set a validation slip to the slip printer (TM-295). -
Page 140: Printer Rerouting
Printer rerouting All printers can be rerouted to any other printer, like from a receipt printer to remote printer. When any error occurs at a printer, a window will appear to prompt you to select another printer for rerouting. For rerouting, select a printer. To retry printing on the error printer, touch the [Retry] key. -
Page 141: Electronic Journal
Electronic journal This function is intended to record the journal data in the electronic journal file (memory) instead of journal paper. Also this data is used instead of Transaction Log data. All transaction data and operation log is logged into the electronic journal file. On your POS server, the data for one day are stored. -
Page 142: Receipt Printing On A Remote Printer
Receipt printing on a remote printer ■ Sort shift function Registered items are printed on remote printers according to their sort groups. You can temporarily change the group number of an item to be registered by using the [S.SFT] key. If the [S.SFT] key is used for a link, combo, or condiment PLU, the sort group numbers of all items are changed. -
Page 143: Receipt Printing Style Shift Function
Receipt printing style shift function Receipt printing style can be temporarily shifted from S/D to Addition or from Addition to S/D by using the [RCP SF] key. When the receipt printing style is programmed to S/D, the style is changed to Addition, and it is programmed to Addition, the style is changed to S/D. -
Page 144: Printing Bills
Printing bills This function is used for issuing the bill to the guest. Your POS terminal can print bills on the bill printer or the receipt printer. When bill printing is compulsory for table guest checks, and a paper is inserted, bills are automatically printed. - Page 145 Bills on journal When a bill is printed, a copy of the bill is printed on journal at the same time. However, the print format of a bill on journal depends on the journal format. NOTE Consecutive number is not printed on the copy on the journal, but the bill consecutive number is printed. You can trace the bill later by the bill number.
-
Page 146: Guest Check Copy
Guest check copy You can use this function when you want to take a copy of guest check. Touch the [G.C.COPY] key and make a desired entry. ➞ [G.C. COPY] ➞ item entry ➞ finalization ➞ (Bill/G.C.RCPT/RCPT) ➞ NOTE • The guest check copy has nothing to do with the memory. •... -
Page 147: Entertainment Bill
Entertainment bill This function is used to print sales data on guest checks (Entertainment bill) on a receipt printer or bill printer. (Continental Europe only) NOTE • When a bill printer is not assigned, an entertainment bill is printed at a receipt printer. •... -
Page 148: Macro Key Entries
Macro Key Entries You can achieve many different key sequences automatically with a single operation. For this function your POS terminal allows you to use a magnetic card reader (MCR), a barcode scanner, the [MACRO #] key and the direct macro ([MACRO n] ) keys. You can make the entries anytime during item registration. -
Page 149: Training Function
Training Function The training function is used when a clerk practices POS terminal operations. When a clerk set in training is selected, the POS terminal automatically enters the training function mode. When a clerk not set in training is selected, the POS terminal automatically enters the ordinary registration mode. -
Page 150: Compulsory Cash/Cheque Declaration
Compulsory Cash/Cheque Declaration If your POS terminal has been programmed for compulsory cash/check declaration, you must declare cash/cheque in drawer in advance according to the type of the declaration when you take a individual or all clerk Z report or a terminal report Z, which depends on programming. For the declaration, there are two methods, preset type and open type. -
Page 151: Close Session (Eos)
Close Session (EOS) Close session closes the terminal. Close session may be performed automatically at the preset time, or can be performed manually. When a close session is executed, the following Z reports may be issued automatically. • Transaction report •... -
Page 152: Terminal Programming
Terminal Programming Downloading POS programming data Programming data set by the POS sever (Back Office) may be downloaded to your POS terminal automatically or manually depending on the programming setting. When the programming data is downloaded, all the terminals connected to the POS server are updated. Automatic downloading When you turn on your POS terminal, all programming data is copied from the POS sever to the terminal. -
Page 153: Changing Programming Settings
Changing programming settings All programming settings necessary for your POS terminal are done at the POS sever. However, on the terminal you can temporarily change some programming settings depending your need. ■ Programming list Price change Use price change function. New price are distributed to all satellites. EAN/PLU creation Use EAN/PLU learning function. - Page 154 Enter a new tare number for the PLU item, and touch [ENTER]. The tare list window will appear again with the changed parameter. If necessary, repeat from the step 2 for selecting another items. To finish the operation, touch [Cancel].
-
Page 155: Reading (X) And Resetting (Z) Of Daily Sales Totals
Reading (X) and Resetting (Z) of Daily Sales Totals You can take reading and resetting reports of daily sales totals. Those operations can be performed by issuing daily sales reports. For the issuance, you may • display on the operator display. •... - Page 156 Available report At the close in each mode Report title Filter session Item Report by Time Zone PLU Groups Departments Item Range Theoretical Food Cost% PLU Groups report Departments Item Range Revenue Center Simple Stock report PLU Groups Departments Item Range Hourly reports *2 Time range PLU Hourly reports *2...
- Page 157 Touch the [REPORT] key. The report window will appear. Select a target report and touch [X] or [Z]. Filter layout will be shown. In case of the Department X report In case of the Department Z report...
- Page 158 Select the target filtering data from the drop menu, or enter the filtering data if necessary and touch [Display], [Print] or [Display & Print].
-
Page 159: Receipts Printed On The Remote Printer
Receipts Printed on the Remote Printer Type of Receipts You can select one of the following five types of receipts for remote printers. These types of receipts are available in the REG or VOID mode. The receipt type may vary depending on each PLU, category, department, group and remote printer. -
Page 160: Single/Double Receipt Type
■ Single/double receipt type A single receipt or a double receipt is issued in accordance with the receipt type programmed for each item. Same consecutive number is printed on each double receipt Double receipt Single receipt Perforation ■ Addition + single receipt type Single type receipt is issued for each item after a normal receipt (addition type) is issued. -
Page 161: Double Addition Receipt Type
■ Double addition receipt type The contents of this type of receipt is same as the addition receipt type. However, the same receipt will be issued two times. ■ Double (addition + single) receipt type The contents of this type of receipt is same as the (addition + single) receipt type. However, the same receipt will be issued two times. - Page 162 SHARP CORPORATION ➀ XXXXXXXXXX...