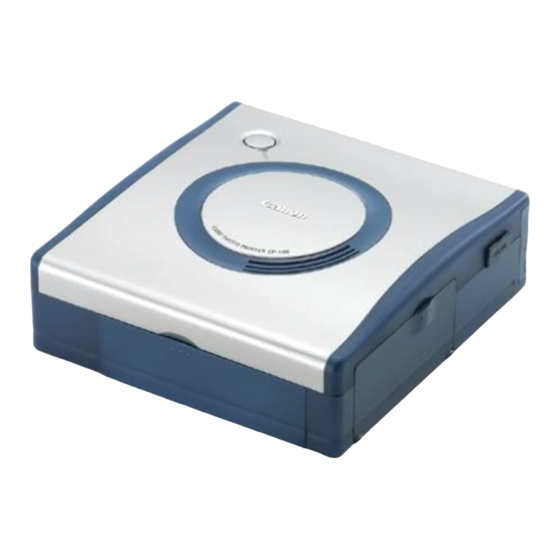
Canon CP-100 User Manual
Card photo printer printer driver for windows
Hide thumbs
Also See for CP-100:
- User manual (108 pages) ,
- Brochure (2 pages) ,
- Connection manual (76 pages)
Table of Contents
Advertisement
Quick Links
Advertisement
Table of Contents
Troubleshooting

Related Manuals for Canon CP-100


Summary of Contents for Canon CP-100
- Page 1 Card Photo Printer CP-100/CP-10 Printer Driver User Guide Windows...
-
Page 2: Table Of Contents
Contents Safety Precautions ..................4 Read This First ..................5 About the Manuals ................5 Printing Flow Diagram ...............6 About the Connection Cable .............7 Installing the Software from the Solution Disk ........8 Installing ....................8 Uninstalling ..................10 Installing the Printer Driver ..............11 Installing ..................11 Windows 98 ................12 Windows Me ................17 Windows 2000 ................21... - Page 3 Appendices ....................53 About the Print Area and Pixels ............53 Print Area ...................53 Number of Pixels ...............55 Troubleshooting ................56 Error Messages ................58...
-
Page 4: Safety Precautions
• While every effort has been made to ensure that the information contained in this guide is accurate and complete, no liability can be accepted for any errors or omissions. Canon reserves the right to change the specifications of the hardware and software described herein at any time without prior notice. -
Page 5: Read This First
Read This First About the Manuals This user guide describes how to connect the printer to a computer and print images. Provides printer handling notes, safety precautions, printer preparation, names of parts and other information necessary for operating the printer. Please read before CP-100 or CP-10 using the printer. -
Page 6: Printing Flow Diagram
Printing Flow Diagram Follow the steps outlined below to prepare the printer and install the necessary software to enable printing. Prepare the printer. Insert paper cassette and ink cassette. See CP-100 or CP-10 user guide. Install the necessary software. ➀ Install ZoomBrowser EX into your computer. -
Page 7: About The Connection Cable
Printing. Print on standard paper or full size labels. Selecting a Print Mode (➡ p.39), Setting the Printer Driver for Printing (➡ p.41) in this user guide. To print an 8-label sheet: Printing Duplicate Images on an 8-Label Sheet (➡ p.45), Printing Different Images on an 8-Label Sheet (➡... -
Page 8: Installing The Software From The Solution Disk
Installing the Software from the Solution Disk Canon Digital Camera Solution Disk contains software required for printing from your computer. With Windows 2000 or Windows XP, be sure to log on with Administrator privileges when installing the software. Installing Close any programs that are running. - Page 9 Click [Software Installation]. Read the product license agreement. If you agree to all of its conditions, click the [Yes] button. You must agree to the product license agreement before you can install the software. Verify the installation destination, and then click the [Next] button. Select the software to install, and then click the [Next] button.
-
Page 10: Uninstalling
Note that if you uninstall software, you will not be able to use it anymore. Click the [Start] button and select [Programs] ([All Programs] for Windows XP), [Canon Utilities], [ZoomBrowser EX], and [ZoomBrowser EX Uninstall]. Uninstallation begins and ZoomBrowser EX is removed. -
Page 11: Installing The Printer Driver
[Canon CP-10] icon and select [Properties]. <Windows XP> Click the [Start] button and select [Control Panel], [Printers and Other Hardware], and [Printers and Faxes]. Right-click the [Canon CP-10] icon and select [Properties]. For details on how to uninstall the printer driver, see Uninstalling (➡... -
Page 12: Windows 98
After a moment, the Add New Hardware Wizard dialog appears. Click the [Next] button. Select “Search for the best driver for your device. (Recommended).”, and then click the [Next] button. Place the Canon Digital Camera Solution Disk in the CD-ROM drive. - Page 13 Select “Specify a location”. Click the [Browse] button to select the [\CP_DRV\ENGLISH\WIN9X\CP100] folder on the CD-ROM and click the [OK] button. Then click the [Next] button. For the CP 10, select the [\CP_DRV\ENGLISH\WIN9X\CP10] folder. Do not select “CD-ROM drive”. This displays the Browse dialog. Specify the [\CP_DRV\ENGLISH\WIN9X\CP100] folder or [\CP_DRV\ENGLISH\WIN9X\CP10] folder, and then click the [OK] button to enter the folder path at [Specify a location].
- Page 14 Click the [Next] button. The USB driver for the printer is installed. When the following message appears, click the [Finish] button. Now you can continue and install the printer driver. When the following message appears, click the [Next] button.
- Page 15 Select “Search for the best driver for your device (Recommended).” and then click the [Next] button. Because the folder specified in step 7 already appears here, simply click the [Next] button. Do not select “CD-ROM drive”. Click the [Next] button.
- Page 16 Adjust any necessary settings, and then click the [Finish] button. The printer driver is installed. When the following message appears, click the [Finish] button.
-
Page 17: Windows Me
Connect the printer to your computer, using the USB cable. (➡ p.33) After a moment, the Add New Hardware Wizard dialog appears. Place the Canon Digital Camera Solution Disk in the CD-ROM drive. Select “Automatic search for a better driver (Recommended)” and... - Page 18 In the list of printer drivers, select [Canon CP-100] so that [\CP_DRV\ENGLISH\WIN9X\CP100\CNY100U.INF] appears in [Location], then click the [OK] button. For the CP-10, select [Canon CP-10] so that [\CP_DRV\ENGLISH\WIN9X\CP10\CNY10U.INF] appears. The USB driver for the printer is installed. When the following message appears, click the [Finish] button.
- Page 19 Select “Automatic search for a better driver (Recommended)” and then click the [Next] button. In the list of printer drivers, select [Canon CP-100] so that [\CP_DRV\ENGLISH\WIN9X\CP100\CNY100.INF] appears in [Location], then click the [OK] button. For the CP-10, select [Canon CP-10] so that...
- Page 20 Adjust any necessary settings, and then click the [Finish] button. The printer driver is installed. When the following message appears, click the [Finish] button.
-
Page 21: Windows 2000
Windows 2000 Log on to Windows 2000 with administrator privileges before installing the software. Close any programs that are running. Turn the printer on. (➡ p.32) Connect the printer to your computer, using the USB cable. (➡ p.33) After a moment, the Found New Hardware Wizard dialog appears. Click the [Next] button. - Page 22 Select “Search for a suitable driver for my device (recommended)” and then click the [Next] button. Place the Canon Digital Camera Solution Disk in the CD-ROM drive. Select “Specify a location” and then click the [Next] button. Do not select “CD-ROM drives”.
- Page 23 Click the [Browse] button, select the [CNY100.inf] file in the [\CP_DRV\ENGLISH\WIN2K\CP100] folder on the CD-ROM, click the [OPEN] button, then click the [OK] button. For the CP-10, select the [CNY10.inf] file in the [\CP_DRV\ENGLISH\WIN2K\CP10] folder. This displays the Browse dialog. Specify the [CNY100.inf] file in the [\CP_DRV\ENGLISH\WIN2K\CP100] folder or the [CNY10.inf] file in the [\CP_DRV\ENGLISH\WIN2K\CP10] folder, and then click the [Open]...
- Page 24 Click the [Next] button. The printer driver is installed. When the following message appears, click the [Finish] button.
-
Page 25: Windows Xp
Connect the printer to your computer, using the USB cable. (➡ p.33) After a moment, the Found New Hardware Wizard dialog appears. Place the Canon Digital Camera Solution Disk in the CD-ROM drive. Select “Install the software automatically (Recommended)”, and... - Page 26 In the list of printer drivers, select [Canon CP-100] so that [\CP_DRV\ENGLISH\WIN2K\CP100\CNY100.INF] appears in [Location], then click the [Next] button. For the CP-10, select [Canon CP-10] so that [\CP_DRV\ENGLISH\WIN2K\CP10\CNY10.INF] appears. The printer driver is installed. When the following message appears, click the [Finish] button.
-
Page 27: Troubleshooting The Printer Driver Installation (Windows 98/Me)
Troubleshooting the Printer Driver Installation (Windows 98/Me) If you have problems with the printer driver installation (for example, the printer driver’s installation program stops during the installation), the USB driver may not be installed correctly. Use the following procedure to check the installation status of the USB driver, delete any unnecessary USB driver, and then install the printer driver again. - Page 28 Click the [Device Manager] tab. Following the examples shown below, select [Canon CP-100] or [Canon CP-10] under [Universal Serial Bus controllers] or [Other devices], and then click the [Remove] button. Use the following screen examples as a reference and make sure you select the correct device for deletion.
- Page 29 Example 2: When the confirmation message appears, click the [OK] button. Click the [OK] button to close the System Properties dialog. Close the Control Panel window. Disconnect the USB cable from your computer. Restart your computer. Follow the procedure described in Installing (➡...
-
Page 30: Uninstalling
Start your computer. If you are using Windows 2000 or Windows XP, be sure to log on using Administrator privileges. Close any programs that are running. Place the Canon Digital Camera Solution Disk in the CD-ROM drive. - Page 31 If you are using the CP-10, select [Canon CP-10]. For Windows 98 or Windows Me If [Canon CP-100] or [Canon CP-10] does not appear, it was probably not installed correctly. In this case, perform the procedure described in Troubleshooting the Printer Driver Installation (Windows 98/Me) (➡...
-
Page 32: Turning On The Printer
Turning On the Printer With CP-100 Connect the compact power adapter to the printer, and then connect the AC cable to the compact power adapter and a power outlet. Press the ON/OFF button until the printer’s indicator lights orange. The printer is on when the printer’s indicator light changes from orange to green. -
Page 33: Connecting The Printer To Your Computer
Connecting the Printer to Your Computer Notes about connection • Using the USB cable, be sure to connect the printer directly to your computer. If you connect it via a USB hub, the printer may not function properly. • Do not use the printer together with other USB devices (except a USB mouse or keyboard);... - Page 34 Connect one end of the USB cable to the DIGITAL terminal on the printer, and the other end to a USB port on your computer. • There is no need to turn off the printer when connecting it to your computer. •...
-
Page 35: Printing
This section describes how to use PhotoRecord to print images registered in ZoomBrowser EX. ZoomBrowser EX and PhotoRecord are applications included on the Canon Digital Camera Solution Disk. These applications make it easy to print. Screen shots from Windows XP are used for illustration, but the procedure is the same with Windows 98/Me/2000. -
Page 36: Starting Zoombrowser Ex
Starting ZoomBrowser EX Double-click the [ZoomBrowser EX] icon on the desktop. Or, click the [Start] button and select [Programs] ([All Programs] for WIndows XP), [Canon Utilities], [ZoomBrowser EX], and [ZoomBrowser EX] to start the program. Selecting an Image for Printing Perform printing from the task bar on the left side of ZoomBrowser EX. - Page 37 Click [Layout Print]. When you select [Index Print], use the following procedure to print. 1. Click [1 Select Images] and click an image you want to print. 2. Click [2 Select Captions for Printing] and select captions. 3. Click [3 Open Index Print], adjust thumbnail size and paper size in the Index Printing window.
- Page 38 Click [2 Select Captions for Printing] and select captions. Selecting this check mark enables you to add comments, a file name or date to printouts. Click [3 Open Layout Print]. PhotoRecord opens, then the PhotoRecord Print Modes window and the PhotoRecord layout window appear.
-
Page 39: Selecting A Print Mode
Printing Different Images on an 8-Label Sheet (➡ p.47). With CP-100 From the [Printer] drop-down list, select [Canon CP-100]. The printer setup dialog appears. For [Print Mode], select “CP-100 standard printing -Borderless” or “CP-100 standard printing -Bordered” and then click the [Next] button. - Page 40 To open the PhotoRecord Print Modes window again, click (print modes) in the PhotoRecord layout window. With CP-10 From the [Printer] drop-down list, select [Canon CP-10]. The printer setup dialog appears. For [Print Mode], select “Photo printer standard printing” and then click the [Next] button.
-
Page 41: Setting The Printer Driver For Printing
Select “Bordered” or “Borderless”, and then click the [Finish] button. If you select “Bordered”, the image is automatically resized to fit within the print. To print bordered images, be sure to select “Bordered”. Close the PhotoRecord Print Modes window. The print mode settings are now reflected in the album page window. - Page 42 Click the [Properties] button. At this point, do not change the printer. Click the [Print Settings] tab, and then set the print orientation and the number of copies. For details, click the [?] button or [Help] button to see the online help. When printing from PhotoRecord, this should be selected.
- Page 43 Click the [Image Adjustment] tab, and then adjust the brightness and color of prints. For details, click the [?] button or [Help] button to see the online help. Adjust the color of prints. Adjust the brightness and contrast of prints. Automatically adjusts image quality to the equivalent of Direct Print mode (the image quality used with the camera directly connected to the printer).
- Page 44 Adjust other settings, and then click the [Print] button. Confirm to select your printer. Specify the number of copies to print of the same image. If multiple images are selected, use these settings to specify the pages (images) to print. Printing starts.
-
Page 45: Printing Duplicate Images On An 8-Label Sheet
Printing Duplicate Images on an 8-Label Sheet PhotoRecord allows you to print duplicate images. This makes it possible to print multiple copies of the same image on an 8-label sheet. In the PhotoRecord Print Modes window, select “CP-100 multiple printing”, and then click the [Finish] button. With the CP-10, select “Photo printer multiple printing”, and then click the [Finish] button. - Page 46 Right-click the image you want to print, and then select [Make Copies]. For [Number of copies], enter 7 and click the [OK] button. The images are laid out in replicate, with their positions adjusted for the eight labels on the 8-label sheet. Click the (PRINT) button to start printing.
-
Page 47: Printing Different Images On An 8-Label Sheet
Printing Different Images on an 8-Label Sheet You can also print a combination of different images on an 8-label sheet. In the PhotoRecord Print Modes window, select “CP-100 multiple printing”, and then click the [Finish] button. With the CP-10, select “Photo printer multiple printing”, and then click the [Finish] button. -
Page 48: Printing Part Of An Image (Trimming)
Printing Part of an Image (Trimming) You can select and then print a portion of an image (trimming). This is useful when you only want to print part of an image, or if the part you are most interested in is not at the center of the image. •... - Page 49 Select the area you want to print, and then click the (CLOSE) button. This determines the area to print. The area inside the frame is printed. You can drag the edge of the frame to change its size, or drag inside the frame to move it.
-
Page 50: Printing With Image Quality Correction
Printing with Image Quality Correction PhotoRecord has a function that supports Exif 2.2 (referred to as Exif Print), allowing you to automatically optimize print quality and print clearer, better- looking images. Click the image you want to print, and select [Clip/Correct Photo]. - Page 51 Select [Exif Print] or [PHOTO OPTIMIZER PRO] and and then click (Close) button. After you select [Exif Print] or [PHOTO OPTIMIZER PRO], the corrected image is displayed. Images captured with Exif 2.2 compatible cameras Images captured with other cameras Click this button after making the settings.
-
Page 52: Other Printing Functions
Other Printing Functions By selecting [Artwork/Layout album] in the PhotoRecord Print Mode window, you can add text or decorative embellishments to an image when printing it. Also, you can combine the different functions and create your own original name card. Adding text Adding decorative embellishments Creating original name cards... -
Page 53: Appendices
Appendices About the Print Area and Pixels Print Area The shaded area ( ) in the following diagrams indicates the maximum printable area. Note that because the print area is larger than the actual paper size, a border is trimmed from the image when it is printed. (shown in millimeters) CP-100 L size sheet... - Page 54 Postcard size sheet 148.0 Credit card size sheet/full-size label sheet 86.0...
-
Page 55: Number Of Pixels
CP-10 Standard sheet/full-size label sheet 86.0 Number of Pixels Total number of Effective number of Printer Name Paper Type pixels (dots)* pixels (dots) × × CP-100 Postcard size sheet 1232 1823 approx. 1180 1748 × × L size sheet 1100 1471 approx. -
Page 56: Troubleshooting
“Use Printer Offline” is selected, clear it. <Windows XP> 1. Click the [Start] button and select [Control Panel], [Printers and Other Hardware], and [Printers and Faxes]. 2. If the [Canon CP-100] or [Canon CP-10] is offline, right-click the printer icon, and then click “Use Printer Online”. - Page 57 <Windows 98/Me/2000> 1. Click the [Start] button and select [Settings], and [Printers]. 2. Right-click the [Canon CP-100] or [Canon CP-10] icon and select [Properties]. 3. Click the [Details] tab. Click the [Spool Settings] button and then click the [Restore defaults] button.
-
Page 58: Error Messages
• If the error does not go away after you have tried the recommended solutions, consult your nearest Canon Customer Support. • Use the information in this section in conjunction with the CP-100 User Guide or CP-10 User Guide. - Page 59 Ink cassette is empty and must be replaced. Press [Resume] to resume, or [Cancel] to stop. Cause : There is no more ink in the ink cassette. Correction : Replace the ink cassette with a new one. Ink cassette not installed. You must insert an ink cassette before printing.
- Page 60 The paper cassette differs from the setup. Please check the paper cassette. Press [Resume] to resume, or [Cancel] to stop. Cause : The paper cassette in the printer is not suitable for the print settings. Correction : Insert the correct paper cassette. The specified Ink Cassette cannot be found.
- Page 61 Errors where printing is canceled If any of the following messages appear, printing is canceled. After using the recommended solution to clear the error, you need to start the print job over again. Paper jammed in printer. Clear the jam as follows, then try printing again. 1.
- Page 62 Correction : Remove paper from the paper cassette, and then make sure to load the correct amount of paper in the paper cassette. For messages caused by errors related to the operating environment of your computer, follow the messages on the screen. CDP-E015 ©2002 CANON INC.