Table of Contents
Advertisement
Advertisement
Table of Contents

Related Manuals for Lexicon MX300


Summary of Contents for Lexicon MX300
- Page 1 MX300 Stereo Reverb Effects Procesor MX300 User Guide...
-
Page 2: Important Safety Instructions
IMPORTANT SAFETY INSTRUCTIONS SAFETY INSTRUCTIONS NOTICe FOR CUSTOMeRS IF YOUR UNIT IS eqUIPPeD WITh A POWeR CORD. WARNING: ThIS APPLIANCe ShALL Be CONNeCTeD TO A MAINS SOCKeT OUTLeT WITh A PROTeCTIVe eARThING CONNeCTION. The cores in the mains lead are coloured in accordance with the following code: The symbols shown above are internationally accepted symbols that GREEN and YELLOW - Earth BLUE - Neutral... -
Page 3: Declaration Of Conformity
Date: January 26, 2011 not operate normally, or has been dropped. POWeR ON/OFF SWITCh: The Power switch used in this piece of european Contact: Your local Lexicon Sales and Service equipment DOeS NOT break the connection from the mains. Office or MAINS DISCONNeCT: The plug shall remain readily operable. - Page 4 The company shall not be liable for any consequential damage as a result of the product’s use in any circuit or assembly. 4. Lexicon Professional reserves the right to make changes in design or make addi- tions to or improvements upon this product without incurring any obligation to install the same additions or improvements on products previously manufactured.
-
Page 5: Table Of Contents
Table of Contents MX300 Table of ConTenTs IntroductIon ................1 Included Items ...............1 QuIck start ................2 Standard Parallel Connection ................2 Powering the Unit ....................2 Set Audio Levels ..................... 2 Select and Load a Program ................... 3 the Front Panel ..............4 Gain LEDs ...................... - Page 6 Table of Contents the mX300 and dIgItal I/o ...........12 usIng the mX300 ..............13 Selecting and Loading Programs ................13 Storing/Copying Programs..................13 Editing a Program ....................13 Changing an Effect ....................14 Changing Knob Assignments ................15 Effect Mix/Routing ....................16 Editing Effect/Mix Routing ...................
-
Page 7: Introduction
Congratulations and thank you for purchasing the MX300 Stereo Reverb Effects Processor! You now have the rich, luscious sound that’s defined studio reverb for three decades; something only a Lexicon hardware processor can deliver. Not only does the MX300 deliver sonically, it also offers the flexibility of programming high-quality effects right inside your VST ®... -
Page 8: Quick Start
Quick Start QuICk sTarT Ideally, you should read this entire manual before using the MX300. But, if you just can’t wait to get started, this section explains how to set up a simple parallel connec- tion (using the MX300 with a mixer) and select a program. standard Parallel connectIon 1. -
Page 9: Select And Load A Program
Quick Start MX300 6. Turn up the Aux Return 1 and 2 to the 12 o’clock position, or stereo line input faders to the 0dB position, if you used that connection. 7. To increase or decrease the amount of effect on the signal, adjust the Aux Send level on the channel that you want affected. -
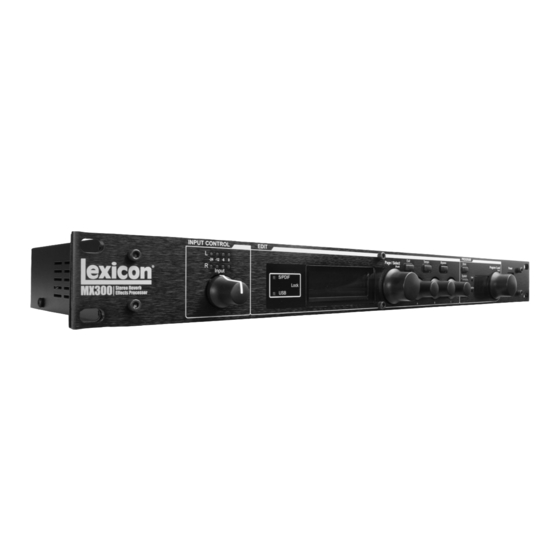
Page 10: The Front Panel
The Front Panel The fronT Panel 4 5 6 7 9 10 14 15 11 12 13 1. Gain LEDs Indicate input signal strength of each of the MX300’s inputs. Range is from –24dB, –12dB, –6dB, and 0dB. 2. Input Knob Controls input gain of the stereo inputs. -
Page 11: Store
The Front Panel MX300 9. Store Used to store or copy programs to the same or different user memory locations. 10. System Accesses the System global setup menus. 11. Bypass Pressing this button bypasses or mutes the currently selected program. 12. -
Page 12: The Rear Panel
USB, the blue USB LED next to the main display will light. 3. Footswitch Input The optional Lexicon® LEX-DFS 2-button footswitch can be plugged into this TRS jack for remote control of the MX300 (see page 33 for more information). -
Page 13: Balanced Analog Line Input Pair
The Rear Panel MX300 7. Balanced Analog Line Input Pair Left and Right active analog 1/4” TRS or XLR balanced line inputs. If only a single plug is connected to the Left input, the signal can be split and sent to both the Left and Right input paths by selecting Analog Mono L in the Input Source section of the System Menu. -
Page 14: Connecting The Mx300
About the MX300 ConneCTIng The mX300 The MX300 is an extremely versatile effects processor capable of a wide variety of ap- plications. The MX300’s multiple routings offer several connectivity options, making it extremely flexible both in the studio and for live sound. The following setups explain how the MX300 should be connected and which routings apply for your specific effects processing needs. -
Page 15: Mixer - Dual Mono In/Stereo Out Setup
Connecting the MX300 MX300 signal. The Input Source must be set to Anlg Mono L in the System menu (described on page 30). This setup is ideal for programs using Cascade, Parallel, and Stereo routings (see page 16 for more information about routings). Mixer - Dual Mono In/Stereo Out Setup Return 1 Return 2... -
Page 16: Guitar - Effects Loop Setup
Connecting the MX300 Guitar - Effects Loop Setup Effects Effects Return Send This setup is optimized for use within a guitar amplifier effects loop system. A single input source is fed into the MX300 and output as a mono signal. The Input Source must be set to Anlg Mono L in the System menu (described on page 30). -
Page 17: Studio - Digital Setup
Connecting the MX300 MX300 the System menu (described on page 30). This setup is ideal for use with programs using Cascade, Parallel, and Stereo routings (see page 16 for more information about routings). Studio – Digital Setup S/PDIF Out S/PDIF In Port This setup is ideal if you are using the MX300 as a hardware plug-in in a digital record- ing system. -
Page 18: The Mx300 And Digital I/O
The MX300 and Digital I/O The mX300 and dIgITal I/o The MX300 is equipped with digital input and output connections (S/PDIF). The S/ PDIF input and output are the digital equivalent of the analog inputs/outputs. The digital output on the MX300 is always active and will always mirror its analog output counterpart. -
Page 19: Using The Mx300
Using the MX300 MX300 usIng The mX300 selectIng and loadIng Programs 1. Choose a program by rotating the Program knob. The selected program number flashes in the Program Display until loaded. The name of the program also appears in the MX300’s Main Display. The Factory or User light next to the Program Display lights to indicate whether a Factory or User program is selected. -
Page 20: Changing An Effect
Using the MX300 (Fig. A) In Figure A the Edit Knobs A, B, and C will modify the Tape Delay effect’s Delay Time, Delay Ratio, and Feedback parameters respectively. Programs using routing 5 - Stereo have several other parameters that can be modified from the Edit Effect menus. Editing From the Program Display Select the program you want to edit and load it using the Program knob. -
Page 21: Changing Knob Assignments
Using the MX300 MX300 While on the Program you would like to edit, press the Page/Select knob. This will enter the Program Edit menus. Turn the Page/Select knob until the Change Effect menu is highlighted. Change Effect 2 is selected in our example. Press the Page/Select knob to enter the Change Effect 2 menu. -
Page 22: Effect Mix/Routing
Using the MX300 Using the MX300 eFFect mIX/routIng ... -
Page 23: Editing Effect/Mix Routing
Using the MX300 MX300 edItIng eFFect mIX/routIng 1. While on the Program Screen, press the Page/Select knob. This will enter the Program Edit menus. 2. Turn the Page/Select knob until the Edit Mix/Routing menu is highlighted. 3. Press the Page/Select knob to enter the Edit Mix/Routing menu. 4. -
Page 24: Effects Descriptions
Effects Descriptions effeCTs desCrIPTIons Parallel vs. serIal The MX300 can be used as both a Parallel and Serial (in-line) effects processor. Typically, reverbs and delays are used in parallel, compressors and de-essers in serial, and modulated effects can be used in either configuration, depending on the desired application. - Page 25 Effects Descriptions MX300 Hall Reverbs - Stereo small hall, large hall, vocal hall, drum hall A Hall reverb is designed to emulate the acoustics of a concert hall – a space large enough to contain an orchestra and an audience. Because of the size and character- istics, Halls are the most natural-sounding reverbs, designed to remain “behind”...
- Page 26 Effects Descriptions Reverse Reverb - Mono In/Stereo Out Reverse reverb works in the opposite fashion from normal reverb. Whereas a normal reverb has the loudest series of reflections heard first that then become quieter over time, the Reverse reverb has the softest reflections (essentially the tail of the reverb) heard first, and then grows louder over time until they abruptly cut off.
-
Page 27: Bass Boost
Effects Descriptions MX300 Diffusion Controls the initial echo density. High settings of Diffusion result in high initial echo density, and low settings cause low initial density. In a real-world situation, irregular walls cause high diffusion, while large flat walls cause low diffusion. For drums and percussion, try using higher Diffusion settings. -
Page 28: Delays
Effects Descriptions ER Time Adjusts the amount of time before reverb early reflections occur. ER Level Adjusts the level of early reflections within the reverb. Feedback Delay Changing this parameter changes the resonant frequencies of Plate reverb. Feedback Level Adjusts the Plate reverb's presence and prominence. Boing This is a unique parameter to the Spring reverb, designed to increase or decrease the amount of spring rattle that is a physical characteristic of spring tank reverbs. - Page 29 Effects Descriptions MX300 Modulated Delay - Stereo The Modulated Delay is enhanced by an LFO (low frequency oscillator) that produces a chorusing effect on the delay repeats. This is a great delay for guitar and instrument passages that need that “special something.” The Modulated Delay features up to 2.5 seconds of stereo modulated delay.
- Page 30 Effects Descriptions Ducker Level Ducker Level is the level you want the delay to be heard at when signal is present. This provides attenuation (up to 18dB) of the delay signal while a performer is singing or playing to help provide intelligibility. As the performance pauses, the delay signal level returns to its normal setting.
-
Page 31: Dbx ® Dynamics
Effects Descriptions MX300 dynamICs ® The MX300 offers two dynamics processing modules, De Esser and Compressor, that utilize dbx’s legendary digital dynamics processing technology. De-Esser - Stereo A De-Esser is a type of compressor used to tame excessive sibilance, or the “s” sounds in a vocal performance. - Page 32 Effects Descriptions Dynamics Controls Ratio Determines the amount of compression, from 1:1 (no effect) to Infinity:1 (complete limiting). Frequency Selects the frequency range of compression from 1600Hz to 10kHz (the most common frequencies in which excessive sibilance occurs). Bandwidth Controls the bandwidth or “Quality” (Q) of frequency range. The higher the selected value, the tighter the bandwidth, and less apparent the de-essing effect is.
-
Page 33: Modulated Effects
Effects Descriptions MX300 modulaTed effeCTs Chorus - Stereo Chorus creates a lush, full sound by combining two or more signals together where one is unaffected and the other signals vary in pitch very slightly over time. Chorus is commonly used to fatten up tracks and to add body to guitars without coloring the original tone. - Page 34 Effects Descriptions The Rotary effect is modeled after a Leslie-style cabinet. The input signal is split into high and low-frequency bands. The rotation effect is created by a synchronized com- bination of pitch shifting, tremolo, and panning. Like the physical cabinet, the high (horn) and low (rotor) frequencies are “spun”...
- Page 35 Effects Descriptions MX300 PreDelay Determines the amount of offset between the two signals that create the flange effect. Lower values create a tighter effect, higher values result in a more extreme "whoosh- ing" sound. Waveform Selects the wave pattern used by the modulated effect. Phase Controls whether amplitude or depth change occurs in both left and right outputs simul- taneously or alternates between left and right outputs.
-
Page 36: Mx300 System Menus
MX300 System Menus mX300 sysTem menus system menus The MX300 System menus are where global settings are configured. These include Program Auto Load, Output Level, and Factory Restore. Changes made to these settings affect all programs. Press the System button to access these menus. Turn the Page/ Select knob to scroll up and down through the available menus. -
Page 37: Analog Output
MX300 System Menus MX300 sources. The MX300 offers three different input sources to select from: Anlg Mono L (Left), Anlg Stereo, and Digital. Input Source refers to whether you will be using the analog Input pair or the S/PDIF digital input. When only a single analog input is to be used, connect to the analog Input Left input only and select Anlg Mono L as the Input Source. - Page 38 MX300 System Menus Analog Out Level The MX300 outputs can be optimized to run with equipment requiring different output levels. High end audio systems run at +4dBu levels while many inexpensive system levels run at –10dBV levels. Consult the technical guides that came with the equipment you will be connecting the MX300 to so as determine which output level should be selected.
- Page 39 MX300 System Menus MX300 incoming MIDI messages. (The Tempo button on the front panel will be disabled while these messages are being received.) When set to Off, the unit ignores MIDI Clock messages. Use the Knob A to change MIDI Clock Sync options.
-
Page 40: The Mx-Edit Editor/Librarian - Windows And Mac
The MX-Edit Editor/Librarian - Windows and Mac ® ® The mX-edIT edITor/lIbrarIan - WIndoWs and maC ® ® The included MX-Edit Editor/Librarian software lets you create, edit, compare, save and load reverb and effects programs for use with your MX300 on your Windows or Mac computer. -
Page 41: Quick Start
The MX-Edit Editor/Librarian - Windows and Mac MX300 ® ® • 800 MHz (1.2 GHz recommended) • 512 MB RAM (1 GB recommended) To install the MX-Edit and Audio Units software for Macintosh computers, insert the ® provided disc into the CD-ROM drive and double-click on the disc icon when it appears. Double-click on the MX300.dmg.hqx file to extract and run the installer. -
Page 42: The Mx-Edit Library
The MX-Edit Editor/Librarian - Windows and Mac ® ® The mX-edIT lIbrary The MX-Edit Library contains the Factory and User programs that are currently loaded in your MX300. When you first open MX-Edit, it communicates via USB (or MIDI) with the MX300 hardware, and populates the Library with all the information about each of the Factory and User programs stored in MX300’s physical memory. -
Page 43: The Mx-Edit Program Editor
The MX-Edit Editor/Librarian - Windows and Mac MX300 ® ® The mX-edIT Program edITor The MX-Edit Program Editor lets you quickly and easily view, compare and edit any program stored in the MX300, or programs saved to your computer. MX-Edit gives you all the same control and functionality as the MX300 front panel, with the exception of Input control and System functions. - Page 44 The MX-Edit Editor/Librarian - Windows and Mac ® ® or effect name now appears in the Reverb/Effect Select button, and the Parameter knobs in MX-Edit change position, layout, and number, depending on the default val- ues for the selected reverb or effect. adjustIng knobs To make editing in MX-Edit easy and intuitive, there are three ways to adjust knobs in MX-Edit:...
-
Page 45: Saving A Program
The MX-Edit Editor/Librarian - Windows and Mac MX300 ® ® If a non-delay effect is loaded in the processor, the Tempo button is dimmed and inactive. byPass To engage the Bypass button (and turn off the selected effect), place the mouse cur- sor over the Bypass button, and left-click to bypass that processor. -
Page 46: Archiving
The MX-Edit Editor/Librarian - Windows and Mac ® ® To rename a User program in the Library, right-click on its name in the Library win- dow and select Rename. Type in the new name and press Enter to save the change. Since the Factory programs can never be over-written, you cannot store to nor rename a Factory program location. -
Page 47: Using The Mx300 As A Hardware Plug-In
The MX300 comes with VST™ and Audio Units software which allows you to use the MX300 as a Hardware Plug-In. Now you have access to classic Lexicon® reverbs and effects within your software recording projects, with full automation and total recall, without burdening your CPU! Using the MX300 with the VST and Audio Units software works much like any other plug-in you’d use with a DAW, except that the audio is... -
Page 48: Software Configuration
Sonar™ users: see information about “Adding Send / Return Effects to ® a Bus” Note: The plug-in will fail to connect if the Lexicon MX300 Control MIDI port has been captured by the DAW. Check your DAW’s MIDI device settings if you experience connection problems. -
Page 49: Using The Mx300 Plug-In Window
Main Mix Bus, just as you would any audio or plug-in effect. usIng The mX300 Plug-In WIndoW In your DAW, open the Lexicon MX300 plug-in. You’ll see an instance of the Program Editor window. You can use the MX300 plug-in software just as you would any other plug-in: Session Recall, automation –... -
Page 50: Midi Implementation Chart
0-98 = 1-99 See Program Mapping Bank Select MIDI CC 32 Value 0 = Factory, Value 1 = User Lexicon Editor Only. Sys Ex channel follows MIDI channel except System Exclusive when MIDI channel is set to Off, where Sys Ex channel then re- ceives on all channels. -
Page 51: Midi Cc Maps
MIDI CC Map - Routings 1-4 MX300 mIdI CC maP - rOutIngS 1-4, dual StereO effectS MIDI CC # Effect 1/2 14/21 15/22 16/23 17/24 18/25 Small Hall Pre Delay Decay / Mid RT Liveliness Large Hall Pre Delay Decay / Mid RT Liveliness Small Plate Pre Delay... - Page 52 MIDI CC Map - Routing 5 mIdI CC maP - rOutIng 5, StereO effectS MIDI CC # Effect Hall Reverbs Pre Delay Mid RT Size Shape Plate Reverbs Pre Delay Mid RT Size Shape Chamber Reverb Pre Delay Mid RT Size Shape Room Reverb...
- Page 53 MIDI CC Map - Routing 5 MX300 mIdI CC maP- rOutIng 5, StereO effectS (continued) MIDI CC # Effect RT High High Bass Boost Bass Hall Reverbs Spread Diffusion ER Time ER Level Freq Boost RT High High Bass Boost Bass Feedback Feedback...
-
Page 54: Program List
Programs Programs Preset Name Routing Preset Name Routing Orchestral Stereo Big Chamber Stereo Small But Large Stereo Small Chamber Stereo Gothical Stereo Dry Chamber Stereo ConcertVerb Stereo Small Room Stereo Fan Tastic Stereo Brick House Stereo Wide Load Stereo The Spacialist Stereo Realism Stereo... - Page 55 Programs MX300 Preset Name Routing Preset Name Routing Quickie Cascade Brewed Awakening Dual Mono Guitar World Cascade Jet Flange Cascade ‘60s Delay Cascade Phaser Taser Cascade Vocal Chorus Cascade The Low Down Dual Mono Choral Hall Cascade And Then Some Cascade Tape Chorus Cascade...
-
Page 57: Specifications
Specifications MX300 sPeCIfICaTIons Analog Audio Inputs Connectors two XLR and two ¼" TRS balanced or unbalanced Impedance 50k Ohms bal., 25k Ohms unbal. Input Level +4 dBu nominal, +24 dBu maximum A/D Conversion 24-bit, 48kHz or 44.1kHz, 128 x oversampling Analog Audio Outputs Connectors two XLR and two ¼"... - Page 59 MX300...
- Page 60 Questions or comments? 8760 South Sandy Parkway | Sandy, Utah 84070 Email us at: customer@lexiconpro.com U.S.A. or visit our World Wide Web home page at: www. Phone: (801)-568-7660 | Fax: (801)-568-7662 lexiconpro.com Part Number: 18-0473V-C Copyright 2011 Lexicon ® Printed in China...
Need help?
Do you have a question about the MX300 and is the answer not in the manual?
Questions and answers