
Related Manuals for AEG Electrolux D77000GF


Summary of Contents for AEG Electrolux D77000GF
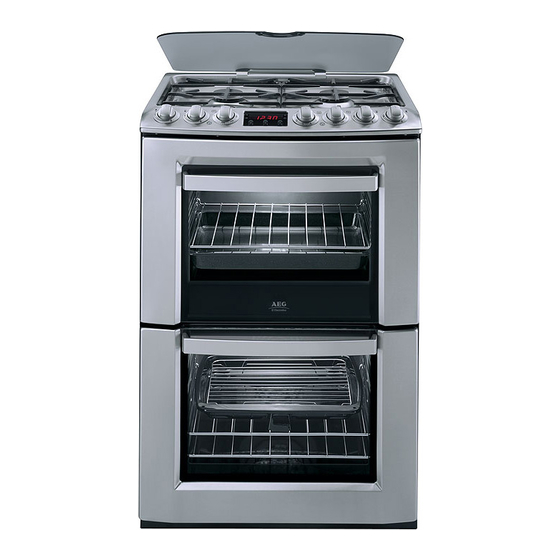
- Page 1 D77000GF Slip In Dual Fuel Multifunction Double Oven Installation and Operating Instructions PERFEKT IN FORM UND FUNKTION...
-
Page 2: Important Safety Information
Never line any part of the appliance with foil. Always stand back from the appliance when opening the oven door to allow any build up of steam or heat to release. Never leave the appliance unattended when the oven doors are open. -
Page 3: Table Of Contents
Removing and Replacing the Wirework Runners 30 Cleaning the Hob When Replacing Hotplate Burner Parts Cleaning the Shelves, Wirework Runners and Grill/Oven Furniture Cleaning Inside the Grill and Oven Compartments 32 Cleaning the Door(s) Replacing an Interior-Lighting Bulb Something Not Working? Service and Spare Parts... -
Page 4: Description Of The Appliance
DESCRIPTION OF THE APPLIANCE SLIP-IN DUEL FUEL MULTIFUNCTION DOUBLE OVEN Electronic Timer Control Panel Second Oven / Grill Main Oven... -
Page 5: Getting To Know Your Appliance
GETTING TO KNOW YOUR APPLIANCE THE CONTROL PANEL FEATURES - Hotplate Control - Hotplate Control - Second Oven/Grill Temperature Control - Electronic Timer - Main Oven Multifunction Selector Defrost Bottom Heat Pizza Fan Roasting PROFI Hot air Conventional Cooking Main Oven Grill... -
Page 6: Before Using The Appliance
The cooling fan comes on immediately when the grill/second oven is switched on and after a short time when the main oven is in use. It may run on after the controls are switched off until the appliance has cooled. During the initial period the cooling fan may turn ON and OFF, this is quite normal. -
Page 7: The Timer
DECREASE CONTROL SELECTOR CONTROL G INCREASE CONTROL NOTE: The time of day must be set before the main oven will operate manually. 1. HOW TO SET THE TIME OF DAY The oven has a 24 hour clock. When the electricity supply is first switched ON, the display will show 12.00 and the 'Time' (... -
Page 8: Setting The Oven Timer
The oven indicator neon should be OFF. NOTE: When the automatic timed period starts, the oven indicator neon will glow. It may turn on and off during use to show that the setting is being maintained. ) flashes and Fig.5. -
Page 9: Automatic Cooking
7. AUTOMATIC COOKING It is advisable to leave food in the oven for as short a time as possible before automatic cooking. Always ensure commercially prepared food is well within its use by date and that home prepared food is fresh and of good quality. -
Page 10: The Hob
THE HOB USING THE HOB The gas hob has three different burner sizes to suit different types of cooking: To ensure maximum burner efficiency only use pots and pans with flat bases appropriate to the burner size used. Larger burner (Rapid or triple crown where applicable) - use a large pan for food such as chips. -
Page 11: Things To Note
In the event of the burner flames being accidentally extinguished, turn off the burner control and do not attempt to re-ignite the burner for at least 1 min. THINGS TO NOTE If you are having any difficulty lighting a hob burner turn all the hob controls off and make sure the burner parts have been replaced correctly. -
Page 12: The Grill
It provides quick, direct heat and no preheating is necessary. • Turn the second oven/grill control clockwise to the full power setting ( ), then turn down as necessary. The grill settings are as follows:- •... -
Page 13: Hints And Tips
HINTS AND TIPS • Most foods should be placed on the grid in the grill pan to allow maximum circulation of air to lift the food out of the fats and juices. • Adjust the grid and grill pan runner position to allow for different thicknesses of food. -
Page 14: The Second Oven
THE SECOND OVEN The second oven is the smaller of the two ovens. It is heated by elements in the top and bottom of the oven. It is designed for cooking smaller quantities of food. It gives especially good results if used to cook fruit cakes, sweets and savoury flans or quiche. -
Page 15: Hints And Tips
• Stand dishes on a suitably sized baking tray on the shelf to prevent spillage onto the oven base and to help reduce cleaning. • The material and finish of the baking tray and dishes used affect base browning. -
Page 16: Second Oven Cooking Chart
Scones Shepherd’s Pie Soufflés Vegetables: Baked Jacket Potatoes Roast Potatoes Yorkshire Puddings: Large Individual Note: Shelf positions are counted from the bottom of the oven. SECOND OVEN POSITION COOKING TEMP°C 170 - 190 200 - 220 200 - 220 170 - 180... -
Page 17: Main Oven Grill
CAUTION – Accessible parts may be hot when the grill is in use. should be kept away. USING MAIN OVEN GRILL • Turn the main oven multifunction selector to grill. • Turn the main oven temperature control to the required setting. THINGS TO NOTE •... -
Page 18: Grilling Chart
• Accompaniments such mushrooms may be placed around the outer edges or underneath the grid when grilling meats. • When toasting bread, we suggest that the top runner position is used with the grid in its 'high' position. • Preheat the grill on full setting for a few minutes to seal meat or for toasting. -
Page 19: Conventional Cooking
• The interior-lighting will illuminate. • If an automatic programme has been set, the oven fan and light do not come on until cooking begins. • Some internal noise may be heard during operation. This is quite normal. -
Page 20: Hints And Tips
• Stand dishes on a suitably sized baking tray on the shelf to prevent spillage onto the oven base and to help reduce cleaning. • The material and finish of the baking tray and dishes used will affect the degree of base browning. -
Page 21: Profi Hot Air
The advantages of fan oven cooking are: PREHEATING The fan oven quickly reaches its temperature, so it is not usually necessary to preheat the oven. Without preheating however, you may need to add an extra 5 – 10 minutes on the recommended cooking times. For recipes needing high temperatures, e.g. -
Page 22: To Fit The Main Oven Shelves
The shelves should be fitted with the straight rods uppermost on the frame and the forms towards the back of the oven. To remove a shelf slide the shelf towards you until the shelf stop is reached. Tilt shelf up at the front to that the stops clear the side supports. -
Page 23: Oven Cooking Chart
Pastry: Choux Shortcrust Flaky Puff Plate Tarts Quiches/Flans Scones Note: Shelf positions are counted from the bottom of the oven. It may be necessary to increase or decrease the FAN OVEN Position Cooking Temp °C 180 - 190 Shelf 200 - 220... -
Page 24: Roasting Chart
ROASTING CHART INTERNAL TEMPERATURES – Rare : 50-60°C; Medium : 60-70°C; Well done : 70-80°C MEAT Beef/ Beef boned Mutton/Lamb Pork/Veal/Ham Chicken Turkey/Goose Duck Pheasant Rabbit The roasting temperatures and times given in the chart should be adequate for most joints, but slight adjustments may be required to allow for personal requirements and the shape and texture of the meat. -
Page 25: Fan Roasting
Fan Roast all the foods you would normally cook under a conventional grill. The lower part of the oven can be used to cook accompaniments at the same time, e.g. tomatoes and mushrooms with a mixed grill or breakfast. -
Page 26: Hints And Tips
Steaks - Well Done Heating through and Browning, e.g. Au-gratin, Lasagne, Shepherds Pie. NOTE: Shelf positions are counted from the bottom of the oven. Times quoted above are given as a guide and should be adjusted to sit personal taste. FOOD POSITION TEMP (°C) -
Page 27: Pizza
• The interior-lighting will illuminate. • If an automatic programme has been set, the oven fan and light do not come on until cooking begins. • Some internal noise may be heard during operation. This is quite normal. -
Page 28: Bottom Heat
• If an automatic cooking programme is set, the oven fan and oven light do not come on until cooking begins. Do not place dishes, tins and trays directly onto the oven base as it becomes very hot... -
Page 29: Defrost
1 – 2 hours. • A 1kg/2¼lb oven ready chicken will be thawed in approximately 5 hours. Remove the giblets as soon as possible during the thawing process. •... -
Page 30: Care And Cleaning
THE SURFACE FINISH. REMOVING REPLACING WIREWORK RUNNERS 1. Remove all shelves and furniture from the oven. 2. Hold the wirework at the bottom, unclip from the cavity side and gently pull towards the centre of the oven. 3. Unhook the runner at the top and remove from the cavity. -
Page 31: Cleaning The Hob
RUNNERS AND GRILL/OVEN FURNITURE All removable parts, except the grill pan handle can be washed in the dishwasher. The grill pan, grill pan grid, oven shelves and wirework runners may be cleaned using a soap impregnated steel wool pad. soapy water will make cleaning easier. -
Page 32: Cleaning Inside The Grill And Oven Compartments
Stayclean surfaces destroy splashes of food and fats when the oven temperature is raised to around 220°C. It is a good idea to run the oven for an hour or two per week to ensure continued good performance from the Stayclean finish. -
Page 33: Cleaning The Door(S)
INNER DOOR GLASS The inner door glass is removable for cleaning. TO REMOVE THE INNER GLASS Open the oven door to gain access to the top of the oven door. To remove the top trim:- Second Oven - Carefully pull the trim away from the door and lift off. -
Page 34: Replacing An Interior-Lighting Bulb
4. Unscrew the bulb by turning it to the left. 5. Fit a new bulb and then replace the glass bulb cover. 6. Refit the wirework runners and replace the oven shelves. 7. Restore the electricity supply and reset the time of day. -
Page 35: Something Not Working
Check that the recommended temperatures and shelf positions are being used. The interior-lighting bulb may need replacing. If the Main Oven is set for automatic cooking the interior-lighting will illuminate when the cook time begins. Check that the recommended temperatures and shelf positions are being used. -
Page 36: Service And Spare Parts
Please note that a valid purchase receipt or guarantee documentation is required for in-guarantee service calls. CUSTOMER CARE DEPARTMENT For general enquires concerning your AEG-Electrolux appliance or for further information on AEG-Electrolux products, please contact our Customer Care Department by letter or telephone at the address below or visit our website at www.aeg-electrolux.co.uk... -
Page 37: Guarantee Conditions
GUARANTEE CONDITIONS Standard guarantee conditions We, AEG-ELECTROLUX, undertake that if within 12 months of the date of purchase this AEG-ELECTROLUX appliance or any part thereof is proved to be defective by reason only of faulty workmanship or materials, we will at... -
Page 38: Technical Details
TECHNICAL DETAILS DIMENSIONS Height: 900 mm (nominal) Width: 600 mm (nominal) Depth: 600 mm (to front of door panel) Weight: 60Kg Net Space for fixing at hotplate level 2mm minimum clearance. Space for fixing above hotplate level See important note 'Location of Appliance'. Minimum space above hotplate 650mm (If cooker hood is fitted refer to the cooker hood installations. -
Page 39: Installation Instructions
INSTALLATION INSTRUCTIONS IMPORTANT - SAFETY REQUIREMENTS Check that this model is suitable for the type of supply available. This appliance must be installed and/or serviced by a competent person, in accordance with the Gas Safety (Installation and Use) Regulations Current Editions and the IEE Wiring Regulations. Detailed recommendations are contained in the following British Standards Codes of Practice - BS.5440: Par 2 and BS.6891. -
Page 40: Moving Your Appliance
To move the appliance open the grill door. Raise the appliance off its front feet by lifting it from inside the oven. Pull the appliance forward. When you replace the appliance push it back to the stop and make sure there is the same gap at each rear corner. -
Page 41: Connecting To The Electricity Supply
CONNECTING TO THE ELECTRICITY SUPPLY Warning: This appliance must be earthed. Do not earth this appliance to the gas supply piping. Connect to 230 - 240V AC supply only. • The electrical connection should be made using a double pole isolating switch (cooker socket) with at least 3mm contact separation in all poles. -
Page 42: Connecting To Gas Supply
CONNECTING TO GAS SUPPLY This appliance is designed to be installed with an appliance flexible connection only. should not be less than R /8. Connection is made to the Rc ½ (½” B.S.P.) female threaded entry pipe located just below the hotplate level on the rear left hand side of the appliance. -
Page 43: General Note
3. Turn on the second oven thermostat to the highest setting. 4. Ensure that the oven is heating up by checking firstly that the oven neon illuminates. 5. After a short period the heat from the oven element may be felt with the oven door open. -
Page 44: Important Notice
In line with our continuing policy of research and development, we reserve the right to alter models and specifications without prior notice. This instruction booklet is accurate at the date of printing, but will be superseded if specifications or appearance are changed. AEG-ELECTROLUX MAJOR APPLIANCES, ADDINGTON WAY, LUTON, BEDFORDSHIRE LU4 9QQ.
Need help?
Do you have a question about the D77000GF and is the answer not in the manual?
Questions and answers