Table of Contents
Advertisement
Available languages
Available languages
BUILT-IN ELECTRIC OVENS
Use & Care Guide
For questions about features, operation/performance, parts accessories or service, call: 1-800-422-1230
In Canada, for assistance, installation and service, call: 1-800-807-6777 or visit our website at...
www.kitchenaid.com or www.kitchenaid.ca
FOURS ÉLECTRIQUES ENCASTRÉS
Guide d'utilisation et d'entretien
Au Canada, pour assistance, installation ou service, composer le 1-800-807-6777 ou visiter notre site Web au www.kitchenaid.ca
Table of Contents/Table des matières............................................................................. 2
Models/Modèles
KEMS309,
KEMS379
W10354194A
Advertisement
Table of Contents

Related Manuals for KitchenAid KEMS309BSS


Summary of Contents for KitchenAid KEMS309BSS
- Page 1 In Canada, for assistance, installation and service, call: 1-800-807-6777 or visit our website at... www.kitchenaid.com or www.kitchenaid.ca FOURS ÉLECTRIQUES ENCASTRÉS Guide d’utilisation et d’entretien Au Canada, pour assistance, installation ou service, composer le 1-800-807-6777 ou visiter notre site Web au www.kitchenaid.ca Table of Contents/Table des matières................2 Models/Modèles KEMS309,...
-
Page 2: Table Of Contents
TABLE OF CONTENTS TABLE DES MATIÈRES OVEN SAFETY ................3 SÉCURITÉ DU FOUR ..............22 PARTS AND FEATURES..............4 PIÈCES ET CARACTÉRISTIQUES ..........23 ELECTRONIC OVEN CONTROL ...........5 COMMANDES ÉLECTRONIQUES DU FOUR ......24 Display(s) ..................5 Affichage(s) .................24 Start ....................5 Démarrer..................24 Cancel ..................5 Cancel (annulation)..............24 Clock ....................5 Horloge ..................24 Tones....................6... -
Page 3: Oven Safety
OVEN SAFETY Your safety and the safety of others are very important. We have provided many important safety messages in this manual and on your appliance. Always read and obey all safety messages. This is the safety alert symbol. This symbol alerts you to potential hazards that can kill or hurt you and others. All safety messages will follow the safety alert symbol and either the word “DANGER”... -
Page 4: Parts And Features
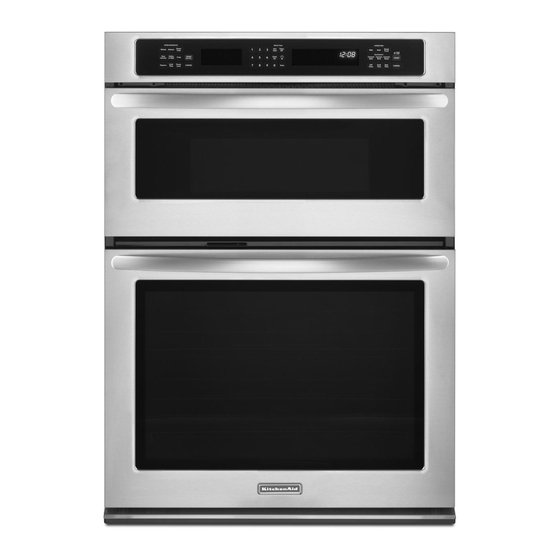
PARTS AND FEATURES This manual covers different models. The oven you have purchased may have some or all of the items listed. The locations and appearances of the features shown here may not match those of your model. F, G A. -
Page 5: Electronic Oven Control
ELECTRONIC OVEN CONTROL This manual covers different models. The oven you have purchased may have some or all of the items listed. The locations and appearances of the items shown here may not match those of your model. A. Microwave controls D. -
Page 6: Tones
Tones Tools Tones are audible signals, indicating the following: (combination oven models) The TOOLS selection key allows you access to 9 hidden One beep functions within the Electronic Oven Control. These hidden Valid key touch functions allow you to change the oven temperature between Fahrenheit and Celsius, turn the audible signals and prompts on Function has been entered and off, adjust the oven calibration, change language and turn on... -
Page 7: Oven Temperature Control
To Enable: Oven Temperature Control Before the Sabbath Mode can be regularly set, the oven must first be enabled with a one time only setup. IMPORTANT: Do not use a thermometer to measure oven 1. Touch TOOLS and then touch number key “6.” “SABBATH temperature because opening the oven door during cycling may MODE ON”... -
Page 8: Oven Use
Temperature Change Positioning Racks and Bakeware The oven temperature can be changed when the oven is in the Sabbath Mode. No tones will sound, and the display will not IMPORTANT: To avoid permanent damage to the porcelain change. The heating elements will not turn on or off for a random finish, do not place food or bakeware directly on the oven door or time, anywhere from 16 to 24 seconds. -
Page 9: Satinglide™ Roll-Out Extension Rack
For best results when baking layer cakes in Bake mode in non- convection oven models, use racks 2f or 4f. Place the cakes on SatinGlide™ Roll-Out Extension Rack the rack as shown. The SatinGlide™ roll-out extension rack allows easy access to position and remove food in the oven. -
Page 10: Bakeware
3. Slowly push the rack and the sliding shelf to the back of the oven until the back edge of the rack pulls over the end of the Oven Vent rack guide. To avoid damage to the sliding shelves, do not place more than 25 lbs (11.4 kg) on the rack. -
Page 11: Broiling
Broiling BROILING CHART For best results, place food 3" (7 cm) or more from the broil elements, rack position 4 is recommended. For diagram, see the “Positioning Racks and Bakeware” section. A temperature setting of 550°F (288°C) is recommended. Times are guidelines only and may need to be adjusted for individual foods and tastes. -
Page 12: Convection
When cooking an oven meal with several different types of foods, Convection be sure to select recipes that require similar temperatures. Cookware should sit in the oven with at least 1" (2.5 cm) of space In a convection oven, the fan-circulated hot air distributes heat between the cookware and the sides of the oven. -
Page 13: Convection Roast
Convection Roast CONVECTION ROASTING CHART FOOD/RACK COOK TIME OVEN TEMP. INTERNAL POSITION (min. per FOOD TEMP. 1 lb [454 g]) Beef, Rack Position 2 Rib Roast rare 20-25 140°F (60°C) A. Broil element medium 25-30 325°F (162°C) 160°F (71°C) B. Convection fan well-done 30-35 170°F (76°C) -
Page 14: Convection Broil
Convection Broil Temperature Probe WARNING Burn Hazard A. Broil heat B. Convection fan Use an oven mitt to remove temperature probe. During convection broiling, the broil element will cycle on and off Do not touch broil element. in intervals to maintain oven temperature, while the fan circulates Failure to follow these instructions can result in burns. -
Page 15: Timed Cooking
Timed Cooking OVEN CARE WARNING High Temp Self-Cleaning Cycle Food Poisoning Hazard WARNING Do not let food sit in oven more than one hour before or after cooking. Doing so can result in food poisoning or sickness. Timed Cooking allows the oven to be set to turn on at a certain time of day, cook for a set length of time, and/or shut off automatically. -
Page 16: General Cleaning
Use the following chart as a guide to determine the desired 4. Touch START. cleaning level. The start time and stop time is automatically calculated and displayed. CLEANING TOTAL CLEANING TIME LEVEL (includes a 30 minute cool down time) The door will not lock until the start time is reached. When the start time is reached, the oven will automatically 1 (Quick) 3 hours 30 minutes... -
Page 17: Oven Lights
CONTROL PANEL Oven Door IMPORTANT: To avoid damage to the control panel, do not use abrasive cleaners, steel-wool pads, gritty washcloths or abrasive paper To avoid oven door glass breakage: towels. Do not close the oven door if the racks are not fully inserted Cleaning Method: into the oven cavity or when bakeware extends past the front edge of an oven rack. -
Page 18: Troubleshooting
TROUBLESHOOTING Try the solutions suggested here first in order to avoid the cost of an unnecessary service call. Nothing will operate Self-Cleaning cycle will not operate Has a household fuse blown, or has a circuit breaker Is the oven door open? tripped? Close the oven door all the way. -
Page 19: Assistance Or Service
Features and specifications on our full line of appliances. Use and maintenance procedures. For further assistance If you need further assistance, you can write to KitchenAid with Accessory and repair parts sales. any questions or concerns at: Referrals to local dealers, repair parts distributors and service KitchenAid Brand Home Appliances companies. -
Page 20: Warranty
In the second through fifth years from the date of purchase, when this appliance is operated and maintained according to instructions attached to or furnished with the product, KitchenAid will pay for Factory Specified Parts for the following components if defective in... - Page 21 Keep this book and your sales slip together for future Dealer name____________________________________________________ reference. You must provide proof of purchase or installation date for in-warranty service. Address ________________________________________________________ Write down the following information about your major appliance Phone number __________________________________________________ to better help you obtain assistance or service if you ever need it. You will need to know your complete model number and serial Model number __________________________________________________ number.
-
Page 22: Sécurité Du Four
SÉCURITÉ DU FOUR Votre sécurité et celle des autres est très importante. Nous donnons de nombreux messages de sécurité importants dans ce manuel et sur votre appareil ménager. Assurez-vous de toujours lire tous les messages de sécurité et de vous y conformer. Voici le symbole d’alerte de sécurité. -
Page 23: Pièces Et Caractéristiques
Avertissements de la proposition 65 de l'État de Californie : AVERTISSEMENT : Ce produit contient au moins un produit chimique connu par l’État de Californie pour être à l’origine de cancers. AVERTISSEMENT : Ce produit contient au moins un produit chimique connu par l’État de Californie pour être à l’origine de malformations et autres déficiences de naissance. -
Page 24: Commandes Électroniques Du Four
COMMANDES ÉLECTRONIQUES DU FOUR Ce manuel couvre différents modèles. Le four que vous avez acheté peut comporter tous les articles énumérés ou seulement certains d'entre eux. Les emplacements et aspects des articles illustrés ici peuvent ne pas correspondre à ceux de votre modèle. A. -
Page 25: Signaux Sonores
Signaux sonores Outils Les signaux sonores indiquent ce qui suit : (modèles de fours combinés) La touche de sélection des TOOLS (outils) permet d'accéder à Un bip 9 fonctions cachées dans les commandes électroniques du four. Touche numérique valide Ces fonctions cachées permettent d'alterner entre unités Fahrenheit et Celsius pour la température du four, d'activer ou de Fonction entrée désactiver les signaux sonores et les messages, d'ajuster le... -
Page 26: Verrouillage Des Commandes
Verrouillage des commandes Mode Sabbat Le verrouillage des commandes désactive les touches du tableau Le mode Sabbat permet au four de rester sur un réglage de de commande pour éviter l’utilisation involontaire du ou des cuisson au four jusqu’à ce qu’on l’éteigne. Un mode Sabbat fours. -
Page 27: Utilisation Du Four
Pour programmer l'arrêt minuté de façon régulière : UTILISATION DU FOUR AVERTISSEMENT Les odeurs et la fumée sont normales lorsque le four est utilisé Risque d'empoisonnement alimentaire pour les premières fois, ou lorsqu’il est très sale. Lors de l'utilisation du four, les éléments chauffants ne resteront Ne pas laisser des aliments dans un four plus d'une pas allumés, mais fonctionneront par intermittence lorsque le heure avant ou après la cuisson. -
Page 28: Grille Déployante Satinglide
Cuisson par convection Pour des résultats optimaux lors de la cuisson au four de gâteaux sur 2 grilles au mode de cuisson au four sur les modèles de four RÉGLAGE DU FOUR NOMBRE DE POSITION(S) DE avec convection, utiliser les grilles 2f et 5f. Placer les gâteaux sur GRILLES LA GRILLE les grilles tel qu'indiqué. -
Page 29: Ustensiles De Cuisson Au Four
Retrait de la grille déployante SatinGlide™ : USTENSILES DE CUISSON RECOMMANDATIONS 1. Enfoncer la grille complètement en la faisant glisser jusqu'à AU FOUR/RÉSULTATS ce qu'elle soit rétractée et emboîtée sur la grille coulissante. Tôles à biscuits ou moules Suivre les recommandations 2. -
Page 30: Cuisson Au Gril
Selon le modèle, si la porte du four est ouverte pendant la Sortir la grille jusqu’à la butée d’arrêt avant de tourner ou cuisson au four ou le rôtissage, les éléments chauffants (cuisson d’enlever les aliments. Utiliser une pince pour tourner les au four et au gril) s'éteignent environ 30 secondes après aliments et éviter la perte de jus. -
Page 31: Cuisson Par Convection
Vérifier la cuisson des aliments quelques minutes avant le ALIMENT POSITION(S) DURÉE DE temps de cuisson minimum, avec un cure-dents par DE LA CUISSON exemple. GRILLE minutes) AVERTISSEMENT Agneau Côtelettes d’agneau 1" (2,5 cm) d’épaisseur saignant à point 4f ou 5f 10-12 à... -
Page 32: Rôtissage Par Convection
Cuisson au four par convection : Rôtissage par convection : Avant la cuisson au four par convection, placer les grilles tel Avant le rôtissage par convection, placer les grilles tel qu’indiqué qu’indiqué à la section “Positionnement des grilles et des à... -
Page 33: Cuisson Au Gril Par Convection
ALIMENTS/ DURÉE DE TEMP. DU TEMP. Levée du pain POSITION DE CUISSON FOUR INTERNE DES LA GRILLE (min par ALIMENTS La levée du pain prépare la pâte pour la cuisson en activant la 1 lb [454 g]) levure. Sauf indication contraire de la recette, il est recommandé de procéder à... -
Page 34: Cuisson Minutée
2. Appuyer sur BAKE (cuisson au four ), CONVECT BAKE 4. Appuyer sur START (mise en marche). (cuisson au four par convection) ou CONVECT ROAST Le compte à rebours en minutes apparaîtra sur l'affichage du (rôtissage par convection). four. L’heure de début et de fin ne s’affichent pas avant la fin Appuyer sur les touches numériques pour entrer une du préchauffage du four. -
Page 35: Entretien Du Four
ENTRETIEN DU FOUR Programme d'autonettoyage à haute température Comment fonctionne le programme AVERTISSEMENT IMPORTANT : Le chauffage et le refroidissement de la porcelaine sur l’acier dans le four peuvent causer une décoloration, une perte de lustre, des fissures minuscules et des craquements. Le programme d’autonettoyage à... -
Page 36: Nettoyage Général
Lorsque le programme est terminé et que le four est froid, “fin Nettoyant pour acier inoxydable affresh™ - Pièce n° autonettoyage” apparaît sur l’affichage du four et “PORTE W10355016 (nonfournie) ou chiffons pour acier inoxydable VERROUILLÉE” disparaît. La porte ne se déverrouille pas tant affresh™... -
Page 37: Lampes Du Four
4. Soulever la porte du four tout en la retenant de chaque côté. Lampes du four Continuer de maintenir la porte du four fermée et l'éloigner du châssis de la porte du four. Les lampes du four sont des ampoules à halogène de 120 volts, 5 watts maximum. -
Page 38: Assistance Ou Service
Commander la pièce numéro W10355049 ® fabrication de chaque nouvel appareil KITCHENAID Pour savoir où trouver des pièces spécifiées par l’usine dans Nettoyant pour cuisine et appareils ménagers affresh™ votre région, nous appeler ou contacter le centre de service Commander la pièce numéro W10355010... -
Page 39: Au Canada
5. Les défauts apparents, notamment les éraflures, les bosses, fissures ou tout autre dommage au fini du gros appareil ménager, à moins que ces dommages soient dus à des vices de matériaux ou de fabrication et soient signalés à KitchenAid dans les 30 jours suivant la date d’achat. - Page 40 CONFÈRE DES DROITS JURIDIQUES SPÉCIFIQUES ET VOUS POUVEZ ÉGALEMENT JOUIR D'AUTRES DROITS QUI PEUVENT VARIER D'UNE JURIDICTION À UNE AUTRE. Si vous résidez à l'extérieur du Canada et des 50 États des États-Unis, contactez votre marchand KitchenAid autorisé pour déterminer si une autre garantie s'applique.