Table of Contents
Advertisement
Available languages
Available languages
Quick Links
Advertisement
Chapters
Table of Contents

Related Manuals for Toshiba CAMILEO BW20


Summary of Contents for Toshiba CAMILEO BW20
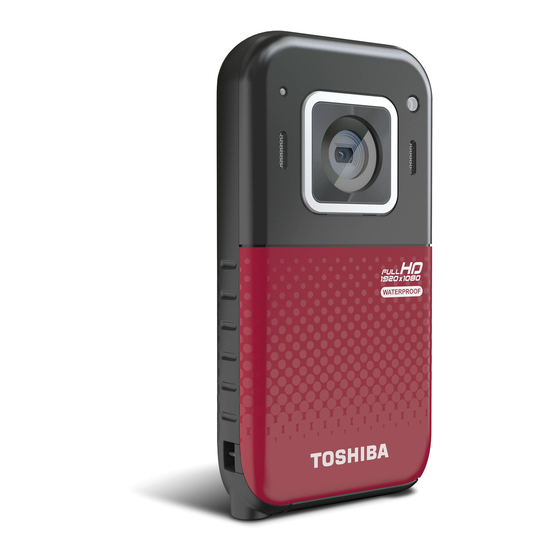
- Page 1 ® CAMILEO BW20 User’s Guide English/Español GMAA00395012 06/12...
-
Page 2: Regulatory Information
❖ Consult the dealer or an experienced radio/TV technician for help. NOTE Changes or modifications made to this equipment, not expressly approved by TOSHIBA or parties authorized by TOSHIBA could void the user’ s authority to operate the equipment. -
Page 3: About The Battery
❖ Only use the AC Adaptor (sold separately) or USB cable, or an optional Toshiba battery charger to charge the battery. Never attempt to charge the battery with any other charger. -
Page 4: Safety Icons
Safety icons This manual contains safety instructions that must be observed to avoid potential hazards that could result in personal injuries, damage to your equipment, or loss of data. These safety cautions have been classified according to the seriousness of the risk, and icons highlight these instructions as follows: Indicates an imminently hazardous situation which, if not avoided, will result in death or serious injury. - Page 5 Waterproof* feature This camcorder complies with Japanese Industrial Standards (JIS) IPX8 (formerly JIS protection grade 8) waterproof standard and can be used in water. Note, however, that failing to heed the following precautions may result in damage or injury that is not covered by the warranty. Please take the time to carefully read and heed the following cautions.
- Page 6 Storing and maintaining your camcorder ❖ Do not leave the camcorder unwashed after it has been immersed in salt water or if salt water is adhering to it. Doing so may cause corrosion and discoloration of the plating, as well as deterioration of the camcorder’s waterproof capability.
-
Page 7: Additional Information
Additional Information © Copyright 2012 TOSHIBA CORPORATION. All rights reserved. TOSHIBA reserves the right to make technical changes. TOSHIBA assumes no liability for damages incurred directly or indirectly from errors, omissions or discrepancies between this product and the documentation. Trademarks CAMILEO is a registered trademark of Toshiba America Information Systems, Inc. -
Page 8: Table Of Contents
Contents Regulatory Information ..........2 About the battery ............3 Safety icons ..............4 Chapter 1: Getting to Know Your Camcorder......11 Overview ..............11 Check the components ........12 Waterproof design - up to 16’ (5 meters) ..13 Ruggedized ............13 System requirements........13 Lens view............14 Underside view ..........14 Rear view ............15 Chapter 2: Getting Started............ - Page 9 Contents Chapter 3: Record Mode............21 Button functions .............22 LCD screen information ..........23 Video recording ............24 Taking Photos ............25 Using Digital Zoom ..........25 Using the Anti-Glare function........25 Using Underwater Mode .........26 Menu options/operations ........26 Video Setting options........27 Photo Settings ..........29 Effects...............31 Settings.............32 Chapter 4: Playback Mode............
- Page 10 Operating Environment Conditions ......49 Chapter 10: Troubleshooting............. 50 Chapter 11: Other Information..........53 Toshiba Support .............53 Before you call ..........53 Contacting Toshiba ..........54 Toshiba’s technical support web site ....54 Toshiba voice contact ........54 Warranty ..............54 Online Warranty Information......54 Warranty Service ..........54...
-
Page 11: Chapter 1: Getting To Know Your Camcorder
Getting to Know Your Camcorder Overview ® The CAMILEO BW20 camcorder is equipped with a 5 megapixel sensor that can take H.264 format videos, which allows for extended video recording with less memory usage. ® Other features of your CAMILEO BW20 camcorder are: ❖... -
Page 12: Check The Components
Getting to Know Your Camcorder Overview NOTE Install the bundled software application for viewing the videos correctly on a PC. Check the components Unpack the box and make sure all items listed below are included: (Sample Illustration) Components NOTE NOTE Be sure to remove the protective film on the lens before using. -
Page 13: Waterproof Design - Up To 16' (5 Meters)
Getting to Know Your Camcorder Overview Waterproof design - up to 16’ (5 meters) ❖ The camcorder can record videos or photos under water, at a depth of up to 16’ (5 meters), for a period of up to 30 minutes. ❖... -
Page 14: Lens View
Getting to Know Your Camcorder Overview Lens view Power button LED indicator Speaker Lens Light Microphone (Sample Illustration) Lens view Underside view ® Mini USB 2.0 port Mini HDMI port Tripod socket Reset button Micro SD™ Card slot (Sample Illustration) Underside view... -
Page 15: Rear View
Getting to Know Your Camcorder Overview Rear view Power button LCD screen Menu button Up button Left button Mode button Playback button Right button Record / OK button Strap hook Down button Delete button (Sample Illustration) Rear view... -
Page 16: Chapter 2: Getting Started
Chapter 2 Getting Started Charge the built-in battery You must use the AC Adaptor (sold separately) or the USB cable to charge your camcorder before use. To charge your camcorder through the AC Adaptor (sold separately) (rated at 5 volts, 2 amps), follow these steps: Plug the AC adaptor into an AC wall socket, and connect its mini USB plug into the mini USB port on the underside of the camcorder. -
Page 17: Inserting And Removing A Micro Sd™ Card
Getting Started Inserting and removing a Micro SD™ Card To charge your camcorder through the supplied USB cable, follow these steps: Connect your camcorder’s mini USB port to a USB port on your computer, with the supplied USB cable. The blinking light indicates that the battery is currently charging; the light glows continuously once charging is completed. -
Page 18: Remove Moisture From All Camcorder Surfaces
Getting Started Remove moisture from all camcorder surfaces NOTE The recommended capacity of an (optional) Micro SD™ Card is 1 GB or greater. To prevent data corruption, format the Micro SD™ Card in the camcorder before using. All data will be erased when the Micro SD™ Card is formatted. Make sure that all data is copied to your computer or other media before formatting the Micro SD™... -
Page 19: Turning The Camcorder On And Getting Started
Getting Started Turning the camcorder on and getting started ❖ If there is any moisture adhering inside the cover, wipe it off completely. (Sample Illustration) Wiping the moisture off the ports and slot cover and port cover NOTE Moisture inside the camcorder may not only be due to immersion in water. -
Page 20: Turning Off The Camcorder
Getting Started Turning off the camcorder Turning off the camcorder To turn off the camcorder, press the Power ( ) button for approximately one second. NOTE If you don’t use the camcorder for approximately 3 minutes, it will turn itself off. -
Page 21: Chapter 3: Record Mode
Chapter 3 Record Mode Before recording in water ❖ Make sure that the slot cover and the port cover are closed tightly. ❖ If a cover is open, water will get inside the camcorder and cause internal damage. ❖ When closing the slot cover and port cover, make sure that no foreign objects such as sand, hair, dust, etc. -
Page 22: Button Functions
Record Mode Button functions Button functions Press for one second to turn Power the camcorder on or off. Mode Switch between Video mode and Photo mode Menu ON. Menu Return to Preview mode. View recorded videos / photos in a continuous mode. -
Page 23: Lcd Screen Information
Record Mode LCD screen information LCD screen information The indicators shown below may display on the LCD screen when videos and photos are recorded: (Sample Image) LCD screen information Battery: Shows the battery charge level. IDEO ESOLUTION FULL HD 1080/30 HD60 HD 720/60 HD30... -
Page 24: Video Recording
Record Mode Video recording Video mode Photo mode Digital Zoom meter NOTE Some features may not be used in combination with others. NOTE To avoid persistence of the image on the screen, please turn off the Digital Light function after you use it. Video recording Operation Display Screen... -
Page 25: Taking Photos
Record Mode Taking Photos Taking Photos Operation Display Screen In Photo mode, press the Record ( button to take photo. Using Digital Zoom The Digital Zoom function magnifies images when recording videos or taking photos. ❖ To zoom in, press the Up button. To zoom out, press the Down button. -
Page 26: Using Underwater Mode
Record Mode Using Underwater Mode Using Underwater Mode When using this camera for video/photo shooting in the water, activate Underwater mode to get the best images. Operation Display Screen Press the Left button in preview mode, the Underwater Mode icon ( ) will appear on the screen. -
Page 27: Video Setting Options
Record Mode Menu options/operations Icon Description Displays the Video Settings options. Displays the Photo Settings options. Displays the Effects options. Displays the Setup options. Video Setting options Resolution The Resolution settings available are: Full HD 1080/30 Records videos at 1920 x 1080p, 30 fps. HD 720/60 Records videos at 1280 x 720p, 60 fps. -
Page 28: Motion Detection
Record Mode Menu options/operations Stabilization Electronic Image Stabilization reduces the effect of camcorder shaking, resulting in less blurry video. Motion Detection Record video automatically when the camcorder detects movement. Face Tracking The camcorder detects and focuses on faces automatically. This helps with capturing subjects in backlit conditions. -
Page 29: Photo Settings
Record Mode Menu options/operations NOTE Motion Detect, Time Lapse, and Slow Motion functions cannot be used simultaneously. Photo Settings Resolution The Resolution settings available are: High-16MP Takes photos at 4608 x 3456, 16MP quality. (interpolated) Standard-5MP Takes photos at 2592 x 1944, 5MP quality. Low-3MP Takes photos at 2048 x 1536, 3MP quality. -
Page 30: Date Printing
Record Mode Menu options/operations Date Printing This setting enables imprinting of the current date and time on each photo. See “Date & Time” on page 32 for instruction on setting the date and time. Description Display Screen When the Date Printing feature is ON, the date and time appear at the lower right corner of the photo. -
Page 31: Effects
Record Mode Menu options/operations Effects Scene You can select a mode according to the scene and conditions. The Scene settings available are: Auto Automatically adjusts to current conditions. Skin Adjusts skin tones to appear more natural. Night Adjusts for low light conditions or at night. Backlight Brightens closer subjects when brightly lit from behind. -
Page 32: Settings
Record Mode Menu options/operations Settings Sound You can enable or disable tone and operation sounds. Enables tone and operation sounds. Disables tone and operation sounds. TV format Use this function to select the appropriate TV standard for your area, either NTSC or PAL. Selecting the incorrect TV format setting may cause image flickering. -
Page 33: Restore Default
Record Mode Menu options/operations Format Use this option to delete all data on the Micro SD™ Card, or in the built-in memory. All the data will be erased if the memory card is formatted. Make sure that all files are copied to your computer before formatting the card. Deletes all photos and videos on the installed Micro SD™... -
Page 34: Chapter 4: Playback Mode
Chapter 4 Playback Mode Button functions The buttons have the following functions in Playback mode. Turn on Menu. Menu Return to Preview mode. In Playback Mode, go to the information screen. When playing video, increase volume. Down When playing video, decrease volume. Left Go to the previous video or photo. -
Page 35: Lcd Touch Screen Information
Playback Mode LCD touch screen information LCD touch screen information The indicators shown below may appear on the LCD screen while in Playback mode: (Sample Image) LCD screen indicators (Information screen) Notification icons Battery: Shows the battery charge level. Press the Up button to switch to the Information screen. -
Page 36: Playback Mode Operations
Playback Mode Playback mode operations Playback mode operations Operation Display Screen In Video / Photo mode, press the Playback ) button to switch to Video / Photo Playback mode. Use the Right / Left buttons to go to the next / previous video/photo. Press the Up button to go to the video / photo information screen. -
Page 37: Photo Playback
Playback Mode Photo Playback Photo Playback Operation In Photo Playback mode, use the Right / Left button to go to the next / previous photo. Press the Playback ( ) button to start the slideshow. Press the Record/OK ) button to stop the slideshow. Press the Menu ( ) button to exit. -
Page 38: Chapter 5: Viewing Photos And Videos On A Computer
Chapter 5 Viewing Photos and Videos on a Computer NOTE It may be necessary to install the bundled software application, ® ArcSoft MediaImpression to view videos correctly on your computer. Installing bundled software The CD-ROM supplied with your camcorder contains two software applications. -
Page 39: Transferring Photos And Videos To A Computer
Viewing Photos and Videos on a Computer Transferring photos and videos to a computer NOTE Detailed information can be found in the online help of all the bundled software. NOTE ® The ArcSoft MediaImpression application must be installed to view videos correctly on your computer. Transferring photos and videos to a computer You can transfer photos or videos stored on your camcorder to a computer and send them via email to friends or post them on the... -
Page 40: Chapter 6: Uploading Video And Photo Files To The Internet
Chapter 6 Uploading Video and Photo Files to the Internet ® The built-in CAMILEO Uploader application offers an easy way to upload video clips and photos to social media web sites instantly, allowing you to share them with your family and friends on these ®... -
Page 41: Camileo ® Uploader
Uploading Video and Photo Files to the Internet ® CAMILEO Uploader ® CAMILEO Uploader To upload files to the Internet: Connect the camcorder to the computer by using the supplied USB cable. (Sample Illustration) Connecting the camcorder to a computer Select MASS STORAGE on the camcorder screen. - Page 42 Uploading Video and Photo Files to the Internet ® CAMILEO Uploader Choose the web site you wish to upload to. ® (Sample Image) CAMILEO Uploader main screen NOTE Some social media web sites may not be accessible in certain regions. Click the Videos or Photos tab to go to the videos/photos thumbnail page.
-
Page 43: Setting Up Your Account Information For A Web Site
Uploading Video and Photo Files to the Internet ® CAMILEO Uploader ❖ Click Cancel to stop the uploading process. ® (Sample Image) CAMILEO Uploader screen - Cancel Setting up your account information for a web site NOTE You need to activate your Facebook account by email after registering it. - Page 44 Uploading Video and Photo Files to the Internet ® CAMILEO Uploader If you have not previously set up an account with the web site, one will first need to be created. ® (Sample Image) CAMILEO Uploader screen - Sign up for new account NOTE Some social media web sites may not be accessible in certain...
-
Page 45: Chapter 7: Webcam Mode
Chapter 7 Webcam Mode Connect the camcorder to your computer, using the supplied USB 2.0 cable. Select WEBCAM on the camcorder’s menu. In this mode, you can implement live video conference meetings and multimedia communications. (Sample Illustration) Connecting the camcorder to a computer NOTE The camcorder supports webcam mode in VGA (640 x 480) resolution. -
Page 46: Chapter 8: Viewing Photos And Videos On Tv
Chapter 8 Viewing Photos and Videos on TV Connecting to a high-definition 16:9 (wide) TV To view images or videos from your camcorder on an TV: ® Connect the mini HDMI cable to your camcorder’s mini ® HDMI Out port. Connect the other end of the cable to an HDTV. - Page 47 Viewing Photos and Videos on TV Connecting to a high-definition 16:9 (wide) TV NOTE The LCD screen does not display when the camcorder is connected to an HDTV. NOTE Some functions may not be accessible while the camcorder is connected to a TV or an HDTV.
-
Page 48: Chapter 9: Specifications
Chapter 9 Specifications Image sensor 5MP (megapixel) CMOS sensor Operation modes Video record, Photo record, Webcam Lens Fixed Focus (F 2.2) Focus range 1.0 meters to infinity Zoom 5X Digital zoom Shutter Electronic LCD screen 2" (50.8mm) Built-in 128MB memory (part of the memory is used for firmware) Storage media Micro SD™... -
Page 49: Operating Environment Conditions
Specifications Operating Environment Conditions White balance Auto, Daylight, Fluorescent, Tungsten Auto / 800 / 1600 Self-timer 10 seconds delay Light Light On / Light Off / Digital Light Photo: JPG File format Video: MP4 (H.264) Image play Single image / slide show Computer interface Mini USB 2.0 port ®... -
Page 50: Chapter 10: Troubleshooting
Chapter 10 Troubleshooting If the camcorder fails to function as expected, check the list of the common problems below. Problem / Situation Recommendation / Solution Power is off. Press the Power Button to turn on. Cannot turn on the camcorder. The power Battery pack is weak or depleted. - Page 51 Troubleshooting Problem / Situation Recommendation / Solution “!” means the Micro SD™ Card is low speed or contains corrupted files. To solve this, format the Micro SD™ Card using the camcorder instead of a computer. (Please refer to the detailed Format The files on the memory instruction in Section 5).
- Page 52 Troubleshooting Problem / Situation Recommendation / Solution [DV] indicates the internal memory of the camcorder. [Removable Disk] indicates the external memory When the camcorder is connected to the PC via (memory card installed in the camcorder). USB cable, many ® The disk [DVAP] shows the built-in CAMILEO Autoplay windows may UPLOADER application is saved at this disk.
-
Page 53: Chapter 11: Other Information
Other Information Toshiba Support If you require help or are having problems operating your product, you may need to contact Toshiba for additional technical assistance. Before you call Since some problems may be related to software, it is important that you investigate other sources of assistance first. -
Page 54: Contacting Toshiba
For technical support, or to stay current on the most recent software ® and hardware options for your CAMILEO product and for other product information, be sure to regularly check the Toshiba web site at support.toshiba.com. Toshiba voice contact For technical support, call the Toshiba Customer Support Center:... - Page 55 ® CAMILEO BW20 Manual del usuario...
-
Page 56: Información Reglamentaria
Consultar al distribuidor o a un técnico especializado en radio y televisión para obtener ayuda. N O T A Los cambios o las modificaciones realizados a este equipo, que no estén aprobados expresamente por TOSHIBA o por terceros autorizados por TOSHIBA, pueden invalidar el derecho del usuario a utilizar el equipo. -
Page 57: Instrucciones De Seguridad
❖ Para cargar la batería utilice solamente el adaptador de CA (vendido separadamente) o el cable USB suministrado, o un cargador de baterías Toshiba opcional. Nunca trate de cargar la batería con cualquier otro tipo de cargador. -
Page 58: Conos De Seguridad
Íconos de seguridad Este manual contiene instrucciones de seguridad que deben seguirse a fin de evitar posibles peligros que podrían tener como consecuencia lesiones personales, daños al equipo o pérdida de datos. Son advertencias de seguridad que están clasificadas de acuerdo con la gravedad del peligro y están representadas por íconos que distinguen cada instrucción como se muestra abajo: P E L I G R O Este ícono indica la presencia de una situación inminentemente peligrosa... - Page 59 Propiedades de impermeabilidad* Esta videocámara cumple con la Norma Industrial Japonesa (Japanese Industrial Standard o JIS) IPX8 de impermeabilidad (anteriormente el nivel de protección 8 de la norma JIS) y se puede usar bajo el agua. Sin embargo, tenga en cuenta que hacer caso omiso de las siguientes precauciones podría ocasionar daños o lesiones que no están cubiertos por la garantía.
- Page 60 Precauciones relativas al uso de la videocámara en el agua ❖ La propiedad de impermeabilidad de la videocámara se aplica solamente al agua dulce y al agua salada, pero no a sustancias de limpieza, químicos, aguas termales, etc. En caso de salpicaduras, elimine con un paño suave cualquier humedad.
- Page 61 Almacenamiento y mantenimiento de la videocámara ❖ Lave la videocámara después de sumergirla en agua salada o cuando ha quedado agua salada adherida a la misma. De lo contrario se puede causar la corrosión o descoloración de la lámina, al igual que el deterioro de la impermeabilidad de la videocámara.
- Page 62 Antes de grabar bajo el agua ❖ Asegúrese de que la cubierta de la ranura y la del puerto estén cerradas. Si una cubierta está abierta, el agua podría entrar en la videocámara y dañarla. Al cerrar la cubierta de la ranura y la del puerto, asegúrese de que no quede atrapado en el sello de caucho ningún objeto extraño como arena, pelos, polvo, etc.
-
Page 63: Marcas Comerciales
Información adicional © 2012 TOSHIBA CORPORATION. Todos los derechos reservados. TOSHIBA se reserva el derecho de efectuar cambios técnicos. TOSHIBA no asume ninguna responsabilidad por daños directos o indirectos incurridos por errores, omisiones o discrepancias entre este producto y la documentación. - Page 64 Contenido Información reglamentaria........2 Instrucciones de seguridad........3 Íconos de seguridad ..........4 Capítulo 1: Familiarícese con la videocámara......13 Vista general ............13 Revise los componentes ........14 Diseño a prueba de agua hasta 5 metros (16 pies) de profundidad ......15 Reforzada............15 Requisitos del sistema ........15 Vista de lente ............16 Vista inferior .............16 Vista posterior ..........17...
- Page 65 Contenido Cómo apagar la videocámara........22 Capítulo 3: Modo Grabar............23 Funciones de los botones ........23 Información sobre la pantalla de cristales líquidos (LCD)...........25 Grabación de video ..........27 Tomar fotografías ...........27 Uso del zoom digital ..........27 Uso de la función antirreflejo ........28 Uso del modo Bajo el agua ........28 Opciones/operaciones del Menú...
- Page 66 Capítulo 11: Información adicional........... 57 Asistencia técnica de Toshiba .........57 Antes de contactar a Toshiba ......57 Contacto con Toshiba ..........58 Sitio web de asistencia técnica de Toshiba ..58 Contacto telefónico con Toshiba .......58 Garantía ..............59 Información en línea sobre la garantía ....59...
-
Page 67: Vista General
Familiarícese con la videocámara Vista general ® La videocámara CAMILEO BW20 está equipada con un sensor de 5 megapíxeles que puede grabar videos en formato H.264, lo que permite grabar más video usando menos memoria. ® La videocámara CAMILEO BW20 también incluye las siguientes funciones: ❖... -
Page 68: Revise Los Componentes
Familiarícese con la videocámara Vista general ❖ Varias opciones de efectos tales como Tiempo de espera y Cámara lenta. N O T A Una pequeña porción de la memoria integrada de la videocámara se usa para el firmware de la misma. N O T A Para ver videos correctamente en un PC instale el paquete de software incluido. -
Page 69: Diseño A Prueba De Agua Hasta 5 Metros (16 Pies) De Profundidad
Familiarícese con la videocámara Vista general Diseño a prueba de agua hasta 5 metros (16 pies) de profundidad ❖ La videocámara puede grabar videos o tomar fotografías bajo el agua, a profundidades hasta de 5 metros (16 pies) por un período hasta de 30 minutos. -
Page 70: Vista De Lente
Familiarícese con la videocámara Vista general Vista de lente Botón de Encendido Indicador LED Parlante Lente Micrófono (Ilustración de muestra) Vista del lente Vista inferior ® Puerto mini USB 2.0 Puerto mini HDMI Soporte del trípode Ranura para tarjeta Botón Reinicializar Micro SD™... -
Page 71: Vista Posterior
Familiarícese con la videocámara Vista general Vista posterior Botón de Encendido Pantalla LCD Botón Menú Botón Arriba Botón Izquierda Botón Modo Botón Reproducir Botón Derecha Botón Grabar/ Gancho para correa Botón Abajo Botón Eliminar (Ilustración de muestra) Vista posterior... -
Page 72: Carga De La Batería Integrada
Capítulo 2 Para comenzar Carga de la batería integrada Antes de utilizar la videocámara debe cargar la batería usando el adaptador de CA (vendido separadamente) o el cable USB que se suministran. Para cargar la videocámara a través del adaptador de CA (vendido separadamente) (con capacidad de 5 voltios, 2 amps) siga los pasos siguientes: Conecte el adaptador de CA a un tomacorriente de CA de... -
Page 73: Inserción Y Extracción De Una Tarjeta Micro Sd
Para comenzar Inserción y extracción de una tarjeta Micro SD™ Para cargar la videocámara a través del cable USB suministrado, siga los pasos siguientes: Conecte el puerto mini USB de la videocámara a un puerto USB de una computadora usando el cable USB suministrado. Una luz intermitente indica que se está... - Page 74 Para comenzar Inserción y extracción de una tarjeta Micro SD™ Para extraer la tarjeta Micro SD™, presiónela hacia adentro para liberarla. Cuando se asome la de tarjeta sujétela y sáquela de la ranura. (Ilustración de muestra) Inserción y extracción de una tarjeta ™...
-
Page 75: Elimine La Humedad De Todas Las Superficies De La Videocámara
Para comenzar Elimine la humedad de todas las superficies de la videocámara Elimine la humedad de todas las superficies de la videocámara Si no se elimina debidamente la humedad adherida a las hendiduras de la cubierta de la ranura y la cubierta del puerto, cuando se abre una cubierta la humedad podría penetrar en la videocámara. -
Page 76: Encender La Videocámara Y Empezar A Usarla
Para comenzar Encender la videocámara y empezar a usarla Encender la videocámara y empezar a usarla Para encender la videocámara, presione el botón de Encendido ) durante aproximadamente un segundo. Para grabar video: Presione el botón Grabar/OK ( ) para iniciar la grabación. -
Page 77: Funciones De Los Botones
Capítulo 3 Modo Grabar Antes de grabar bajo el agua. ❖ Asegúrese de que la cubierta de la ranura y la del puerto estén bien cerradas. ❖ Si una cubierta está abierta, el agua podría entrar en la videocámara y dañarla. ❖... - Page 78 Modo Grabar Funciones de los botones Para ver videos/fotografías registrados en modo continuo. Reproducir Para alternar entre los modos Grabar y Reproducir. En el modo Menú, para regresar al nivel previo del menú. En el modo Video, presione el botón Reproducir para revisar los videos grabados.
-
Page 79: Información Sobre La Pantalla De Cristales Líquidos (Lcd)
Modo Grabar Información sobre la pantalla de cristales líquidos (LCD) Información sobre la pantalla de cristales líquidos (LCD) Los indicadores que aparecen en la siguiente imagen podrían aparecer en la pantalla LCD cuando se registran videos o fotografías: (Imagen de muestra) Información sobre la pantalla LCD Batería: Muestra el nivel de carga de la batería ESOLUCIÓN DE VIDEO FULL HD 1080/30... - Page 80 Modo Grabar Información sobre la pantalla de cristales líquidos (LCD) Tiempo de grabación restante 01:22:23 Cantidad de fotografías restantes que se pueden tomar con 0015 la configuración de resolución actual Modo Video Modo Fotografía Contador del zoom digital N O T A Algunas funciones no se pueden usar en combinación con otras.
-
Page 81: Grabación De Video
Modo Grabar Grabación de video Grabación de video Operación Pantalla En el modo Video, presione el botón Grabar ( ) para iniciar la grabación. Cuando se está grabando un video, un indicador de tiempo aparece en la pantalla LCD. Para detener la grabación vuelva a presionar el botón Grabar ( Para pausar la grabación, presione el botón Derecha. -
Page 82: Uso De La Función Antirreflejo
Modo Grabar Uso de la función antirreflejo Uso de la función antirreflejo Active esta función para mejorar la visibilidad de la pantalla LCD en condiciones de iluminación brillante o reflectante en exteriores. Esto le ayuda a ver al sujeto en la pantalla LCD. Este efecto se aplica solamente a la imagen que se ve en la pantalla LCD y no al video o fotografía que se está... -
Page 83: Opciones/Operaciones Del Menú
Modo Grabar Opciones/operaciones del Menú Opciones/operaciones del Menú Para ajustar las opciones del menú: Presione el botón Modo ( ) para ver las opciones de modo/ configuración disponibles. Presione el botón Menú ( Para cada configuración debe seleccionar la opción usando los botones Derecha/Izquierda y luego presionando el botón OK ( ) para entrar en el menú... -
Page 84: Opciones De Configuración De Video
Modo Grabar Opciones/operaciones del Menú Opciones de configuración de Video Resolución Las configuraciones de resolución disponibles son: Full HD 1080/30 Graba videos con resolución de 1920 x 1080p, 30 fps. HD 720/60 Graba videos con resolución de 1280 x 720p, 60 fps. HD 720/30 Graba videos con resolución de 1280 x 720p, 30 fps. -
Page 85: Seguimiento De Caras
Modo Grabar Opciones/operaciones del Menú Seguimiento de caras La videocámara detecta y enfoca las caras en forma automática. Esta función ayuda a capturar sujetos iluminados a contraluz. Descripción Pantalla En el modo Grabar enfoque la videocámara hacia las caras. Aparecen marcos alrededor de las caras. Cámara lenta Esta opción permite grabar videos con efecto de cámara lenta. -
Page 86: Opciones De Configuración De Fotografía
Modo Grabar Opciones/operaciones del Menú Opciones de configuración de Fotografía Resolución Las configuraciones de resolución disponibles son: Alta-16MP Toma fotografías con una calidad de 4608 x 3456, 16MP. (interpolada) Estándar-5MP Toma fotografías con una calidad de 2592 x 1944, 5MP. Baja-3MP Toma fotografías con una calidad de 2048 x 1536, 3MP. - Page 87 Modo Grabar Opciones/operaciones del Menú Impresión de fecha Esta configuración permite imprimir la fecha y hora actuales en cada fotografía. Para instrucciones sobre la configuración de la fecha y hora consulte “Fecha y hora” en la página Descripción Pantalla Cuando la función de Impresión de fecha está activada, la fecha y hora aparecen en la esquina inferior derecha de la fotografía.
-
Page 88: Efectos
Modo Grabar Opciones/operaciones del Menú Efectos Escena Puede seleccionar un modo de acuerdo con la escena y las condiciones. Las configuraciones de Escena disponibles son: Auto Ajusta las condiciones actuales automáticamente. Piel Hace que los tonos de la piel aparezcan más naturales. Noche Efectúa ajustes para condiciones de baja iluminación o en la noche. -
Page 89: Configuración
Modo Grabar Opciones/operaciones del Menú Configuración Sonido Se pueden habilitar o deshabilitar el tono y los sonidos de operación. ACTIVAR (ON) Habilita el tono y los sonidos de operación. DESACTIVAR (OFF) Deshabilita el tono y los sonidos de operación. Formato de TV Utilice esta función para seleccionar el estándar de TV apropiado para su área, ya sea NTSC o PAL. - Page 90 Modo Grabar Opciones/operaciones del Menú Fecha y hora Siga las siguientes instrucciones para fijar la fecha y hora actuales para imprimirla en la fotografías. Para la configuración que habilita esta función consulte “Impresión de fecha” en la página Operación Pantalla En el menú...
- Page 91 Modo Grabar Opciones/operaciones del Menú Restaurar configuración predeterminada Para restaurar la configuración predeterminada en fábrica seleccione esta opción. En la siguiente tabla se enumeran las configuraciones predeterminadas de la videocámara. ONFIGURACIÓN PREDETERMINADA EN ONFIGURACIÓN FÁBRICA Video: Alta HD 1080p/30 RESOLUCIÓN Fotografía: Estándar-5MP ESTABILIZACIÓN Desactivada...
-
Page 92: Funciones De Los Botones
Capítulo 4 Modo Reproducir Funciones de los botones En el modo Reproducir los botones tiene las siguientes funciones: Activar el Menú. Menú Regresar al modo de Vista previa. En el modo Reproducir, ir a la pantalla de información. Arriba Aumentar el volumen cuando se reproduce un video. -
Page 93: Información De La Pantalla Lcd Táctil
Modo Reproducir Información de la pantalla LCD táctil Información de la pantalla LCD táctil Los indicadores que se muestran a continuación podrían aparecer en la pantalla LCD táctil en el modo Reproducir: (Imagen de muestra) Indicadores de la pantalla LCD (Pantalla de información) Íconos de notificación Batería: Muestra el nivel de carga de la batería. -
Page 94: Operaciones Del Modo Reproducir
Modo Reproducir Operaciones del modo Reproducir Operaciones del modo Reproducir Operación Pantalla En el modo Video/Fotografía, presione el botón Reproducir ( ) para cambiar al modo Reproducir Video/Fotografía. Use los botones Izquierda/Derecha para ir al video o fotografía previo/siguiente. Presione el botón Arriba para ir a la pantalla de información del video/fotografía. -
Page 95: Reproducción De Fotografía
Modo Reproducir Reproducción de Fotografía Reproducción de Fotografía Operación En el modo Reproducir fotografía, use los botones Derecha/Izquierda para ir a la fotografía siguiente/previa. Presione el botón Reproducir ( ) para iniciar la presentación de diapositivas. Presione el botón Grabar/OK ( ) para detener la presentación de diapositivas. -
Page 96: Instalación Del Paquete De Software Incluido
Capítulo 5 Ver fotografías o videos en una computadora N O T A Para ver videos correctamente en una computadora podría ser necesario instalar la aplicación de software incluido ArcSoft ® MediaImpression Instalación del paquete de software incluido El CD-ROM suministrado con la videocámara contiene dos aplicaciones de software. -
Page 97: Cómo Transferir Fotografías O Videos A La Computadora
Ver fotografías o videos en una computadora Cómo transferir fotografías o videos a la computadora N O T A En la ayuda en línea del paquete de software incluido puede obtener información detallada. N O T A Para ver videos correctamente en una computadora es necesario ®... - Page 98 Capítulo 6 Cómo cargar archivos de video y fotografías en Internet ® La aplicación integrada CAMILEO Uploader permite transferir fácilmente videoclips y fotografías a sitios web de redes sociales en forma instantánea, para compartirlos con familiares y amigos. ® El paquete de software incluido, ArcSoft MediaImpression también se puede utilizar para transferir videoclips a estos sitios web.
-
Page 99: Camileo ® Uploader
Cómo cargar archivos de video y fotografías en Internet ® CAMILEO Uploader ® CAMILEO Uploader Para cargar archivos en Internet: Conecte la videocámara a la computadora usando el cable mini USB que se suministra. (Ilustración de muestra) Cómo conectar la videocámara a una computadora En la pantalla de la videocámara seleccione MASS STORAGE (Almacenamiento masivo). - Page 100 Cómo cargar archivos de video y fotografías en Internet ® CAMILEO Uploader Seleccione el sitio web a donde desea transferir los archivos. ® (Imagen de muestra) Pantalla principal de CAMILEO Uploader N O T A En ciertas regiones puede que no se pueda acceder a algunos sitios web de redes sociales.
-
Page 101: Configuración De La Información De Cuenta De Un Sitio Web
Cómo cargar archivos de video y fotografías en Internet ® CAMILEO Uploader Haga clic en Upload (Cargar) para empezar a transferir los archivos. ❖ Haga clic en Cancel (Cancelar) para detener el proceso de carga. ® (Imagen de muestra) Pantalla de CAMILEO Uploader - Cancelar Configuración de la información de cuenta de un sitio web N O T A... - Page 102 Cómo cargar archivos de video y fotografías en Internet ® CAMILEO Uploader Si no ha establecido previamente una cuenta en el sitio web, primero tendrá que crear una. ® (Imagen de muestra) Pantalla de CAMILEO Uploader - Cómo crear una cuenta nueva N O T A En ciertas regiones puede que no se pueda acceder a algunos sitios web de redes sociales.
- Page 103 Capítulo 7 Modo Cámara web Conecte la videocámara a la computadora utilizando el cable USB 2.0 que se suministra. Seleccione WEBCAM en el menú de la videocámara. En este modo usted puede realizar videoconferencias en vivo y comunicaciones multimedia. (Ilustración de muestra) Cómo conectar la videocámara a una computadora N O T A La videocámara admite el modo de cámara web en resolución...
-
Page 104: Conexión A Un Televisor De Alta Definición De 16:9 (Ancho)
Capítulo 8 Ver fotografías o videos en un televisor Conexión a un televisor de alta definición de 16:9 (ancho) Para ver imágenes o videos almacenados en la videocámara en un televisor de alta definición: ® ® Conecte el cable mini HDMI al puerto de salida mini HDMI de la videocámara. - Page 105 Ver fotografías o videos en un televisor Conexión a un televisor de alta definición de 16:9 (ancho) N O T A Cuando la videocámara está conectada a un televisor de alta definición no aparecen imágenes en la pantalla LCD. N O T A Algunas funciones podrían no estar accesibles cuando la videocámara esté...
- Page 106 Capítulo 9 Especificaciones Sensor de imagen Sensor CMOS de 5 megapíxeles Modos de operación Grabación de video, grabación de fotografías, cámara web Lente Enfoque fijo (F 2.2) Rango de enfoque 1 m (39") ~ infinidad Zoom Zoom digital 5x Obturador Electrónico Pantalla LCD 2 pulg.
-
Page 107: Condiciones Ambientales De Funcionamiento
Especificaciones Condiciones ambientales de funcionamiento Balance de blancos Auto, Luz de día, Fluorescente, Tungsteno Auto/800/1600 Autotemporizador Demora de 10 segundos Luz encendida/Luz apagada/Luz Digital Fotografía: JPG Formato de archivo Video: MP4 (H.264) Reproducción de Imagen individual/ Presentación de diapositivas imagen Interfaz de PC Puerto mini USB 2.0 ®... - Page 108 Capítulo 10 Solución de problemas Si la videocámara no funciona como es de esperar consulte la lista de los problemas más comunes a continuación. Problema/Situación Recomendación/Solución La alimentación está apagada. Presione el botón de La videocámara no Encendido para encender la alimentación. enciende.
- Page 109 Solución de problemas Problema/Situación Recomendación/Solución El símbolo “!” significa que la tarjeta Micro SD™ es demasiado lenta o que contiene archivos dañados. Para resolver este problema, formatee la tarjeta Micro SD™ Los archivos usando la videocámara en lugar de la computadora. contenidos en la (Consulte las instrucciones detalladas sobre el Formato tarjeta de memoria...
- Page 110 Solución de problemas Problema/Situación Recomendación/Solución Cuando la [DV] indica la memoria interna de la videocámara. videocámara está [Disco extraíble] indica la memoria externa (tarjeta de conectada al PC a memoria instalada en la videocámara). través de un cable USB puede que aparezcan El disco [DVAP] muestra la aplicación integrada en pantalla muchas de ®...
-
Page 111: Asistencia Técnica De Toshiba
Información adicional Asistencia técnica de Toshiba Si necesita ayuda o tiene problemas con el funcionamiento de su producto, podría ser necesario ponerse en contacto con Toshiba para obtener asistencia técnica adicional. Antes de contactar a Toshiba Puesto que algunos problemas pueden estar relacionados con el software, es conveniente que recurra primero a otras fuentes de asistencia técnica. -
Page 112: Contacto Con Toshiba
Toshiba: Al (888) 592-0944 dentro de Estados Unidos Al (949) 583-3305 desde fuera de Estados Unidos Centro de Asistencia Telefónica de Toshiba para América Latina, servicio en español. Horas: De lunes a viernes de 8:00 a.m. a 9:00 p.m. (hora estándar del este):... -
Page 113: Garantía
Este producto incluye una Garantía limitada estándar de un (1) año. La Garantía limitada estándar de un (1) año para los accesorios de computadoras y los productos electrónicos de Toshiba se puede encontrar en línea en el sitio http://pcsupport.toshiba.com/accessories1yr. Servicio de garantía Los clientes en los cincuenta (50) estados de Estados Unidos y en el Distrito de Columbia pueden obtener el servicio en garantía...