
Related Manuals for Toshiba S20-B


Summary of Contents for Toshiba S20-B
-
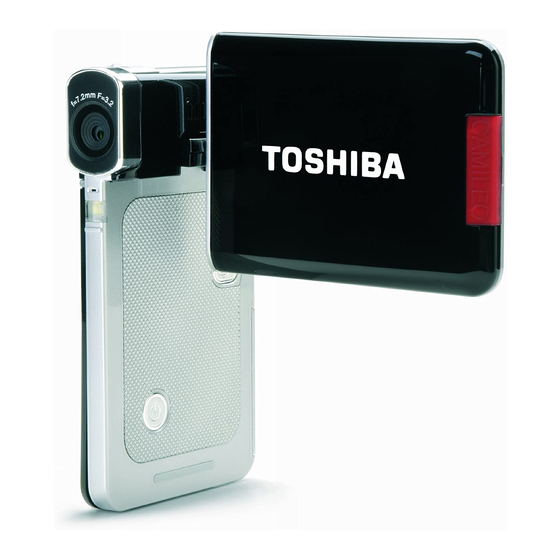
Page 1: Quick Start Guide
GMAA00217011.book Page 1 Friday, March 26, 2010 10:53 AM CAMILEO S20 Quick Start Guide English/Español... -
Page 2: Safety Instructions
Never install or remove the battery pack without first turning off the power and disconnecting the AC adaptor. ❖ Only use the supplied AC adaptor or USB cable, or an optional Toshiba battery charger to charge the battery pack. Never attempt to charge the battery pack with any other charger. -
Page 3: Regulatory Information
State of California to cause birth defects or other reproductive harm. Wash hands after handling. Regulatory Information TOSHIBA declares that this product conforms to the following Standards: FCC Conditions This equipment has been tested and found to comply with Part 15 of the FCC Rules. -
Page 4: Getting Started
GMAA00217011.book Page 4 Friday, March 26, 2010 10:53 AM Getting Started Getting Started The battery comes pre-installed in the camcorder, however you must remove the protective film on the battery before use. To properly connect the battery: Slide the back battery cover off. Remove the battery. - Page 5 GMAA00217011.book Page 5 Friday, March 26, 2010 10:53 AM Getting Started Charge your battery You must use the supplied AC adaptor or the USB cable to charge your camcorder before use. Turn off the camcorder. A blinking light will indicate active charging and a solid light will indicate that charging is complete.
- Page 6 GMAA00217011.book Page 6 Friday, March 26, 2010 10:53 AM Quick Tour Quick Tour Record and Play 1 Flip to power on Flip out the LCD screen or hold the Power (..) button for one second. To conserve battery power, the camcorder will turn off automatically after 3 minutes of non-operation.
- Page 7 GMAA00217011.book Page 7 Friday, March 26, 2010 10:53 AM Quick Tour Front/Side SD™ Card cover Macro switch LCD screen Switch between Macro mode and Normal mode. Lens NOTE: Remove the protective film from the lens before use. Microphone Light Power button Speaker Mode button When recording movies, press...
-
Page 8: Record Button
GMAA00217011.book Page 8 Friday, March 26, 2010 10:53 AM Quick Tour Rear/Underside Picture mode indicator light Movie mode indicator light Tele (Up) button Record button Move between the option items, In Movie Record mode, press to Zoom in, and Volume increase. record a movie, press again to stop. -
Page 9: Menu Options
GMAA00217011.book Page 9 Friday, March 26, 2010 10:53 AM Quick Tour Menu options Resolution Movie Resolution FHD (1080p 30) 1920 x 1080p (30fps) HD (720p 30) 1280 x 720p (30fps) WVGA 60 848 x 480 (60fps) VGA (4:3) 640 x 480 Picture resolution High (16 MP) 4608 x 3456 (16 M pixels) - Page 10 GMAA00217011.book Page 10 Friday, March 26, 2010 10:53 AM Quick Tour Black and white The image is converted to black and white Classic The image is converted to sepia Negative The image is converted as the negative of the original Effect Movie effect Enables motion stabilization, giving you smooth,...
- Page 11 GMAA00217011.book Page 11 Friday, March 26, 2010 10:53 AM Quick Tour The camcorder adjusts the ISO sensitivity of its Auto images automatically. The larger the number, the higher the ISO sensitivity is set to. Select a small number to shoot a smoother image. Select a large number to shoot an image in a dark location or to shoot a 1600 subject moving at high speed.
- Page 12 GMAA00217011.book Page 12 Friday, March 26, 2010 10:53 AM Plug and share Plug and share ® Install the bundled software application, ArcSoft MediaImpression , for optimal video playback on your computer. Connect the computer and camcorder with the supplied mini USB 2.0 cable as shown.
-
Page 13: Toshiba Support
Toshiba’s technical support Web site For technical support, or to stay current on the most recent software and hardware options for your CAMILEO product and for other product information, be sure to regularly check the Toshiba Web site at www.pcsupport.toshiba.com. Toshiba voice contact... - Page 14 GMAA00217011.book Page 14 Friday, March 26, 2010 10:53 AM...
- Page 15 GMAA00217011.book Page 1 Friday, March 26, 2010 11:00 AM CAMILEO S20 Guía de inicio rápido...
-
Page 16: Instrucciones De Seguridad
12 Elimine las baterías usadas de acuerdo con las instrucciones. Información sobre la batería ❖ Utilice solamente las baterías recomendadas por TOSHIBA como repuestos. La batería es de iones de litio y puede explotar si no se reemplaza, utiliza, manipula o elimina en forma correcta. Deseche la batería según lo requieran la legislación y los reglamentos locales. -
Page 17: Información Reglamentaria
❖ Para cargar la batería utilice solamente el adaptador de CA o el cable USB suministrado o un cargador de baterías Toshiba opcional. Nunca trate de cargar la batería con cualquier otro tipo de cargador. Al tocar el cable de este producto las personas se exponen al plomo, A D V E R T E N C I A una sustancia química que el estado de California sabe que ocasiona... -
Page 18: Para Comenzar
GMAA00217011.book Page 4 Friday, March 26, 2010 11:00 AM Para comenzar Para comenzar La batería ya viene instalada en la videocámara, sin embargo, debe retirar la película protectora de la batería antes de usarla. Para conectar correctamente la batería: Abra la cubierta de la batería deslizándola. Saque la batería. - Page 19 GMAA00217011.book Page 5 Friday, March 26, 2010 11:00 AM Para comenzar Carga de la batería Antes de utilizar la videocámara debe cargar la batería usando el adaptador de CA o el cable USB que se suministran. Apague la videocámara. Una luz intermitente indica que se está cargando la batería y una luz sólida indica que se completó...
-
Page 20: Referencia Rápida
GMAA00217011.book Page 6 Friday, March 26, 2010 11:00 AM Referencia rápida Referencia rápida Grabar y reproducir 1 Abrir la pantalla para encender la videocámara Abra la pantalla LCD o mantenga presionado el botón de encendido ( ) durante un segundo. Para conservar energía de la batería la videocámara se apaga automáticamente después de 3 minutos de inactividad. - Page 21 GMAA00217011.book Page 7 Friday, March 26, 2010 11:00 AM Referencia rápida Lado frontal/lateral Cubierta de la tarjeta SD™ Interruptor macro Pantalla LCD Para alternar entre el modo Macro y el modo Normal. Lente NOTA: Retire la película protectora del lente antes de usarlo. Micrófono Parlante Botón de encendido...
- Page 22 GMAA00217011.book Page 8 Friday, March 26, 2010 11:00 AM Referencia rápida Lados Posterior/Inferior Luz indicadora del modo Fotografía Luz indicadora del modo Película Botón Grabar Botón Tele (Arriba) En el modo Grabar películas, presione este botón para grabar una película. Para moverse entre las opciones, Presiónelo de nuevo para detener la efectuar acercamientos y aumentar...
-
Page 23: Opciones Del Menú
GMAA00217011.book Page 9 Friday, March 26, 2010 11:00 AM Referencia rápida Opciones del menú Resolución Resolución de películas FHD (1080p 30) 1920 x 1080p (30fps) HD (720p 30) 1280 x 720p (30fps) WVGA 60 848 x 480 (60fps) VGA (4:3) 640 x 480 Resolución de fotografías Alta (16 MP) - Page 24 GMAA00217011.book Page 10 Friday, March 26, 2010 11:00 AM Referencia rápida Blanco y negro La imagen se convierte a blanco y negro Clásica Le da una apariencia sepia a la imagen Negativa La imagen se convierte en una versión negativa del original Efectos Efectos para las películas Habilita la estabilización del movimiento,...
- Page 25 GMAA00217011.book Page 11 Friday, March 26, 2010 11:00 AM Referencia rápida La videocámara ajusta la sensibilidad ISO de las Auto imágenes automáticamente. Al un número más grande corresponde una sensibilidad ISO más alta. Seleccione un número menor para filmar una imagen más suave. Seleccione un número mayor para filmar una imagen en una ubicación oscura o para filmar un 1600...
- Page 26 GMAA00217011.book Page 12 Friday, March 26, 2010 11:00 AM Conectar y compartir Conectar y compartir Para una reproducción de video óptima en la computadora, instale el ® programa de software ArcSoft MediaImpression incluido. Conecte la computadora y la videocámara, con el mini cable USB 2.0 que se suministra, como se muestra a continuación.
-
Page 27: Arcsoft Mediaconverter
Para obtener asistencia técnica o para mantenerse al día acerca de las opciones más recientes de software y hardware para su producto CAMILEO, así como para obtener otro tipo de información sobre otros productos, asegúrese de visitar periódicamente el sitio web de Toshiba en pcsupport.toshiba.com. Contacto telefónico con Toshiba Si desea solicitar asistencia técnica, llame al Centro de asistencia al cliente... - Page 28 GMAA00217011.book Page 14 Friday, March 26, 2010 11:00 AM GMAA00217011 03/10...