Table of Contents
Advertisement
Advertisement
Table of Contents

Related Manuals for Zanussi ZOD370


Summary of Contents for Zanussi ZOD370
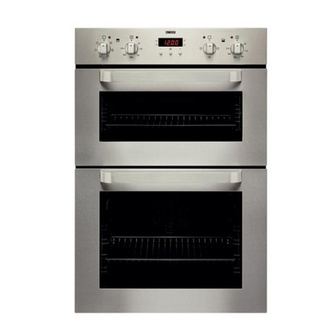
- Page 1 User manual Built in double oven ZOD370...
-
Page 2: Table Of Contents
Contents Safety information _ _ _ _ _ _ _ _ _ _ _ _ _ _ _ _ 2 What to do if… _ _ _ _ _ _ _ _ _ _ _ _ _ _ _ _ _ 17 Product description _ _ _ _ _ _ _ _ _ _ _ _ _ _ _ _ 3 Installation _ _ _ _ _ _ _ _ _ _ _ _ _ _ _ _ _ _ _ 18 Before first use _ _ _ _ _ _ _ _ _ _ _ _ _ _ _ _ _ _ 4... -
Page 3: Product Description
• Stand clear when opening the drop down doors. Sup- up of fat or other foodstuff could result in a fire especially port the doors using the handles until fully open. in the grill pan. • Do not place sealed cans or aerosols inside the oven. •... -
Page 4: Before First Use
Control Panel Overview Top oven function knoob Oven grill shelf Top oven temperature knob Decrease button Mode button Increase button Main oven function knob Main oven temperature knob Display Oven accessories Anti stick meat/Drip pan 3 oven shelfs Before first use Rating plate Preparing to use your appliance This is situated on the front frame of the appliance and... -
Page 5: Operation
The cooling fan Setting the Time The cooling fan comes on immediately the top oven or The oven only operates when the time has been set. grill is switched on. It may run on after the ovens are switched off until the appliance has cooled. During the cooling down period the cooling fan may switch on and off. -
Page 6: Top Oven
Important! Always grill with the door closed. The temperature pilot light is lit as long as the oven is heating up. Switching the Oven On and Off The fan switches on automatically in order to keep 1. Turn the oven functions dial to the desired function. the appliance’s surfaces cool. -
Page 7: Use, Tables And Tips
Clock Functions 4. When the time has elapsed, the function indicator flashes and an audible signal sounds for 2 minutes. • Countdown - See appropriate chapter on setup. A The signal can be stopped by pressing any button. signal sounds after the time has elapsed. This function Cook time does not affect the functioning of the oven. - Page 8 How to use the Baking Tables 1 tray, e.g. oven level 3 • The tables give the required temperature settings, cooking times and oven levels for a selection of typical dishes. • Temperatures and baking times are for guidance only, as these will depend on the consistency of pastry, dough or mixture, the amount and the type of baking tin.
- Page 9 • To prevent escaping meat juices or fat from burning • Stand dishes on a suitably sized baking tray on the on to the pan, we recommend placing some liquid in shelf to prevent spillage onto the oven base and to help the roasting cookware.
- Page 10 • A 1kg/2¼lb oven ready chicken will be thawed in ap- • Do not leave food at room temperature once it is de- proximately 5 hours. Remove the giblets as soon as frosted. Cook raw food immediately or store cooked possible during the thawing process.
- Page 11 Temperature Approx Cook Time Food Shelf Position [°C] (mins) Shortcrust: - Mince Pies 190 - 200 15 - 20 - Meat Pies 190 - 210 25 - 35 - Quiche, Tarts, Flans 180 - 200 25 - 50 Scones 220 - 230 8 - 12 Shepard´s Pie 190 - 200...
- Page 12 Grill Time Food (mins in total) - Rare 4 - 6 - Medium 6 - 8 - Well Done 12 - 15 Toasted Sandwiches 3 - 4 Main Oven - Thermaflow® - Baking Shelf Positions are not critical but ensure that oven shelves are evenly spaced when more than one is used (e.g.
-
Page 13: Care And Cleaning
Main Oven - Thermaflow® - Roasting Meat Temperature [°C] Cooking Time Beef/ Beef boned 20-35 minutes per ½ kg (1lb) and 160 - 180 20-35 minutes over Mutton/ Lamb 20-35 minutes per ½ kg (1lb) and 160 - 180 20-35 minutes over Pork/ Veal/ Ham 30-40 minutes per ½... - Page 14 Removing the side rails 2. If necessary: replace with a 40 Watt, 230V, 300°C heat-resistant Pull the rails away from the Unhook them at the back oven light bulb . oven wall at the front 3. Refit the glass cover. Replacing the side oven lamp/Cleaning the glass Replace the side rails cover (for selected models only)
- Page 15 Oven door glass The oven door comprises 2,3 or 4 panels of glass (de- pends of the model) mounted one on top of another. The interior glass panels can be removed for cleaning. Important! Important: Rough handling, especially around the edges of the front panel, can cause the glass to break. Removing the glass door panels Hold the glass panels on their upper side and one...
- Page 16 On the open side of the door strip (B) there is a guide Fold the clamp levers on both door hinges (A) down bar (C). This must be pressed between the outer side into their original position. of the door and the corner (D). The seal (E) must audibly Close the oven door.
-
Page 17: What To Do If
Cleaning inside the grill and oven compartments • Household detergents and bleaches. The vitreous enamel coating in the grill/top oven and main • Soap Impregnated pads unsuitable for non-stick sau- oven compartments can be cleaned using normal oven cepans. cleaners with care. •... -
Page 18: Installation
Problem Possible Solution The oven is not cooking evenly. Check that the appliance is correctly installed and is level. Check that the recommended temperatures and shelf positions are being used. The oven light fails to illuminate. The oven light bulb may need replacing. The oven fan is noisy. - Page 19 600 min 550 min 2000 min 907 min 560 min 570 max 300 min...
- Page 20 90°...
- Page 21 2x 3,5x25 Electrical Installation lating switch with at least 3mm contact separation in all poles and neutral. • Enquiries regarding the installation of the cooker point, c) If you wish to connect an oven and a hob to a cooker if required, should be made to your Regional Electricity point you can by connecting the oven and hob sep- Company to ensure compliance with their regulations.
-
Page 22: Disposal
Disposal Packaging material The symbol on the product or on its packaging The packaging material is environmentally-friendly indicates that this product may not be treated as and recyclable. Plastic parts are marked with the interna- household waste. Instead it should be taken to the tional abbreviations such as, e.g. -
Page 23: Www.electrolux.com
Slavonska avenija 3, 10000 Zagreb Ireland +353 1 40 90 753 Long Mile Road Dublin 12 Italia +39 (0) 434 558500 C.so Lino Zanussi, 26 - 33080 Porcia (PN) Latvija +371 67313626 Kr. Barona iela 130/2, LV-1012, Riga Lietuva +370 5 278 06 03... - Page 24 Nederland +31 17 24 68 300 Vennootsweg 1, 2404 CG - Alphen aan den Rijn Norge +47 81 5 30 222 Risløkkvn. 2 , 0508 Oslo Österreich +43 18 66 400 Herziggasse 9, 1230 Wien Polska +48 22 43 47 300 ul.
- Page 28 www.zanussi.com...