Table of Contents
Advertisement
Available languages
Available languages
®
Front-Loading
Automatic
Washer
Use & Care Guide
Lavadora
automat|ca
de carga
frontal
Manual
de uso y cuidado
Models/Modelos
796.4044#9##
Designed
to use only HE
High Efficiency
detergent
DiseSado
para utilizar solamente
detergente
de alta eficacia
Protocol
P172
Sanitization
Performance
of Residential
and Commercial,
Family Sized Clothes
Washers
Protocolo
P172
Ejecucion
de Saneamiento
en la zona
residencial
y comercial,
lavodoras
del uso
del hogar
o
° !ll!
MFL62526816
Sears Brands Management
Corporation,
Hoffman
Estates,
|L 60t 79
Sears Canada
|nc,, Toronto,
Ontario, Canada
M5B 2B8
www,sears,com
www,sears,ca
Advertisement
Chapters
Table of Contents

Related Manuals for Kenmore 4044 - 4.2 cu. Ft. Front-Load Washer


Summary of Contents for Kenmore 4044 - 4.2 cu. Ft. Front-Load Washer
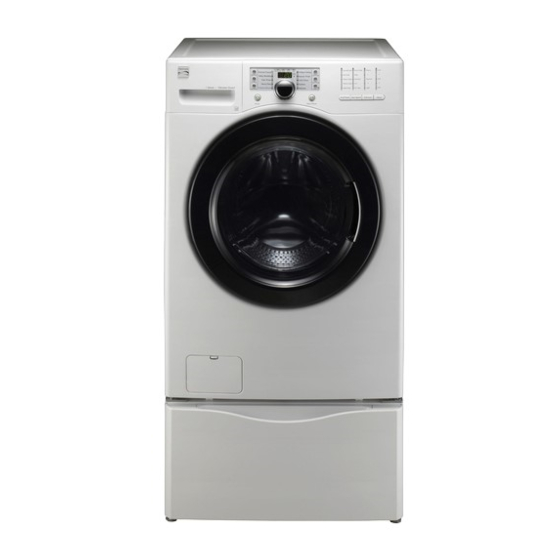
- Page 1 ® Front-Loading Automatic Washer Use & Care Guide Lavadora automat|ca de carga frontal Manual de uso y cuidado Models/Modelos 796.4044#9## ° !ll! Designed to use only HE High Efficiency detergent DiseSado para utilizar solamente detergente de alta eficacia Protocol P172 Sanitization Performance of Residential...
-
Page 2: Table Of Contents
........... GROUNDING INSTRUCTIONS ............. Congratulations on making a smart purchase. Your new Kenmore ®product is designed and manufactured for FEATURES AND BENEFITS years of dependable operation. But like all products, it Key Parts and Components ..............Included Accessories ................may require preventive maintenance or repair from time Optional Accessories ................ -
Page 3: Safety Messages
Wehaveprovided manyimportant safetymessages i nthismanual andonyourappliance. Always readandobey allsafetymessages. Thisisthesafetyalertsymbol. Thissymbol alertsyouto potential hazards thatcanresult i nproperty d amage and/or s erious bodily harmor death. Allsafetymessages willfollow thesafetyalertsymbol a ndeitherthewordDANGER or WARNING. These wordsmean: Failure tofollow thesesafety instructions m ayresultinproperty d amage and/or serious bodilyharmor death. - Page 4 To reduce the risk of fire, electric shock, or injury to appliance from the power supply. Failure to follow this persons when using this appliance, follow basic warning can cause serious injury, fire, electrical shock, or death. precautions, including the following. •...
-
Page 5: Grounding Instructions
• Do not allow children to play on or in the washer. • Keep laundry products out of children's reach. To Close supervision of children is necessary when the prevent personal injury, observe all warnings on washer is used near children. As children grow, product labels. -
Page 6: Key Parts And Components
KEY PARTS AND COMPONENTS DETERGENT DISPENSER There are four compartments, one each for prewash (not ® used on this model) main wash, liquid bleach, and liquid fabric softener. CONTROL PANEL WITH LED DISPLAY The easy-to-read LED display shows cycle options, settings, cycle status, and estimated time remaining during operation. -
Page 7: Key Dimensions And Specifications
KEY DIMENSIONS AND SPECIFICATIONS Description Front-Loading Washer Rated Voltage/Frequency 120 VAC @ 60 Hz. Dimensions 27" (W) X 293/4'' (D) X 3811/16 '' (H), 511/8'' (D, door open) 68.6 cm (W) X 75.6 cm(D) X 98.3 cm(H), 129.8 cm (D, door open) Net Weight 190.7 lb. -
Page 8: Unpacking And Removing Shipping Bolts
UNPACKING AND REMOVING SHIPPING BOLTS When removing the washer from the carton base, be sure to remove the foam tub support in the middle of the carton base. See drawing below. If you must lay the washer down to remove the base packaging materials, always protect the side of the washer and lay it carefully on its side. -
Page 9: Connecting The Water Lines
CONNECTING THE WATER LINES • IMPORTANT: Use new hoses when installing the washer. For cold water For hot water Do NOT reuse old hoses. • IMPORTANT: Use ONLY the inlet hoses provided with this laundry product. Aftermarket hoses are not guaranteed to fit or function correctly. -
Page 10: Connecting The Drain Hose
CONNECTING THE DRAIN HOSE •The drain hose should always be properly secured. Option 2: Laundry Failure to properly secure the drain hose can result in flooding and property damage. Ilii Elbow Bracket • Do not install the end of the drain hose higher than 96 in. (244.8 cm) above the bottom of the washer. -
Page 11: Leveling The Washer
LEVELING THE WASHER The drum of your new washerspins at very high speeds. To minimize vibration, noise, and unwanted movement, the floor must be a level, solid surface. NOTE: Adjust the leveling feet only as far as necessary to level the washer. -
Page 12: Control Panel Features
WARNING: To reduce the risk of fire, electric shock, or injury to persons, read and follow this entire manual, including the Important Safety Instructions, before operating this washer. CONTROL PANEL FEATURES ; Sfeam • Vibration Guard ® START/PAUSE SPECIAL CYCLE AND OPTION BUTTONS POWER (ON/OFF) BUTTON Press to turn the washer ON. -
Page 13: Operating The Washer
OPERATING THE WASHER SORT LAUNDRY AND LOAD WASHER Refer to page 15. ADD DETERGENT AND OTHER PRODUCTS Open the dispenser drawer and add _detergent to the main wash compartment in the dispenser drawer. Add bleach and fabric softener as desired. See pages 16 and 17 for important information on detergents and dispenser use. -
Page 14: Cycle Guide
CYCLE GUIDE The cycle guide below shows the default settings, available options and recommended fabric types for each cycle. Allowable modifier adjustments are shown below the default setting for each cycle. = Available option = Default setting Cycle Modifiers Options Steam Dressshirts,Blouses Refresh... -
Page 15: Sorting Wash Loads
SORTING WASH LOADS Fabric Care Labels Loading the Washer Many articles of clothing include a fabric care label. Using • Check all pockets to make sure that they are empty. the chart below, adjust the cycle and options selections to Items such as clips, matehes, pens, coins, and keys can care for your clothing according to the manufacturer's damage both your washer and your clothes. -
Page 16: About The Dispenser
ABOUT THE DISPENSER The automatic dispenser consists of four compartments Main Wash which hold: Liquid Chlorine Compartment Bleach • Liquid chlorine bleach. Compartment • Liquid fabric softener. • Liquid or powdered detergent for prewash. (This compartment is not used on this model.) uid Fabric •... -
Page 17: Detergent And Dispenser Use
DETERGENT AND DISPENSER A Word About Detergents Filling the Dispenser HE detergents produce fewer suds, dissolve more efficiently To add detergent, bleach, and fabric softener to the to improve washing and rinsing performance, and help to automatic dispenser: keep the interior of your washer clean. Open the dispenser lid. -
Page 18: Time And Status Display
TIME AND STATUS DISPLAY The time and status display shows the estimated time remaining, cycle progress, and door lock status. ESTIMATED TIME REMAINING CYCLE STATUS INDICATOR When the START/PAUSE is pressed, the washer These status LEDs illuminate to indicate which portion of automatically detects the wash load (weight) and the cycle is currently running. -
Page 19: Cycle Modifier Buttons
CYCLE MODIFIER BUTTONS Each cycle has default settings that are selected NOTE: To protect your garments, not every wash/rinse automatically. You may also customize these settings using temperature, spin speed, soil level, or option is available with the cycle modifier buttons. Press the button for the desired every cycle. -
Page 20: Steam Cycles And Options
STEAM CYCLES AND OPTIONS ADD STEAM Option Using the STEAM REFRESH Cycle STEAM REFRESH uses the power of steam alone to quickly Steam cycles include the Steam Refresh, Normal/Casual, Bulky/Bedding, Kids Wear, reduce wrinkles and odor in fabrics. It brings new life to wrinkled clothes that have been stored for an extended time .. -
Page 21: Cycle Option Buttons
CYCLE OPTION BUTTONS SPECIAL FUNCTIONS CONTROLLOCK Your washing machine features several additional cycle options to customize cycles to meet your individual needs. Use this option to disable the controls. The Turn ON the washer and turn the cycle selector knob to washer can be locked during a cycle. -
Page 22: Care And Cleaning Of The Interior
WARNING: To reduce the risk of fire, electric shock, or injury to persons, read and follow this entire manual, including the Important Safety Instructions, before operating this washer. • Unplug the washer before cleaning to avoid the risk of electric shock. Failure to follow this warning can cause serious injury, fire, electrical shock, or death. -
Page 23: Cleaning The Dispenser
REGULAR CLEANING (cont.) Cleaning the Dispenser The dispenser should be cleaned periodically to remove buildup of detergent and other laundry products that can cause the dispenser not to dispense the laundry product properly. 1. Pull the dispenser drawer out until it stops. 3. -
Page 24: Maintenance
MAINTENANCE Cleaning the Water Inlet Filters If the washer detects that wateris not entering the dispenser, an error message will show on the display. Inlet valve filter screens could be plugged by hard water scale, sediment in the water supply, plumbing scale, etc. NOTE: The inlet screens protect the delicate parts of the fill valve from being damaged by particles that may get into the valves with the water supply. -
Page 25: Cleaning The Drain Pump Filter
MAINTENANCE (cont.) Cleaning the Drain Pump Filter Your Washer is equipped with a filter that helps prevent excess lint and foreign objects like buttons, keys, and coins from causing damage to the pump. If the washer fails to drain properly, unplug the washer and allow the water to coot, if necessary, before proceeding. -
Page 26: Normal Sounds You May Hear
NORMAL SOUNDS YOU MAY HEAR The following sounds may be heard whilethe washer is operating. They are normal. Clicking: Humming or gurgling: Door lock relay when the door locks and unlocks. Drain pump pumping water from the washer at the end of a cycle. - Page 28 BEFORE CALLING FOR SERVICE (cont.) Door will not unlock when cycle is stopped or paused Check if... Then... Interior temperature of washer is too high. The washer door has a safety feature to prevent burns. For example, if the washer is paused during the hot wash portion of a Sanitize cycle, the interior temperature of the drum will be very hot, so the door wilt not unlock.
- Page 29 BEFORE CALLING FOR SERVICE (cont.) The display shows: I Check if... Then... Loadis too small. Add 1 or 2 similar items to help balance the load. Load is out of balance. Pause the cycle and redistribute the load after the door unlocks. The washer has an imbalance detection and correction system.
-
Page 30: Warranty
Kenmore Limited Warranty When installed, operated and maintained according to all instructions supplied with the product, if this appliance fails due to a defect in material and workmanship within one year from the date of purchase, call 1-800-4-MY-HOME ®to arrange for free repair. - Page 31 MENSAJES DE LA SEGURIDAD ............Acuerdos Maestros de Proteccion INSTRUCCIONES IMPORTANTE DE SEGURIDAD ..... 32-35 Felicitadones por haber efectuado una compra inteligente. REQUISITOS DE CONEXION A TIERRA ........... Su nuevo producto Kenmore_ esterdise_ado y fabricado para CARACTERISTICAS Y BENEFICIOS brindar a_os de funcionamiento confiabte. Pero como con todos Piezas y componentes clave ............
-
Page 32: Mensajes De La Seguridad
Enestemanual y ensuelectrodomestico figuran muchos mensajes i mportantes deseguridad. Leaycumpla siempre contodoslosmensajes d eseguridad. I_ste eselsimbolo dealerta de seguridad. Estesimbolo Ioalertasobreposibles r iesgos quepueden resultar e ndaSos sobrelapropiedad y /o lesiones f isicasgraves o lamuerte. Todoslosmensajes d eseguridad e staran a continuacion delsimbolo dealertadeseguridad y con lapalabra PELIGRO o ADVERTENCIA. - Page 33 Para reducir el riesgo de fuego, de descarga • No combine detergentes, suavizantes de tela y otros electrica, o de lesion alas personas al usar esta productos de lavanderia de diferentes fabricantes aplicacion, siga las precauciones basicas, en una misma carga, a menos que asi se incluyendo el siguiente.
- Page 34 • Consulte las INSTRUCCIONES DE INSTALACI(3N La lavadora deberia estar siempre conectada a un para un procedimiento detallado de conexion a enchufe especifico con un indice de voltaje tierra. Junto con la lavadora se encuentran las equivalente al que figura en su etiqueta de instrucciones de instalacion como referencia.
-
Page 35: Requisitos De Conexion A Tierra
• Nopermitaquelos ni_osjueguenen o en la • Guarde los productos del lavadero fuera del alcance lavadora. L asupervisioncercanade ni_oses de los nihos. Para evitar da_os corporales, observe necesaria cuandola lavadorase utilizacercade todas las advertencias en etiquetas del producto. La ni_os.Comolos ni_oscrecen,ens6_eles al uso falta de conformarse con estas advertencias podia dar apropiado, s egurode todaslasaplicaciones. -
Page 36: Piezas Y Componentes Clave
PIEZAS Y COMPONENTES CLAVE CAJON DE DEPOSlTO DE DETERGENTE Hay cuatro compartimientos debajo de la tapa, una para cada uno prevalado, lavado principal, blanqueador liquido, and suavizante liquido de telas. PANTALLA DE LED DEL PANEL DE CONTROL La pantalla LED de lectura sencilla muestra opciones de ciclo, configuraciones, el estado del ciclo y tiempo restante estimado durante el funcionamiento. -
Page 37: Requisitos De Instalacic)N Dimensiones Y Especificiones Clave
DIMENSIONES Y ESPECIFICIONES CLAVE Descripcion Lavadora de carga frontal Requisitos electricos 120 VAC/60 Hz. Dimensiones 27" (anchura) X 293/4 '' (profundidad) X 3811/16 ' ' (attura), 511/8"(profundidad con puerta abierto) 68,6 cm (anchura) X 75,6 cm(profundidad) X 98,3 cm(altura), 129,8 cm (profundidad con puerta abierto) Peso neto 190,7 lb. -
Page 38: Desembalaje Y Retiro De Los Pernos De Embalaje
DESEMBALAJE Y RETIRO DE LOS PERNOS DE EMBALAJE AI retirar la lavadora de la base de carton, asegt]rese de quitar el soporte de base de espuma colocado en la mitad de la base de carton. Consulte el siguiente dibujo. Si debe asentar la lavadora hacia abajo para quitar los materiales de embalaje de la base, siempre proteja el lado de la lavadora y depositela con cuidado sobre su lado. -
Page 39: Conexion De Las Tuberias De Agua
CONEXlON DE LAS TUBERiAS DE AGUA • IMPORTANTE: Cuando instale la lavadora use mangueras Para agua fria Para agua caliente nuevas. NO reutilice mangueras viejas. • IMPORTANTE: Usar SOLAMENTE las mangueras de la Tomas de entrada proporcionadas de este producto del lavadero. Las agu_ mangueras del mercado de accesorios no estan garantizadas para caber o para funcionar correctamente. -
Page 40: Conexion De La Manguera De Drenaje
CONEXION DE LA MANGUERA DE DRENAJE • La manguera de drenaje siempre debe estar asegurada Opci6n 2: Lavadero adecuadamente. No asegurar adecuadamente la manguera de drenaje puede resultar en inundacion o Abrazadera Ilil daSos a la propiedad. del codo • No instalar el extremo de la manguera a una altura de m,Csde 2,44 m (96 pulgadas) sobre la parte inferior de la Lavadero lavadora. -
Page 41: Nivelacion De La Lavadora
NIVELACION DE LA LAVADORA El tamborde su nuevalavadoracentrifuga a velocidades muyaltas. Paraminimizarla vibracion, e l ruidoy movimiento no deseados, e l piso debera, ser unasuperficie perfectamente n iveladay solida. NOTA:Fijelaspatasniveladoras s oloen la medidanecesaria para nivelarla lavadora. L a extension de las patasniveladoras ma.s de Io necesario puedecausarvibracion de la lavadora. -
Page 42: Caracteristicas Del Panel De Control
ADVERTENCIA: Para r eduoir.esgo dei.oendios, desoargas eleotrioas lea este o heridas, manual en su totalidad, incluyendo las Instrucciones Importantes de Seguridad, antes de operar la lavadora. CARACTERiSTlCAS DEL PANEL DE CONTROL iiiiil;i (bSfeam Vibration Guard ® START/PAUSE BOTON POWER ON/OFF (ENCENDIDO/APAGADO) _1 BOTONES DE PROGRAMAClON DE ClCLOS Apriete et boton para POWER (ENCENDER) la lavadora. -
Page 43: Como Usar La Lavadora
COIVlO USAR LA LAVADORA CLASIFIQUE LA ROPA Y CARGUE LA LAVADORA Consulte la pagina 45. ANADIR DETERGENTE Y OTROS PRODUCTOS Abra la gaveta del dispensador y aSada detergente _ al compartimento principal de lavado. ASada la lejia y el suavizante que desee. Examine la pa.gina 46 y 47 para obtener informaci6n importante sobre el uso de detergentes y el dispensador. -
Page 44: Guia De Ciclos
GUiA DE CICLOS La siguiente guia de ciclos muestra las opciones permitidas y los tipos de tela recomendadas para cada ciclo. = Opcion disponible = Configuracion por omision Ciclo Modificadores Options Steam Camisasde etiqueta,blusas Refresh (Carguehasta5 prendas) No i Algoodon,lino,toallas, Tibio/Tibio Extraalto Pesado... -
Page 45: Clasificaci6N De Las Cargas De Lavado
CLASIFICACION DE LAS CARGAS DE LAVADO Etiquetas de cuidado de las telas Carga de la lavadora • Revise todos los bolsillos para asegurarse de que esten La mayoria de las prendas de vestir disponen de una vacios. Articulos como clips, cerillos, plumas, monedas y etiqueta. -
Page 46: Detalles Sobre El Deposito
DETALLES SOBRE EL DEPOSITO El caj6n de suministro autom,Ctico consiste en f-Compartimiento 4 compartimentos que almacenan: Compartimiento detergente para el del btanqueador • Blanqueador liquido. tavado principal liquido • Suavizante liquido de telas. • Detergente liquido o en polvo para el prelavado. (Este compartimento no se usa en este modelo.) )artimien •... -
Page 47: Uso Del Detergentey El Dispensador
USO DEL DETERGENTE Y EL DISPENSADOR Como Ilenar el distribuidor Informacion Sobre Detergentes Los detergentes de alta eficiencia producen menos espuma, Para a_adir detergente, blanqueador, y suavizante al cajon de suministro automatico: se disuelven mas eficientemente para mejorar el desempe_o de lavado y enjuague, y ayudan a mantener limpio el interior Abra la tapa de deposito. -
Page 48: La Pantalla De Tiempoy Estado
LA PANTALLA DE TIEMPO Y ESTADO La pantalla de tiempo y estado muestra el tiempo restante estimado, el progreso del ciclo y el estado de la puerta, TIEMPO RESTANTE ESTIMADO INDICADOR DE ESTADO DEL CICLO Cuando se aprieta el bot6n START/PAUSE #stos LEDs de estado se iluminan para indicar la parte (INCIO/PAUSA), la lavadora detecta automaticamente la del ciclo en ejecuci6n. -
Page 49: Botones Modificadores De Ciclo
BOTONES MODIFICADORES DE CICLO Cada ciclo tiene ajustes preprogramables que se naturaleza altamente eficaz de este producto, es posible seleccionan automaticamente. Usted tambien puede que los niveles de agua sean mas bajos de Io esperado. El personalizar estas configuraciones utilizando los botones funcionamiento normal y la limpieza/enjuague no se veran modificadores de ciclo. -
Page 50: Ciclos Y Opciones De Vapor
ClCLOS Y OPCIONES DE VAPOR C6mo usar el ciclo STEAM REFRESH Opci6n ADD STEAM (a_adir vapor) (steam refresh) Los ciclos de ADD STEAM (a_adir vapor) incluyen Steam Refresh (steam refresh), STEAM REFRESH usa el poder del vapor por si solo para .. -
Page 51: Botones De Opcion De Ciclo
BOTONES DE OPCION DE CICLO FUNCIONES ESPECIALES Su lavadora dispone de varias opciones de ciclo CONTROL LOCK (bloqueo del control) adicionales, INscuales personalizan los ciclos para cumplir con sus necesidades individuales. controles.USe esta opci6n para deshabilitar los Se puede bloquear a la lavadora Y gire perilla Encienda la lavadora... -
Page 52: Mantenimiento Y Limpieza Del Interior
A DV ERT ENC IA: Parareducirel riesgode incendio, c hoque electrico o lesiones fisicas, leay cumpla completamente e stemanual,incluyendo las instrucciones i mportantes deseguridad, a ntesde ponerenfuncionamiento esta lavadora. • Desenchufe la lavadora antes de limpiar la misma para evitar el riesgo de descargas electricas. Si no se cumple con esta advertencia se podran producir heridas graves, incendios, descargas electricas o muerte. -
Page 53: Limpieza Del Deposito
LIMPIEZA REGULAR (cont.) Limpieza del deposito Se debe limpiar el deposito periodicamente para eliminar la acumulacion de detergente y otros productos de lavanderia que pueden hacer que el dispensador no distribuya el producto de lavado de forma adecuada. 1. Tire del cajon de deposito hasta que se detenga. 3. -
Page 54: Mantenimiento
MANTENIMIENTO Limpieza de los filtros de entrada de agua Si ta tavadora detecta que et agua no esta ingresando at cajon de deposito, se mostrara,un mensaje de error en la pantatla. Los filtros de la vb.tvutade entrada pueden enchufarse debido at sarro de agua dura, sedimentos en el suministro de agua, sarro en la tuberia, etc. -
Page 55: Limpieza Del Filtro De La Bomba De Drenaje
MANTENIMIENTO (cont.) Limpieza del filtro de la bomba de drenaje Su tavadora se encuentra equipada con un filtro que ayuda a evitar que la acumutacion de pelusas y objetos extra_os como botones, llaves y monedas provoquen da_os a ta bomba. Si ta lavadora no drena adecuadamente, desconectela y deje enfriar el agua, de ser necesario, antes de continuar. -
Page 56: Sonidos Normales Que Podria Escuchar
SONIDOS NORMALES QUE PODRiA ESCUCHAR Se pueden escuchar los siguientes sonidos mientras la lavadora se encuentra en funcionamiento. Son normates. Chasquido: Zumbido o gorgoteo: Et seguro de la compuerta se vuetve a cotocar cuando la misma La bomba de drenaje bombea agua de la lavadora al final de un cicto. - Page 57 ANTES DE LLAMAR A MANTENIMIENTO (cont.) Telas manchadas Controle si... Luego... _,Seagregaron los btanqueadores o suavizantes Los quimicos de lavado se deben cargar en el dispensador. directamente sobre la carga de lavado en el tambor? No ha descargado la lavadora con rapidez. Siempre retire los items de la lavadora Io antes posible luego del cicto de lavado.
- Page 58 ANTES DE LLAMAR A MANTENIMIENTO (cont.) La compuerta no se abre cuando se ha detenido o pausado el ciclo Controle si... Luego... Ea temperatura interior de la lavadora es demasiado La compuerta de ta lavadora dispone de un seguro para prevenir elevada.
- Page 59 ANTES DE LLAMAR A MANTENIMIENTO (cont.) i It- La pantalla muestra: Controle si... Luego... La carga es demasiado pequefia. Afiada 1 6 2 prendas similares para ayudar a balancear la carga. La carga esterdesbalanceada. Vuetva a acomodar tas prendas para ayudar a batancear la carga cuando la puerta se destrabe.
-
Page 60: Garantia
Garantia Limitada de Kenmore Si este electrodomestico fallara debido a un defecto de materiales o mano de obra dentro del afio de la fecha de compra, Ilame al 1-800-4-MY-HOME ® para solicitar su reparacion gratuita, siempre y cuando se instale, opere o mantenga de acuerdo con todas las instrucciones suministradas con el producto. - Page 64 ® MFL62526816...
Need help?
Do you have a question about the 4044 - 4.2 cu. Ft. Front-Load Washer and is the answer not in the manual?
Questions and answers