Table of Contents
Advertisement
Quick Links
Advertisement
Table of Contents

Related Manuals for Garmin GNC 255


Summary of Contents for Garmin GNC 255
- Page 1 GNC 255A/255B Pilot’s Guide...
- Page 2 Garmin. Garmin hereby grants permission to download a single copy of this manual and of any revision to this manual onto a hard drive or other electronic storage medium to be viewed for personal...
-
Page 3: Limited Warranty
(iv) damage caused by service performed by anyone who is not an authorized service provider of Garmin; or (v) damage to a product that has been modified or altered without the written permission of Garmin. In addition, Garmin reserves the right to refuse warranty claims against products or services that are obtained and/or used in contravention of the laws of any country. - Page 4 Unauthorized repairs or modifications could void both the warranty and the pilot’s authority to operate this device under FAA/FCC regulations. CAUTION: The GNC 255 display uses a lens coated with a special anti- reflective coating that is very sensitive to skin oils, waxes, and abrasive cleaners.
- Page 5 Specifications Standard 102 (RSS 102), RF field strength exposure to persons from an antenna connected to this device should be limited to 60 V/m for controlled environment and 28 V/m for uncontrolled environment. 190-01182-01 Rev. A Garmin GNC 255A/255B Pilot’s Guide...
- Page 6 Please, have the serial particular installation. number of your unit handy, connect to our web site (www.garmin.com) and look for our If this equipment does cause harmful Product Registration link on the Home page. interference, the user is encouraged to try...
-
Page 7: Product Registration And Support
Product Registration and Support Help us better support you by completing your online registration today! Have the serial number of your product handy and connect to the Garmin web site (www.garmin.com or https://fly.garmin.com/fly-garmin). Look for the Product Registration link on the Home page. Also, be sure to record your serial number in the space provided. - Page 8 Record of Revisions Part Number Revision Date Description 190-01182-01 11/19/12 Initial release 190-01182-01 Rev. A Garmin GNC 255A/255B Pilot’s Guide...
-
Page 9: Table Of Contents
2.3.1 Selecting a Nav Frequency ............. 2-6 2.3.2 Saving a Nav Channel ............2-6 2.3.3 Listening to the Nav Audio Channel ........2-7 OBS Mode ................... 2-8 Distance/Speed/Time (DST) Display ............2-9 190-01182-01 Rev. A Garmin GNC 255A/255B Pilot’s Guide... - Page 10 3.5.6 Software Version ..............3-22 3.5.7 Serial Number ..............3-22 Timers ....................3-23 3.6.1 Setting Up the Count Down Timer ........3-23 3.6.2 Setting Up the Count Up Timer ..........3-24 viii 190-01182-01 Rev. A Garmin GNC 255A/255B Pilot’s Guide...
- Page 11 Appendix ....................4-1 Troubleshooting ................... 4-1 Updating the Frequency Database ............4-3 4.2.1 Downloading the Frequency Database ........4-3 4.2.2 Updating the GNC 255 Frequency Database ......4-3 Messages .................... 4-4 Index .....................Index-1 190-01182-01 Rev. A Garmin GNC 255A/255B Pilot’s Guide...
- Page 12 This page intentionally left blank 190-01182-01 Rev. A Garmin GNC 255A/255B Pilot’s Guide...
-
Page 13: Getting Started
(328 MHz to 335 MHz) when the localizer is tuned. The GNC 255 is available in 10 and 16 watt com transmitter versions. The GNC 255A is available with a 10 watt com transmitter. -
Page 14: Pilot Controls
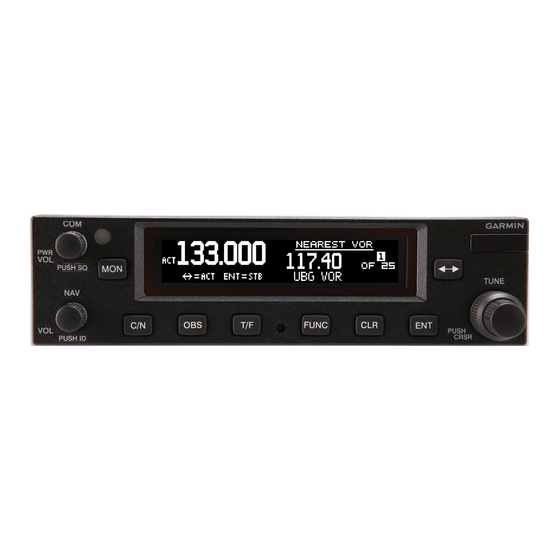
Pilot Controls The GNC 255 controls have been designed to simplify operation of the system and minimize workload and the time required to access sophisticated functionality. Controls are comprised of dual concentric knobs for frequency tuning, Com volume/squelch knob, Nav volume/ID knob, and bezel keys. -
Page 15: Tuning Large/Small Concentric (Cursor) Knobs
Pressing the CLR key erases information, cancels entries, and resets timers. 1.2.9 ENT (Enter) Key Press the ENT key to save selected values, to confirm a prompt, or to save the Standby frequency. 190-01182-01 Rev. A Garmin GNC 255A/255B Pilot’s Guide... -
Page 16: Func (Function) Key
Standby frequency may be monitored while still listening to the Active frequency. USB Port The USB port is used to update the frequency database in the GNC 255. NOTE: Garmin recommends the use of a USB 2.0 compatible USB flash drive for updating the database. -
Page 17: Basic Operation
New frequencies are first selected as a Standby frequency and then toggled to the Active side with the FLIP/FLOP key. While viewing the Standby frequency display, use the LARGE and SMALL knobs on the right side of the GNC 255 to select the desired frequency. -
Page 18: Monitoring The Standby Com Channel
Press the ENT Key to Save Press the CLR Key To Revert To Move Cursor the Displayed Value to the Previous Value Figure 2-3 Com User Frequency Name Selection 4. After selecting the desired characters, press ENT. 190-01182-01 Rev. A Garmin GNC 255A/255B Pilot’s Guide... - Page 19 Clearance CTAF Common Traffic Advisory Frequency Flight Service Station Remote Flight Service Station Mandatory Frequency Unicom Blank None Table 2-1 - Com Frequency Type List 7. After making a selection, press ENT. 190-01182-01 Rev. A Garmin GNC 255A/255B Pilot’s Guide...
-
Page 20: Com Database Look-Up
Waypoint Types with a “+” sign will have more frequencies for the same type. Airport Identifier Shown For Freqs In Database Figure 2-8 Frequency Database Reverse Look-Up 190-01182-01 Rev. A Garmin GNC 255A/255B Pilot’s Guide... -
Page 21: Emergency Channel
The GNC 255 helps protect you from a situation where the microphone may get stuck in the ON or Transmit position. If the microphone is keyed for longer than 35 seconds, the GNC 255 will return to the receive mode on the selected frequency. -
Page 22: Nav Radio
2. Turn the SMALL knob to select characters. 3. Turn the LARGE knob to move the cursor. Figure 2-11 Nav User Frequency Name Selection 4. After selecting the desired characters, press ENT. 190-01182-01 Rev. A Garmin GNC 255A/255B Pilot’s Guide... -
Page 23: Listening To The Nav Audio Channel
Figure 2-13 Listening to the ID for a Nav Frequency Nav audio volume is adjusted using the Nav Volume knob. Turn the Nav Volume knob clockwise to increase volume, or counterclockwise to decrease volume. 190-01182-01 Rev. A Garmin GNC 255A/255B Pilot’s Guide... -
Page 24: Obs Mode
2. Use the LARGE and SMALL knobs to change the displayed OBS values. The GNC 255 graphic CDI is shown as a graph of five dots right or left of the triangle icon. Each dot indicates two degrees deflection with ten degrees full deflection to each side. -
Page 25: Distance/Speed/Time (Dst) Display
Distance/Speed/Time (DST) Display When the GNC 255 has received data from an external device, such as a GPS receiver or DME sensor through the serial port, DST data will be available. If you are not connected to an external sensor, you will not see this display. - Page 26 This page intentionally left blank 2-10 190-01182-01 Rev. A Garmin GNC 255A/255B Pilot’s Guide...
-
Page 27: Functions
Software Ver Serial Number Timers Count Down ENT - Start/Stop CLR - Reset Push CRSR - Settings ENT - Accept Count Up ENT - Start/Stop CLR - Reset Figure 3-1 Functions Diagram 190-01182-01 Rev. A Garmin GNC 255A/255B Pilot’s Guide... -
Page 28: Com Frequencies
Figure 3-2 Recent Com Frequencies 3. Press and release the FLIP/FLOP key to transfer the displayed channel to the Active frequency position. Press the ENT key to transfer the displayed channel to the Standby frequency position. 190-01182-01 Rev. A Garmin GNC 255A/255B Pilot’s Guide... -
Page 29: Com User Frequencies
Press ENT Key To Delete Selected Freq Position In List. Active Frequency Turn SMALL Knob To Select Entry. Selected Frequency Press ENT To Confirm Deleting The Selected Freq Figure 3-4 Deleting User Com Frequencies 190-01182-01 Rev. A Garmin GNC 255A/255B Pilot’s Guide... -
Page 30: Editing A Com User Frequency
6. Turn the SMALL knob to select the Waypoint Type. Select Wpt Type Figure 3-8 Com User Frequency Type Selection 7. After selecting the Waypoint Type, press ENT to accept changes to the User Frequency. 190-01182-01 Rev. A Garmin GNC 255A/255B Pilot’s Guide... -
Page 31: Com Database Frequencies
3.2.3 Com Database Frequencies The GNC 255 contains a large database of Com frequencies that may be recalled by identifier. Turn SMALL Knob To Select Character Turn LARGE Knob To Move Cursor Figure 3-9 Com Database Frequencies 1. Press FUNC to access the Functions. With the Com Frequency Function highlighted, turn the SMALL knob to view the Com Database function. -
Page 32: Com Nearest Airports (Apt)
3.2.4 Com Nearest Airports (APT) The GNC 255 will report the 25 nearest Airports (APT), when interfaced with an appropriate GPS receiver. Turn SMALL Knob To Scroll Through Available Airports Figure 3-11 Com Nearest APT Frequencies 1. Press FUNC to access the Functions. With the Com Frequency Function highlighted, turn the SMALL knob to view the Com Nearest APT function. -
Page 33: Com Nearest Area Control Center (Acc) Frequencies
3.2.5 Com Nearest Area Control Center (ACC) Frequencies The GNC 255, when interfaced with an appropriate GPS receiver, will report the 25 nearest Area Control Center (ACC) frequencies. ACCs are also known as Air Route Traffic Control Centers (ARTCC). Turn SMALL Knob... -
Page 34: Com Nearest Flight Service Station (Fss) Frequencies
3.2.6 Com Nearest Flight Service Station (FSS) Frequencies The GNC 255, when interfaced with an appropriate GPS receiver, will report the 25 nearest Flight Service Station (FSS) frequencies. Turn SMALL Knob To Scroll Through Available Frequencies Figure 3-13 Com Nearest FSS Frequencies 1. -
Page 35: Com Nearest Weather (Wx) Frequencies
3.2.7 Com Nearest Weather (WX) Frequencies The GNC 255, when interfaced with an appropriate GPS receiver, will report the 25 nearest Weather (WX) frequencies. Turn SMALL Knob To Scroll Through Available Frequencies Figure 3-14 Com Nearest Weather Frequencies 1. Press FUNC to access the Functions. With the Com Frequency Function highlighted, turn the SMALL knob to view the Com Nearest Weather function. -
Page 36: Nav Frequencies
3. Press and release the FLIP/FLOP key to transfer the displayed channel to the Active frequency position or press the ENT key to transfer the displayed channel to the Standby frequency position. 3-10 190-01182-01 Rev. A Garmin GNC 255A/255B Pilot’s Guide... -
Page 37: Nav User Frequencies
Turn SMALL Knob To Select Entry. Selected Frequency Press ENT To Delete The Selected Freq Figure 3-17 Deleting User Nav Frequencies 2. Press the ENT key to delete the displayed frequency. 3-11 190-01182-01 Rev. A Garmin GNC 255A/255B Pilot’s Guide... -
Page 38: Editing A Nav User Frequency
6. Turn the SMALL knob to select characters and Turn the LARGE knob to move the cursor. Figure 3-20 Nav User Frequency Type Selection 7. After selecting the desired characters, press ENT. 3-12 190-01182-01 Rev. A Garmin GNC 255A/255B Pilot’s Guide... -
Page 39: Nav Database Frequencies
3.3.3 Nav Database Frequencies The GNC 255 contains a large database of Nav frequencies that may be recalled by identifier. 1. Press FUNC to access the Functions. With the Nav Frequency Function highlighted, turn the SMALL knob to view the Nav Database function. -
Page 40: Nav Nearest Vor
Selected Freq As Active Figure 3-25 Set Selected Frequency as Active or Standby 3.3.4 Nav Nearest VOR The GNC 255, when interfaced with an appropriate GPS receiver, will report the 25 nearest VORs. Turn SMALL Knob To Scroll Through Available VORs Figure 3-26 Nav Nearest VOR Frequencies 1. -
Page 41: Ics Configuration
Figure 3-28 Adjust the Intercom Values 3. Turn the LARGE knob to select the ICS Squelch or Volume. Turn the SMALL knob to set the value. Then, press the ENT key to save the selected values. 3-15 190-01182-01 Rev. A Garmin GNC 255A/255B Pilot’s Guide... -
Page 42: Aux Audio
Previous Value Figure 3-30 Adjust Aux Audio 4. Press the CLR key to revert to the previous Volume value and then repeat step 3 to select a new value. 3-16 190-01182-01 Rev. A Garmin GNC 255A/255B Pilot’s Guide... -
Page 43: Intercom On/Off
Default Value Figure 3-32 Turn the Speaker On/Off 2. Turn the SMALL knob to set the speaker output On or Off. Then, press the ENT key to save the selected value. 3-17 190-01182-01 Rev. A Garmin GNC 255A/255B Pilot’s Guide... -
Page 44: System Configuration
Press CLR to Return to the Selected Value the Previous Value Figure 3-33 Com Spacing Display 2. Turn the SMALL knob to set the Com spacing and then press the ENT key. 3-18 190-01182-01 Rev. A Garmin GNC 255A/255B Pilot’s Guide... -
Page 45: Display Brightness
3.5.2 Display Brightness As it arrives from the factory, the GNC 255 automatically adjusts its display brightness for the current lighting conditions. A small sensor on the display is used for this function. A manual adjustment is available for controlling the brightness level of the display as an offset from the “normal”... -
Page 46: Display Contrast
3.5.4 Database Info The Database information for the GNC 255 unit is displayed. This information is useful when contacting Customer Support. 1. Press FUNC to access the Functions. Turn the LARGE knob to select the SYS Function. Turn the SMALL knob to view the Database Version function. -
Page 47: Load Database
3.5.5 Load Database The GNC 255 has a USB connector to allow for easily updating the system databases. NOTE: Garmin recommends the use of a USB 2.0 compatible USB flash drive for updating the database. 1. Insert the supplied cable into the USB port on the top right corner of the GNC 255. -
Page 48: Software Version
6. Verify the correct frequency database is loaded after power-up. 3.5.6 Software Version The software versions of the GNC 255 unit are displayed. This information is useful when contacting Customer Support. 1. Press FUNC to access the Functions. Turn the LARGE knob to select the SYS Function. -
Page 49: Timers
Timers The GNC 255 has both Count Up and Count Down timers, which may operate simultaneously and are shown in the lower right of the Com/Nav displays. The countdown timer always takes precedence if it is running. 3.6.1 Setting Up the Count Down Timer 1. -
Page 50: Setting Up The Count Up Timer
1. Pressing CLR and then ENT will reset the displayed Timer. Figure 3-47 Stop or Clear the Timer in the Com Display 2. Pressing ENT twice will stop the displayed Timer. 3-24 190-01182-01 Rev. A Garmin GNC 255A/255B Pilot’s Guide... - Page 51 Count Up value. The Count Down Timer that is counting up will be highlighted. A Count Up Timer will continue counting separately. Count Down Timer Value Highlighted When Counting Up Figure 3-48 Count Down Timer Value Now Counting Up 3-25 190-01182-01 Rev. A Garmin GNC 255A/255B Pilot’s Guide...
- Page 52 This page intentionally left blank 3-26 190-01182-01 Rev. A Garmin GNC 255A/255B Pilot’s Guide...
-
Page 53: Appendix
Aviation Products Customer Service Department 1200 East 151st Street Olathe, KS 66062-3426 USA If you have any questions, the Garmin AT Product Support department may be reached Monday through Friday, 7:00 AM to 7:00 PM Central Time. US: 913-397-8200 US Toll Free: 1-866-739-5687 Canada Toll Free: 1-866-429-9296 e-mail: support.gat@garmin.com. - Page 54 Problem Possible Cause Action GNC 255 does not power on No power to the Check power connections, GNC 255 breakers, and main avionics switch Faulty electrical Contact your dealer to wiring or connection perform electrical system test No Nav audio...
-
Page 55: Updating The Frequency Database
The GNC 255 uses a standard USB memory device to load the frequency database into the GNC 255. The memory device is not provided by Garmin. The Frequency database is stored internally and the USB memory device is only used to transfer the database into the unit. -
Page 56: Messages
121.5 MHz. Hold 121.5. To exit this mode, hold the remote com com remote transfer (COM RMT transfer key to exit. XFR) switch for two seconds. 190-01182-01 Rev. A Garmin GNC 255A/255B Pilot’s Guide... - Page 57 Contact dealer for pressed position for service if this message persists. Com push-to-talk at least 30 seconds. key is stuck. This input will now be ignored and the com radio will no longer transmit. 190-01182-01 Rev. A Garmin GNC 255A/255B Pilot’s Guide...
- Page 58 Com remote switch has been in frequency pressed position for decrement key is at least 30 seconds. stuck. This input will now be ignored. This input is not available in all installations. 190-01182-01 Rev. A Garmin GNC 255A/255B Pilot’s Guide...
- Page 59 The nav radio needs service. may continue to function. VLOC RECEIVER - The nav radio is Contact dealer for service. not communicating Navigation receiver property with the has failed. system. Table 4-2 Messages 190-01182-01 Rev. A Garmin GNC 255A/255B Pilot’s Guide...
- Page 60 This page intentionally left blank 190-01182-01 Rev. A Garmin GNC 255A/255B Pilot’s Guide...
-
Page 61: Index
Pilot controls 1-2 Power on 2-1 Flight Service Station 3-8 Power-up 3-22 FLIP/FLOP key 1-3 Product description 1-1 Fly.Garmin v, 3-22, 4-1, 4-3 Product Support v, 4-1 Frequency monitoring 2-2 Front panel description 1-1 Index-1 190-01182-01 Rev. A Garmin GNC 255A/255B Pilot’s Guide... - Page 62 Squelch 1-2 Stuck mic 2-5 Support v System configuration 3-18 Timers 3-23 To-From 1-3 Troubleshooting 4-1, 4-4 Updating frequency database 4-3 USB 1-4, 3-21 User frequencies 3-3, 3-11 Volume 1-2 Warranty i Index-2 190-01182-01 Rev. A Garmin GNC 255A/255B Pilot’s Guide...
- Page 64 © 2012 GARMIN Corporation GARMIN International, Inc. 1200 East 151 Street, Olathe, Kansas 66062, U.S.A. Tel. 913/397.8200 or 800/800.1020 Fax 913/397.8282 Garmin AT, Inc. 2345 Turner Rd., S.E., Salem, Oregon 97302, U.S.A. Tel. 503/581.8101 or 800/525.6726 Fax. 503/364.2138 Garmin (Europe) Ltd.
Need help?
Do you have a question about the GNC 255 and is the answer not in the manual?
Questions and answers