Advertisement
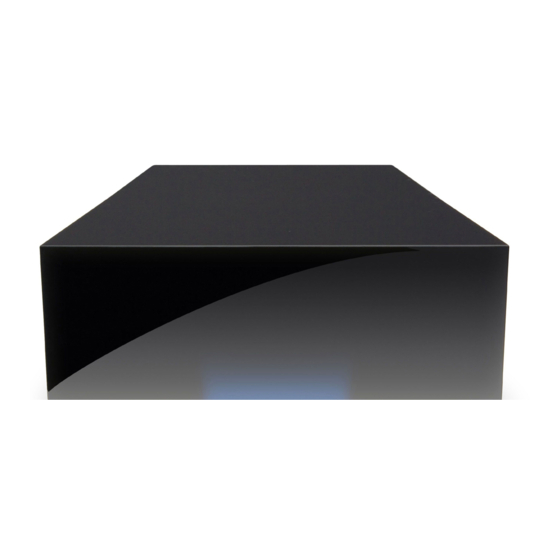
Disassembly instructions for LaCie 301304U "Design by Neil
Poulton" external hard drive:
Neil Poulton may be an award winning "industrial designer," but he's not an engineer. This thing is
a bit tricky to disassemble.
The black shiny plastic top is a single piece cover over a metal bottom plate. It is held in place by
plastic bumps on the inside edges of the cover that fit into slots in the metal bottom's vertical walls.
There are no screws.
There are two bumps along each of the long edges of the plastic cover, and two similar ones on the
short side with the LED light underneath. There are two smaller bumps placed closer together on
the power/USB/switch side of the drive, and between those is another sort of vertical grapple that
holds the cover down more firmly on that side.
First, here is what the top (plastic) part of the casing looks like, turned upside down. The various
snappy things are hilighted. We will release the BLUE ones first, then the GREEN ones, and finally
the rear RED ones.
To open the case:
1. Use a thin plastic or metal thing (like a putty knife) to pry the plastic away from the metal
bottom on one of the long sides. Insert a CD or a credit card that you don't care about into the
gap to hold it open.
Advertisement
Table of Contents

Related Manuals for LaCie 301304U - Hard Disk Design


Summary of Contents for LaCie 301304U - Hard Disk Design
- Page 1 Disassembly instructions for LaCie 301304U "Design by Neil Poulton" external hard drive: Neil Poulton may be an award winning "industrial designer," but he's not an engineer. This thing is a bit tricky to disassemble. The black shiny plastic top is a single piece cover over a metal bottom plate. It is held in place by plastic bumps on the inside edges of the cover that fit into slots in the metal bottom's vertical walls.
- Page 2 2. Do the same thing with the other side. Your enclosure should now look like this: (The masking tape isn't related to this procedure; I just like to note the voltage and polarity of the power supply on devices that don't come with such a label. [12 volts 2 amps, + on the inside, - outside for this drive.]) 3.
- Page 3 4. Carefully wiggle the cover around until it comes free of the back part. The power switch, USB port, and power connector are not attached to the top cover, but you should still be very careful not to break them. Eventually the middle post/grapple thing should let go and the cover will come off completely.
Need help?
Do you have a question about the 301304U - Hard Disk Design and is the answer not in the manual?
Questions and answers