Casio 140CR - Cash Register User Manual
Electronic cash register
Hide thumbs
Also See for 140CR - Cash Register:
- User manual (4 pages) ,
- Manual (4 pages) ,
- Quick start manual (2 pages)
Table of Contents
Advertisement
Advertisement
Table of Contents

Related Manuals for Casio 140CR - Cash Register


Summary of Contents for Casio 140CR - Cash Register
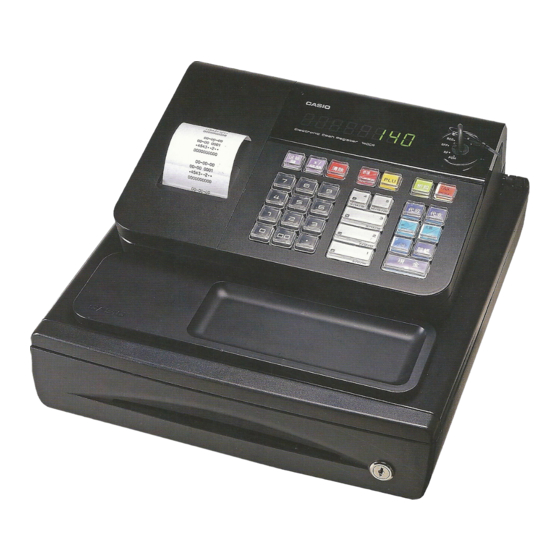
- Page 1 140CR Electronic Cash Register (140CR small drawer model) User's Manual START-UP is QUICK and EASY! Simple to use! 20 departments and 120 PLUs Automatic Tax Calculations Calculator function CASIO COMPUTER CO., LTD. 6-2, Hon-machi 1-chome Shibuya-ku, Tokyo 151-8543, Japan...
-
Page 2: Cleaning
INTRODUCTION Thank you very much for purchasing this CASIO electronic cash regis- ter. START-UP is QUICK and EASY! Part-1 of this User's Manual can help you make a quick start. Once you have mastered the QUICK START operations, you will un- doubtedly want to expand your use of this machine by studying other sections of Part-2. -
Page 3: Safety Precautions
Continued use creates the danger of short circuit, fi re and electric shock. • Attempting to repair the register yourself is extremely dangerous. Contact CASIO service representative. Never try to take the register apart or modify it in any way. High-voltage components inside the register create the danger of fi... - Page 4 fi re. • Contact CASIO service representative whenever the power cord or plug requires repair or maintenance. Caution! Do not place the register on an unstable or uneven surface.
-
Page 5: Table Of Contents
Contents Getting to know your cash register ..............Daily Job Flow ....................Part-1 QUICK START OPERATION ............(You can operate this ECR on a basic level by reading the following sections) 1. Initialization ....................2. Loading Paper .................... 10 3. Basic Programming for QUICK START – TIME/DATE ........ 11 4. -
Page 6: Getting To Know Your Cash Register
Getting to know your cash register Getting to know your cash register Mode Switch The position of the Mode Switch controls the type of operations you can perform on the cash register. The PROGRAM key (marked PGM) can be select any Mode Switch setting, while OPERATOR key (marked OP) can be used to select OFF, REG or CAL only. - Page 7 Getting to know your cash register Keyboard — FEED DATE CLK# CORR TIME 10/15/20 9/14/19 DEPT SHIFT 8/13/18 TOTAL 7/12/17 CA AMT TEND 6/11/16 Certain keys have two functions; one for register mode and one for calculator mode. In this manual, we will refer to specifi c keys as noted below to make the operations as easy to un- derstand as possible: U G , S , D , F , [ Register Mode...
-
Page 8: Daily Job Flow
Daily Job Flow Daily Job Flow Before Opening The Store 1. Plugged in? 2. Enough Roll Paper? Page-10 3. Date and Time is correct? Page-33 4. Enough small change in the drawer? Page-34 While The Store Is Open 1. Registrations. Page-13 ~ 2. -
Page 9: Part-1 Quick Start Operation
Part-1 QUICK START OPERATION QUICK START OPERATION Part-1 1. Initialization / Loading Memory Protection Battery ◗ To initialize the cash register Important 1. Set the Mode Switch to OFF. You must initialize 2. Load the memory protection batteries. 3. Plug the power cord of the cash register into an AC outlet. the Cash register. -
Page 10: Loading Paper
Part-1 QUICK START OPERATION 2. Loading Paper Roll And Replacing The Printer’s Ink Roll Mode Switch Replace the printer cover by Load new paper following the placing the cover’s front tab instructions above, and re- into the register’s groove. place the printer cover. 1. -
Page 11: Basic Programming For Quick Start - Time/Date
Part-1 QUICK START OPERATION 3. Basic Programming for QUICK START Mode Switch CAL X Purpose Procedure Programming 1. Turn the mode switch to PGM position. 00-00-00 2. When the display shows blinking “0”, such as enter current date in Day, Month, Year order. ?<?ZZ? Example: 8, January, 2010: enter Setting the... - Page 12 Part-1 QUICK START OPERATION Purpose Procedure 5. To select the date format and monetary mode (if necessary) You can select the date format and monetary mode after initialization depending on the requrements in your area. Default date format is Day/ Month/ Year and default monetary mode is add 2.
-
Page 13: Basic Operation After Basic Programming
Part-1 QUICK START OPERATION 4. Basic Operation after Basic Programming Mode Switch Note: Whenever an error is generated, the input fi gures reset to 0. All printout samples are journal images and the header (date, time and consecutive no.) are eliminated from the samples. Printout Operation 4-1 Open the drawer... - Page 14 Part-1 QUICK START OPERATION 4-5 Split cash/ Printout Operation charge sales 01••••2•00 Example 02••••3•00 Unit Price $2.00 $3.00 $4.00 01••••4•00 Quantity •9•00 S Dept. •5•00 C — Cash Amount Tendered Cash Amount $5.00 •4•00 H — Charge Sales tendered Corrections can be made while you are registering the item (before 4-6 Corrections you press a department key), or after it has already been regis- tered into the memory (by pressing a department key).
- Page 15 Part-1 QUICK START OPERATION Mode Switch Printout Operation 4-6-2 After you pressed a de- key cancels the last registered item. partment key Example 01••••5•50 1. Entered unit price 550 by Wrong entry -5•50 V mistake instead of 505 and pressed a department key. 01••••5•05 Cancels the last item registered.
-
Page 16: Currency Exchange
Part-1 QUICK START OPERATION Mode Switch 4-7-1 Registering with currency exchange Display Operation Example Unit Price £2.00 Quantity Dept. 1 Cash Amount 10.00 Euro '50e tendered Rate 1Euro = £ 0.8 Pressing ] before subtotal converts the Main currency Local (£) subtotal amount into the Euro. -
Page 17: Daily Management Report
Part-1 QUICK START OPERATION 5. Daily Management Report This section tells you the procedures to use to produce reports of the transaction data stored in the cash register's memory. Important Remember that when you issue a reset (Z) report, the data that is reported is cleared from the applicable totalizers. - Page 18 Part-1 QUICK START OPERATION •1•40 — Reduction Amount •0•91 %- — Premium/Discount Amount •1182•64 — Taxable Amount for Tax Rate 1 •62•07 t1 — Tax Amount for Tax Rate 1 •167•45 *T — Taxable Amount for Tax Rate 2 •16•75 t™ —...
-
Page 19: Part-2 Convenient Operation
Part-2 CONVENIENT OPERATION Part 2 CONVENIENT OPERATION Mode Switch CAL X 1. Various Programming 1-1 Unit price for Depart- ments Example Unit Price $1.00 $2.20 $11.00 P appears in mode display Dept. (For Dept. 1) (For Dept. 2) ZZ?? (For Dept .3) •... - Page 20 Part-2 CONVENIENT OPERATION 1-4 Status for Depart- Mode Switch ment CAL X Example Selections Depts. P3 appears in mode display For Dept. 1 Select a number Select a number from list C Select a number from list A from list B For Dept.
- Page 21 Part-2 CONVENIENT OPERATION 1-5-2 Status for percent key Example P3 appears in mode display Round Percent Select a number from list A Select a number from list B (To end the setting) Selections Rounding of results produced by Percent Key operation. Round off (1.544=1.54;...
- Page 22 Part-2 CONVENIENT OPERATION 1-7 General features Mode Switch CAL X 1-7-1 To set general controls P3 appears in mode display ?NXX Program code No. ???? Select a number from list A (To end the setting) Select a number from list B Select a number from list C Select a number from list D Selections...
- Page 23 Part-2 CONVENIENT OPERATION 1-7-2 To set printing controls P3 appears in mode display ?BXX Program code No. ???? Select a number from list A Select a number from list B (To end the setting) Select a number from list C Select a number from list D Selections Selections...
- Page 24 Part-2 CONVENIENT OPERATION 1-7-3 Printer switch for Mode Switch The printer is initialized as journal. Receipt or Journal CAL X Example To print a receipt P appears in mode display Select a number from list A (To end the setting) Selections Use the printer to print a journal.
-
Page 25: Plu Setting
Part-2 CONVENIENT OPERATION 1-8 PLU setting 1-8-1 Linkage with Departments P3 appears in mode display Example PLU No. PLU No. Select number from list A Link dept. No. PLU No. Dept. No. to be linked (To end the setting) Selections Linked to dept. - Page 26 Part-2 CONVENIENT OPERATION 1-9 Setting the Tax Rate and rounding P3 appears in mode display ?ZXB Program set code No. for tax rate 1* ??"???? Enter tax rate A ???? Select numbers from list B Select number from list D Select number from list C Program set code (To end the setting)
- Page 27 Part-2 CONVENIENT OPERATION 1-10 To control Tax Mode Switch CAL X Status printing P3 appears in mode display ?CXN Program set code No. Select number from list A Select number from list B Always “0” (To end the setting) Selections Print tax total line (only for Australia).
- Page 28 Part-2 CONVENIENT OPERATION 1-11 Printing to read All Preset Data • Printing preset data. 1-11-1 Printing preset data except PLU Printout Operation settings 08-01-10 — Date 08-06#0038 — Time/Consecutive No. — Read Symbol 01••••1•00 — Dept No./Unit Price 01-041 — Tax Status/Normal Dept/ Digit Limit/ Single Item 02••••2•20 02-051...
- Page 29 Part-2 CONVENIENT OPERATION Mode Switch CAL X Printout Operation 1-11-2 Printing preset PLU settings 08-01-10 — Date 08-10#0039 — Time/Consecutive No. — Read symbol 001•••1•00 — PLU No./Unit Price — Linked department 002•••2•20 003•••3•00 004•••4•00 100••10•00 08-01-10...
-
Page 30: Various Operations
Part-2 CONVENIENT OPERATION 2. Various Operations Mode Switch 2-1 Registration using preset price for De- partments. (Programming: See page 19) Printout Operation Example Unit Price $1.00 $2.20 $11.00 — Dept.1 Unit Price 01••••1•00 Quantity 02••••2•20 — Dept.2 Unit Price Depts. 02••••2•20 —... - Page 31 Part-2 CONVENIENT OPERATION 2-3 Check sales Printout Operation Example CB?? 04•••35•00 Unit Price $35.00 04•••35•00 Quantity •70•00 — Check Sales Depts. 2-4 Split cash/ check sales C???S Example 02•••30•00 XB??D Unit Price $30.00 $25.00 03•••25•00 Quantity •55•00 S Depts. X???p •20•00 C Cash amount $20.00...
- Page 32 Part-2 CONVENIENT OPERATION 2-6 PLU operation Mode Switch 2-6-1 PLU registration Printout Operation (Programming: See page 25) PLU No. 001•••1•00 Example 001•••1•00 — Repeat PLU No. — Multiplication Symbol Unit Price $1.00 $2.00 — Preset Unit Price •2•00 Quantity 002•••8•00 Depts.
-
Page 33: Other Registrations
Part-2 CONVENIENT OPERATION 2-7 Other registrations Mode Switch 2-7-1 Reading the Time Display Operation and Date 13-5# Hour/Minute 08-01-10 Day/Month/Year • Flashes per second • If you have changed the date order (refer to page 9), enter date of that order. Mode Switch CAL X Adjusting the Time... - Page 34 Part-2 CONVENIENT OPERATION Mode Switch Printout Operation 2-7-2 Paid out from cash in drawer 12345678 #12345678 — Reference Number Enter reference No. 08-01-10 Z??? 13-57#0060 •10•00 P — Paid Out Amount Printout 2-7-3 Cash received Operation on account •6•00 R —...
- Page 35 Part-2 CONVENIENT OPERATION 2-7-6 Premium/ Printout Operation Discount Premium Discount 01••••1•00 01••••1•00 2•5 % — *1 2•5 %- — *1 • 2.5% premium/discount (programmed to x key) •0•03 — *2 -0•03 — *2 applied to fi rst item. 02••••2•00 02••••2•00 01••••3•00 01••••3•00 •6•03 S...
-
Page 36: Part-3 Calculator Function
Part 3 CALCULATOR FUNCTION Mode Switch Mode Switch While registering at REG 1. Calculator mode, you can switch Mode to CAL mode and then return to REG mode to resume the registration. Display Operation 1-1 Calculation examples ç (Miss operation) (Cancels item entered.) BHCJX &... - Page 37 Part-3 CALCULATOR FUNCTION 1-3 Setting for calculator Mode Switch CAL X operation P3 appears in mode display Z?XX Program Code No. Select a number from list A. (To end the setting) Selections Open drawer whenever is pressed.* Open drawer whenever m is pressed.* Print No.
-
Page 38: Part-4 Useful Information
Part 4 USEFUL INFORMATION 1. Troubleshooting Symptom/Problem Most common causes Solutions Changing modes without complet- Return mode switch to where it stops buzz- 1 E01 appears on the display. ing and press p . ing transaction. Prior to starting registration of any other 2 E08 appears on the display. - Page 39 Apparaten skall anslutas till jordat nätuttag This mark applies in EU countries only. Manufacturer: CASIO COMPUTER CO., LTD. 6-2, Hon-machi 1-chome, Shibuya-ku Tokyo 151-8543, Japan Representative within the European Union: Casio Europe GmbH Casio-Platz 1, 22848 Norderstedt Germany Please keep all information for future reference.
- Page 40 140CR*E CASIO COMPUTER CO., LTD. MA0812-A Printed in Indonesia 6-2, Hon-machi 1-chome Shibuya-ku, Tokyo 151-8543, Japan Printed on recycled paper.
Need help?
Do you have a question about the 140CR - Cash Register and is the answer not in the manual?
Questions and answers