Nextar MA715 - 1 GB Digital Player Instruction Manual
Mp3/mp4 digital audio/video player
Hide thumbs
Also See for MA715 - 1 GB Digital Player:
- Instruction manual (46 pages) ,
- Brochure (17 pages) ,
- Instruction manual (46 pages)
Table of Contents
Advertisement
Quick Links
Advertisement
Table of Contents

Related Manuals for Nextar MA715 - 1 GB Digital Player


Summary of Contents for Nextar MA715 - 1 GB Digital Player
-
Page 1: Instruction Manual
MA715 MP3/MP4 Digital Audio/Video Player Instruction Manual... - Page 2 MA715 MP3/MP4 Digital Audio/Video Player Instruction Manual V1.0 Reminder: Thank you for selecting our product. In order to ensure correct operation, please read this manual carefully.
-
Page 3: Instruction
1. Instruction (1) We try to ensure the correctness and completeness of this manual, but mistakes and omission may still exist. (2) Our company is not responsible for any data loss caused by malpractice of software, wrong repair or other accident, or any indirect loss herein arising of. -
Page 4: Table Of Contents
Content Instruction....................................1 Precaution ....................................6 System requirement .................................. 7 Introduction....................................8 Features ..................................8 Button layout................................... 9 Battery charge ................................10 USB driver installation ..............................11 Connection and download ............................11 4.5.1 Connection to PC ............................11 4.5.2 MP3 music download ..........................11 4.5.3 Remove from USB port .......................... - Page 5 4.7.1 Main menu ..............................15 4.7.2 Selection and exit ............................15 Power on and off................................16 4.8.1 Power on player ............................16 4.8.2 Power off player ............................16 Application....................................17 Music playback function..............................17 5.1.1 Play all................................. 18 5.1.2 Internal device ............................. 18 Photo ....................................
- Page 6 Radio .................................... 28 5.5.1 FM radio ..............................29 5.5.2 FM record..............................29 Record..................................30 Delete ................................... 32 5.7.1 Delete one..............................32 5.7.2 Delete all ..............................32 Settings ..................................33 5.8.1 Language ..............................33 5.8.2 EQ................................33 5.8.3 Play mode ..............................34 5.8.4 Record Type ..............................
- Page 7 5.8.8 Timer off ..............................36 5.8.9 Reset................................36 About .................................... 36 5.10 Exit ....................................37 Other functions ................................... 37 A-B play mode ................................37 Button lock..................................37 DRM music transfer function............................38 6.3.1 Download operation of WMA music with DRM9 (PD-DRM) protection............38 6.3.2 Operation introduction ..........................
-
Page 8: Precaution
Precaution (1) Do not use this player when driving, riding or operating any other vehicles as it may lead to traffic accidents, which is illegal in some regions. Even when walking on the road, especially crossing the roads, listening with high volume is also hazardous. -
Page 9: System Requirement
memory and, it will cause the difference between flash memory marked capacity and real capacity. The real flash memory capacity is lesser than the marked memory capacity of this device is normal. Due to different firmware size, it will have the different free flash memory capacity. -
Page 10: Introduction
4. Introduction Features Support formats such as MP3 WMA WAV SMV JPG BMP This product supports playback of music files, photo browsing and movie playing with high quality. Folder management Easy to choose the folder or music file to play. DRM 9 playback This product supports WMA DRM 9 digital authorized music playback. -
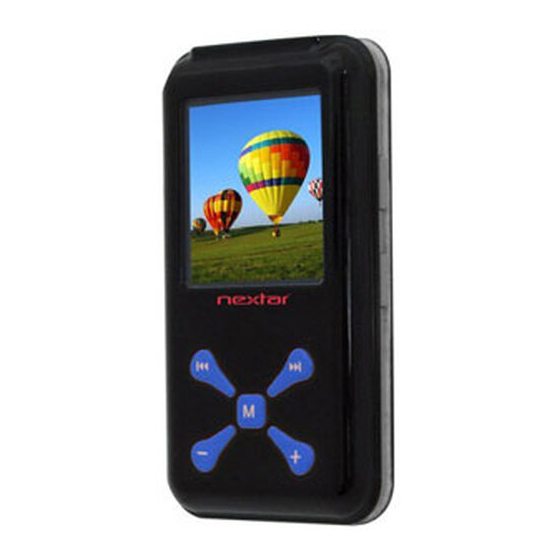
Page 11: Button Layout
Button layout Earphone jack USB port Display area Button lock Rewind button Microphone Volume down button- Play/pause button Volume up button+ (10) Reset hole (11) Fast forward button (12) Power button (13) A-B repeat/record button... -
Page 12: Battery Charge
Battery charge This product adopts build-in rechargeable Li battery. You can connect the mp3 player to PC or use USB adapter to charge the battery. This icon will be displayed at the upper left corner of the screen. The following pictures indicate the charging status of the battery: When the battery is charging, the icon will be changing from an empty battery to a full one to indicate the process. -
Page 13: Usb Driver Installation
USB driver installation (USB driver needs to be installed only on when Windows 98SE operating system is used.) Execute Setup.exe in driver CD and complete the driver installation. Reboot the PC. Connect the MP3 player to the USB port of the PC. Connection and download 4.5.1 Connection to PC... -
Page 14: Remove From Usb Port
4.5.3 Remove from USB port Double click the icon of safely remove hardware on the task column, and the relevant dialog box will be displayed. On the picture of safely remove hardware dialog box, select the item of “USB mass storage device” and click “stop”... - Page 15 Click “OK” button. When the screen displays “Safe to Remove Hardware”, the player can be safely removed from PC. Special reminder: Do not disconnect the USB cable when the data is being transmitted between PC and the player, which may damage and lose the data in the player.
-
Page 16: Lcd Display
LCD display... -
Page 17: Menu
Menu 4.7.1 Main menu (1) MUSIC: Select MUSIC in the main menu, the device will enter music sub-menu. (2) PHOTO: Select PHOTO in the main menu, the device will enter photo sub-menu. (3) MOVIE: Select MOVIE in the main menu, the device will enter movie function. (4) VOICE: Select VOICE in the main menu, the device will enter voice playback function. -
Page 18: Power On And Off
Power on and off 4.8.1 Power on player Press power/stop button to turn it on while the player is off. Power on images will be shown before going to the defaulted music play mode and followed by music playback. The power on time is determined by the music file number in the player. This player supports user-defined image when power on You can save the photo file with size 128*128 pixel and named LOGO.BMP under the root directory of this device. -
Page 19: Application
Application Music playback function Press rewind button or fast forward button in the main menu to select Music function. Press play button to enter the sub-menu of Music Play All or Internal Device. Operation instruction: When the music is stopped or played, press rewind button or fast forward button to select previous or next file. -
Page 20: Play All
5.1.1 Play all Press rewind button or fast forward button to select Play All,and press play button to enter and start playing all music in the player. 5.1.2 Internal device Press rewind button or fast forward button to select Internal device,and press play button to enter the function of play list. - Page 21 Play one folder The difference of playing songs in folders and playing under root directory Play mode Under root directory In folder and its subdirectory. Normal Play all the songs under root directory and in folders Play all the songs in current folder one time and then stop. one time and then stop.
-
Page 22: Photo
Photo Press rewind button or fast forward button in the main menu to select Photo function. Press play button to enter the sub menu of Photo : Manual, Slide Show and Thumbnail. This player supports pictures in JPG and BMP formats. In order to get a smooth and clear display, please convert the resolution of pictures to 128x128 on PC and then put them in PHOTO folder (If there is no PHOTO folder, please create one). -
Page 23: Thumbnail
5.2.3 Thumbnail After entering photo function, press rewind button or fast forward button to select thumbnail display and press play button to start displaying photo in thumbnail form. Movie Press rewind button or fast forward button in main menu to select Movie function and press play button enter Movie play. - Page 24 How to transfer the movie file to SMV format by Video2smv.exe process Select video2smv and double click it to enter the folder as indicates in the following figure:...
- Page 25 Select and double click video2smv.exe program to enter as indicates in the following figure:...
- Page 26 Click “Add” to select the files that need to be converted. You can set the size and quality at the same time. The screen resolution of this player is 128x128 pixel, so please set the size less than 128*128 pixel. The higher quality produces larger SMV file size and vice versa.
- Page 27 Click Convert to start the converting. Meanwhile you can click “stop” to stop transferring.
- Page 28 When there is Finish appears in the column of Status, it means the conversion is finished. You may close the windows and transfer the formatted movie with SMV format to the player. Attention : If you can use the windows media player to play the video files in your PC, and the video file type is supported by video2smv, it will be able to be converted to SMV format.
-
Page 29: Voice
Voice Press rewind button or fast forward button in the main menu to select Voice function and press play button to enter that voice play function. The following functions are provided in voice mode: Play recorded files from FM Play recorded files from microphone Support record files in WAV format (ADPCM),that stored in VOICE directory of the player. -
Page 30: Radio
Radio Press rewind button or fast forward button in the main menu to select FM Radio function and press play button to enter FM Radio play function. Locked state Current function Volume Power level Pre-set radio Radio band FM audio output Band scanning Current channel Up to 20 radio stations can be stored in the radio. -
Page 31: Fm Radio
5.5.1 FM radio Press PLAY button to switch radio station from CH01 CH02 … CH20.Press A-B/REC to switch radio station from CH01 CH20 CH19 … CH01. When switching the radio station, the player will save the current frequency to the current station number before skip to the next station. Press rewind button or fast forward button to fine-tune the frequency forward or backward by 0.1MHz. -
Page 32: Record
(2) When the battery is running out of power in record state, there will be low energy level warming. The recorded files will be saved before player exits from record state and returns to FM radio. Locked state Current function Volume Power level Leftover record time... - Page 33 Locked state Current function Volume Power level Leftover record time Format Sampling rate Record progress Bit rate Record state Elapse record time Name of record file V002.WAV 7 recording sampling rate: user can set the sampling rate of recorded file. The higher the sampling rate, the 7 recording sampling rate: user can set the sampling rate of recorded file.
-
Page 34: Delete
Delete Press rewind button or fast forward button in the main menu to select Delete function and press play button to enter Delete function, which includes delete one and delete all. Note that, deleted files can’t be recovered. 5.7.1 Delete one Press rewind button or fast forward button to select the files that need to be deleted and press play button... -
Page 35: Settings
Settings Press rewind button or fast forward button in the main menu to select Settings menu and press play button to enter Settings menu, which includes language setting, EQ setting, play mode setting, recording format setting, FM band setting, FM auto scan setting, contrast setting, timing off setting and resume default value setting. -
Page 36: Play Mode
5.8.3 Play mode Press rewind button or fast forward button in play mode setting menu to select play mode and press play button to confirm. Long press play button or press power button to skip this setting. The play mode of this player includes: normal, repeat one, repeat all, random and random &... -
Page 37: Fm Band
5.8.5 FM band Press rewind button or fast forward button in FM band setting menu to select FM band and press play button to confirm. Long press play button or press power button to skip this setting. FM band includes: US-EU band and Japan band. 5.8.6 FM auto scan Select “YES”... -
Page 38: Timer Off
5.8.8 Timer off Press rewind button or fast forward button in timing off setting menu to select timing off and press play button to confirm. Long press play button or press power button to skip this setting. The sub menus of timing off are: stop off, sleep off and backlight off. -
Page 39: 5.10 Exit
5.10 Exit Exit and return to the music playback function. Other functions A-B play mode In music or voice play mode: Press A-B/REC button to set the starting point of repeat section A-B, and the play mode icon A will be displayed. -
Page 40: Drm Music Transfer Function
DRM music transfer function 6.3.1 Download operation of WMA music with DRM9 (PD-DRM) protection On Window 98SE / Window ME / Windows 2K / Windows XP, music with DRM should be transferred by Windows Media Player version 9.0 or 10.0 (Version 10.0 is for Windows XP only) to mp3 player. Other download operation probably will cause the mp3 player can not read and play the music with WMA DRM file. - Page 41 A. Connect player to PC. B. Choose the desired WMA music with DRM.
- Page 42 C. Click Right button of the mouse and choose “Add to Sync list”. D. On the open window, choose “Sync” option.
- Page 43 E. On “Sync” window, choose the desired WMA music with DRM as step B and choose “Removable Disk”.
- Page 44 F. Click “Start Sync“ to transfer the WMA music with DRM to player.
-
Page 45: Trouble Shooting
Trouble shooting If there is no picture displayed after the player is connected to PC and cannot serve as storage disc or cannot be powered on after the battery is fully charged, please refer to the following steps to update the software in the player. -
Page 46: Specification
Specification 32~320Kbps Music format MP3, WMA bit rate Photo JPG,BMP Movie format format Sampling rate 8/11/16/22/ Frequency 20Hz~20KHz 32/44/48KHz response Recorded format Dynamic current <70mA (play mp3 music & ( ADPCM) backlight OFF) Maximun Record 9 hours Power off current <500uA duration (128M... - Page 47 Listening caution Do not play your headphones or earphones at a high volume. Hearing experts advise against continuous extended play. If you experience a ringing in your ears, reduce volume or discontinue use. Do not use while operating a motorized vehicle. It may create a traffic hazard and is illegal in many areas.
- Page 48 2). Do not use the player in extremely hot, cold, dusty or damp environments. 3). Make sure the HOLD key is in the unlock position before using the player (otherwise controls will not function). 4). Avoid dropping or striking the unit .This may cause external and internal physical damage to the player.
-
Page 49: Fcc Caution
television reception, which can be determined by turning the equipment off and on, the user is encouraged to try to correct the interference by one or more of the following measures: ◆ Reorient or relocate the receiving antenna. ◆ Increase the separation between the equipment and receiver. ◆... - Page 50 Nextar, Inc. Any unauthorized distribution of this manual is expressly forbidden. © 2008 Nextar (Hong Kong) Limited. Nextar is a trademark and service mark of Nextar (Hong Kong) Limited. All other brand names, trademarks and service marks are property of their owners.
- Page 51 For instruction manuals, updated drivers or other information, be sure to visit our website at: www.Nextar.com Or write us at: Nextar 1661 Fairplex Dr. LaVerne, CA USA 91750 Copyright © 2008...
Need help?
Do you have a question about the MA715 - 1 GB Digital Player and is the answer not in the manual?
Questions and answers