Samsung HT-C9950W User Manual
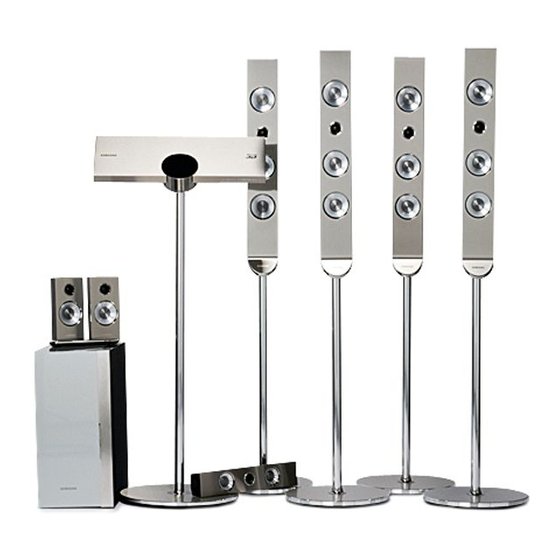
7.1ch blu-ray home theater system
Hide thumbs
Also See for HT-C9950W:
- User manual (76 pages) ,
- Upgrade instructions (1 page) ,
- Quick start manual (2 pages)

Related Manuals for Samsung HT-C9950W


Summary of Contents for Samsung HT-C9950W
-
Page 1: Home Theater System
HT-C9950W HT-C9959W 7.1CH Blu-ray Home Theater System user manual imagine the possibilities Thank you for purchasing this Samsung product. To receive more complete service, please register your product at www.samsung.com/register... -
Page 2: Safety Information
Safety Information Safety Warnings TO REDUCE THE RISK OF ELECTRIC SHOCK, DO NOT REMOVE THE COVER (OR BACK). NO USER-SERVICEABLE PARTS ARE INSIDE. REFER SERVICING TO QUALIFIED SERVICE PERSONNEL. CAUTION RISK OF ELECTRIC SHOCK DO NOT OPEN The lighting fl ash and Arrowhead within The explanation point within the triangle is CAUTION : TO REDUCE THE RISK OF ELECTRIC Triangle Is awarning sign alerting you of... -
Page 3: Important Safety Instructions
Important Safety Instructions Read these operating instructions carefully before using the unit. Follow all the safety instructions listed below. Keep these operating instructions handy for future reference. 1) Read these instructions. 2) Keep these Instructions. 3) Heed all warnings. 4) Follow all instructions. 5) Do not use this apparatus near water. -
Page 4: Precautions
Safety Information Precautions • Ensure that the AC power supply in your house complies with the identifi cation sticker located on the back of your product. • Install your product horizontally, on a suitable base (furniture), with enough space around it for ventilation (7.5~10cm). -
Page 5: Cautions On Handling And Storing Discs
"Blu-ray 3D" and "Blu-ray 3D"logo are trademarks of Blu-ray operate correctly. If this occurs, remove the disc Disc Association. and let the product stand for 1 or 2 hours with the power on. Copyright © 2010 Samsung Electronics Co., Ltd. All rights reserved. English... -
Page 6: Table Of Contents
Contents Safety Warnings SAFETY INFORMATION Important Safety Instructions Precautions Cautions on Handling and Storing Discs License Copyright GETTING STARTED Key features of your new Blu-ray Home Theater Icons that are used in this manual Disc Types and Characteristics Control Unit Parts and Accessories Description Control Unit Front Panel Control Unit Rear Panel... - Page 7 General Background Front Display Power On/Off Sound Support Software Upgrade Contact Samsung BASIC FUNCTIONS Playing a Disc Using the Disc menu / Title menu / Popup menu Using the Search and Skip Functions Slow Motion Play/Step Motion Play Repeat Playback...
-
Page 8: Getting Started
You can enjoy music files by connecting your iPod to the product with the supplied iPod dock. BD Wise BD Wise automatically adjusts BD Wise-compliant Samsung products to their optimal settings. This feature is enabled only if BD Wise-compliant Samsung products are connected to each other using an HDMI cable. Internet@TV You can download various fee charged or free of charge applications through the network connection. -
Page 9: Icons That Are Used In This Manual
Icons that are used in this manual Make sure to check the following terms before reading the user manual. Term Logo Icon Definition BD-ROM Indicates a function available on a BD-ROM. Indicates a function available on a BD-RE/-R disc recorded in the BD-RE/-R BD-RE format. -
Page 10: Disc Types And Characteristics
For additional Blu-ray Disc 3D Blu-ray Disc information, refer to the Disc Types and Characteristics section of this Manual. If you encounter compatibility problems, please contact the SAMSUNG customer care center at 1-800 SAMSUNG. ✎ NOTE NTSC broadcast system in ... -
Page 11: Disc Types
Mongolia • This product can play back DVD-R disc recorded and fi nalized with a Samsung DVD video recorder. China • This product can play back fi naliized DVD-RW discs in the Video Mode only. -
Page 12: Disc Format
Getting Started Audio CD DivX (Digital Video Express) • An audio disc on which 44.1kHz PCM Audio is DivX is a video fi le format developed by Microsoft and is recorded. based on MPEG4 compression technology to provide • This product can play back CD-DA format audio audio and video data over the Internet in real-time. - Page 13 Supported File Formats Video File Support File Extension Container Video Codec Audio Codec Resolution 1920x1080 Divx 3.11/4.x/5.1/6.0 1920x1080 XviD *.avi 1920x1080 MP4v3 1920x1080 H.264 BP/MP/HP 1920x1080 VC-1 AP 1920x1080 DivX 5.1/6.0 *.mkv 1920x1080 XviD 1920x1080 H.264 BP/MP/HP 1920x1080 VC-1 AP *.wmv WMV (wmv9) 1920x1080...
-
Page 14: Control Unit Parts And Accessories
Getting Started Notes on USB connection The PTP protocol for digital cameras is not supported. Do not disconnect USB devices during the Supported USB devices "loading" process. USB storage media, MP3 player, digital camera, The bigger the image resolution, the longer USB card reader the delay in displaying. - Page 15 Wireless Dock Cradle for iPod/iPhone : HT-WDC10 Wireless Transmitter Charging Cradle DC Power Cord DC Power Adaptor (AH96-00641A) (AH96-00641B) (AH96-00647A) (BN44-00388D) Mounting Hardware for Control Unit Table Stand Set Wall Mount Set Small Black screws Small Black screws Table Stand Bracket Wall Mount Bracket Set Mount (6003-000133)
-
Page 16: Description
CAUTION Heat on the top of the HT-C9950W main unit: - The top of side of the product may get warm after a long period of use. This is normal and does not indicate any defect or operational failure. However, children should be prevented from touching the upper part of the product. -
Page 17: Control Unit Rear Panel
Control Unit Rear Panel Use the system cable to connect the subwoofer here. Connect the SYSTEM CABLE JACK subwoofer before you activate the product. Connect a USB storage device here and use it as storage when you USB PORT connect the product to BD-LIVE. You can also use this jack for software upgrades and P3/JPEG/DivX/MKV/MP4 playback. -
Page 18: Rear Panel Of The Subwoofer
Getting Started Rear Panel of the Subwoofer The cooling fan supplies cool air to the subwoofer to prevent overheating and COOLING FAN always revolves when the power is on. TX CARD CONNECTION Insert the TX card here to enable communication between the product and (WIRELESS) the wireless receiver module. -
Page 19: Remote Control
Remote control Tour of the Remote Control Indicator LED. Glows in different colors to indicate the remote's operating mode. POWER FUNCTION Press to select the home theater's TV SOURCE Turn the product on and off. mode or press to select the TV's video mode. -
Page 20: Installing Batteries In The Remote Control
York 15, 17, 18, 48, 54, Magnavox be possible, depending on your brand of TV. 59, 60, 62, 72, 89 Yupiteru The remote control will work with Samsung TVs Marantz 40, 54 Zenith 58, 79 Matsui Zonda by default. -
Page 21: Installation
Installation You can install the Control Unit in three ways: On a table stand, on a Tallboy type of stand, or on the wall. Choose the installation method that fi ts your installation area and decorating plan, and then follow the appropriate directions below. - Page 22 Getting Started Push the smaller plug on the system cable through the cable hole in the bottom of the base. - The fi t might be tight and you may have to wiggle it through or use some force. CAUTION ...
- Page 23 7. Fit the clasps on the Control Unit bottom into the notches on the Stand Pole Bracket. Fix the Control Unit to the Stand Pole using 2 silver M4 x L6 screws. Squeeze the spring releases on the sides of the small plug, and then attach it to the system jack in the well on the bottom of the Control Unit.
- Page 24 Getting Started Tip the stand slightly, and then press the cable on the bottom into the notch in the stand base bottom. - Loosen the screw on one end of the cable bracket on the bottom of stand base and turn the cable bracket aside.
- Page 25 Installing the Product on the Wall Use the wall mount bracket if you want to install the Control Unit on the wall. Place the wall mount bracket in a desired area of the wall arrow pointing up, and then use 4 screws (not supplied) to fi...
-
Page 26: Connections
Connections This section describes various methods of connecting the Control Unit to other external components. Before moving or installing the product, be sure to turn off the power and disconnect the power cord. Connecting the Speakers Connecting the Subwoofer To activate the product, you must connect the subwoofer to the Control Unit using the system cable. -
Page 27: Positioning The Control Unit And Speakers
Positioning the Control Unit and Speakers Positioning the Control Unit Place it on the highboy stand, on the wall, on a cabinet shelf, or under the TV stand. Selecting the Listening Position The listening position should be located about 2.5 to 3 times the distance of the TV’s screen size away from the TV. - Page 28 Connections The table below explains how to place all the speakers. Speakers Location Place these speakers in front of your listening position, facing inwards (about 45°) toward you. Place the speakers so that their tweeters will be at the same height as Front Speakers your ear.
-
Page 29: Speaker Components
Check your box for the supplied components listed below. Speaker Components Assembled Speakers SUBWOOFER CENTER SPEAKER SURROUND BACK SPEAKER FRONT SURROUND CENTER SCREW (3.5x18): 12EA STAND BASE SPEAKER CABLE SURROUND BACK SUBWOOFER FRONT/SURROUND SPEAKER SWA-5000 TX Card Wireless Receiver Module (AH40-00163A) ✎... -
Page 30: Installing The Speakers On The Tallboy Stand
Connections Installing the Speakers on the Tallboy Stand Stretch out the speaker cable and get it through as shown. ✎ NOTE When installing the front and surround speakers, match the label color of the stand with the cable color of the speaker. Stand Base Stand Pole Fit the stand pole into the stand base. - Page 31 HT-C9950W Wireless Receiver Module Front Speaker (L) Front Speaker (R) Surround Speaker (L) Surround Speaker (R) Center Speaker Surround Back Speaker (L) Subwoofer Surround Back Speaker (R) This product should be connected with the SWA-5000 only. Connecting The Speakers Press down the terminal tab on the back of the speaker.
-
Page 32: Attaching The Toroidal Ferrite Core To The Speaker Cable
Connections Attaching the Toroidal Ferrite Core to the Speaker Cable Open the bigger one of two toroidal ferrite cores by pulling the lock lever. Arrange all the speaker cables that are connected to the subwoofer and make three loops. • Attach the ferrite core as close as possible to the subwoofer. -
Page 33: Connecting External Devices To Your Tv Via Hdmi
Connecting External Devices to Your TV via HDMI HDMI is a standard digital interface for connection to such devices as a TV, projector, DVD player, Blu-ray player, set top box and more. HDMI removes any loss of signal from analog conversion, enabling you to enjoy video and audio sound quality as it was originally created in the digital source. -
Page 34: Connecting The Fm Antenna
Connections HDMI Auto Detection Function The product's video output automatically changes to HDMI mode when connected to a TV or other device with an HDMI cable while the power is on. • Auto Detection is not available if the HDMI cable does not support CEC. •... -
Page 35: Connecting Audio From External Components
Connecting Audio from External Components Attach the ferrite core (Large) as close to AUX IN as possible with no loop of core made on the audio cable. Audio Cable (not supplied) If the external analog component has only one Audio Out, connect either left or right. White Optical Cable Set-Top Box... -
Page 36: Connecting To The Network
✎ NOTE Internet access to Samsung’s software update server may not be allowed, depending on the router you use or the ISP’s policy. For more information, contact your ISP (Internet Service Provider). For DSL users, please use a router to make a network connection. -
Page 37: Wireless Network
Wireless Network You can connect the home thaeater to a network through a Wireless IP sharer (either a router or modem). Connect the suppplied wireless LAN adapter to the Wireless LAN Adapter jack on the rear panel of the product. - This unit is compatible with the supplied Wireless LAN Adapter. -
Page 38: Setup
Setup Press the ◄► buttons to select the desired Before Starting (Initial Settings) Network Settings : Wired, Wireless, or PBC Turn on your TV after connecting the product. (WPS), and then press the ENTER button. When the product is connected to TV for the fi rst If you do not know your Network Settings, time, the product turns on automatically and press the BLUE (D) button on your remote... -
Page 39: Navigating The Menu
When the product is connected to the network, confi rm the setting. select Internet@TV from the Home menu. EXIT Button : Press this to exit the menu. Download desired content from Samsung AppS. The access steps may differ depending on the menu you select. -
Page 40: Display
Setup TV Screen Size Display Lets you enter the actual screen size of your You can confi gure various display options such TV so that the product can adjust the image as the TV Aspect Ratio, Resolution, 3D, etc. according to the screen size and display an optimal 3D image. -
Page 41: Tv Aspect
TV Aspect BD Wise (Samsung Products only) Depending on the type of television you have, you BD Wise is Samsung's latest inter-connectivity feature. may want to adjust the screen aspect ratio. When you connect Samsung products with BD-Wise to each other via HDMI, they set the •... - Page 42 Setup Resolution according to the output mode • Blu-ray Disc playback Output HDMI Setup Auto Optimal Resolution 1080p, Movie Frame (24Fs) off 1080p@60F 1080p/1080i, 1080p@24F Movie Frame (24Fs) on 1080i, Movie Frame (24Fs) off 1080i 720p 720p 480p 480p • DVD playback Output HDMI...
-
Page 43: Hdmi Format
HDMI Format Progressive Mode You can optimize the color setting from the HDMI Set to improve picture quality when you view DVDs. output. Select a connected device Type. • Auto : Select to have the product automatically • TV : Select if connected to a TV via HDMI. set the best picture for the DVD you're watching. -
Page 44: Audio
Setup Distance Audio If you cannot place the speakers at equal Speaker Setting distances from the listening position, you can adjust the delay time of the audio signals from the front, center, surround, surround back and DPL llz subwoofer speakers. •... -
Page 45: Musical Room Calibration
✎ Musical Room Calibration NOTE Setting the Musical Room Calibration By setting the Musical Room Calibration (MRC) function takes about 3 minutes. function just once when you relocate or install the You can only use the Musical Room Calibration product, you can have the product automatically when there is no disc in the product. -
Page 46: Digital Output
Setup Digital Output Regular DVDs do not have Secondary and Effect audio. Lets you set the audio output format according Some Blu-ray Discs do not have Secondary and to the capabilities of your amplier. (For more Effect audio. idetails, see the table below.) ... -
Page 47: Av Sync
This function is not available if the HDMI cable • Off : Turn the Audio Return Channel function does not support CEC. If your Samsung TV has an n logo, then off. it supports the Anynet+ function. • Auto : Listen to TV sound from the Home ... -
Page 48: Clock
Setup Description of Device (Storage) Information DivX(R) Registration on the Product View DivX(R) VOD Registration Code to purchase • Total Size : Total memory size of the Device (Storage). and play DivX(R) VOD content. • Available Size : Available memory in the Device (Storage). -
Page 49: Network Setup
Network Setup Network Setting To begin setting up the network connection for Internet Protocol Setup : Auto IP Address your product, follow these steps: Subnet Mask Gateway In the Home menu, press the ◄► buttons to : Auto select Settings, and then press the ENTER DNS Server button. - Page 50 Setup Use the number buttons on your remote to After the network connection is set up, enter numbers. press the RETURN button to exit the Network Setting screen. When done with each fi eld, use the ► button to move successively to the next fi...
- Page 51 In the list of networks, press the ▲▼ When done, press the BLUE (D) button on your remote, and then press the ENTER buttons to select a network, and then press button. the ENTER button. If the PIN/Security pop-up appears, go to Wait until the connection confi...
-
Page 52: Network Status
Setup When done with each fi eld, use the ► BD-LIVE Internet Connection button to move successively to the next Set whether to allow internet connection for the fi eld. BD-LIVE service. You can also use the other arrow buttons to •... -
Page 53: Parental Rating
If you forgot your password Security Remove the disc. When you operate this menu for the fi rst time, the password setup screen appears. Enter the Press and hold the STOP () button on the desired 4-digit password using the number front panel for 5 seconds or more. -
Page 54: Support
Never turn the product off or on manually during the Contact Samsung update process. Samsung Electronics shall take no legal Provide contact information for assistance with responsibility for product malfunction caused an your product. unstable internet connection or consumer negligence during software upgrade. -
Page 55: Basic Functions
Basic Functions Disc Structure Playing a Disc The contents of disc are usually divided as below. Playback • Blu-ray Disc, DVD-VIDEO Insert a disc into the disc slot with the disc's title 1 title 2 label facing front. chapter 1 chapter 2 chapter 1 chapter 2... -
Page 56: Using The Search And Skip Functions
Basic Functions Using the Title Menu Using the Search and Skip Functions During playback, you can search quickly through a chapter or track, and use the skip function to jump to the next selection. During playback, press the TITLE MENU button on the remote Searching for a Desired Scene control. -
Page 57: Slow Motion Play/Step Motion Play
Slow Motion Play/Step Motion Play Repeat Slow Motion Play hzZyx To return to normal play, press the REPEAT button again. • In pause mode, press the SEARCH () Press the ▲▼ buttons to select Off, and button. then press the ENTER button. If you press the SEARCH () button, the playback speed is reduced as follows: ✎... -
Page 58: Using The Tools Button
Basic Functions Information about the primary / secondary Using the TOOLS button mode is also displayed if the Blu-ray Disc has a During playback, you can operate disc BONUSVIEW section. menu by pressing the TOOLS button. Use the ◄► button to switch between primary and secondary audio modes. -
Page 59: Changing The Camera Angle
• Caption Function User : You can adjust the sharpness and noise reduction function respectively. Setting the BONUSVIEW • You must have some experience with video extraction and editing to use this feature properly. • To use the caption function, save the caption The BONUSVIEW feature allows you to view fi... -
Page 60: Listening To Music
Basic Functions Listening to Music ◄► buttons : Fast Play. (except for Audio CD (CD-DA)) STOP button : Stops a track. Buttons on the Remote Control used for Music Playback SKIP($) button : During playback, moves to the next page in the Music List or moves to the next track in the Playlist. - Page 61 To move to the Music List, press the STOP () Displays the music information. or RETURN button. The Music List screen is displayed. Displays the playlist. Press the ▲▼◄► buttons to move to the desired track, and then press the YELLOW (C) Shows the current track/total tracks.
-
Page 62: Sound Mode
Basic Functions Dolby Pro Logic II Mode Sound Mode You can select the desired Dolby Pro DSP (Digital Signal Processor) Function Logic II audio mode. PL II button. Press the This will regulate and stabilize the volume level against a drastic volume change when changing Setting the speakers to DPL IIz channels or during a scene transition. -
Page 63: Playing Back Pictures
✎ NOTE Using the TOOLS button The Dolby Prologic II is not available for sound source encoded in 7.1 CH format or HD sound. During the slide show playback, you For 2 channel audio CD/MP3 playback, wireless can use various functions by pressing receiver does not produce sound (for rear and the TOOLS button. -
Page 64: Playing Back A Usb Storage
Basic Functions ✎ NOTE Playing back a USB Storage You must remove the USB storage device safely by performing the “Safe to Remove Hardware” function to prevent possible You can use the USB connection to play multimedia damage to the USB memory. Press the MENU fi... -
Page 65: Listening To Radio
Listening to Radio Use iPod/iPhone with a Wireless Dock Cradle for iPod/iPhone Using buttons on the Remote Control You can enjoy fi ner quality music through the speakers by transmitting an iPod/iPhone’s audio Press the FUNCTION button to select TUNER. signal using a Wireless Transmitter. -
Page 66: How To Link The Wireless Transmitter With The Main Unit
Basic Functions ✎ NOTE How to Link the Wireless Transmitter with the Main Unit The LED indicates the charging state of the built-in battery in the wireless iPod transmitter. Turn off your Home Theater. Check the charging state of iPod/iPhone by Press the 4, 7, 6, 3 buttons on the remote checking the charging indication of its battery. - Page 67 Operation status of the wireless transmitter's LED Function Display LINK STANDBY (Blue LED) (Red LED) Pairing LED ON successfully STANDBY completed LED BLINK Processing iPod/ LOW BATTERY (Long blink) iPhone LED BLINK Processing Pairing failed (Short blink) pairing CAUTION If you use the main unit near a wireless device such as a laptop computer, an AP, or Wifi...
-
Page 68: Network Services
" View Devices Enter create accounts, etc. Samsung AppS : You can download various Press the ◄► buttons to select Internet@ for-a fee or free-of-charge application services. TV and press the ENTER button. In the start screen of the Internet@TV service, you will see the service agreement screen. - Page 69 ✎ NOTE Using the Keypad ▪ Samsung Electronics shall take no legal respon- Through your remote, you can use the On-Screen sibility for any interruption of the Internet@TV Keypad in several Internet@TV applications to enter service caused by the service provider for any text.
- Page 70 Network Services Starting Internet@TV for the First Time Enter your user account and password. To start up Internet@TV for the fi rst time, follow these steps: Access Internet@TV as described on the previous page. The Internet@TV screen appears. In most cases, immediately after, the Country screen appears.
- Page 71 Service Site you want to associate with your download the services you want to link to through Internet@TV account, and then press the Samsung Apps on the Internet@TV main screen. ENTER (E) button. For instructions, see Samsung Apps. Using your remote and the on-screen To create an account, follow these steps: Keypad, enter your site ID and password.
- Page 72 Network Services If you have entered the ID and password If you have entered the ID and password correctly, the Registered Successfully correctly, the Registered Successfully message appears, asking you if you want to message appears, asking you if you want to add another service site.
-
Page 73: Samsung Apps
Samsung Apps Lock/Unlock Samsung Apps is a store for downloading On the Settings screen, select Service applications and services you can use on Samsung Manager, and then press Enter. TVs and AV equipment. On the Servioe Manager screen, use the You can access and enjoy a variety of contents ▲▼... - Page 74 Network Services Using the Samsung Apps Screen My page Displays the application list. To use the Samsung Apps screen, follow these steps: Help Use the ◄► buttons to move to the If you have questions about Internet@TV, check category list on the left.
-
Page 75: Bd-Live
PC via the network (See pages 36~37) check its remaining memory. The memory and install the SAMSUNG PC Share Manager on device must have at least 1GB of free space the PC. To install and use Share Manager, follow to accommodate the BD-LIVE services. - Page 76 To select a device, use the RED (A) or BLUE Application Program at a Glance (D) button to select a fi le to play. (For playing back Video, Music, or Photos fi les, see pages 55~63.) SAMSUNG PC Share Manager File Share Server Help...
-
Page 77: Other Information
Refer to the chart below when this product does not function properly. If the problem you are experiencing is not listed below or if the instructions below do not help, turn off the product, disconnect the power cord, and contact Samsung Electronics at 1-800-SAMSUNG. Symptom Check/Remedy I cannot eject the disc. - Page 78 Other information Symptom Check/Remedy Aspect ratio cannot be changed. • You can play 16:9 BD/DVDs in 16:9 Wide mode, 4:3 Letter Box mode, or 4:3 Pan - Scan mode, but 4:3 BD/DVDs can be seen in 4:3 ratio only. Refer to the Blu-ray Disc jacket and then select the appropriate function.
- Page 79 Symptom Check/Remedy PC Share Manager function I can see folders shared through the • Since it shows only fi les corresponding to the Image, Music, and Movie PC Share Manager, but I cannot see categories, fi les that do not correspond to these categories may not be the fi...
-
Page 80: Index
Set-Top Box Subtitle Language iPod OPTICAL Support System Network Language LAN Cable Wireless Network Title menu Contact Samsung Mono/Stereo Title list Movie Frame (24 Fs) TV Aspect Musical Room Calibration TV Screen Saver MUTE USB Storage Network Setup Network Settings... -
Page 81: Specifi Cations
Specifi cations Power Requirements AC 120V, 60Hz 110 W Power Consumption Weight 4.98 lbs General Dimensions 19.3 (W) x 6.4 (H) x 1.1 (D) inches Operating Temperature Range +41°F to +95°F Operating Humidity Range 10 % to 75 % Signal/noise ratio 70 dB FM Tuner Usable sensitivity... - Page 82 Center : 0.99 Ibs, Subwoofer : 27.78 Ibs *: Nominal specifi cation - Samsung Electronics Co., Ltd reserves the right to change the specifi cations without notice. - Weight and dimensions are approximate. - Design and specifi cations are subject to change without prior notice.
- Page 83 Transportation of the product to and from the service center is the responsibility of the purchaser. SAMSUNG will repair or replace this product, at our option and at no charge as stipulated herein, with new or reconditioned parts or products if found to be defective during the limited warranty period specified above. All replaced parts and products become the property of SAMSUNG and must be returned to SAMSUNG.
- Page 84 Contact SAMSUNG WORLD WIDE If you have any questions or comments relating to Samsung products, please contact the SAMSUNG customer care center. Contact Center Contact Center Area Web Site Area Web Site ` North America www.samsung.com/ch 0848 - SAMSUNG (7267864, Switzerland www.samsung.com/...
- Page 85 QUESTIONS OR COMMENTS? COUNTRY CALL OR VISIT US ONLINE AT WRITE Samsung Electronics America, Inc. 1-800-SAMSUNG IN THE US www.samsung.com/us 85 Challenger Road Ridgefi eld Park, (7267864) NJ 07660-2112 Code No. AH68-02284R...