Table of Contents
Advertisement
Advertisement
Table of Contents

Related Manuals for Turtle Beach Ear Force PX5


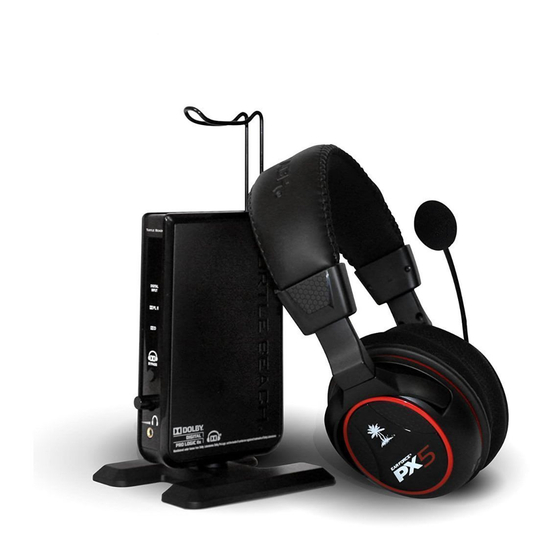
Summary of Contents for Turtle Beach Ear Force PX5
- Page 2 Removable Microphone Talkback Cable (2) AA Batteries PX5 Wireless Digital RF USB Power Cable Digital Optical Cable Turtle Beach Sticker Transmitter download PX5 software and additional presets at: www.TurtleBeach.com download advanced user’s guide at: product support and warranty information: www.TurtleBeach.com/PX5...
-
Page 3: Table Of Contents
Table of Contents About the Ear Force pg 1 ® PX5 Headset Overview pg 3 PX5 Transmitter Overview pg 7 Using the Transmitter pg 9 Pairing the Headset and Transmitter pg 10 Setup ® Transmitter Setup — PS3 ™ , XBOX 360 (slim) pg 11 Transmitter Setup —... -
Page 4: About The Ear Force Px5
About the Ear Force PX5 The Ear Force PX5 is the most technologically-advanced headset ever designed for PS3 and XBOX 360 gaming. To get the most from your PX5, please take a few minutes to review this introduction. Digital RF Technology with Bluetooth The Ear Force PX5 headset provides wireless CD-quality game sound via digital RF (radio frequency) that communicates with the PX5 transmitter. - Page 5 5.1/7.1 Dolby Surround Sound The PX5 transmitter processes Dolby 7.1 Digital surround sound from your PS3 or XBOX 360 and sends it to the headset via digital RF. The result is an immersive sound environment that makes you feel as if you're right in the middle of the action.
-
Page 6: Px5 Headset
PX5 Headset — Left Ear Cup Controls... - Page 7 1. Main Power Button with LED Powering ON: Press and hold until the headset announces “Powering On”. Powering OFF: Press and hold until the headset announces “Powering Off”. Automatic Power OFF: If the headset doesn’t detect any audio for more than 5 minutes, it will automatically shut down to conserve battery power.
- Page 8 PX5 Headset — Right Ear Cup Controls Be sure to insert batteries as shown.
- Page 9 7. Main (Main Preset Button) Press to toggle between the selected (alternate) preset and the main (default) preset. (See "Presets" on pg. 18 for further details) 8. Mic Mute Button Press to toggle between muting and unmuting the microphone. A high tone will sound when the mic is unmuted and a low tone will sound when the mic is muted.
-
Page 10: Px5 Transmitter
PX5 Transmitter Front View Rear View... - Page 11 1. Power/Pairing LED Indicator A solid LED indicates the transmitter is powered on and communicating with the headset. A pulsing LED indicates the transmitter can’t communicate with the headset because it is powered off, not paired, or out of range. If this occurs, please refer to “Pairing the PX5 Headset and Transmitter” on page 10. 2.
-
Page 12: Using The Transmitter
Using the Transmitter Transmitter Range The transmitter sends game audio from your PS3 or XBOX 360 to the headset via digital radio frequency (RF) signal, so a direct line of sight is not required. When you’re out of range, you may hear popping or clicking sounds if the headset loses the RF signal. -
Page 13: Pairing The Headset And Transmitter
Pairing the PX5 Headset and Transmitter The headset and transmitter in this package are “paired”, which means they’re synchronized to ensure they work together. When the headset and transmitter are communicating, the top LED on the front panel of the transmitter will be on solid. If this LED is instead slowly pulsing, it means the transmitter can’t communicate with the headset. -
Page 14: Setup
Setup PS3, XBOX 360 (Slim) 1. Connect the Digital Optical Cable NOTE: Remove the protective caps from each end of the optical cable before inserting it into the sockets. 2. Connect the Transmitter Power XBOX 360 (Original) 1. Connect the Digital Optical Cable (Requires XBOX 360 AV Adapter, sold separately) NOTE: Remove the protective caps from... - Page 15 3. Insert the Headset Batteries Right Ear Cup: To remove the battery cover, slide downward. CAUTION: Be sure to insert batteries as shown. 4. Insert the Mic Boom 5. Turn on the headset by pressing and holding the power button until it turns solid, then release.
-
Page 16: Ps3 Settings & Bluetooth Chat Setup
2. In the PS3 Menu, select “Settings” > “Accessory Settings” > “Audio Device Settings” Microphone Level 3. Set the “Input” and “Output” to Input Device TURTLE BEACH PX5 “TURTLE BEACH PX5” Output Device TURTLE BEACH PX5 4. Navigate to "OK" and press X. -
Page 17: Xbox 360 Settings & Xbox Live Chat Setup
Configure XBOX 360 Settings 1. Place the PX5 headset in XBOX 360 mode Digital Output by quickly pressing the power button twice. The headset will announce which mode it's in. Current Setting Digital Stereo Dolby Digital 2. In the System Settings of the Dashboard, select Dolby Digital 5.1 Choose the digital output “Console Settings”... -
Page 18: Home Theater Setup
Home Theater Setup Setting up the transmitter as illustrated below lets you listen to your console or TV with the PX5 headset. You can also hear your console on your home theater speakers without disconnecting the optical cable from the transmitter. The PX5 transmitter’s analog inputs connected to the TV will automatically shut off whenever your console is active, as indicated by the digital input LED on the transmitter front panel. -
Page 19: Dolby Processing
Dolby Processing The PX5 uses Dolby Pro Logic IIx, Dolby Digital, and Dolby Headphone surround processing technologies – the industry-standard formats for encoding multi-channel game audio. Dolby Headphone processing recreates 7.1 channel surround sound using the PX5 headset so you can hear the sound all around you, as if you were listening to a 7.1 speaker system. -
Page 20: Digital Signal Processing
Digital Signal Processing The PX5 headset incorporates a Digital Signal Processor (DSP) to independently modify game, chat and microphone audio. The DSP settings are saved as presets, which are described in the next section. Connecting the PX5 headset to a PC with the included USB cable lets you create custom presets or replace the presets with different ones downloaded from our website. - Page 21 The DSP provides a wide variety of audio enhancements, including: Noise Gates: Separate noise gates on the game, chat and microphone audio channels cut out back- ground noise that’s below a threshold point, so rather than hearing static or other distracting sounds, you’ll hear total silence when there’s nothing going on.
-
Page 22: Presets
Presets The PX5 has a total of 18 presets that are grouped in two sets of 9. The first set is optimized for PS3 and the second set of is optimized for XBOX 360. Pressing the power button twice quickly will switch between PS3 and XBOX modes and the headset announces which mode is active. -
Page 23: Bluetooth
2. On your Bluetooth enabled device, activate the Bluetooth mode and search for Bluetooth devices as described in its user manual. 3. When your device is finished scanning, select “TURTLE BEACH PX5” from the list and follow the prompts to connect. -
Page 24: Making Phone Calls
Bluetooth (con't) Making Calls Once the PX5 is successfully paired with your mobile phone, you can use it to make and receive calls. The PX5 can be used with voice dialing if your phone supports this function. 1. Using voice dialing* – Press the BT MFB button for 3 seconds until you hear a tone—then release. The voice recognition prompt in your phone will now be activated. -
Page 25: Bluetooth Quick Reference
Quick Reference Power Bluetooth on: Press BT MFB for 3 seconds Power Bluetooth off: Press BT MFB for 4 seconds Microphone mute: During a call, press MIC MUTE Adjust volume: Press the “+” or “-“ buttons Answer call: Press BT MFB Reject call: Press and hold BT MFB for 2 seconds End call: Press BT MFB Cancel outgoing call: Press BT MFB... -
Page 26: Px5 Headset And Transmitter Technical Specifications
PX5 Headset Technical Specifications · 50mm diameter speakers · Game audio frequency response: 20Hz - 20kHz, >120dB SPL @ 1kHz · Condenser microphone frequency response: 50Hz - 15kHz · Game audio digital 2.4GHz RF wireless reception · Bluetooth radio with dual-pairing mode and A2DP compatibility ·... -
Page 27: Troubleshooting And Support
Troubleshooting Tips No sound • Check that the transmitter and headset volume controls are both turned up. • Check that the transmitter power and optical cables are properly connected. • Check that the headset is powered on. The LED on the left ear cup should be flashing. •... -
Page 28: Important Safety Information
Troubleshooting Tips (con't) PS3 Pairing Issues • If the PS3 cannot locate your PX5, make sure that it is in pairing mode before you starting scanning, as indicated by the flashing red/blue LED. • If the PX5 is missing from the device menu list after you re-start your PS3, please repeat the pairing process. - Page 29 Safety Notice To avoid potential damage to the device, always disconnect all cables before transporting it. WARNING: Permanent hearing damage can occur if a headset is used at high volumes for extended peri- ods of time, so it is important to keep the volume at a safe level. Over time, your ears adapt to loud volume levels, so a level that may not cause initial discomfort can still damage your hearing.
- Page 30 Notes...
- Page 31 IC ID: 3879A-2171 Copyright © 2011 Voyetra Turtle Beach, Inc. (VTB, Inc.) All rights reserved. No part of this package may be reproduced without permission. Turtle Beach, the Turtle Beach Logo, Voyetra, Ear Force, Sonic Lens, Ear Guard, the Digital RF logo, the DSP logo, Chat Boost and Engineered For Gaming are either trademarks or registered trademarks of VTB, Inc.
Need help?
Do you have a question about the Ear Force PX5 and is the answer not in the manual?
Questions and answers