Table of Contents
Advertisement
Advertisement
Table of Contents

Related Manuals for Eton VIPER 50M


Summary of Contents for Eton VIPER 50M
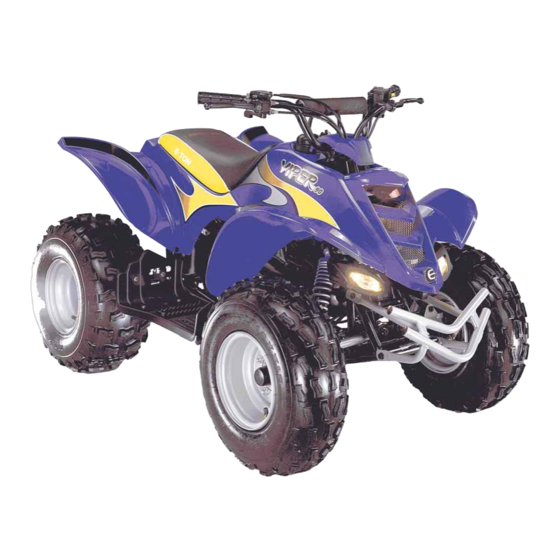
- Page 1 E-TON VIPER OWNER’S MANUAL Viper 50M, Viper 70, Viper 90 and Viper 90R...
- Page 2 This vehicle is equipped with electronic speed limiting devices. Any attempt to change, over-ride or bypass these devices may cause dangerous operating conditions. Age Recommendations by model size ATV Model Size ETON Models Minimum Age Weight Capacity RXL-40Ee Under 70cc...
-
Page 3: Table Of Contents
Table of Contents Safety notes Vehicle identification number location Controls, switches and feature locations Control feature operations Engine stop switch Manual Choke Lever Throttle lever Front & Rear Brakes Parking brake Safety Tether Switch Remote Stop / Start Switch Fuel System Fuel tank Fuel valve Inline Fuel Filter... - Page 4 Specifications Viper 50M Viper 70 Viper 90 & 90R Maintenance Schedule Maintenance Record Chart Wiring Diagram Viper 50M Wiring Diagram Viper 70 Wiring Diagram Viper 90 Wiring Diagram Viper 90R Manufacture’s Warranty Owner’s Notes Page 3...
-
Page 5: Safety Notes
Safety Notes 1. Both the adult supervisor and youth operator must fully understand everything in this manual before operating this vehicle. 2. This vehicle was designed for the operator only. NO PASSENGERS should be allowed on this vehicle. 3. This vehicle is designed for operation on level, obstacle free off-road areas. 4. - Page 6 10. NEVER ride this vehicle unless it has been properly maintained and adjusted. Always perform a pre-ride inspection of your vehicle. Look for wires, bolts and other fasteners that may have come loose on previous rides. Inspect the drive chain, throttle and brakes for proper adjustment and operation.
- Page 7 13. NEVER REFUEL this vehicle when hot. Ask your adult supervisor to refuel your vehicle. Gasoline is extremely flammable and will ignite if spilled on a hot engine or muffler. Never smoke or expose the fuel to an open flame or spark while refueling your vehicle.
- Page 8 Watch out for thin ice which may be camouflaged by snow. • Remember, you can ride further in one hour than you can walk in an entire day. Age Recommendations by model size ATV Model Size ETON Models Minimum Age Weight Capacity RXL-40E Under 70cc...
-
Page 9: Vehicle Identification Number Location
Vehicle Identification Numbers Vehicle Identification Number (VIN) Engine serial number is located at the front of the unit under is located on the left-hand side of the the front fender on a plate mounted engine on the crankcase housing. between the main frame rails. Your VIN RFZ______________ Eng. -
Page 10: Engine Stop Switch
Control Features Engine Stop Switch Throttle lever stop The throttle lever is located on the right-hand handle bar below the grip. To operate the throttle switch is a red colored rocker switch located lever, place your right thumb on the lever and on the left-hand handle bar. -
Page 11: Front & Rear Brakes
Use your front and rear brakes in combination to control your speed while descending a grade. Use caution not to apply too much The Viper 50M and Viper 70 models are pressure to your front brakes so that the equipped with a safety tether switch. The switch wheels lock up, stop turning, and causing a is located on the left hand side of the handlebars. -
Page 12: Fuel Tank
dirt or other debris to enter the tank when Once the unit has been stopped with the refueling. remote switch you must press the run button in order for the unit to be restarted. This Replace the cap if damaged or if it will not seal action resets the remote receiver on the unit. -
Page 13: Inline Fuel Filter
reserve in the tank to allow the unit to be abrasions and deterioration. Replace fuel lines taken to a refueling location. as needed. When you have to switch to the “RES” DO NOT start or operate the engine if the fuel position you must refuel the unit as soon as filter or lines are leaking. -
Page 14: Tires & Wheels
The unit is also equipped with an oil level indicator lamp. The lamp will light when the oil Operating your ATV with damaged tires or level in the tank is low. When the lamp is lit wheels is dangerous. Damaged tires or wheels you MUST refill the oil tank. -
Page 15: Air Filter
3. After every 200 hours of operation the Wash the element in a non-flammable solvent Spark Arrester has to be replaced by such as Air-Filter cleaner from your local auto loosening the retaining nut using a parts dealer. 10mm socket or wrench. Using pliers 1. -
Page 16: Front Brake Adjustment
DO NOT RIDE A UNIT WITH WORN Replacement of the brake shoes and cables BRAKE SHOES. Test the brakes by applying pressure to the brake lever and trying to push the unit forward. If the wheel rotates while the brakes are applied, adjust the brake cable until the wheels no longer rotate. -
Page 17: Filling The Brake Fluid Reservoir
To Fill the Reservoir Purging Brake Lines Remove the reservoir cover by removing the two For the hydraulic brake system to operate safely, the cover bolts. brake system must be purged of air in the lines and reservoir. Fill the reservoir to 1/8” from top with Dot-3 SAE- J1703 grade brake fluid. -
Page 18: Drive Chain
hours of operation, or more frequently if needed, Drive Chain with a high quality chain lubricant. The drive chain will stretch with use and will require periodic adjustments. To check the chain Throttle Lever tension, remove the chain guard and measure the slack. -
Page 19: Electrical Battery
Loosen the throttle stop screw locking nut and the battery to full charge before replacing it in the turn the throttle stop screw clockwise to reduce unit. When reinstalling the battery, be sure to connect the red cable to the positive (+) terminal and the black cable to the negative (-) terminal. -
Page 20: Transmission Gear Selector Control
ATV Break In procedures Transmission Gear selector Your ATV requires a break in period just as with all other internal combustion engines. This period allows the engine parts to seat and wear properly without undue strain which can cause premature failure. 1. -
Page 21: Pre-Operation Inspection
3. Transmission selector switch in the “N” 4. Check tire condition and pressure. position (Viper 90R only) 5. Check drive chain condition and slack. 4. Tether switch is fully inserted. (Viper 50M 6. Check throttle operation and free play & Viper 70 Only) adjustment. -
Page 22: Turning
Start your ATV by following the starting procedure above and allow the engine a few minutes to warm up before releasing the parking brake. Start the unit by slowly increasing the throttle until the unit begins moving. Turning your ATV Learning to turn your ATV requires you to learn to shift your weight and control the throttle to allow the rear wheels to turn... -
Page 23: Viper 50M
2005 VIPER 50M ATV Specifications Viper 50M (RXL-50M) Engine Type Two cycle air cooled Displacement 49.3cc φ40.0 * 39.2mm Bore / Stroke Compression 6.8 : 1 Power 5.2ps @ 7000rpm Transmission Type Automatic (C.V.T. V-Belt) Chassis Overall Length 1430mm / 56.3"... - Page 24 Tires Front 145/70-6 Rear 145/70-6 2psi / 0.14kg/cm2 (Cold) Front 7psi / 0.49kg/cm2 (Cold) Tire Pressure 2psi / 0.14kg/cm2 (Cold) Rear 7psi / 0.49kg/cm2 (Cold) Wheels Bolt Pattern 4 x 110mm Carburetor Make/Size SW 18mm (Manual Coke) Main Jet 85mm Pilot Jet 20mm Air Mixture Adjustment...
-
Page 25: Viper 70
2005 VIPER 70 ATV Specifications Viper 70 (RXL-70) Engine Type Two cycle air cooled Displacement 68.0cc φ47.0 * 39.2mm Bore / Stroke Compression 8.3 : 1 Power 6.3ps @ 6000rpm Transmission Type Automatic (C.V.T. V-Belt) Chassis Overall Length 1470mm / 57.9" Overall Width 850mm / 33.5"... - Page 26 Tires Front 16/8-7 16/8-7 Rear 2psi / 0.14kg/cm2 (Cold) Front 7psi / 0.49kg/cm2 (Cold) Tire Pressure 2psi / 0.14kg/cm2 (Cold) Rear 7psi / 0.49kg/cm2 (Cold) Wheels Bolt Pattern 4 x 110mm Carburetor Make/Size SW 18mm (Manual Coke) Main Jet 85mm Pilot Jet 20mm Air Mixture Adjustment...
-
Page 27: Viper 90 & 90R
Viper 90 & Viper 90R ATV Specifications Viper 90 (RXL-90) & Viper 90R (RXL-90R) Engine Type Two cycle air cooled Displacement 82.5cc φ50.0 * 42.0mm Bore / Stroke Compression 5.8 : 1 Power 7ps @ 7500rpm Transmission Type Automatic (C.V.T. V-Belt) Chassis Overall Length 1500mm / 59.0"... - Page 28 Tires Front 18/7-8 Rear 18/9-8 2psi / 0.14kg/cm2 (Cold) Front 7psi / 0.49kg/cm2 (Cold) Tire Pressure 2psi / 0.14kg/cm2 (Cold) Rear 7psi / 0.49kg/cm2 (Cold) Wheels Bolt Pattern 4 x 110mm Carburetor Make/Size SW 18mm (Manual Coke) Main Jet 85mm Pilot Jet 20mm Air Mixture Adjustment...
-
Page 29: Maintenance Schedule
Maintenance Schedule First week Notes Every 30 Days Every Year Replace Fuel & Vent Fuel Lines Lines every 2 years Inspect as part Throttle Operation of pre-ride inspection Air Filter Fuel Filter Spark Plug Drive Chain I, L I, L Brake Shoes Inspect as part of pre-ride... -
Page 30: Wiring Diagram Viper 50M
Wire diagram Viper 50M (RXL-50M) Page 29... - Page 31 Diagram Viper 70 (RXL-70) Page 30...
- Page 32 Wire Diagram Viper 90 (RXL-90) Page 31...
-
Page 33: Wiring Diagram Viper 90R
Wire diagram RXL-90R Page 32... -
Page 34: Manufacture's Warranty
ETON AMERICA, LLC. LIMITED VEHICLE WARRANTY ETON America warrants all new ETON vehicles sold by authorized Eton Dealers to be free from defects in materials and workmanship, subject to the following exclusions and limitations. New vehicles sold by an authorized dealer to original retail consumers are covered by this policy for a period of six (6) months from the date of delivery. - Page 35 “set-up and pre-delivery checklist” prior to delivery to the customer. This warranty is valid at any authorized ETON Dealer in the United States only. In the event you experience any problem obtaining prompt service, contact ETON America, customer service department for assistance.
-
Page 36: Owner's Notes
Owner’s Notes: Page 35... - Page 37 Owner’s Notes: Page 36...
- Page 38 Owner’s Notes: Page 37...
- Page 39 Owner’s Notes: Page 38...
- Page 40 Page 39...
Need help?
Do you have a question about the VIPER 50M and is the answer not in the manual?
Questions and answers