Table of Contents
Advertisement
Quick Links
Advertisement
Table of Contents

Related Manuals for YAKUMO MEGA-IMAGE 84 D

Summary of Contents for YAKUMO MEGA-IMAGE 84 D
- Page 1 Handbuch Manual Yakumo Mega-Image 84 D Digitalkamera...
- Page 2 Please read before using the digital camera Battery information CAUTION: Risk of explosion if battery is not replaced properly. Replace only with the same type or a type of equal quality recommended by the manufacturer. Dispose of used batteries in accordance with the manufacturer's specifications.
- Page 3 Deutsche Telekom fixed network. Guarantee If you think that you need to make a claim on your Yakumo product under the guarantee, call the Hotline on 0 18 05/ 92 58 66 (12 cent/ minute) when calling from the Deutsche Telekom fixed network.
-
Page 4: Preface
Preface The Yakumo Mega-Image 84 D is equipped with eight modes (Scene selection, Programmed, Aperture priority, Shutter speed priority, Manual exposure, Playback, Movie, Setup) for your exploration. In com-bination with all the above mode function, not only will this cam-era serve as a digital camera, but it can also be used in recording short movies and audio recording. -
Page 5: Table Of Contents
Table of Contents Preface ................ 1 Prior to Operating the Yakumo Mega-Image 84 D..3 Unpacking the Yakumo Mega-Image 84 D.......3 Attaching the lens and strap on the digital camera ....4 Identifying Components ............5 Loading the Batteries and SD Memory Card......6 Basic Settings ................7... -
Page 6: Prior To Operating The Yakumo Mega-Image 84 D
Prior to Operating the Yakumo Mega-Image 84 D Setting up this Yakumo Mega-Image 84 D digital camera is quick and simple. Follow these steps, and you’ll be on your way to infinite boundaries. Unpacking the Yakumo Mega-Image 84 D Clear all items from the box. (It is highly recommended that... -
Page 7: Attaching The Lens And Strap On The Digital Camera
Attaching the lens and strap on the digital camera The lens cap and strap are attached in one. To remove or cap the lens cap, press on both sides of the retractable knob. Thread the strap through the strap hole of the digital camera and the lens cap. -
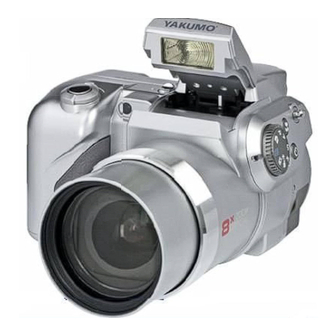
Page 8: Identifying Components
Identifying Components Flash Mode Selection Button Shutter Button AF LED Flash Power Switch Hook of Shoulder Strap Microphone Lens EVF(Electronic View Finder) EVF/LCD Switch Zoom Button Dioptre Adjustment AE/AF Lock Button Menu Button TFT LCD SD Card Cover Five-way Switch Battery Cover Tripod Macro Button... -
Page 9: Loading The Batteries And Sd Memory Card
Loading the Batteries and SD Memory Card (optional) This digital camera uses 4 AA batteries or optional CR-V3 x 2. The batteries and SD card are located in separate compartments The battery compartment is located at the bottom of the digital camera, while the SD card compartment is located at the back of the digital camera. -
Page 10: Basic Settings
Basic Settings Upon turning the digital camera ON, a “welcome image” will appear on the LCD display. Turn the mode dial to the Setup Mode. Please proceed with the following settings: Language Preference Setting There are a total of nine languages to choose from to interact with this digital camera. -
Page 11: Basic Operating Procedure
Basic Operating Procedure This section provides simple and basic directions to get you started with your Yakumo Mega-Image 84 D. From this section, you will learn how to turn the digital camera on and off, shoot pictures, use the Auto Focus function, Zooming In and Out, and Playback your pictures. -
Page 12: Basic Shooting
Basic Shooting 1. Turn the mode dial to the Scene Mode AE-L AF-L 2.)Look into the viewfinder /LCD and try to align your subject in the box. 3.)When you are set, press the shutter button once. Tip: Do not cover the lens or flash with your finger. Auto-Focus Function When the shutter release is pressed halfway, the Auto-Focus function will activate and the digital camera lens will automatically focus. -
Page 13: Viewing Pictures
T(tele)to 4x (4x Digital Zoom) of zoom bar will activate, when the zoom button is pressed. Users can see the result from LCD display. Once you have aligned your subject in the LCD display, press the zoom in or out button to select your preferred distance. Viewing Pictures To instantly view the pictures you just took, simply turn the mode dial to the Playback Mode. - Page 14 AE/AF lock and Protect: These three functions can be AE-L AF-L activated under this button. Under playback mode, press this button to protect the picture. AE lock locks the expo- sure at a different place from the point of focus. After lock- ing the exposure, you can recompose the shot while maintaining the desire exposure level.
- Page 15 Slow: Used for slow shot Force off: When the flash is off Tip: Push down the flash pop-out when not in use. EVF/LCD: This button allows users to switch in between the LCD and EVF (Electronic View Finder) to operate this digital camera.
- Page 16 Note: 1. Flash will not be available under continuous mode. 2.During the shooting, images will not display on the LCD. 3.The focus and white balance are adjusted for the first image, which will also be used for the other images. 4.
- Page 17 Tip: HV / Histogram Value Histogram Value showing the brightness and contrast of the subject. It enables precise exposure control. In playback mode, histogram showing the brightness and contrast information of recorded pictures. You can set. histogram display by pressing up on the five-way switch in shooting and playback modes.
-
Page 18: Eight Main Modes And Instructions
Eight Main Modes and Instructions This section will describe the eight modes included in this digital camera. An in-depth coverage of these modes will be further described. Under each of the following modes, users can choose to proceed with the modes either by looking at the LCD or through the electronic view finder. - Page 19 Shutter speed priority mode White Balance Resolution Image Quality Digital Filter ISO Rating Metering Focus Area L/R Adjustment Manual expo- sure mode White Balance Resolution Image Quality Digital Filter ISO Rating Metering Focus Area L/R Adjustment Playback Mode Rotation Protection Erase Frame Editing Crop Picture...
-
Page 20: Scene Mode
Setup Mode Date and Time Self-timer Option Slide show Interval Audio Value Sound Effect Instant Preview Rotation Auto Power Off Background Editing Languages TV-Out Format File Number Restoring Scene Mode Macro Scene White Balance Timer/Burst Shot Counter Flash Zoom Bar Aperture Shutter Speed Metering... - Page 21 Scene Users can select from the following scenes to include in their pic- tures:Auto/Sport/Landscape/Night/ Portrait/Self Portrait/Night Portrait/ Sunset/Beach/Back light Autumn/Natural/Sky/Party/Text Sport- This is for fast-moving subjects when you want to freeze the action. Landscape- This is used for wide scenic views. This setting cannot be used under macro setting.
-
Page 22: P.a.s.m. Mode
Tip: Users can also change the resolution and image quality under Scene Mode. P.A.S.M. Mode Macro Mode White Balance Timer Battery Flash Zoom Bar Aperture Shutter speed Focus area Metering AEL/AFL Resolution Image Quality Date/Time P.A.S.M. Mode include four modes that are adjustable through the mode dial. - Page 23 Resolution This mode allows you to set the record resolution. 8.0M (3264 x 2448) 6.0M (2880 x 2160) 4.0M (2272 x 1704) 2.0M (1600 x 1200) 1.3M (1280 x 960) VGA ( 640 x 480) Image Quality The widely-used JPEG format is used for image-recording quality set- ting.Users can select from the following quality: Best Better...
- Page 24 Digital Filter This sets and converts according to the different colors and effects: Normal/BW/Sepia/Red/Pink/Purple/Blue/Green/Yellow/Solarize/ Negative Artwork Solarize-This effect creates the impression that the image has been exposed to light. Negative Artwork- Having the light and dark parts opposite to what they were in the original picture. ISO Rating The ISO speed is the sensitivity to light.
- Page 25 Tip: (Follow these steps for Focus Area) 1. The crop mark will be removed once the focus area function is confirmed. 2. Select the desired focus area using the joystick. 3. Press OK to confirm the setting and start taking pic- tures.
-
Page 26: Playback Mode
Playback Mode Protection Playback file type Voice Memo DPOF Zoom Aperture Shutter Speed File Name Image Resolution Quality Date/Time Turn the mode dial to the Playback Mode. Users can view the images by pressing the Left/Right button or press up button to get the image information. - Page 27 Rotation This function rotates images 90° and 270° clockwise, mirror, or flip the image up. Normal 90 degree 270 degree Mirror Flip up Frame Editing This digital camera provides 6 frames for image editing. Digital camera will create a new image with the frame which select by user. Crop Picture Users can crop images through the desired magnified area.
- Page 28 Slide Show Allow user to slide show all images. Tip: --press OK button for interruption. - refer to page 28 (slide show internal setting) to the slide show tim- ing setting Voice Memo This function provides 20 seconds voice memo for still image. Select “Voice Memo”...
-
Page 29: Movie And Audio Mode
Movie and Audio Mode Recording mode Zoom bar Focus area Date/Time Movie and Audio Mode allows you to use the digital camera as a movie and audio recorder. Video mode is the default for this mode, press the ok button to enter this mode. Users can switch modes by pressing the menu button. -
Page 30: Setup Mode
Tip: 1. The file format of movie will be MPEG 4. (.asf) 2. When you playback video in PC, system will require Windows Media Player 9.0 codec. Please link to Microsoft server for the codec, or you can playback the movie through bundled application software. - Page 31 Slide show Interval Under this setting, users can set the interval of seconds they want the slide show to proceed per slide. Users can select: 3 seconds 5 seconds 10 seconds Audio Volume Users can adjust the audio value of audio, video and voice memo functions: High Middle...
- Page 32 Image Rotation When shooting the picture vertically (over 45 degree) the image can be automatically rotated and display horizontally in playback mode: 1. Automatic (default) 2.Off Auto Power Off This setting automatically turns off the digital camera. Users can select the following minutes to Auto Power Off the digital camera: 3 minutes 1 minute...
- Page 33 Language Users can select from the following languages: English German French Spanish Italian Japanese Korean Simplified Chinese Traditional Chinese TV out Depending on where your location, different region requires different system for TV-out func- tion. Connect Video cable for TV out. NTSC Format Formats the internal or external memory.
- Page 34 Restoring Resets the digital camera to factory setting.
-
Page 35: Making Connections
Making Connections In this section you will be able to connect the digital camera to your PC to down-load or edit photos. Installing Software Insert the CD-ROM into your CD-ROM drive. Click “Digital Camera Driver” and Install if your operating system is Windows 98. -
Page 36: Connecting Through The Usb
Connecting through AV-out Before you proceed, please determine your corresponding AV-Out mode. The Yakumo Mega-Image 84 D will enable you to achieve full digital camera functions by AV-out connection. User can enable each function through the TV monitor instead of the LCD display. -
Page 37: Appendix
Appendix Digital camera Default Setting Scene Mode Auto Movie Mode Video Resolution 4M (2272 x 1704) Image Quality White Balance Auto Digital Filter Color Metering Matrix Sharpness Middle Date and Time 2004/1/1 Self-timer Option 10 seconds Slide Show Interval 3 seconds Audio Volume Middle Sound Effect... - Page 38 LED Status Digital camera Status LED AF/Timer LED Behavior Condition Power off Standby Green "Green" LED will be truned off when snap, LED will be lighted again when ready for moving. Strobe Orange When recharging, charging (Flicker) "Orange" LED will be flickered and turned to "Green"...
- Page 39 Battery low Red (Flicker) Note: The "Red" LED will keep flickering in battery low condition. USB plug in Green " Green" LED will be off and turn on again when USB plug-in ready. TV-out Green " Green" LED will be off and turn on again when TV out connect- ing ready.
- Page 40 Write-Protect Card has been pro- To remove write-pro- tected tect latch of card Card Error Cannot record, play- To format this card or back or erase pictures replace another card on this card Picture Error This recorded picture To view the image cannot be playback through PC.
- Page 41 Lens Aperture Wide : F2.8 to F5.58 Tele : F3.41 to 6.82 Optical Zoom 8x optical zoom Digital Zoom Up to 4x digital zoom Viewfinder Electronic Viewfinder (color) Dioptre adjustment Shutter speed 16 sec ~ 1/2000 sec. Internal Memory 16 MB NAND Estimated number of storable 8.0M (3264 x 2448):2 pictures pictures...
- Page 42 Dimension 111 (W) x 70(H) x 105 (D) mm Flash Pop-up range: 3 -10 feet Modes: Force off / Auto Red eye reduction / Force / Slow USB Output B type mini USB 2.0 full speed Video Output NTSC/PAL Battery type AA Alkaline, Ni-MH, Ni-Cd, CR- V3 and RCR-V3 DC-in...
- Page 43 yakumo.com...
Need help?
Do you have a question about the MEGA-IMAGE 84 D and is the answer not in the manual?
Questions and answers